
Nintex Community Menu Bar

Reviewing images and Documents in Assign Task action form

  • July 23, 2026
  • 6 replies
  • 23 views

Callan.Applebee
Forum|alt.badge.img+3

Hi all,

I am curious as to the best way/s to enable a reviewer during an ‘Assign Task’ action to view images/documents that were supplied on the form.

I am wanting to show those on the form and not include them in any emails (due to privacy PHI/PII) data.

I currently have several solutions in the works (active and in test) however I am not getting the best solution overall. I only have access to SharePoint Online (SPO) and the native Nintex Data Tables.

Here are my current options, but I am looking at improvements, opportunities and which one is best. Please HELP!


Option 1) SPO store and retrieve using this method - only allows images and not documents but you have to specify based on the repeats (cannot work out a N solution nor one that allows documents in the image viewer….) It does prevent a user downloading the form which is another caveat some stakeholders require too.

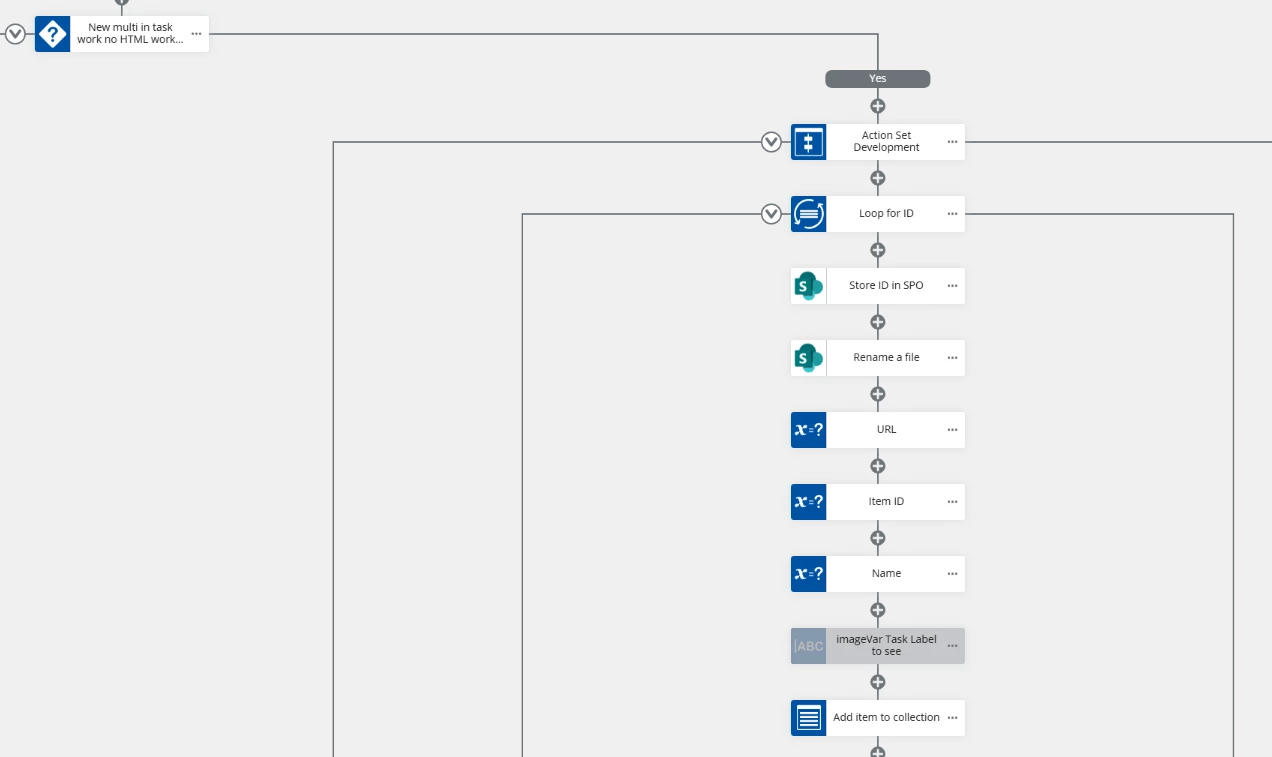
Actions in the workflow before the ‘Assign Task’ action

I use pathways to also talk to the different UAT/PRD lists based on the Type = Development or not
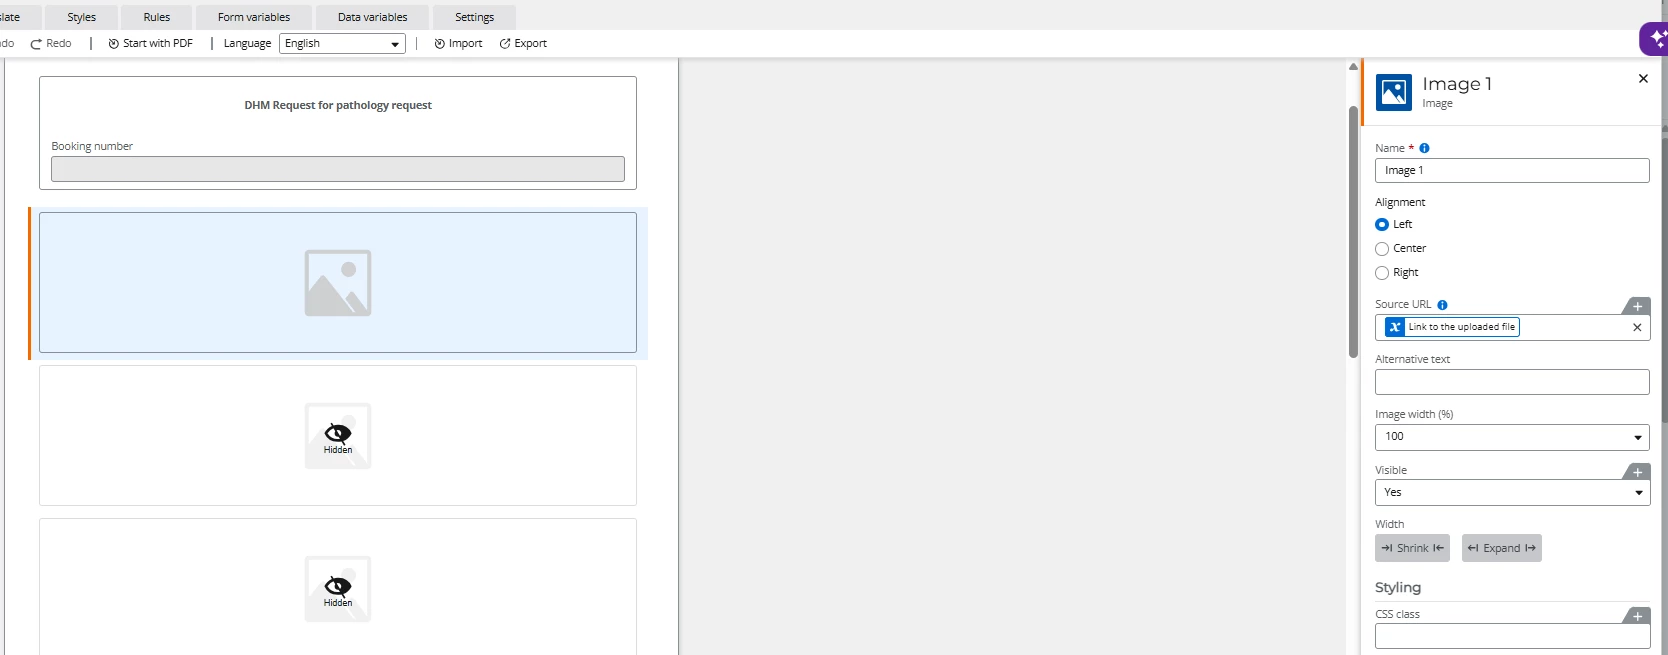
In ‘Assign Task’ form

currently simple 1 image - however feedback is stakeholders not want documents to be able to be loaded and viewed + 1-3 files at a time….
 

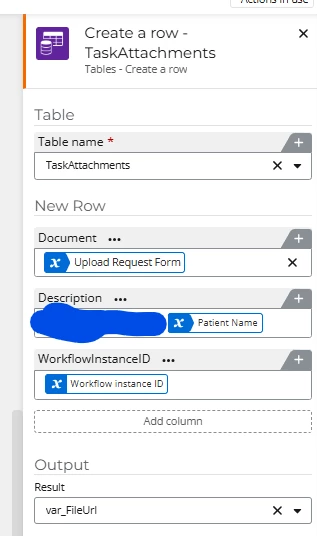
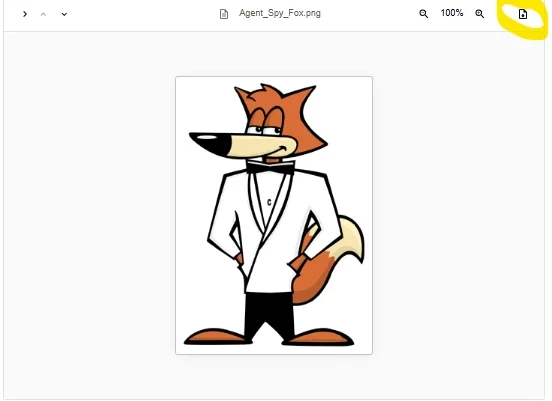
Option 2) Nintex Data Tables appears to be way cleaner and easier to set up, however the File Viewer by default allows ‘Downloads’ which some stakeholders will not allow/like. Unsure how to bypass/disable that. This would have been the ultimate solution if not for that hiccup. The delete option to remove once workflow is complete is also neat and clean.

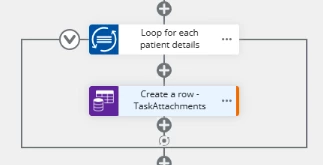
Actions in the workflow before the ‘Assign Task’ action
 

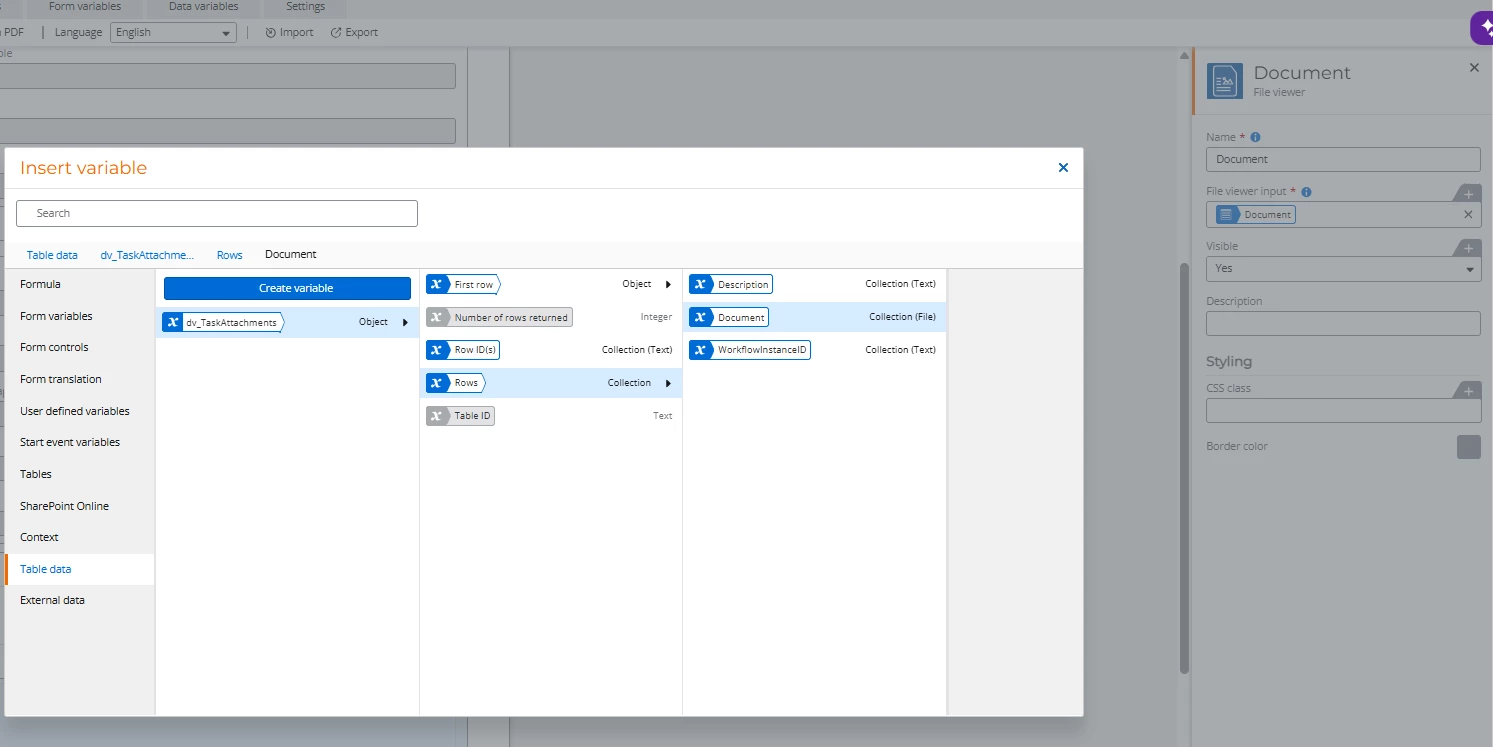
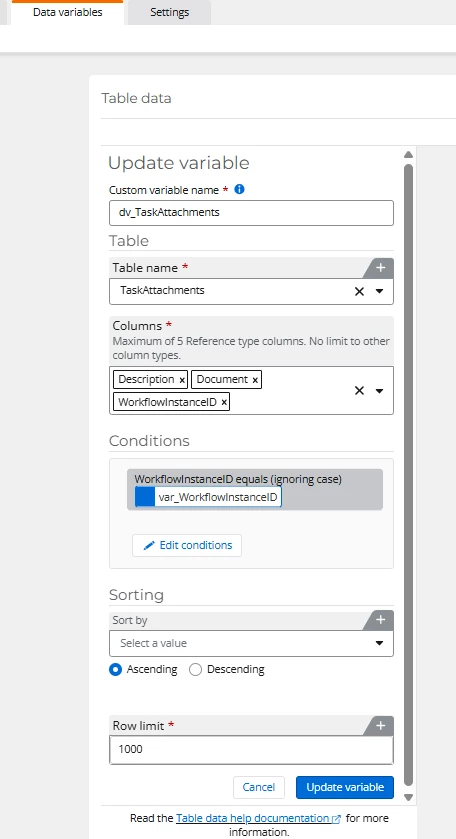
In the Assign Task action
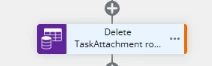
Delete after use in main workflow
 

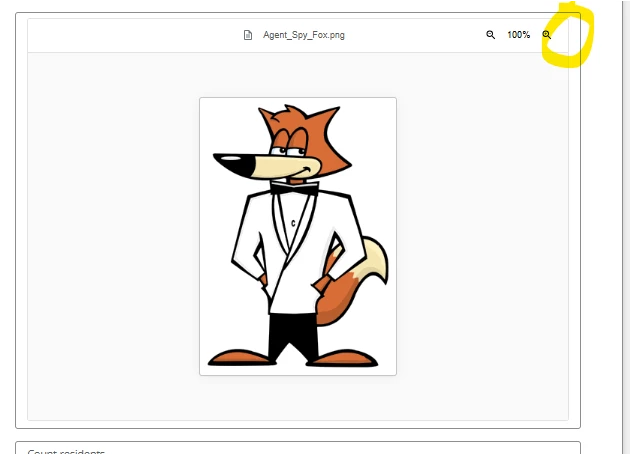
Sample on Task Assign - download button is my only issue that stakeholders will not like
 

6 replies

Forum|alt.badge.img+5
  • Nintex Employee
  • July 24, 2026

hi ​@Callan.Applebee , 

Option 2 looks great with using the new Fileviewer control. While there is no out of box capability to hide the download buttion, you can acheive this by a workaround( applying the custom CSS). For example - 

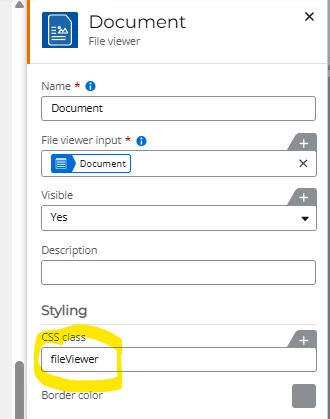
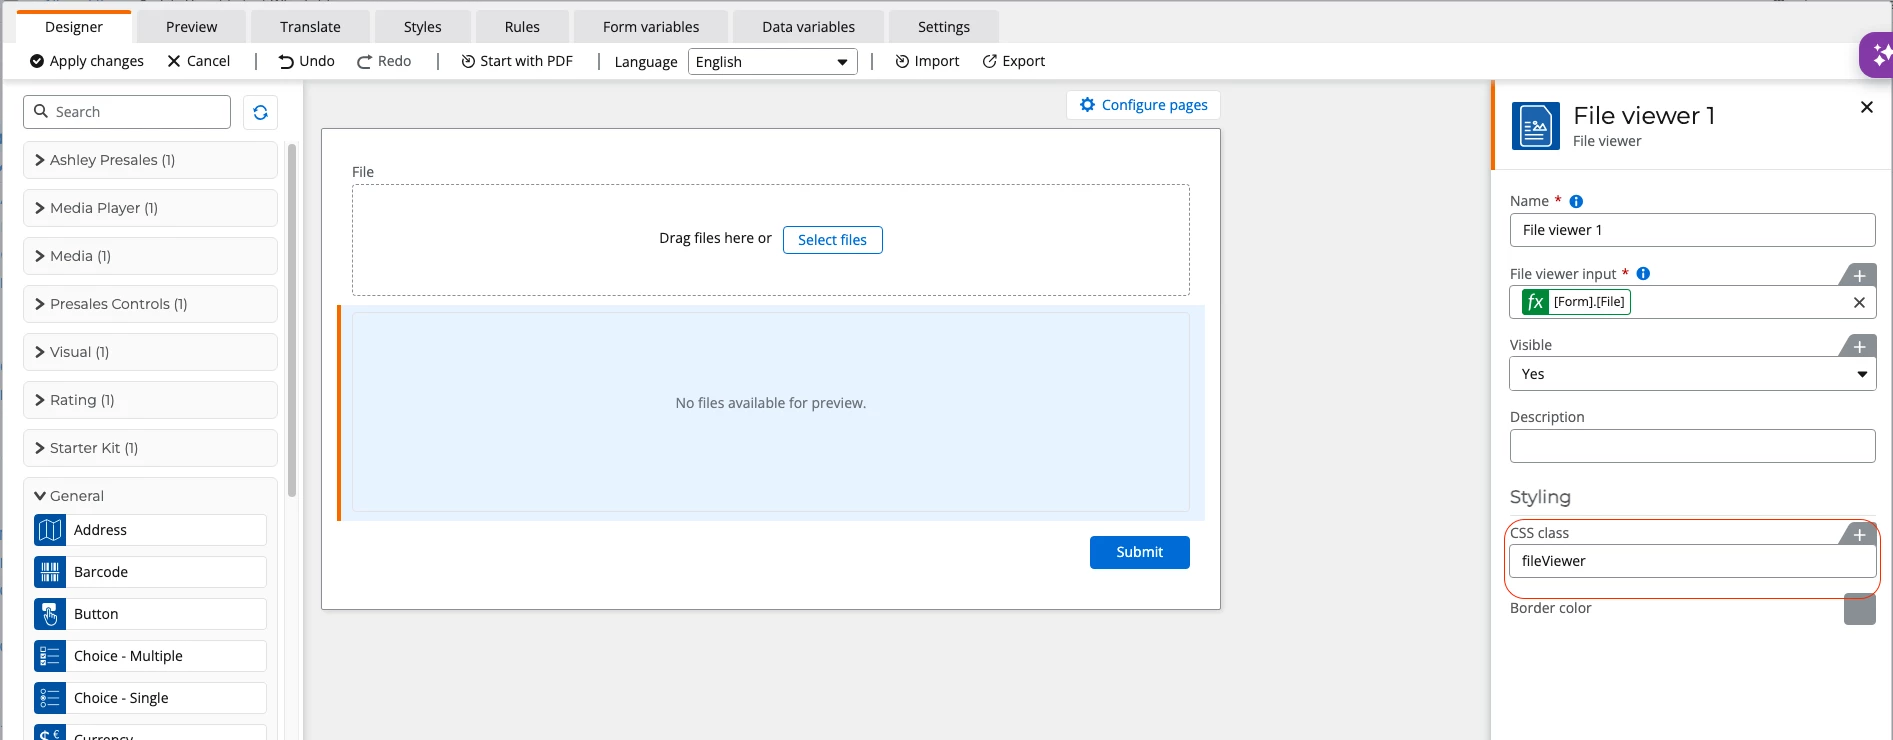
  • Give the File Viewer control the CSS class name of fileViewer
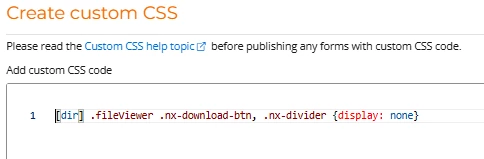
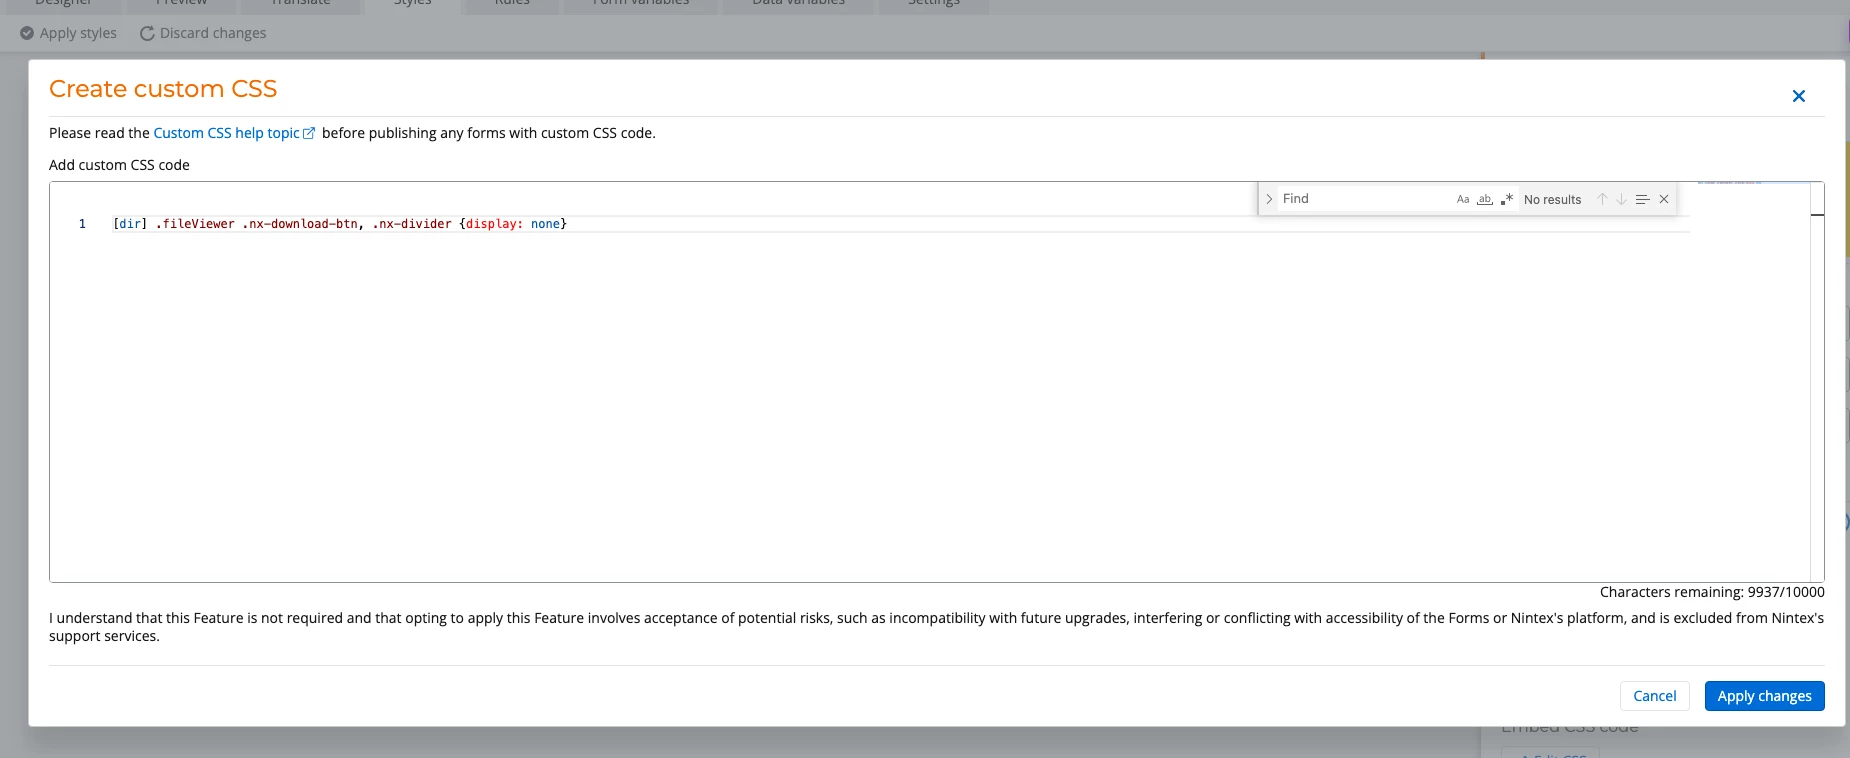
  • Add this custom style to remove the download button and the divider line -  [dir] .fileViewer .nx-download-btn, .nx-divider {display: none}


Callan.Applebee
Forum|alt.badge.img+3

how do I do that on the form as an example?

sounds simple but I have not done that before.

thanks ​@pawankolaki 


Callan.Applebee
Forum|alt.badge.img+3

Oh i think I worked it out and that WORKED thank you ​@pawankolaki 


fileViewer

[dir] .fileViewer .nx-download-btn, .nx-divider {display: none}


Forum|alt.badge.img+5
  • Nintex Employee
  • July 24, 2026

hi ​@Callan.Applebee , 

Here are some snapshots to get you started. All these changes will be applicable in the form designer canvas.

  1. In the Fileview control’s config panel, under styling tab, produce the CSS class name


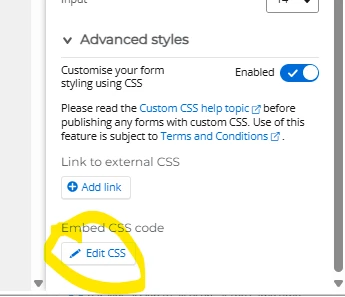
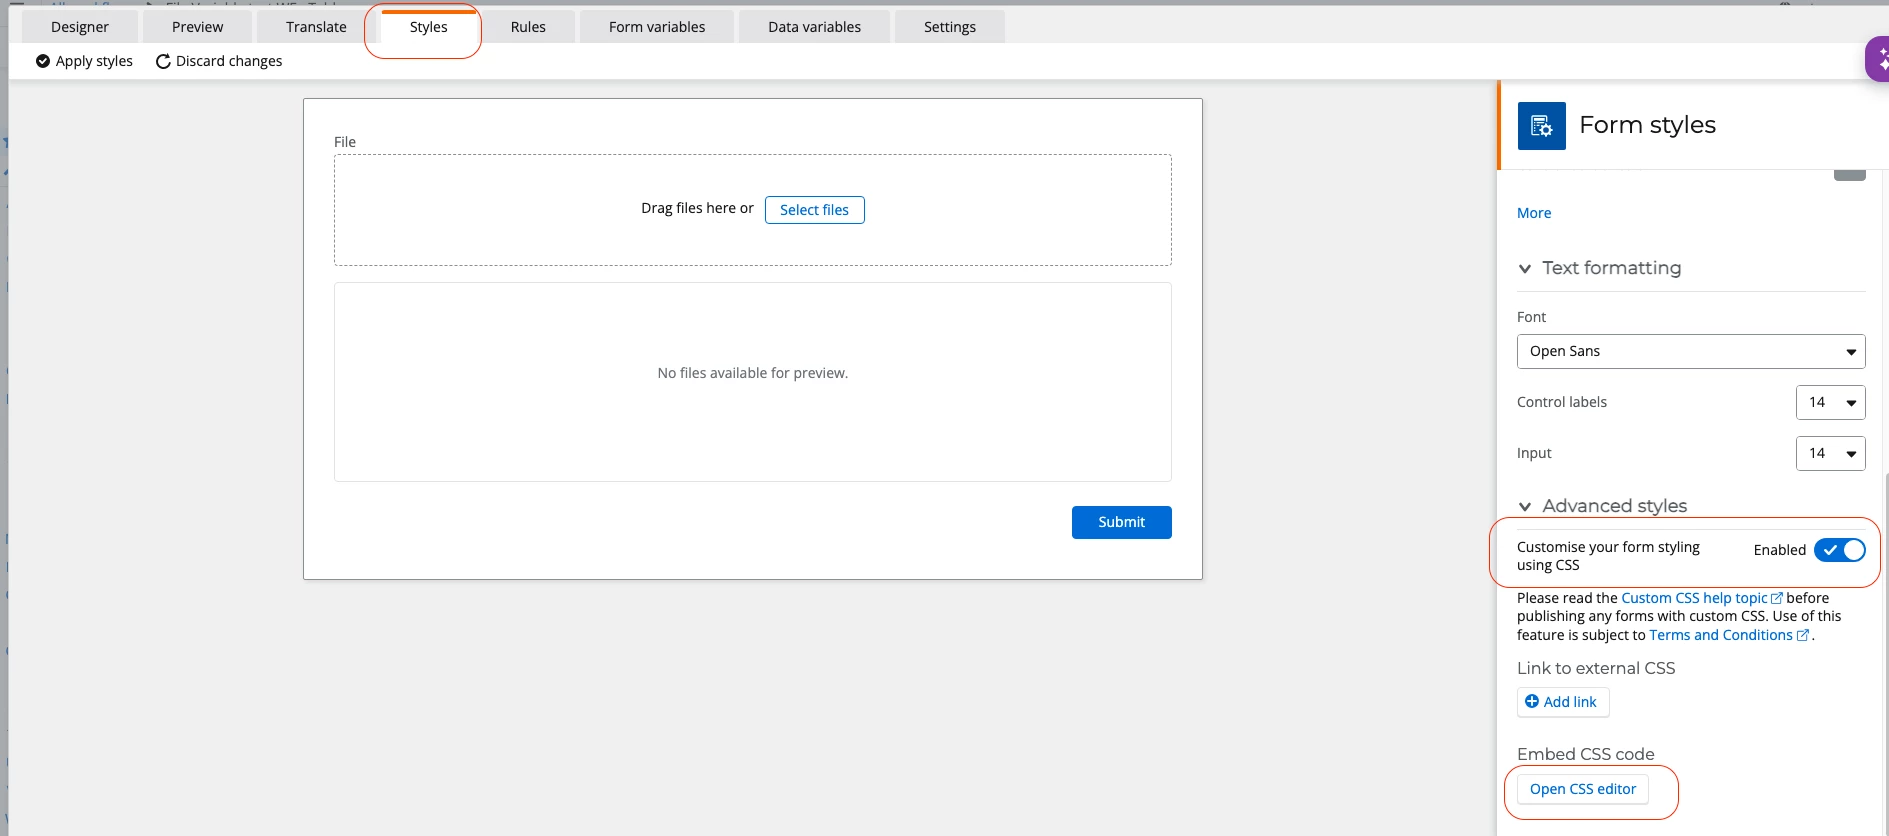
  1. Navigate to “Styles” tab, enable “Customise your form styling using CSS” under advanced styles and open the “Embed CSS code”
  1. In the editor, add the above code and apply changes. 


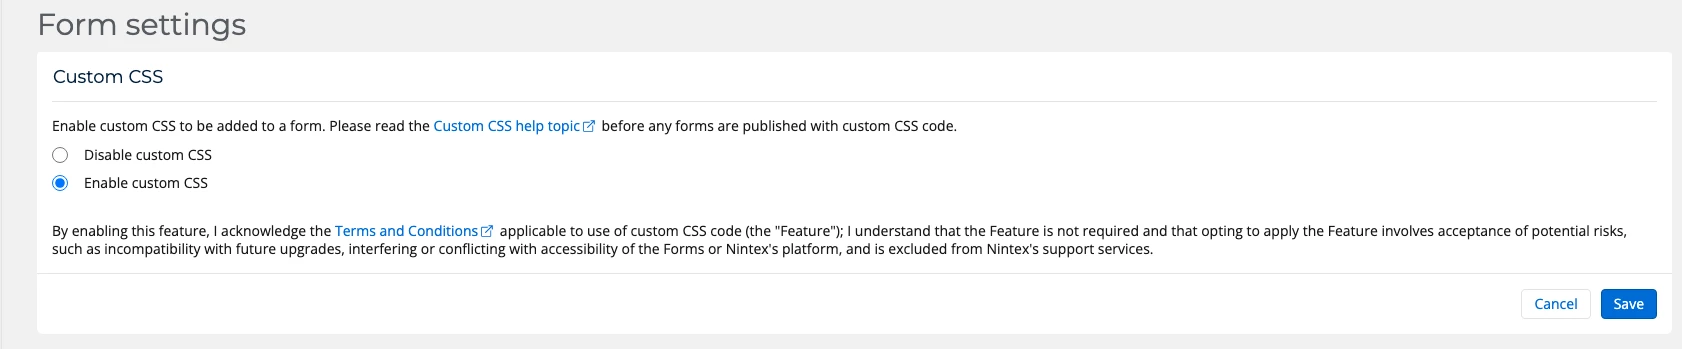
If you don’t see the above options, it may mean that Custom CSS, may not have been enabled for your enviornment. This can be enabled by your tenant admin by going to the Form Settings page. 


Please let me know if this work for you. 


Thankyou.


Forum|alt.badge.img+5
  • Nintex Employee
  • July 24, 2026

Oh i think I worked it out and that WORKED thank you ​@pawankolaki 


fileViewer

[dir] .fileViewer .nx-download-btn, .nx-divider {display: none}


Thats great. Looks like we both posted at the same time. 


Callan.Applebee
Forum|alt.badge.img+3

hi ​@Callan.Applebee , 

Here are some snapshots to get you started. All these changes will be applicable in the form designer canvas.

  1. In the Fileview control’s config panel, under styling tab, produce the CSS class name


  1. Navigate to “Styles” tab, enable “Customise your form styling using CSS” under advanced styles and open the “Embed CSS code”
  1. In the editor, add the above code and apply changes. 


If you don’t see the above options, it may mean that Custom CSS, may not have been enabled for your enviornment. This can be enabled by your tenant admin by going to the Form Settings page. 


Please let me know if this work for you. 


Thankyou.

Love the detail and YES it works