
Getting Started
AssureSign for Salesforce Lightning uses Simple Setup templates.
Installing AssureSign For Salesforce Lightning
Note: AssureSign for Salesforce Lightning solution can be installed without effecting prior installations. As a separate object with separate naming conventions, it will not interfere with or modify any existing AssureSign configuration you may have in your Salesforce environment.
The package for the current version can be installed from the Salesforce AppExchange.
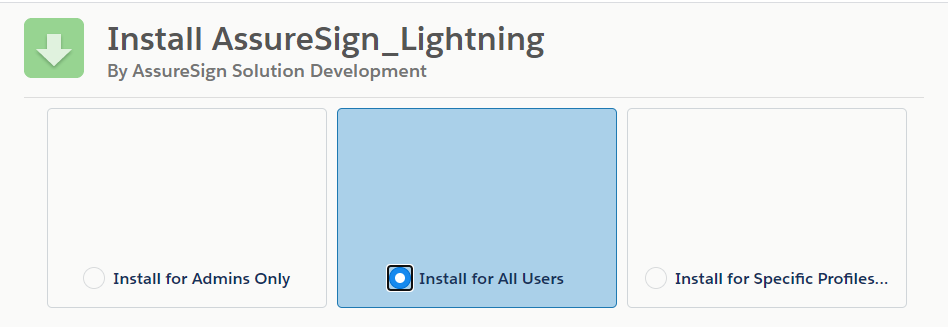
Select that you want to Install for All Users:
You will then be prompted to approve 3rd party access. Select to grant access to AssureSign's websites, and continue. You may also selectively choose only account.assuresign.net and the "Site URL" (NA1, WWW, SB, CA1 or EU1) where your organization is hosted:
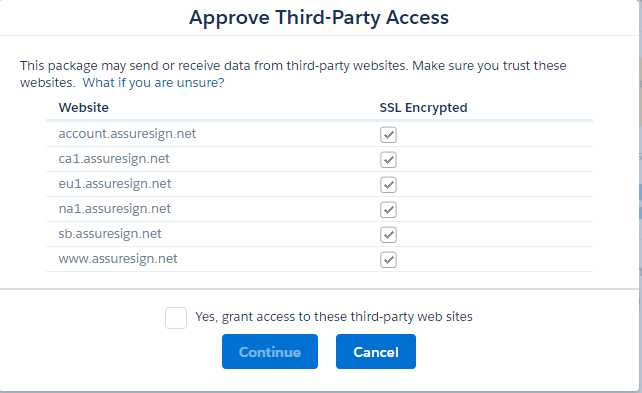
To determine your Site URL in the AssureSign portal you can go to Administration and then Settings and it will be located under the Account Information heading on the row titled "Site URL".

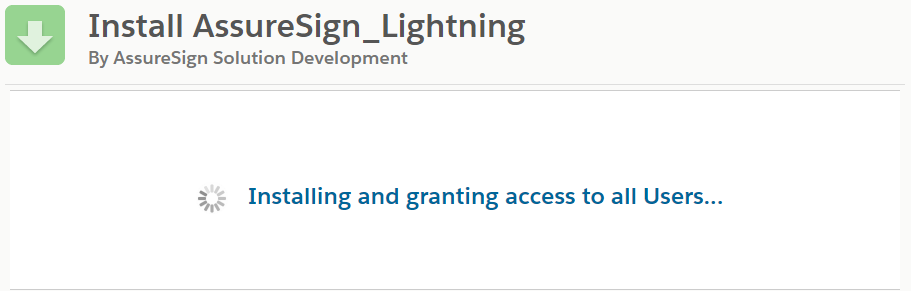
Once you have granted access, click continue. Salesforce will install the application, and send you an email once the features are available in your environment.
Configuring AssureSign For Salesforce Lightning
Once you have received the email that installation is complete, you can now configure AssureSign for Salesforce Lightning.
Navigate to the AssureSign Post-Installation Wizard
Note: When clicking the done button from the installation of the package, it may automatically redirect to the AssureSign Post-Installation Wizard, in which case you should continue to the next section, Logging into AssureSign from the AssureSign Post-Installation Wizard.
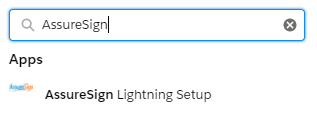
If you are not automatically redirected, or return to your instance at a later time for configuration, in the app finder, search for AssureSign and click on AssureSign Lightning Setup and this will bring you to the AssureSign Post Installation Wizard:
Log into AssureSign from the AssureSign Post-Installation Wizard
The initial AssureSign Post-Installation Wizard looks like the below:
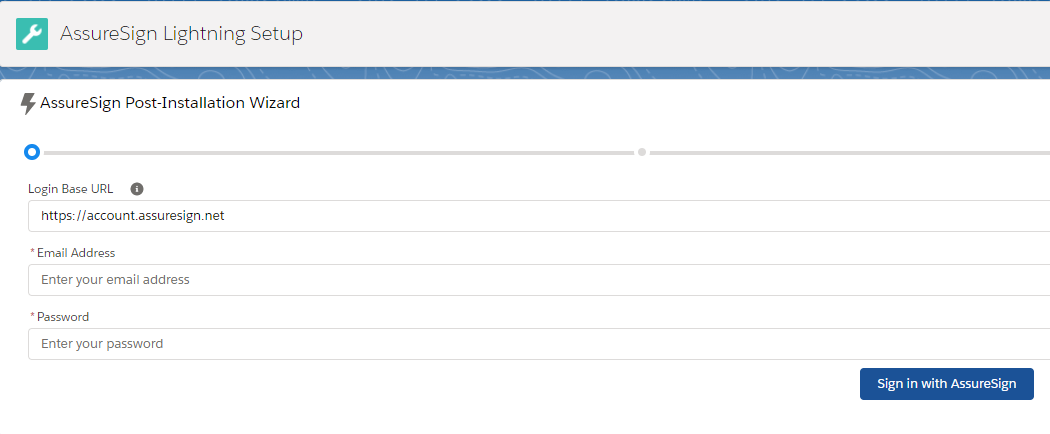
You will need to enter the following:
Login Base URL: For most users, this should be entered as https://account.assuresign.net (the light grey information already prefilled is an example only and is not actually present - you will need to enter the information manually). If you are using a custom login URL for AssureSign, you will need to register this endpoint by going to Setup and then searching for Remote Site Settings.
Email Address: The email address used to access AssureSign
Password: The password for the AssureSign account used in Email Address.
Once you have populated the above information, click Sign in with AssureSign.
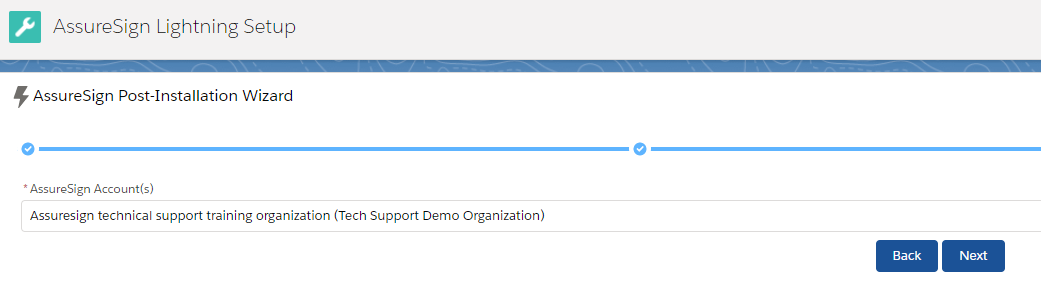
Choose your AssureSign environment for the initial configuration
You will then be brought to the following screen if your account has access to multiple environments. Change the drop down to the appropriate environment you wish to use for the Salesforce configuration, and then click next.
Choose your AssureSign Global Settings settings:
The final screen of the configuration wizard will look like the below:
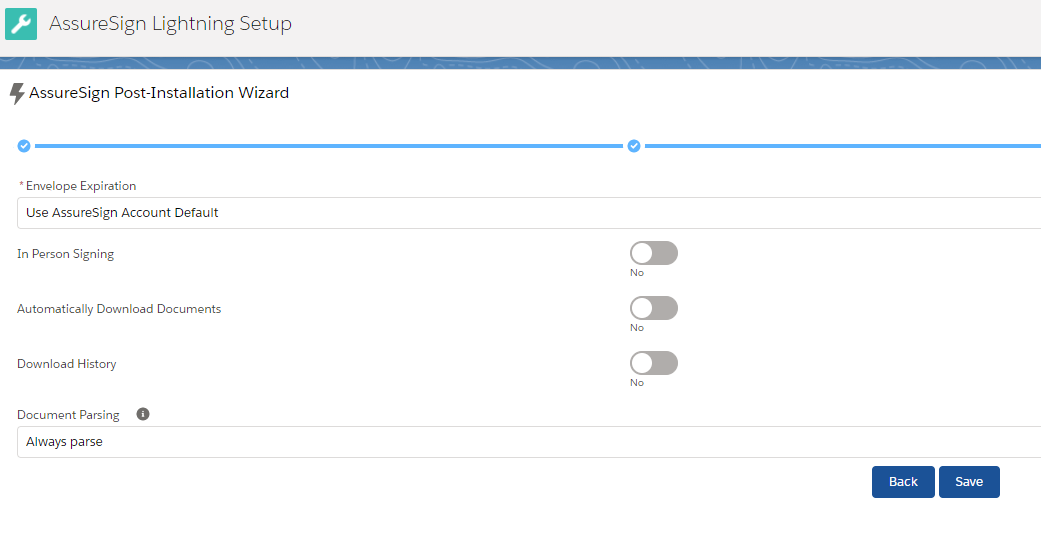
Configure your preferences for the following settings:
Envelope Expiration: Choose between using the AssureSign account default, Specify a fixed number of days for all envelopes, or specify a fixed number of days for all envelopes and allow users to override.
In Person Signing: Turning this option on would present the originator with an option to "Sign in Person" after the envelope is submitted.
Automatically Download Documents: This option pushes documents from AssureSign to Salesforce when enabled in conjunction with a configured DocumentTRAK Document Transmission. For more information on DocumentTRAK Document Transmissions, see the article here.
Download History: This option pushes the history from AssureSign to Salesforce when enabled in conjunction with a configured DocumentTRAK webhook notification. For more information on DocumentTRAK webhook notifications, see this article.
Document Parsing: Turn this option on when documents will be submitted using dynamic jotblocks. For more information on using Dynamic Jotblocks, see the article here.
Finally, click Save.
If configuration was successful, you will see the following message:

After initial configuration, you will be able to install additional configurations if needed. For an additional configuration walkthrough, please see the article here.
Enabling The AssureSign Integration On A Page Layout
To add the AssureSign integration to the standard objects of Accounts, Contacts, Leads, Opportunities, or Orders please follow the following steps.
Click Settings, then Setup
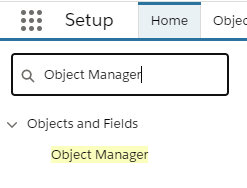
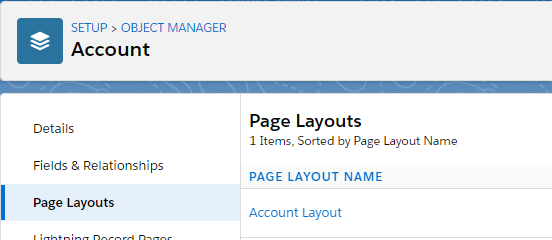
Search for "Object Manager" in the Quick Find menu, then click Object Manager
Click the name of the object where you wish to add the AssureSign integration.
Then, Click Page Layouts in the left hand column. Click the blue hyperlinked name of the page layout where you wish to add the AssureSign integration.
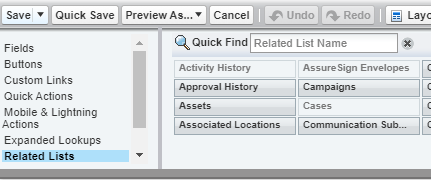
Next, select related lists and drag and drop the AssureSign Envelopes item to a location on the page layout of your choosing.
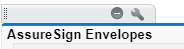
Then select the wrench icon on the AssureSign Envelopes related list:
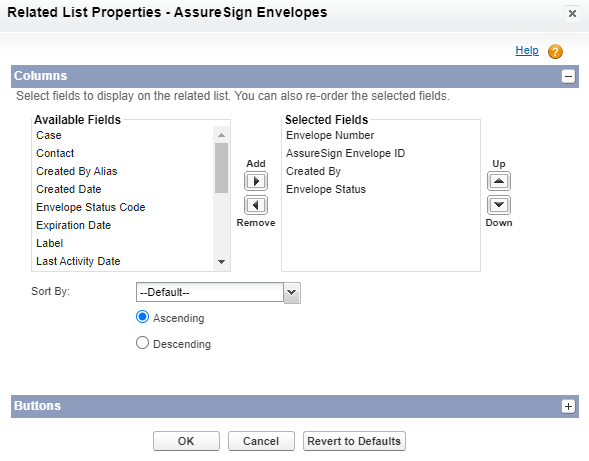
Select from the available fields by highlighting any columns you wish to see in the AssureSign object and clicking add, and then OK (To start, we recommend selecting Envelope Number, AssureSign Envelope ID, Created by, and Envelope Status):
Finally, click save to save the page layout.