
In order for information entered by signers to pass from jotblocks to Salesforce or from Salesforce to pre-fill signer jotblocks, AssureSign Data Mapping must be configured.
AssureSign provides support for bi-directional data mapping. This allows:
- Use of data from Salesforce entity fields to automatically populate the sender inputs for an AssureSign template.
- Use of signer provided data from an AssureSign envelope to update fields on a Salesforce entity after signing is complete.
Navigating To The Item Data Mapping For AssureSign For Salesforce Lightning
First, regardless of if you want information to pass from Salesforce fields to Assuresign, or from AssureSign jotblocks into Salesforce, or both, you will need to navigate to the AssureSign Data Mapping Object in Salesforce.
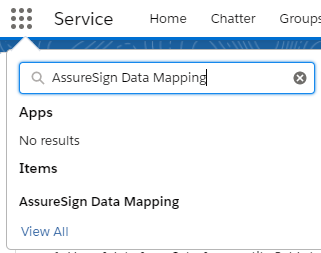
In Salesforce, click the App Menu and search for "AssureSign Data Mapping". Then, click AssureSign Data Mapping under Items:
Next, choose if you are Mapping Data from Fields on a Salesforce Entity to Sender Inputs on a Template or Mapping Data Entered by a Signer to Fields on a Salesforce Entity.
Mapping Data From Fields On A Salesforce Entity To Sender Inputs On A Template:
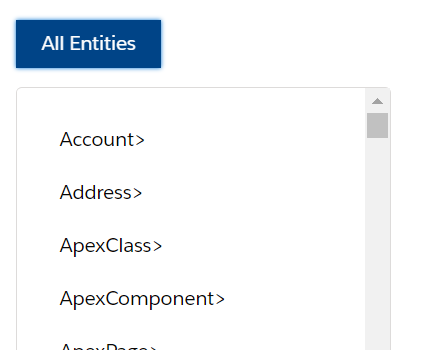
First, select the Salesforce entity from the list on the AssureSign Data Mapping item that you want to populate data from, such as Account:

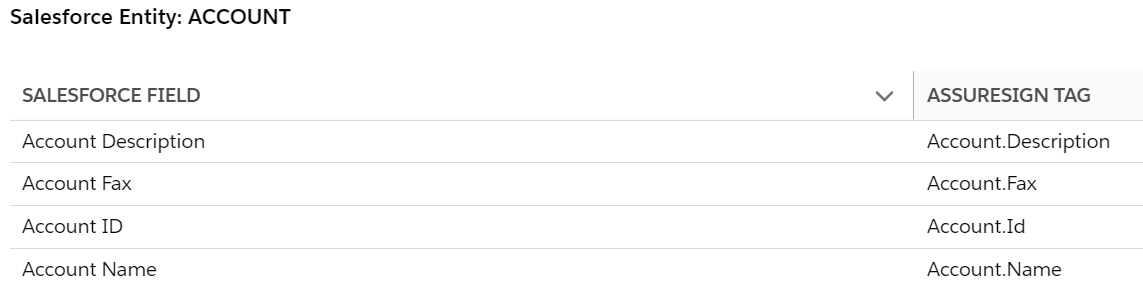
Next, scroll down and identify the field you wish to use, and copy its tag. As an example, the tag for the Salesforce field "Account Name" would be "Account.Name":

Next, edit your Simple Setup template in AssureSign, and click Edit Sender Input in the upper right of the template:

On the view that appears, enter a name that reflects the information that will be imported from Salesforce:
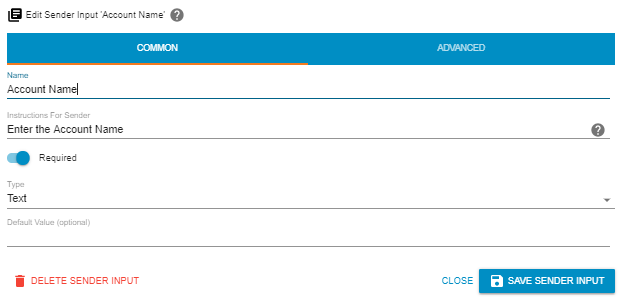
Set this sender input to required or not required depending on your needs.
Next, click the Advanced tab in the same view and add the Salesforce tag to the tag line:
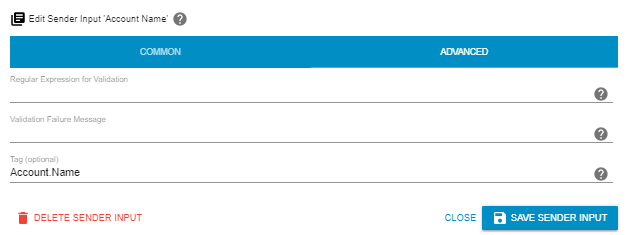
Finally, click Save Sender Input.
Next, if you wish for the information from Salesforce to prefill a jotblock, you would add a merge field with the newly created sender input to the related jotblock in the "Enter the text to prefill the jotblock blank" by selecting the blue circle at the end of the line and then select the appropriate sender input name:
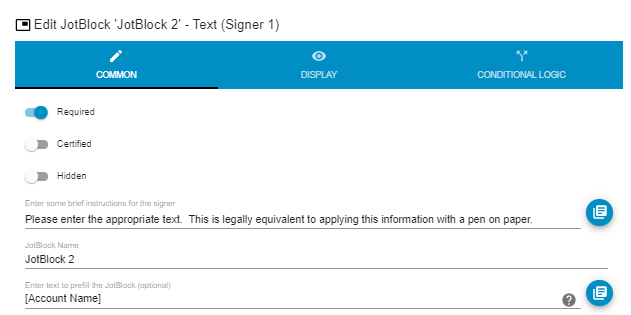
Finally, click Save Jotblock.
Mapping Data Entered By A Signer To Fields On A Salesforce Entity:
First, select the Salesforce entity from the list on the AssureSign Data Mapping item that you want to populate data from, such as Account:
Next, scroll down and identify the field you wish to use, and copy its tag. As an example, the tag for the Salesforce field "Account Name" would be "Account.Name":
Next, in AssureSign, navigate to your template, and click edit on the jotblock that you want to use to send information to the Salesforce field.
On the Tag line, add the tag you created in the prior step:
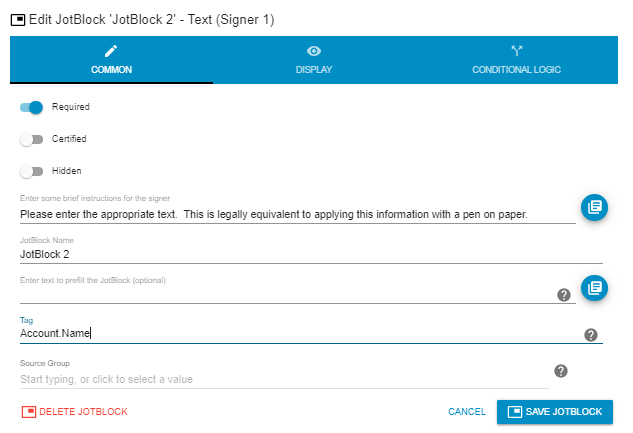
Click Save Jotblock.
Ensure your Webhook attached to the template is set to "Update Salesforce".
If you haven't already, follow the steps in Configuring DocumentTRAK updates for AssureSign for Salesforce Lightning to configure a webhook to use with AssureSign for Salesforce Lightning and attach it to your template. In order for information to pass from signer inputs back to Salesforce, "Update Data" must be turned on as shown here in the Webhook:
