


The following describes how to use and manage Simple Setup templates. Classic templates, usable in V2 DocumentNOW operations, has been archived.
A "Templates" option is available on the Simple Setup envelope portal allowing a user to view and edit templates they have access to.

To manage templates, click on the Templates menu selection on the top bar. You may click on existing templates that you have the rights to edit to bring up more options.

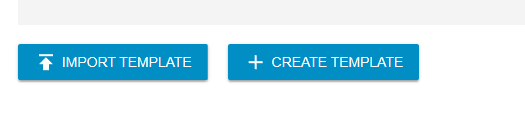
There are two ways to create a template:
- select Create Template from this screen
- perform a Simple Setup send operation and select to save your work as a template
1. Create a new template
When you create a new template, you initially set
- a name (to avoid confusion, you are required to provide a unique name for the template)
- a description - not required, but it is a good idea to provide a short description so users of templates clearly understand the purpose or version of the template
- whether the template may be altered at all when used - if it may not be modified when used by end users, set the template to "Locked"
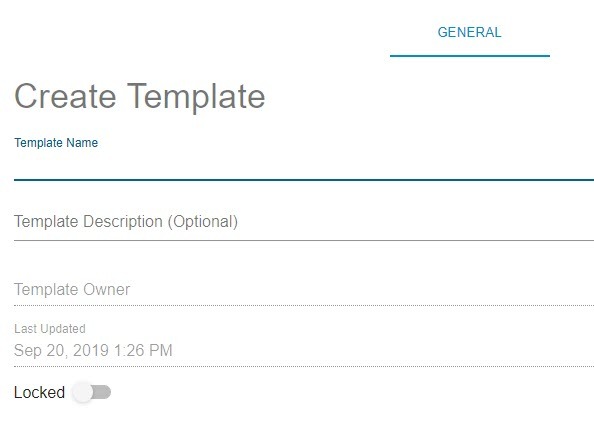
You may always return to the template list to modify these settings later. When the template is initially created, only you will have the ability to use it. You will be able to share the template by editing the template's permissions by returning to the template list, selecting the template, and selecting the permissions view.
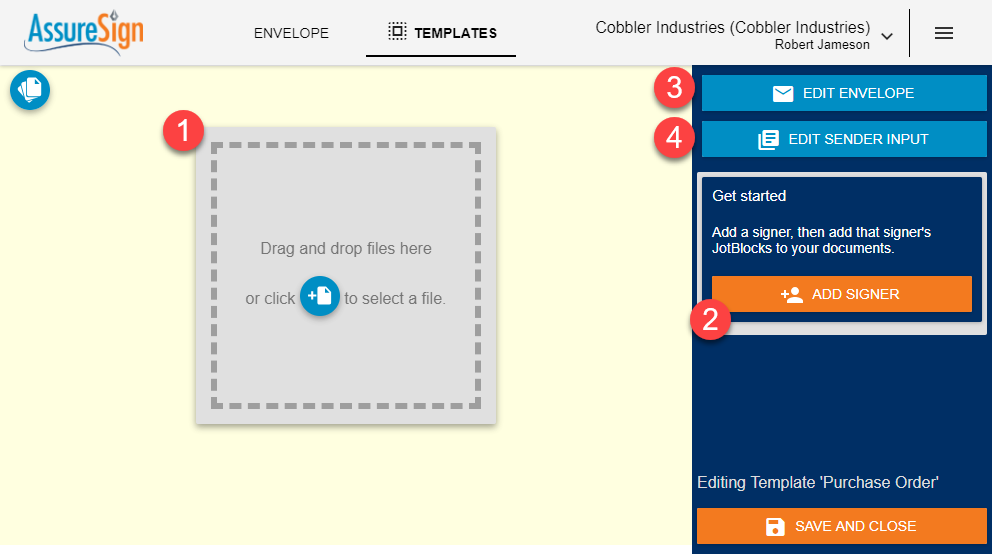
When you select continue, the workspace will look very similar to what you see when sending a one-time-use Simple Setup envelope. You can now:
- add documents
- add signers
- edit sender inputs, which are variables or placeholders for information that needs to be provided by the sender when the template is used
- edit the properties of the container envelope
- add JotBlocks
When the template is complete, you may select it to be used on the Send screen.
Designing a template is very much like sending a one-time envelope, but with a template you are creating a container that allows the data to be defined when the template is used later.
1. Add documents
Once your first document has been added to the workspace, you'll see an image of it shown. You may add signers or select additional documents to be signed by dragging them to the workspace or clicking the blue + button.

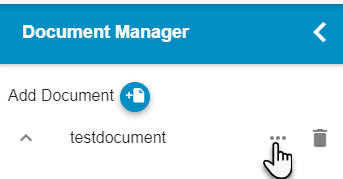
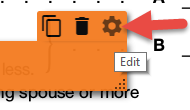
Clicking on the stacked documents button in the upper left corner opens the Document Manager allowing you to delete and change signing order of documents and JotBlocks.
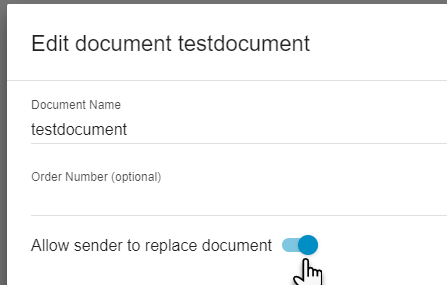
When adding a document, you will be asked whether users of the template should be allowed to replace this document when the template is used later.
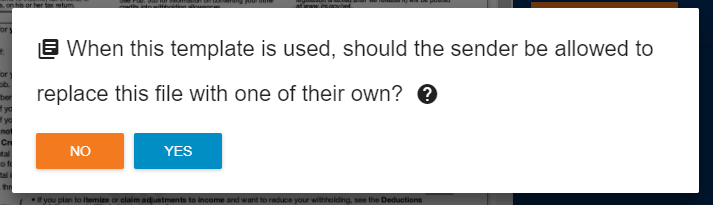
If you select YES, then the sender may upload a new document into the workspace to replace this document when the template is used.
If you select NO, then the document you have uploaded will be the one to be signed when the template is used. The sender will not be able to replace it with one of their own.
Tip: If you would like to later modify whether the sender may replace the document, go to the Document Manager icon, and select the document to be modified.
How you configure this should be based on your expected business workflow. You should ask the questions:
- Do we have a process in place that is already creating documents that are to be signed later?
- if yes, then you may want to allow the sender to use that document at run time, and then this document will just serve as a placeholder to help you design where signatures should be obtained (select YES in the dialog above)
- Can the document being uploaded be used as is, with only a few areas filled in with sender input at runtime to make it fully signable?
- if yes, then you may want to simplify the use of your template by not requiring end users to upload a new document when the template is used (select NO in the dialog above)
If the file may be replaced when the template is used, you should provide sufficient instructions and name this input so it is clear how it is to be used.
2. Add signers
Click on Add Signer to create the signer sender inputs needed at runtime.
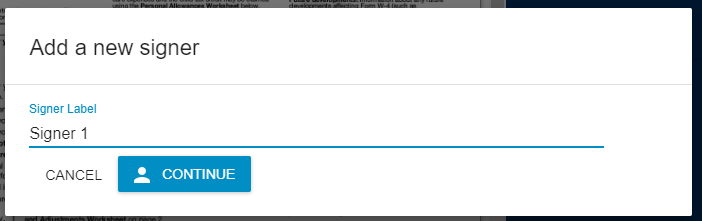
Consider changing the label of the signer to reflect your actual use case, for example:
- borrower
- co-signer
- employee
- contract signer
When you "label" this signer, a number of inputs will be created for you that will need to be filled in with data when the template is used later.
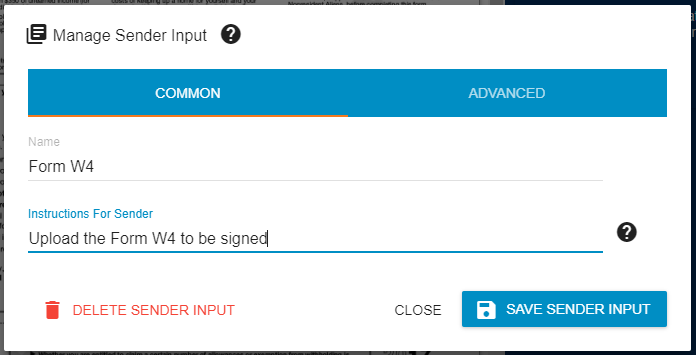
3. Edit sender input
If you click on Edit Sender Input now after creating a signer, you will see a number of inputs tied to the signer you created.

You may edit these inputs from this pop-up window.
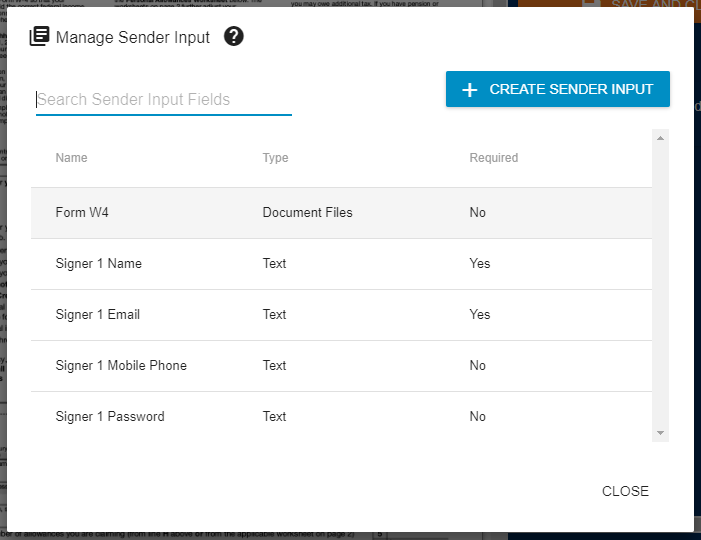
Click on a row containing an input item to edit it.
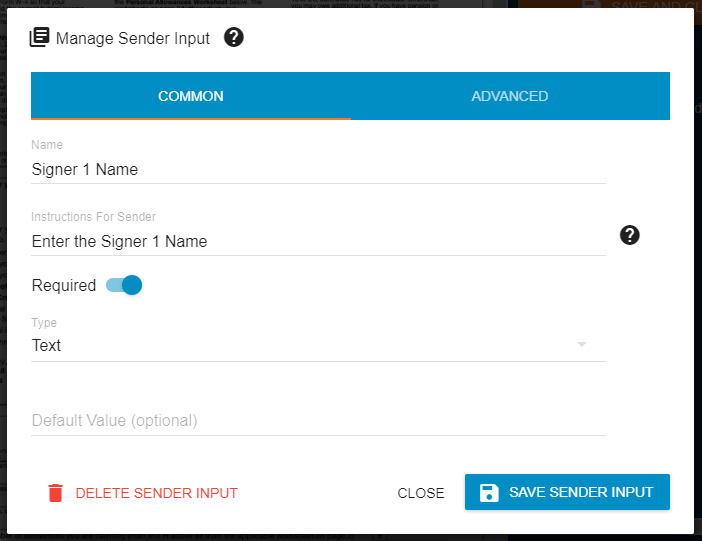
The advanced tab allows you to enter regular expression validation and custom error messages. While you may set an input element to not required, make sure you do so understanding how that will affect the use of your template. For example, a name and some contact method will always be required for a signer. If you set such an input as not required, someone using your template later may need to provide some extra information for the template to be complete.
4. Edit the envelope's properties
Click on Edit Envelope to modify settings for the container envelope.

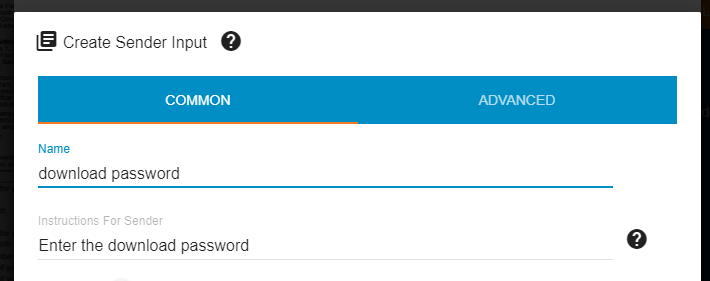
You will be able to modify various elements of the envelope. You may create new sender inputs for some elements by clicking on the blue inputs icon where it is made available.

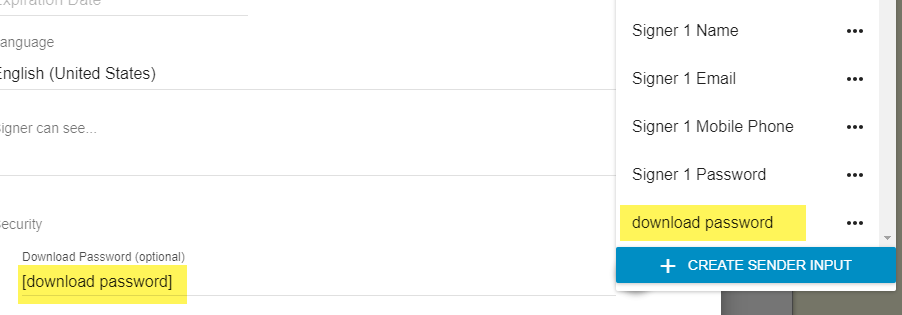
You may pick from existing inputs, or create a new one by selecting the "Create Sender Input" selection:
After creating a new input closing the dialog, you will now be able to pick your newly created input:
5. Add JotBlocks
Add JotBlocks just like you do when sending a one-off simple setup document. Refer to the documentation for sending a simple envelope in order to understand the different types of JotBlocks you can create.
When designing JotBlocks for a template, you will be able to indicate that some properties of the JotBlock should come from sender inputs. Click on a JotBlock's edit icon to see what is available.
For example, you may create a Fixed Text JotBlock that is filled by the sender when the template is used. Drag the Fixed Text JotBlock to the document, and click on the sender input icon.

After creating the new sender input, select that input to populate the fixed text area of the JotBlock editor pop-up.
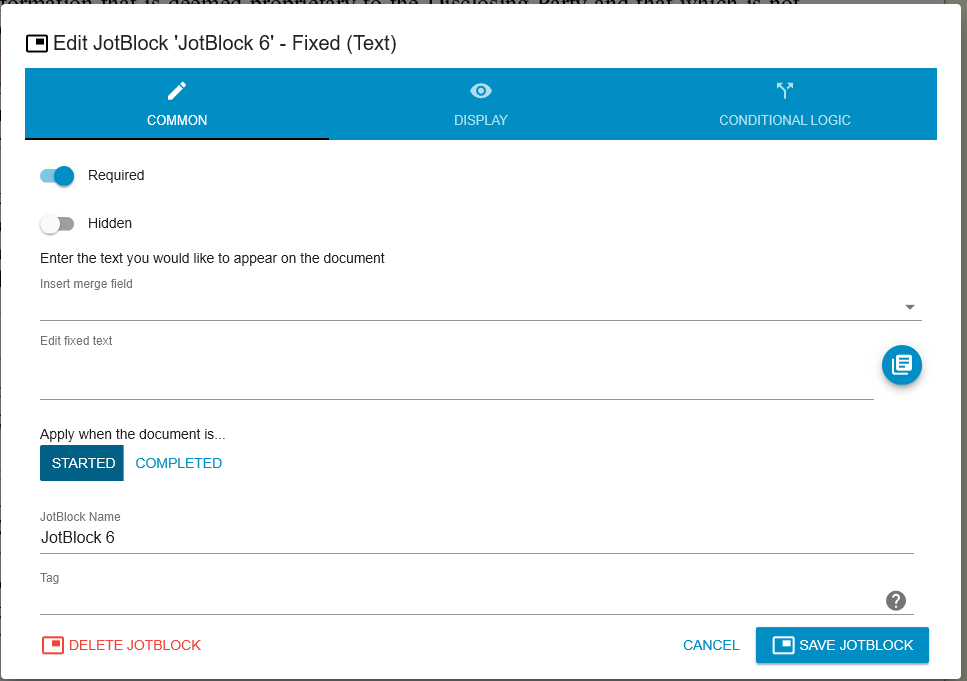
It is important to note that the required setting on a sender input used in a fixed text JotBlock should match the required setting on the fixed text JotBlock itself. While a fixed text JotBlock is not presented to a signer during signing, when the template is used and you have disabled the "required" setting on the fixed text JotBlock, then if the sender input used to populate the JotBlock is also not required and nothing is entered by the person sending the document, nothing will be rendered to that JotBlock area.
Using a template
You may use a template by itself - that will be your only option if it is locked - or in combination with additional documents or information you provide when sending.
It is also possible to apply a template as an overlay - if you allowed the document to be replaced by the sender - to a document you already loaded in the workspace.
Use a template on its own
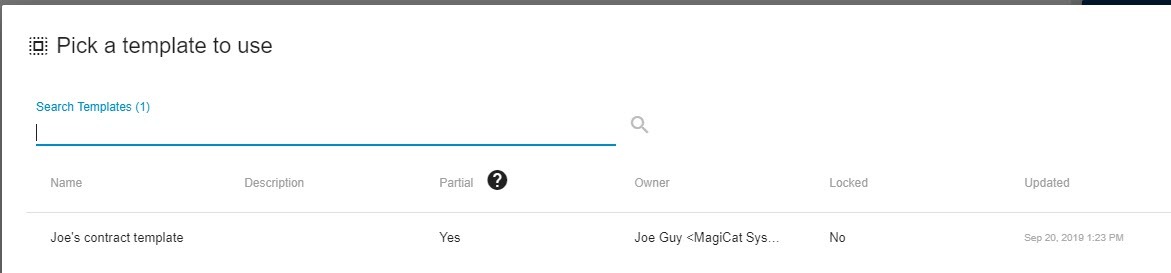
To use a template on its own, click Add Template with nothing in the workspace.

Pick a template.
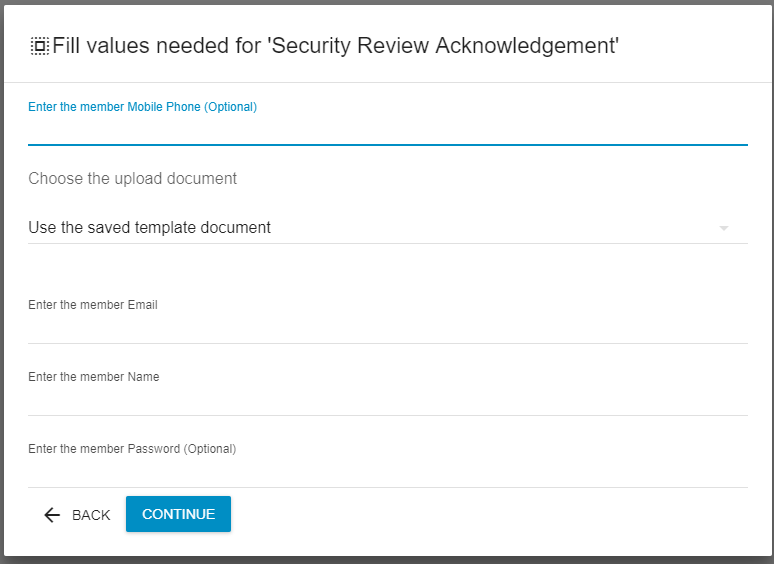
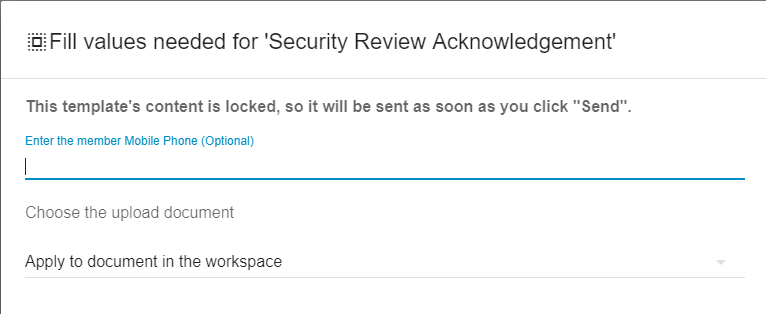
You will be asked to provide values for the sender inputs you created in the template. Your options may be different depending on how you constructed the document requirements, whether the template is locked, and your account settings.
Applying a template to a document in the workspace
With documents in the workspace, if you click Add Template, and the template supports using a sender provided document, the template inputs will default to "Apply to document in the workspace".
If you instead choose "Use the saved template document" or "Upload a document" (if available), then you will be adding the template after the existing document in the workspace.
Note that locked templates may have special restrictions, such as not allowing any additional documents to be present in the workspace. Adding such a locked template may result in behaviors you did not intend when designing the template.
Conditional Logic
When the Conditional Logic feature is enabled, you may create dependencies between JotBlocks. This allows you to change what the signer needs to enter based on the condition of previous JotBlocks. See this documentation for more information.
Payment processing
When the Signer Payment feature is enabled, you may create requests for payments during signing. See this documentation for more information.
Signer Delegation
When the Signer Delegation feature is enabled, signers may reassign their assigned Jotblocks to another individual. See this documentation for more information.