


The following describes how to send documents for signature using our Simple Setup process:
Creating a new document envelope typically involves 5 basic steps:
- Selecting Documents to be signed
- Adding signers
- Making JotBlocks
- Configuring workflow
- Reviewing and sending
1. Selecting documents to be signed
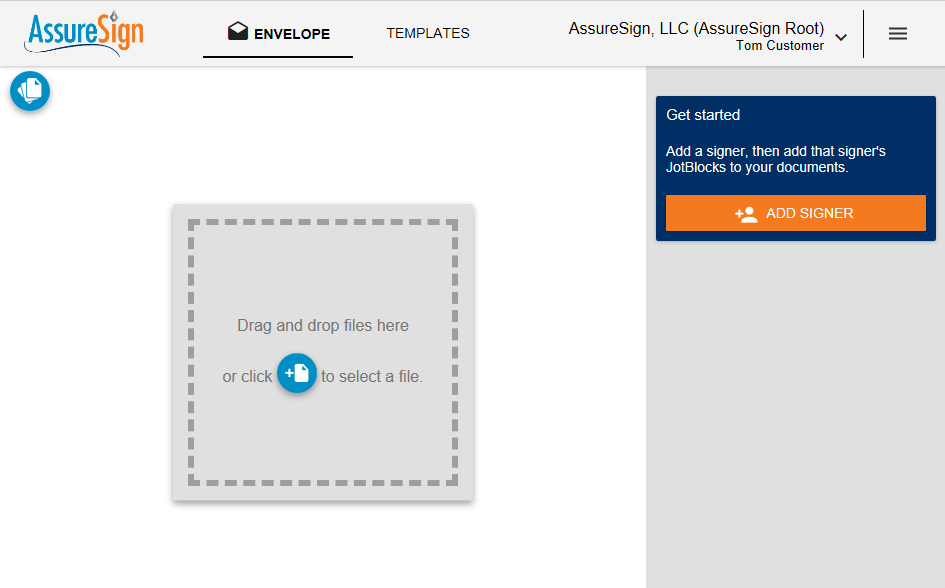
When you start the new document envelope setup process, you'll first be presented with a blank workspace. Typically the first step involves selecting the documents that will be signed. You can add documents to your workspace by:
- Dragging and dropping a file from your computer into the box shown in the main white area of the page, or
- By clicking the add document button

You may also choose to use a Simple Setup template that you or a teammate previously created
Once your first document has been added to the workspace, you'll see an image of it shown.
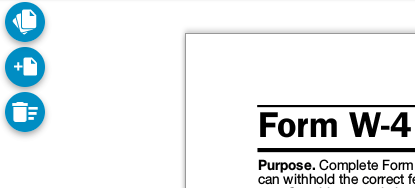
You may now ...

Open the Document Manager, where you may delete and change signing order of documents and JotBlocks.

Add additional documents through the add document button or by dragging additional documents into the workspace.

Clear the workspace.
2. Add signers
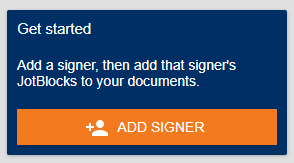
Once you've selected all of the documents to be signed, the next step is to add the signers that will be signing those documents.
Click the ADD SIGNER button, and enter information about the signer :
- the Signer's Name
- Email Address And/Or Mobile Phone
- sending signing invitations by SMS (text) is a a feature add-on: please contact support if you are interested in using this feature
- Password
- optional, depending on your settings - the signer will be required to enter this password before they can access the documents for signing
- Style of Signature
- you may select
- Let the signer choose
- Drawn
- Typed
- you may select

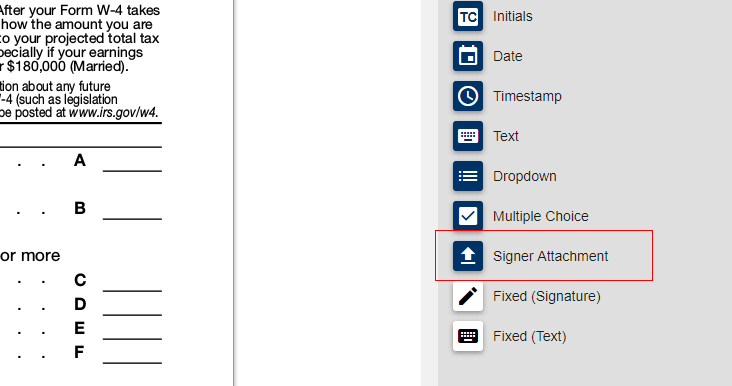
If you need the signer to upload any documents or images during signing (such as a copy of a driver's license, etc.), you can indicate that here by clicking on Signer Attachments.
You can also add Signer Attachments by dragging the corresponding jotblock onto your document.
Enter instructions for the signer so they know what is expected. You'll also be able to indicate whether or not the upload is required and if the signer can upload more than one file or image.
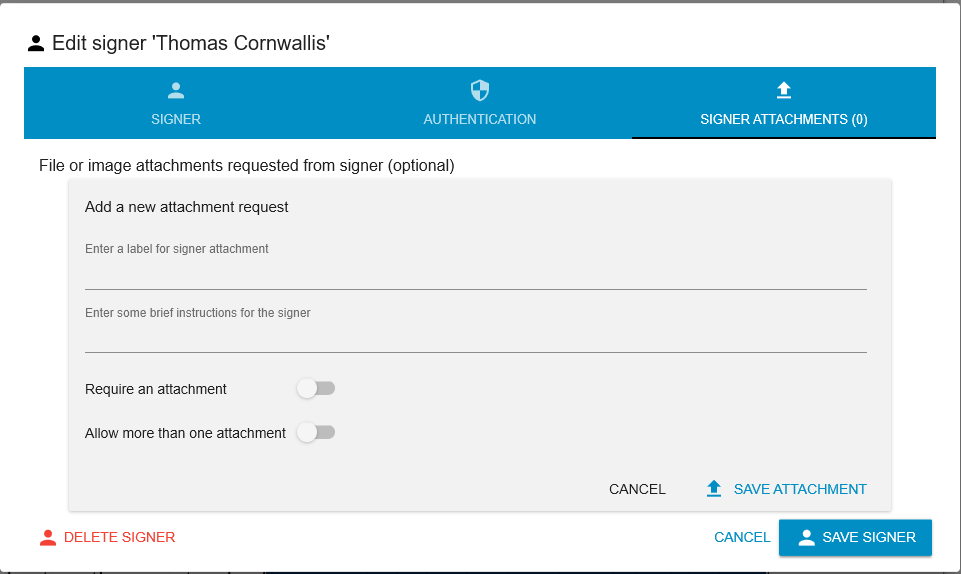
Once you've clicked SAVE SIGNER you'll see the new signer listed on the right-hand side. You can modify or delete the signer by clicking the ellipses (...) that appear to the right of the signer's name when hovering over it.
Add more signers by clicking the blue plus button beneath existing signers.

3. Making JotBlocks
In AssureSign, you can drag in JotBlocks to indicate areas on a document that need to be signed or that require input. Once you have added at least one signer, you can make JotBlocks for that signer by:
- Selecting the signer to work with from the list of signers on the right
- you can confirm the signer is selected by making sure that the background behind the signer's name and email address is highlighted in a color. The JotBlock controls you can add will also be set to the same color.
- Dragging a JotBlock (Signature, Initials, etc.) from the right-hand side onto a page of the document.
- You can move a JotBlock by dragging it to another page or location, and you can resize a JotBlock by selecting the resize handle in the JotBlock's lower left corner when it has been added to the document.
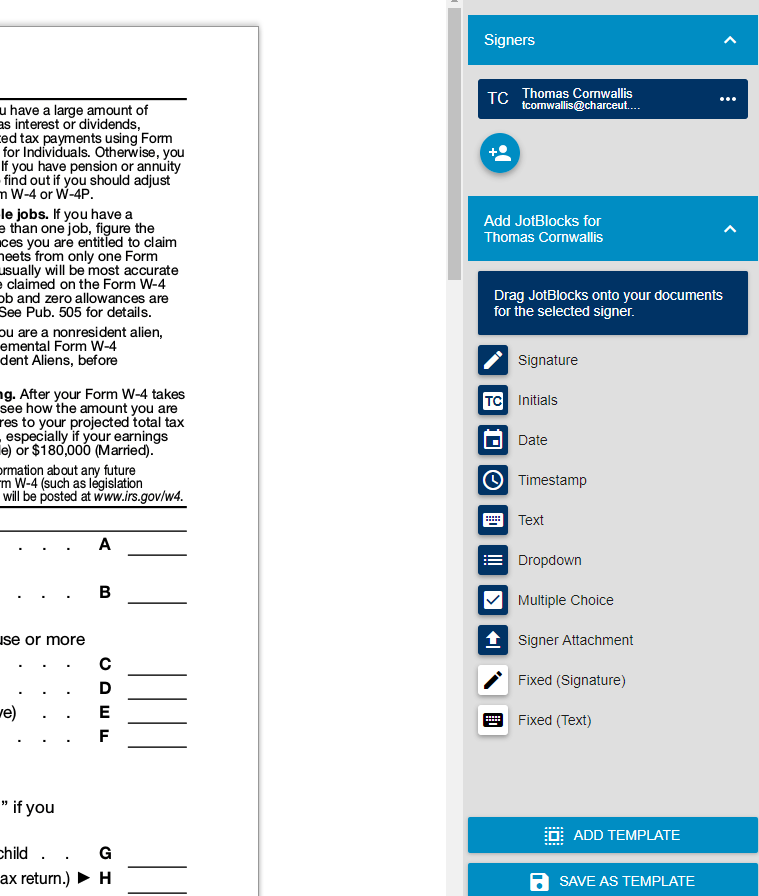
The JotBlocks you drag onto a document for any signer will show up on the document with the same color used to identify the signer.
JotBlocks that are not assignable to a signer, like fixed written signatures you want to apply to a document or fixed text, will be white.
JotBlock Controls
- You can modify properties of the JotBlock by clicking on the GEAR button (item 1 in the image below).
- You can delete a JotBlock by clicking the GARBAGE CAN (item 2).
- Some JotBlocks can be copied by clicking the COPY icon (item 3).
- You may resize a JotBlock by holding down the mouse on the resizing handle in the lower right corner of the JotBlock (item 4) and dragging the edges of the JotBlock to an adjusted size.
- Note that JotBlocks can generally be classified as "written" (mouse or touch-based input) or "typed" (keyboard/text input).
- An indicator of the type of JotBlock may appear in the JotBlock frame (item 5).
- Depending on that classification, there are a number of different properties you can set for JotBlocks.
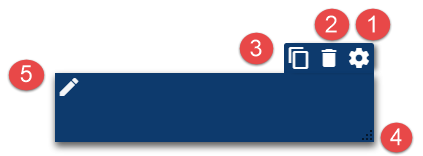
Multiple choice JotBlocks have a PLUS icon instead of COPY, which serves to add a new option location to the multiple choice group.
You may hold down the mouse to select a JotBlock and drag it to a new area of the document.
TIP: To copy a JotBlock and assign the copy to a different signer, select a signer on the right, and then click the COPY icon. The copied JotBlock will be assigned to the currently assigned user.
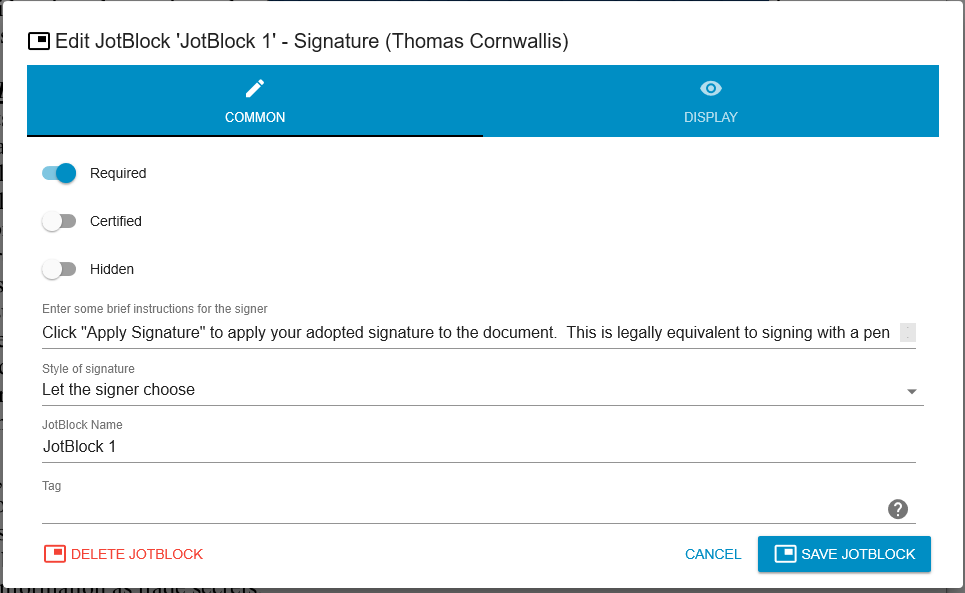
JotBlock Properties
Each kind of JotBlock has some common properties, such as instructions for the signer. And different types of JotBlocks may have different settings that change how a signer interacts with them or modifies what is displayed. Click on the tabs that appear when editing a JotBlock to explore what is available for each type.
 Written JotBlock Properties
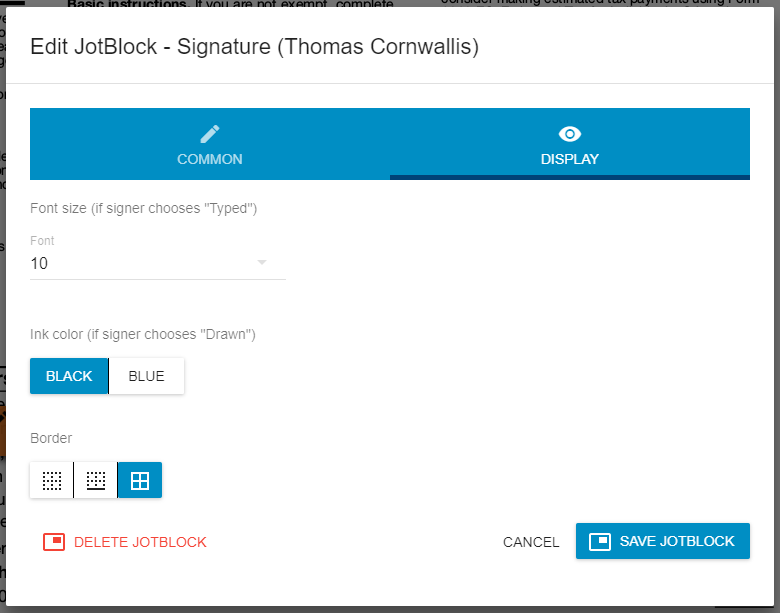
Written JotBlocks have the following properties that can be changed when you click on the GEAR button above the JotBlock:
- Required - sets whether or not the signer will be required to provide input for the JotBlock
- Certified - sets whether the JotBlock will be rendered with meta-data in its frame including
- the AssureSign JotBlock ID,
- the IP address where signing occurred
- and a universal time (UTC) timestamp
- Instructions - the instructions displayed to the signer letting them know what to enter
- JotBlock Name - the internal name you would like to assign to the JotBlock
- Border - type of border to wrap the JotBlock, one of
- none
- bottom border only
- border around the entire JotBlock
- Font Size - size of the text if the JotBlock is typed
- Ink Color - indicates if the JotBlock will be rendered using blue or black "ink", if the JotBlock is drawn
- you may set the default color in your account settings
- you may set the default color in your account settings

- Certified - sets whether the JotBlock will be rendered with meta-data in its frame including
- the AssureSign JotBlock ID,
- the IP address where signing occurred
- and a universal time (UTC) timestamp
- Instructions - the instructions displayed to the signer letting them know what to enter
- JotBlock Name - the internal name you would like to assign to the JotBlock
- Border - type of border to wrap the JotBlock, one of
- none
- bottom border only
- border around the entire JotBlock
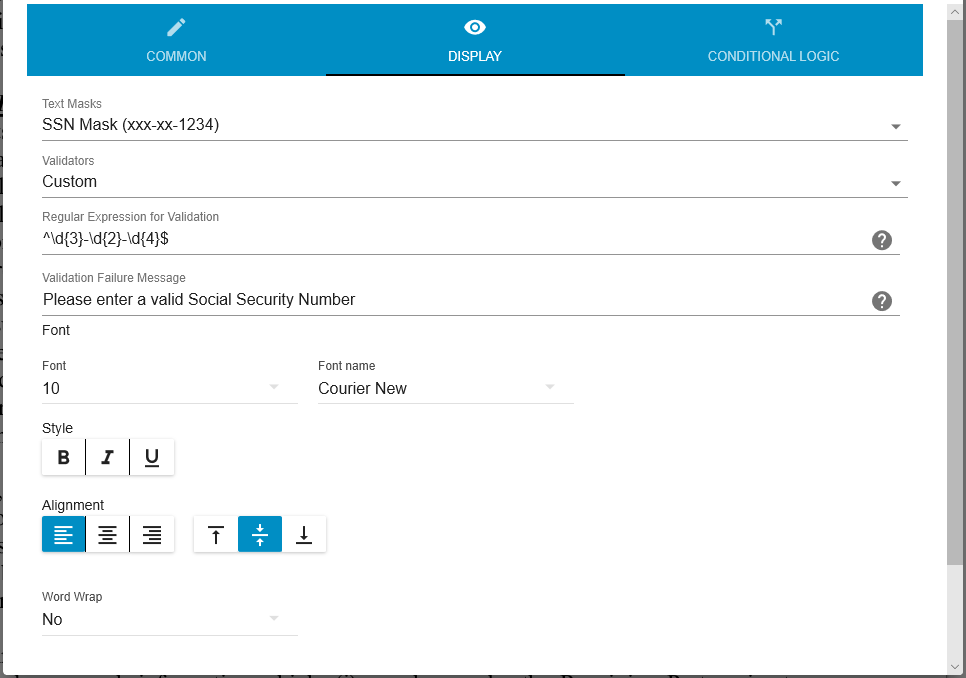
- Font Size - 6, 8, 10, 12, or 14 point
- Font Name - Courier New, Times New Roman, Arial, Bradley Hand ITC, Brush Script BT, My Handwriting, Otto
- Font Decoration - Bold, Italic, Underline
- Horizontal Text Alignment - Left, Center, Right
- Vertical Text Alignment - Top, Middle, Bottom
Tip: TimeStamp JotBlocks write out the date and time when a signer completes signing, in the timezone detected from the signer's browser. Date JotBlocks allow a signer to enter a date in a format you specify.

Text JotBlocks have additional properties
- Source Group - you may assign a unique text value to a JotBlock as a "source group" name. Then, you may pick the source group you created on that JotBlock and assign it to other JotBlocks. JotBlocks that share the same source group value will share signer input. When a signer changes the value one of the JotBlocks with a source group assigned, the same value will be set on all other JotBlocks with the same source group.
- Validators - you may select to require data be entered in certain pre-defined formats, and you may prefill the JotBlock with select data. You may also enter a custom regular expression and a failure message to display when the input does not match what is expected. For date formats, it is faster to select a Date JotBlock.
- Prefill text value - you may prefill the value presented to the signer, who will be able to modify what is initially presented to them.
 DropDown JotBlock Properties
A DropDown JotBlock allows a signer to select a single item from a list of options. What you choose to apply will be rendered to a single location on the document.
- Required - sets whether or not the signer will be required to provide input for the JotBlock
- Instructions - the text displayed to the signer letting them know what to enter
- Options:
- DropDown JotBlocks will display a drop down list of options that the signer may choose from. Each option you create will have
- Display Text - the text that will be shown to the signer
- Value to Save - the value (text or numeric, whatever you need) that we will save
- Display As - you may select to apply an image, like a checkmark or X, the Value you set on the option, or nothing at all.
- DropDown JotBlocks will display a drop down list of options that the signer may choose from. Each option you create will have
- Default pre-selected values - you may preselect values, and the signer will be able to change the selections.
- Font Size, Font Name, Font Decoration, Horizontal Text Alignment, Vertical Text Alignment, and Border may be set on multiple choice JotBlocks when you select to display a value.
TIP: Applying nothing may be useful in the case that the options you are presenting are yes/no values, where only one of the selections should check a box and the other should leave it empty.
 Multiple Choice JotBlock Properties
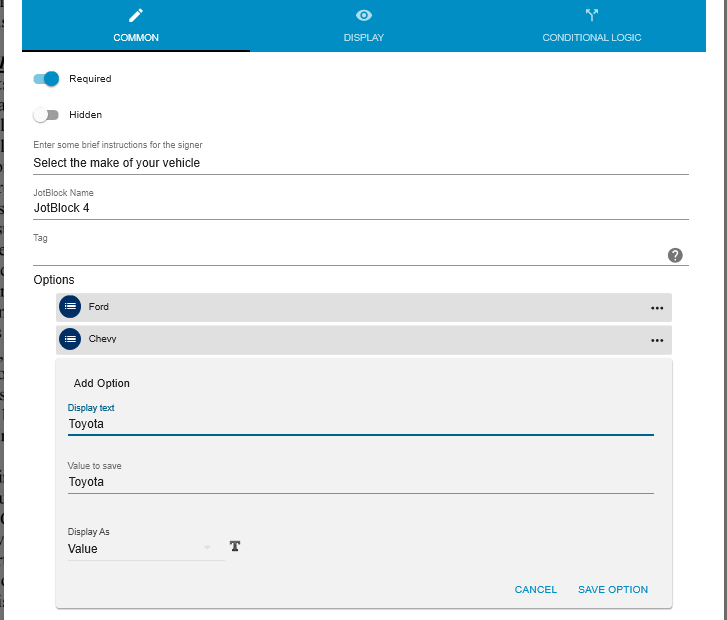
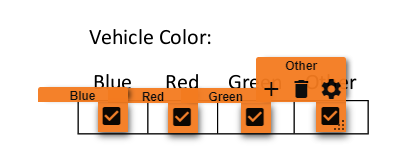
A Multiple Choice JotBlock allows a signer to select one or more items from a list of options. What you choose to apply may be rendered to different locations on the document. Therefore, as you add options, new JotBlocks will be added onto the document next to the previously added option. You can move the options anywhere in the document (they do not need to be in the same area or even on the same page). All options for a single Multiple Choice JotBlock must exist in the same document, though. If you move an option to a new document, all options will be moved in a cluster so that they can be re-aligned.
- Required - sets whether or not the signer will be required to provide input for the JotBlock
- Instructions - the text displayed to the signer letting them know what to enter
- JotBlock Name - the internal name you would like to assign to the JotBlock
- Allow Signer to Select Multiple Values - When enabled, the signer will click to select more than one item from a group of checkboxes. When off, the signer will click to select a single item from a radio button group.
- Options:
- Multiple Choice JotBlocks will display a list of options that the signer may choose from. Each option you create will have
- Display Text - the text that will be shown to the signer
- Value to Save - the value (text or numeric, whatever you need) that we will save
- Display As - you may select to apply an image, like a checkmark or X, the Value you set on the option, or nothing at all.
- Multiple Choice JotBlocks will display a list of options that the signer may choose from. Each option you create will have
- Default pre-selected values - you may preselect values, and the signer will be able to change the selections.
- Font Size, Font Name, Font Decoration, Horizontal Text Alignment, Vertical Text Alignment, and Border may be set on multiple choice JotBlocks when you select to display a value.
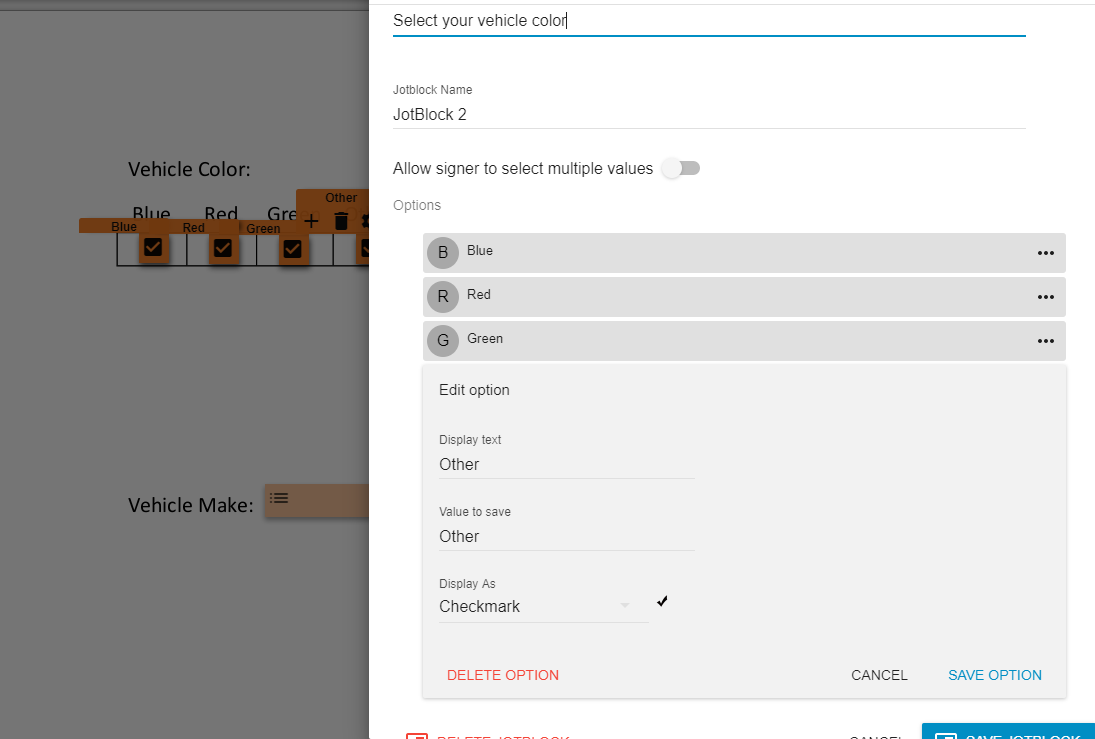
Tip: You may add new Multiple Choice Options by clicking on the + icon on the JotBlock, or by clicking + from within the properties window. As you add new options to the group, these JotBlocks will display the value for the option so you can tell options apart.
 Signer Attachments
You may drag the signer attachments to a document to define something a signer should upload during the signing process. The attachment will not be displayed on the document at any given location. After defining a signer attachment, you can access the attachments for any signer by selecting the signer, and clicking on the attachments list icon in the upper left tool section.

The number counter indicates how many attachments have been defined for the currently selected signer. To manage the attachments for another signer, first select the other signer to change the context of the controls. The attachment icon color will change to the currently selected signer. If no attachment icon appears then no attachments have been defined yet for the signer. Fixed Signature JotBlock Properties
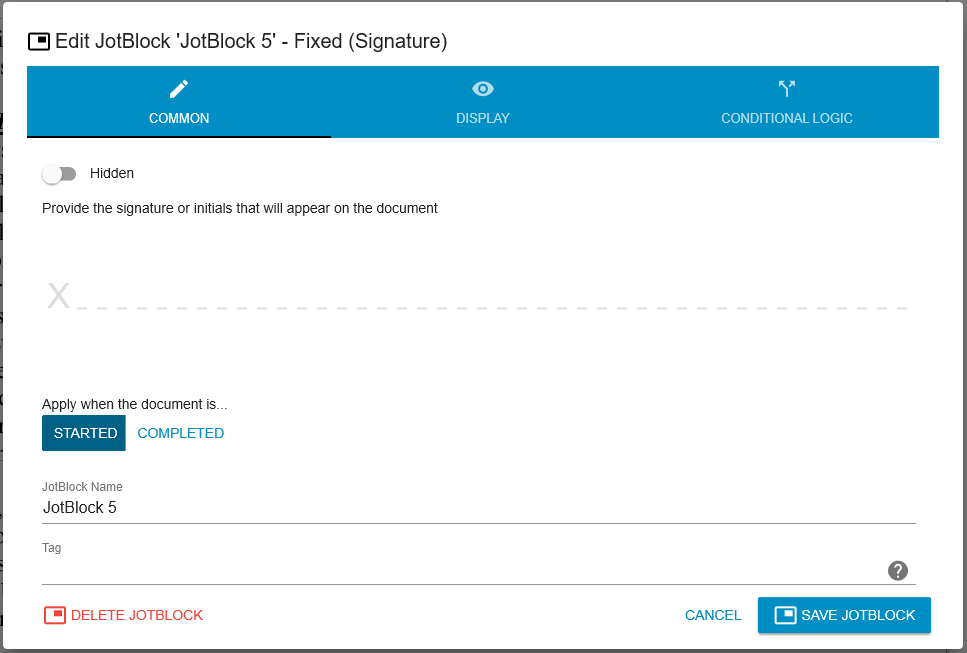
A fixed written JotBlock allows you to apply a signature to the document outside of the signing session. You draw a signature using your mouse, just as a written signature is filled later by holding your left mouse button down and drawing in the signature box.
- Apply to Document ...
- you may select to apply the JotBlock before signing has occurred
- or after signing is done
- Ink Color - indicates if the JotBlock will be rendered using blue or black "ink"
 Fixed Text JotBlock Properties
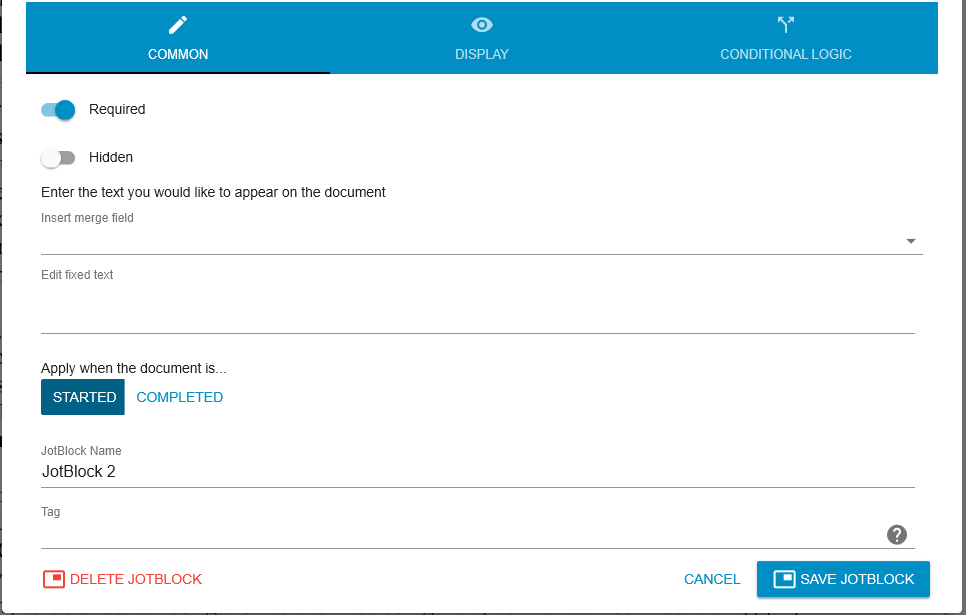
A fixed text JotBlock allows you to apply fixed text. You may select to apply merge field values, fixed text that does not change, or calculated values.
- Insert Merge Field - you may pick from available merge fields
- Edit Fixed text - picked merge fields and items you type are entered here
- Apply to Document ... - you may select to apply the JotBlock before signing has occurred or after all signing is done
- Font Size - 6, 8, 10, 12, or 14 point
- Font Name - Courier New, Times New Roman, Arial, Bradley Hand ITC, Brush Script BT, My Handwriting, Otto
- Font Decoration - Bold, Italic, Underline
- Horizontal Text Alignment - Left, Center, Right
- Vertical Text Alignment - Top, Middle, Bottom
- Border - indicates if the JotBlock will be rendered with a border on all sides, a bottom border only, or no border at all
 The Document Manager
Some additional functions are available to you by opening the "Document Manager." To open this view of documents and JotBlocks, click on the blue button in the upper left corner of the window containing ellipses.
A "tree" view of documents and JotBlocks will be shown.
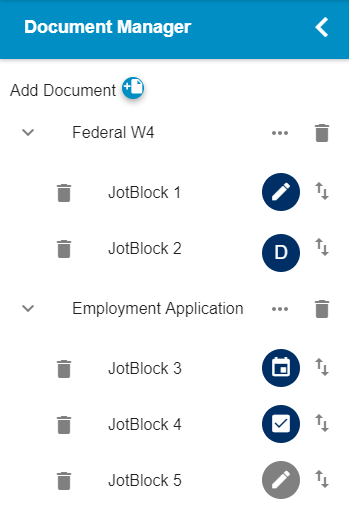
Some of the functions available for you to perform here include:
- Remove documents and JotBlocks by clicking on the garbage can icon next to the item you want to remove. Removing a document will also delete all the JotBlocks it contains.
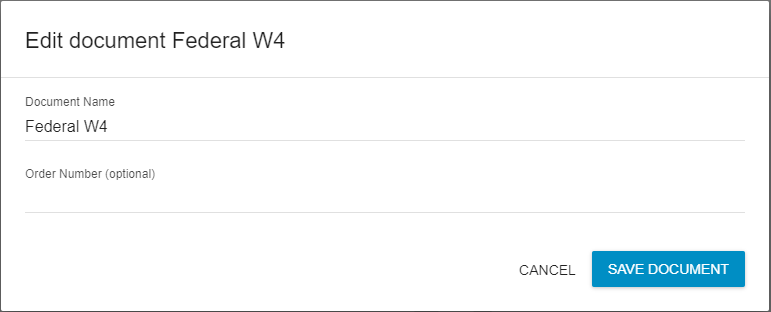
- Edit the document name and add an Order Number for the document by clicking on the ellipses
- JotBlocks will be presented to the signer in the order you add them to the document. You may change the signing order of a JotBlock by clicking and holding the directional icon, and moving it above or below other JotBlocks in the same document. Since moving a JotBlock to a new document requires setting a new location, you may only move JotBlocks across documents by dragging it within the documents viewer.
- Click on a JotBlock or Document to move the item into view in the document view window.
4. Configuring workflow
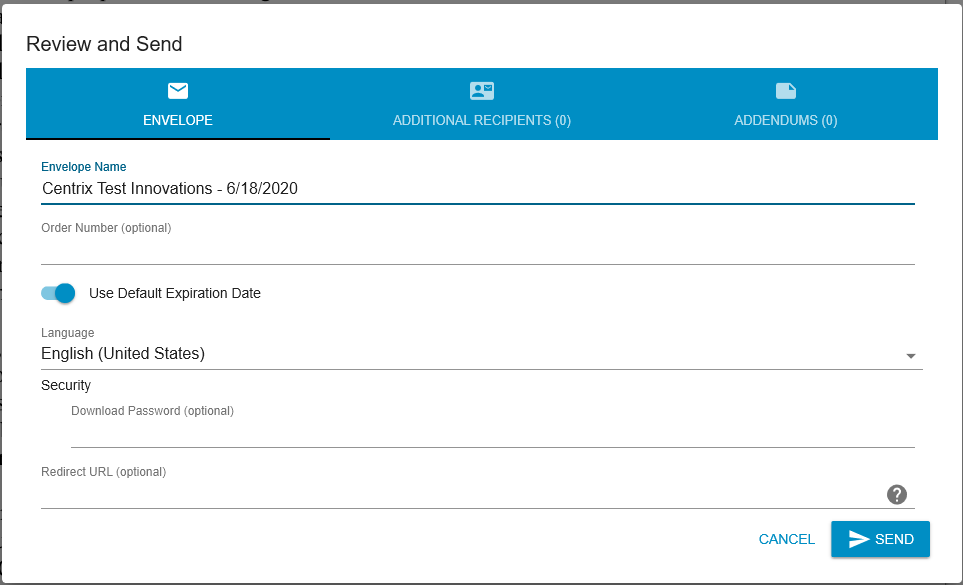
Once you've finished designating all of the JotBlocks on the documents in your envelope, you can click the REVIEW AND SEND button to configure additional workflow.
You may set
- the Envelope Name
- an optional Order Number to help identify the envelope
- the Expiration Date
- the Language
- and optionally set a Password to restrict download access
- when more than one document is present, the decline options
- declining cancels the entire envelope
- signers may cancel individual documents
- if more than one signer has been added, and more than one document is present, you can set which documents signers see
- Documents which they are required to sign
- All documents
- if more than one signer has been added, you can select the order of signing
- In the order in which they were added
- In any order
- a Download Password
If there are any additional recipients to which you'd like to send a copy of the completed document, you can add them by:
- Clicking ADDITIONAL RECIPIENTS
- Entering a Name and Email Address
- Clicking SAVE RECIPIENT
It's also possible to add non-signable addendums to the envelope. These are typically related documents that you'd like to make available to the signer that don't actually require a signature. You can add non-signable addendums to the envelope by:
- Clicking ADDENDUMS
- Clicking the + icon
- Selecting a file to upload
5. Reviewing and sending
Once you've finished configuring envelope properties, additional recipients, and addendums, all that is left is to review your setup and click SEND.
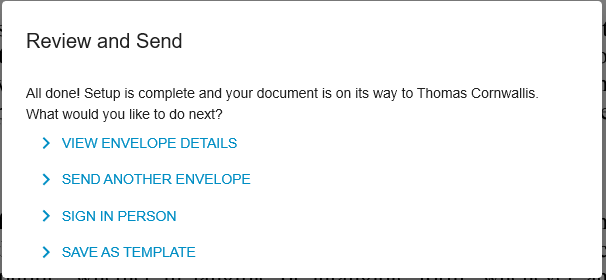
Once your submission has been processed you'll be given the opportunity to:
- VIEW ENVELOPE DETAILS - view the envelope report
- SEND ANOTHER ENVELOPE - clear the workspace and begin the setup process for a new document envelope.
Payment processing
When the Signer Payment feature is enabled, you may create requests for payments during signing. See this documentation for more information.