The Nintex Licensing and Permitting Solution makes it easy for city, county, and state governmental agencies to collect and process license and permit applications.
The Licensing and Permitting Solution platform enables your organization to:
- Define and manage licenses and permits: You can define and modify the types of permits and licenses you want the solution to process. You can define the application form and the final permit document generated upon approval.
- Customize approvals and signatures: For each license and permit type, you can modify the approval process (with up to three review steps), collect application and/or permit fee payments (through integration to Stripe), and collect eSignatures.
- Set up a standardized Applicant Portal: On the Applicant Portal, applicants can sign up for an account, submit applications, check application status, see payment history, and complete additional tasks throughout the application review process.
- Manage the Internal Administration Portal: On the Internal Administration Portal, you can manage permit types, complete assigned tasks, see submitted applications, and view KPI reports and dashboards.
To start using this solution, follow these steps.
Step 1: Create an account
- Once your app has been configured, Nintex will invite you to the solution as a Site Admin. You will receive the invitation by email.
- Follow the sign-up instructions to create your username and password.
- Log in to the Internal Administration Portal and click on Manage Users on the left-hand side of the screen. Here, you can invite other internal users to the solution. They will be prompted to create a username and password.
Note: You can send or post an applicant self-signup link to potential applicants. This self-signup link will prompt the user to sign up for an account to access the applicant portal so they can apply for licenses and permits. Before making this sign-up link available to the public, it is recommended that you test the application process thoroughly by sending the link to other members of your organization who can act as applicants.
Step 2: Configure fee payment links in Stripe
Applicants for the permit or license may need to pay certain fees. For the application fee and permit fee to function properly, you need to configure a few settings in the online payment manager, Stripe.
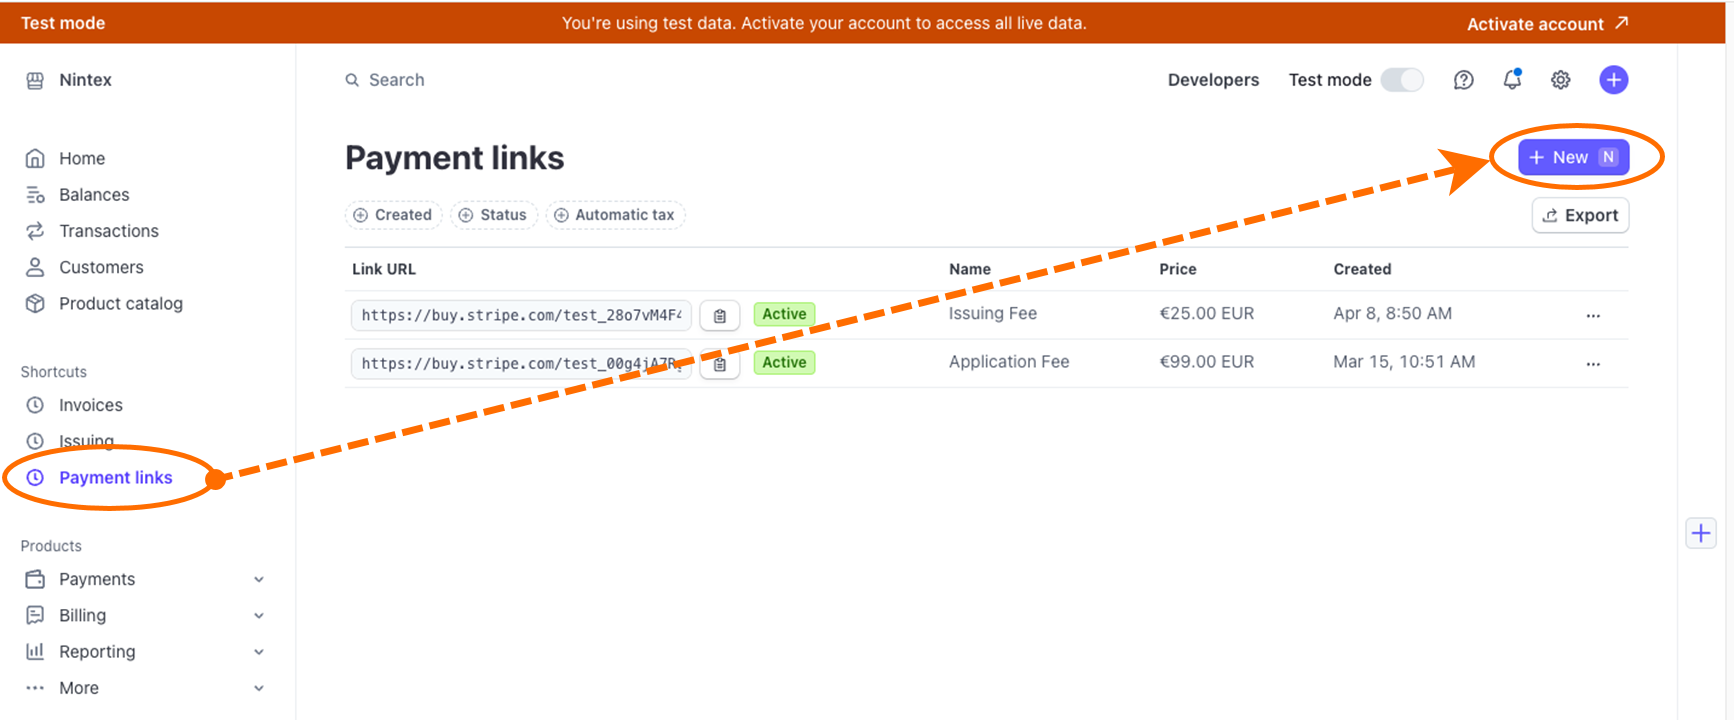
- Log in to your Stripe account. You can create a Stripe account if you don’t have one already.
- Click on the Payment links tab and then click New.
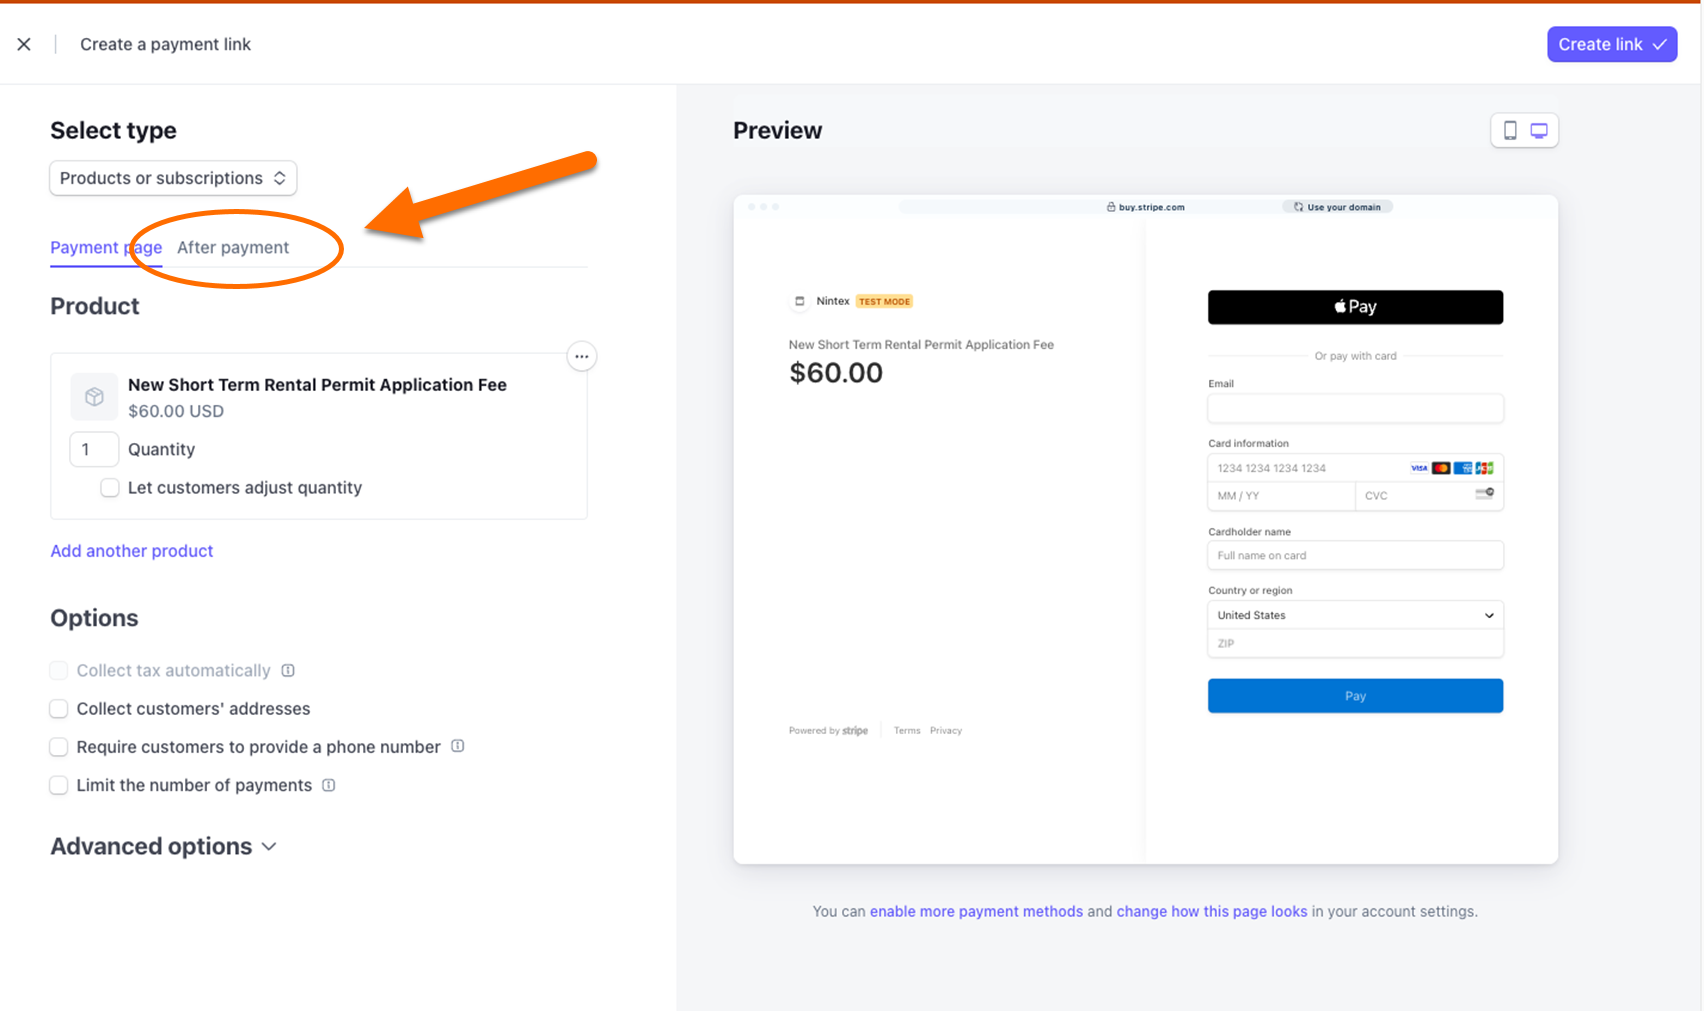
Note: For a given permit type, if you have separate fees for the application and permit fees, you should create a different product and payment link for each.

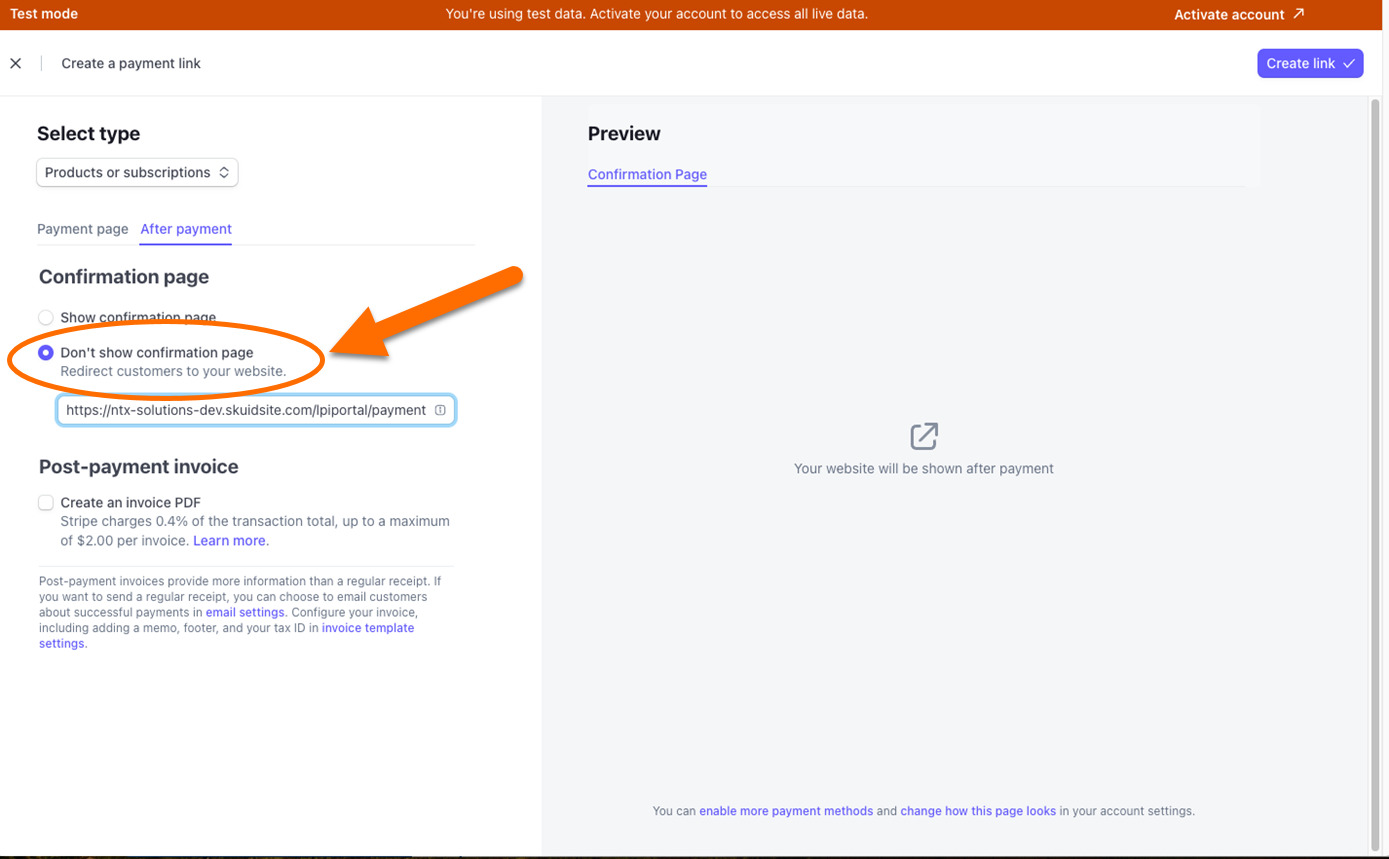
- On the payment link preview page, you can edit the details of the payment link. When you’re done, click the After payment tab.

- Select the Don’t show confirmation page option.

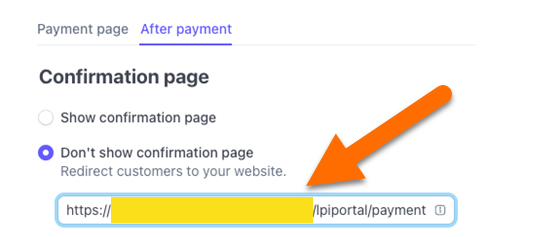
- In the redirect field, paste the following URL with your solution web domain replacing the highlighted section:
https://yoursolutiondomain.com/lpiportal/payment-status/{CHECKOUT_SESSION_ID}

-
Next, reach out to your Nintex onboarding contact. You will need to provide your secret API key in order to configure the solution to work with your Stripe account.
Once you have set up your payment links in Stripe and Nintex has configured the integration, you are ready to set up your permit types within the Internal Portal app settings.
Step 3: Set up a new permit type
You will need to create a new permit type for each type of license or permit that you want the app to process. For example, you should create separate permit types for new and renewal applications so the lists of applicants don’t get mixed together.
The permit setup wizard guides you through each step, starting with the steps of the permit process that the application will go through. You can choose to include an application fee and/or permit issuing fee, and choose how many internal reviews an application will go through before it is approved or rejected.
You can enable up to three review steps for a permit type. This gives you the flexibility to define a review & approval process based on your needs. Some common examples include:
-
Building code team review > Fire team review > Manager approval
-
Team review > Manager approval > Manager’s manager approval
Watch the following video to learn more about how to clone a permit and make adjustments to the permitting process.
Once you have configured the steps of the permitting process for your new permit type, you can move on to editing the application form, permit document, applicant guide, and testing and publishing your permit.
Watch the following video to learn more.
Here are some additional notes on testing and publishing:
Testing the permit
-
It is recommended to advance your permit type to test mode before publishing it. This will enable the permit type on the Internal Portal, with a Test Application button on the permit list page.
Permit types in test mode display on the dashboard with a [TEST] label next to their name. They do not display on the applicant portal or in reports.
- You can change a permit type back to a draft if you need to make edits to the permitting process.
Publishing the permit
- Once you’ve tested your new permit type internally, click Publish to advance it to published mode. This will enable the new permit type on the Applicant Portal.
-
If you need to make modifications to a published permit type, you can clone it and make modifications to the clone. You can disable the old version as you publish the new one.


