Topic
This topic will be a two part series. In part one, this article explains how to work with data that comes from a repeating section used in a Nintex Form. In part two, you will learn how to display this information on Assign a task action task forms and in Send an email message bodies with an HTML table.
Assumptions
This article assumes that you know how to work with:
- XML data
- Nintex Workflow Cloud collections
- Microsoft SharePoint lists
- Nintex Forms with a repeating section for a SharePoint Online list
- HTML code for building tables
- Branching workflow actions
Example Setup
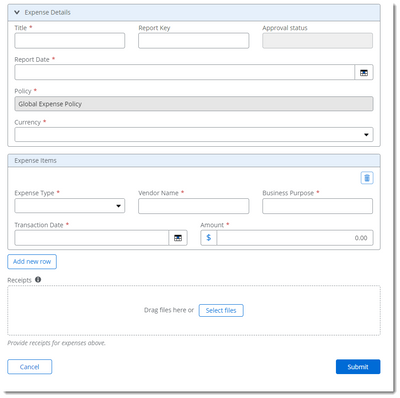
In this example, a custom list in SharePoint Online will capture basic Expense Claims for an organization using fields like Title, Report Date, Currency, Approval Status, and Policy. It will also capture multiple expense item information consisting of things like Expense Type, Vendor Name, Amount, and a few other fields. To do that, a Multiple lines text field set as Plain text called, Expenses, is also included in the SharePoint list. You can click on the images below to expand and see the details of the configuration.

The Nintex Form will layout the Expense Details fields in a group at the top of the form with the repeating section control added below that to capture the list of expense items. The data captured in the repeating section will be stored as XML and connected to the Expenses multiple lines of text field.
Instructions
Form Configuration
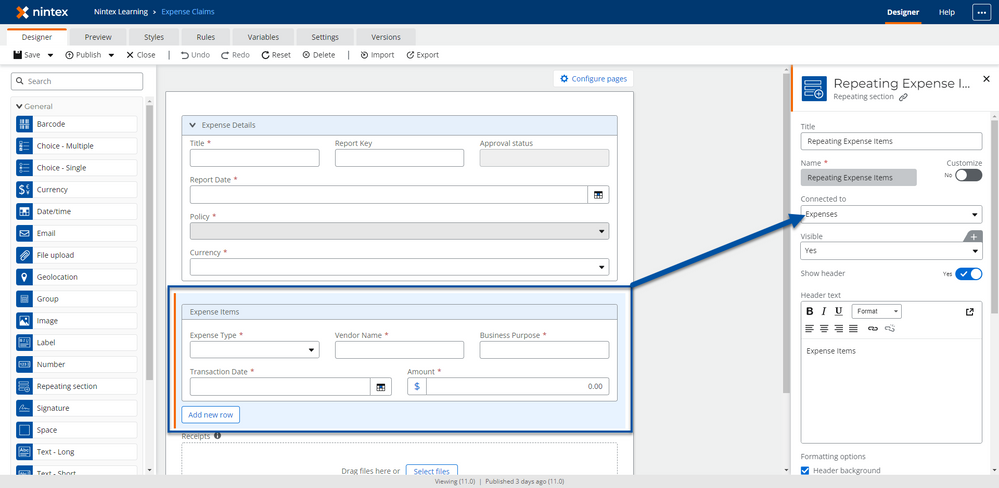
- Create a new Nintex Form for your list using the Responsive Designer. The fields that are currently in the configuration of your list will appear. Rearrange them in any fashion that meets your requirements. In the image below, the fields for Expense Details are grouped together using a Group control.
- Remove the Multiple lines of text field that will store your repeating data and replace it with a repeating section control. Configure the Connect to property to the Multiple lines of text field that you just removed. In the following animation, the repeating section is connected to the Expenses SharePoint column and some other styling properties are applied.

- With the repeating section control wired up to the Multiple lines of text column, add controls to the repeating section to capture the information you need. This example will capture individual expense items in the repeating section.
Analyze Repeating Section XML Data
Information captured by controls inside the repeating section is stored as XML in the connected Multiple lines of text field. Because of this, XML and collection related actions will need to be used in the workflow to access that data in other actions like Send an Email and Assign a task. The XML structure looks like the following example when stored as text.
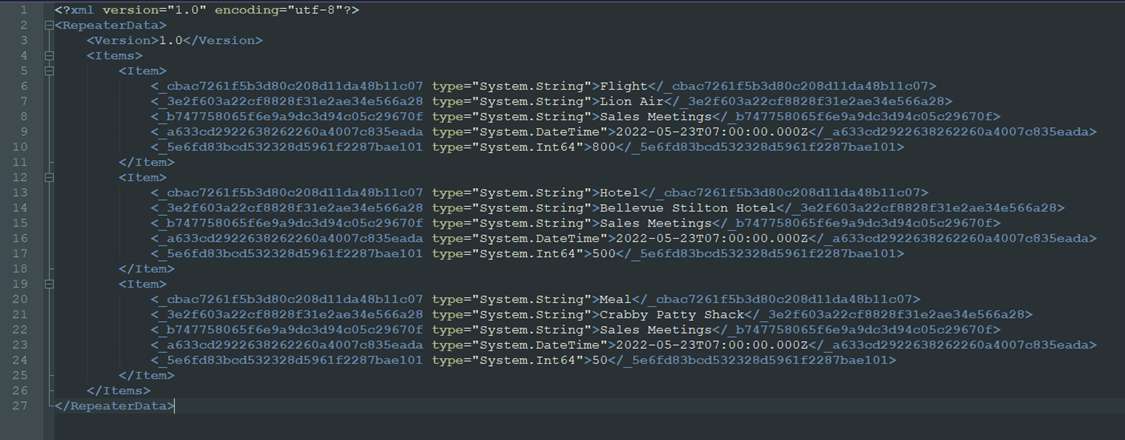
Each row from the repeating section is stored as an <item> element inside <RepeaterData><Items> XML parent elements. Within each <item> element are elements mapped to each control inside the repeating section using the control’s ID number as the element name. You will need the control ID numbers from the stored XML for use in XPath queries later in the workflow. In the example shown, the ID for the Expense Type control is highlighted.
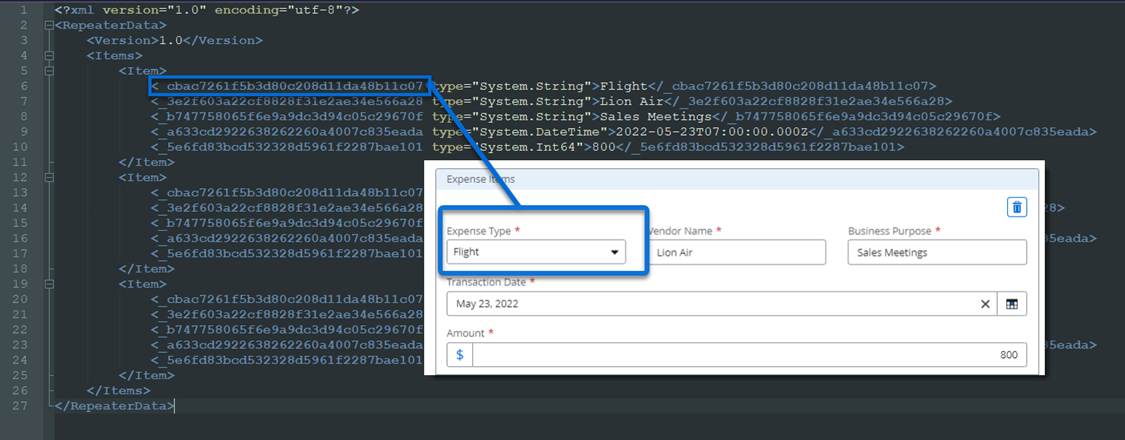
To get to the ID numbers, create a test record in your SharePoint list, then open the list item’s details pane to see the generated XML in the Multiple lines of text column. Copy the XML and paste it into an editor to view it.

Workflow
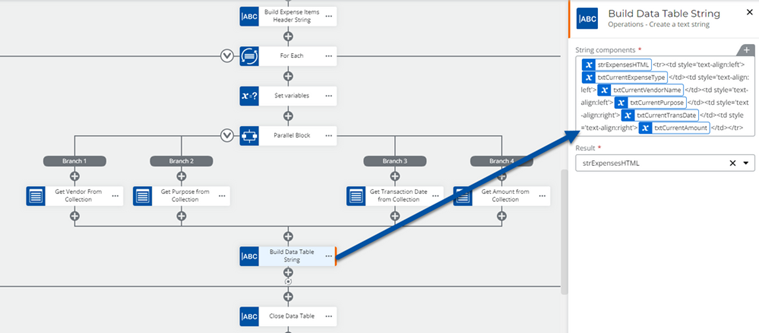
Repeating section data will need to be displayed in an HTML table format in email messages and on Assign a task actions. To set this up, you will need to create individual collections that contain values from each control in each row by parsing through the stored XML with Query XML actions.
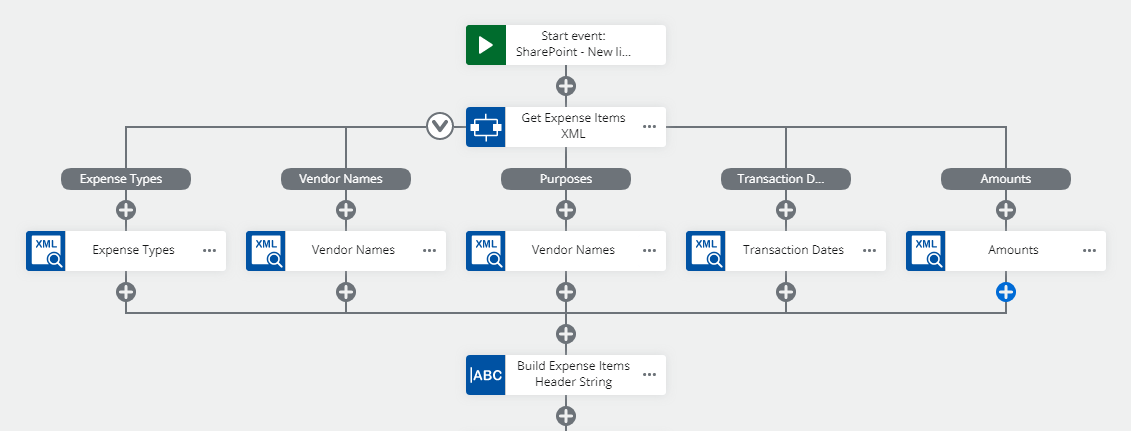
- Drag the Run Parallel Paths action to the design canvas and create a branch for each value that represents a column in the table. Label the branches based on each value’s name.
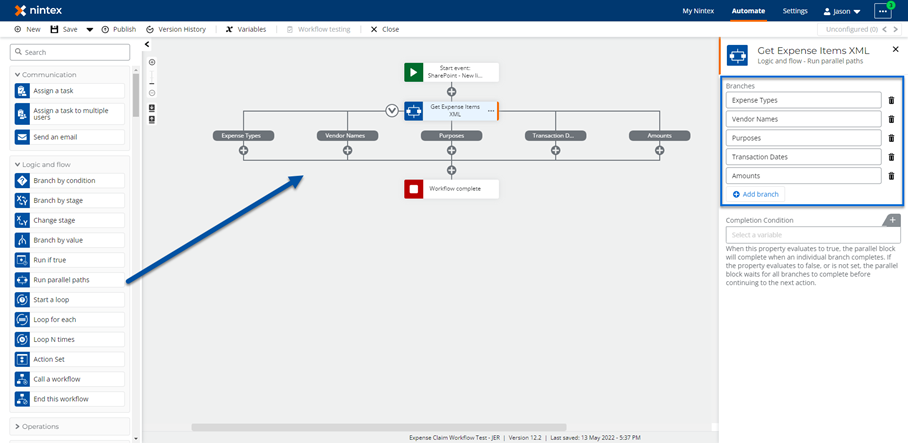
- Drag a Query XML action to the design canvas and point it the Multiple lines of text SharePoint column that contains the XML from the Repeating Section control. This can be found in the Start Event variable referencing your SharePoint list.

- Using the copied XML from your text editor, configure the XPath Query property with the control ID value corresponding to this column. Then create a collection object to store the results in. In this example, this XPath query format will load all values for XML elements with that control ID into the collection. Your XPath Query property will look similar to this example: //_cbac7261f5b3d80c208d11da48b11c07
- Repeat steps 2 and 3 for each value you would like to include in the final output table view for this data.
Create HTML Table String
The next step involves building out an HTML table string that can be used in actions like Send an email and Assign a task to multiple users. For more information on that you can review the second article in this series titled: Part 2: Work with repeating section data from SharePoint based Nintex Forms.