


As teams build numerous workflows across different projects and departments, it becomes important to have a system in place to manage these processes effectively. Nintex Workflow provides a useful tool for this purpose: filters. Filters allow users to sort and view workflows based on specific criteria, helping you easily locate and manage your workflows.
This article will explore how to use filters to organize your workflows in Nintex Workflow and provide tips for optimizing your workflow management.
Why Use Filters in Nintex Workflow?
1. Improved Navigation and Search
As the number of workflows increases, it can be challenging to find a specific one. Rather than scrolling through a long list, filters allow you to quickly narrow down the results by applying relevant criteria. This is particularly useful for organizations that have multiple departments or ongoing projects.
2. Better Workflow Management
Filters make it easier for you to track and manage workflows at different stages of development or execution. By filtering based on status, owner, or type, you can easily monitor active workflows, review completed ones, or identify those that need attention. This ensures that no important workflows are missed.
How to Use Filters in Nintex Workflow
Here’s a step-by-step guide on how to organize your workflows using filters in Nintex Workflow:
1. Access the Workflows Dashboard
Log in to Nintex Workflow and go to the Workflows section, which displays all draft, published, and paused workflows. This is where you can start applying filters to organize your view.

2. Find the Filter Options
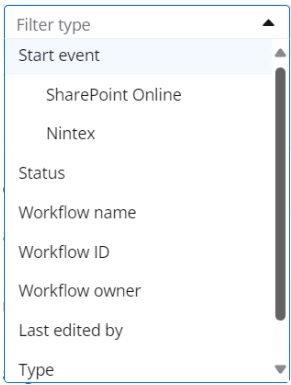
At the top of the workflows dashboard, you’ll see filter options that let you refine the list of workflows. Filters are available based on several criteria, such as:

-
Workflow Name: The name of the workflow
-
Workflow Status: draft, published, and paused workflows.
-
Workflow Owner: Find workflows created or managed by specific users.
-
Start Event: The Start Event of the workflow.
-
Workflow Type: The type of the workflow Production or development workflow.
-
Last edited by: View workflows last edited by a specific person.
-
Tags: Sort workflows by specific tags.
3. Apply Filters
Select the filter criteria relevant to your search. For example, to find paused workflows, choose the “Status” filter. To find workflows created by a specific person, use the “Workflow Owner” filter and enter their name.

4. Use Multiple Filters
To refine your search further, you can combine multiple filters. For instance, filter by Status to see “Draft” workflows, and then use the Type filter to narrow down the results to those created by a particular user.
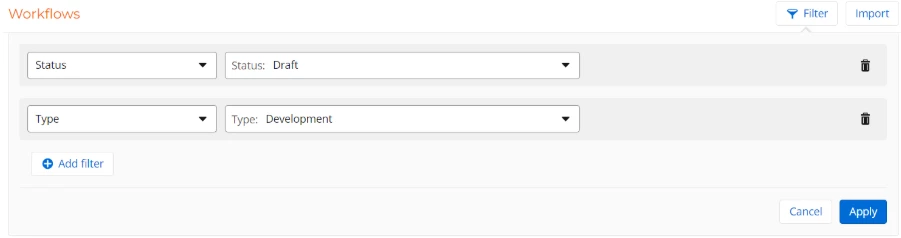
5. Clear or Reset Filters
To return to the default view, showing all workflows, you can clear or reset your filters. This allows you to switch between filtered and unfiltered views easily.
-
To clear of reset filters click on the dustbin icon

Tips for Effective Workflow Organization
-
Use Tags for Easy Sorting: Tagging your workflows by project, department, or priority level can make it easier to organize and filter them later.
-
Regularly Clean Up Your Workflows: Use filters to review completed or inactive workflows periodically. Archiving or deleting workflows you no longer need can help keep your dashboard uncluttered.
-
Keep Workflow Statuses Updated: Ensuring that workflow statuses are always current helps make filters more effective, so active workflows remain visible and completed ones are not cluttering the dashboard.
-
Encourage Team-Wide Adoption: Ensure that your team is familiar with the filtering tools in Nintex Workflow. Consistent use across the team will improve collaboration and efficiency.
Filters in Nintex Workflow are a valuable tool for organizing and managing workflows. Whether you’re managing dozens of workflows or just a few, filters help streamline navigation and improve workflow management. By sorting workflows based on criteria such as status, owner, date, and tags, you can ensure your automation processes remain organized and accessible.