

Introduction
In Nintex for Office 365 you might come across an old lookup list like this:
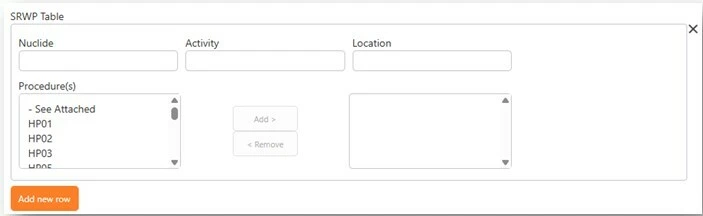
In Nintex Workflow, you no longer have the two columns to add and remove items, you will have to use a Choice –Multiple control.
The O365 Task Form writes back XML using ID, the new Nintex Workflow Task Form uses Title.
Follow this Nintex Workflow help documentation to learn more:
The problem with using Multiple or Data Lookup controls:
-
Choice – Multiple: You get a list where you can select multiple items, but you have no conditions.
-
Data Lookup: You have a list with conditions, but you cannot multi select items.
What to do:
Configure a multi-select action by using a choice field with a data lookup sourced from external data, defined within the form formula.
Solution:
Show Title to the user, but store ID.
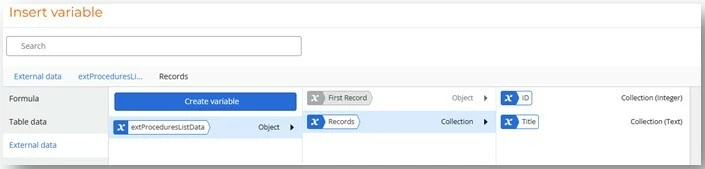
- In the Choice – Multiple control, go to Options → click Insert.
- Choose your external data (connect to your data lookup that you have setup to retrieve data from the relevant list. If you don’t have a data connection, you will need to create one).
- Select Records.
- In the mapping dialog:
- Option label = Title
- Option value = ID
This makes the option list look like titles, but the value behind each is the numeric ID.
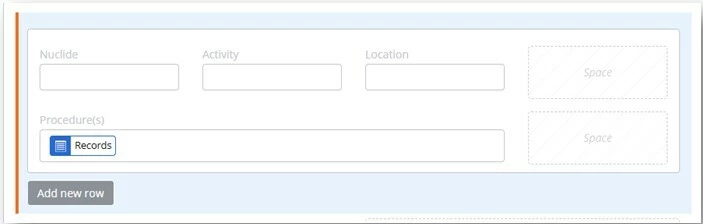
SharePoint List Column with XML data:
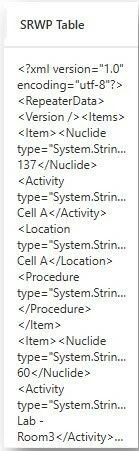
XML data copied from list column into Notepad++ for better viewing
As shown in the XML, you will find names such as Nuclide, Activity, Location, and Procedure. These names must match exactly in the Task Form’s name field.
You will also notice in Procedures, there are ID numbers followed by ;#;#
This will need to be removed in order for the Task Form to display the selected items from the start list form.
Configure actions before task form:
Add the following actions before your task form
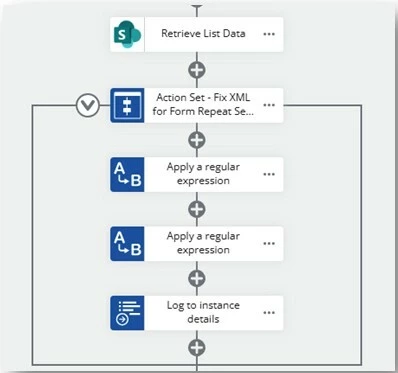
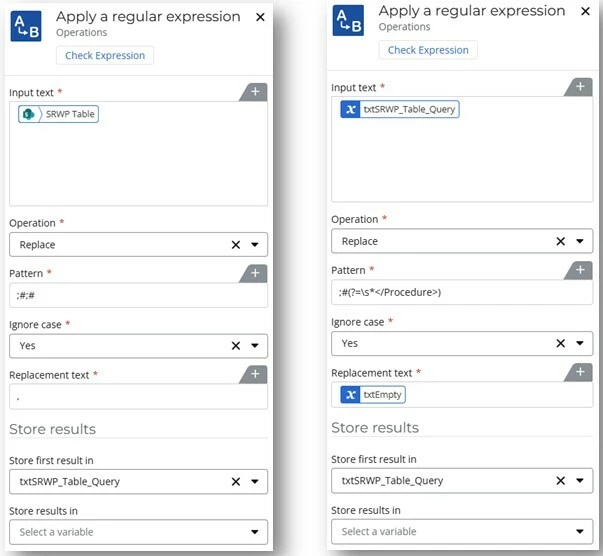
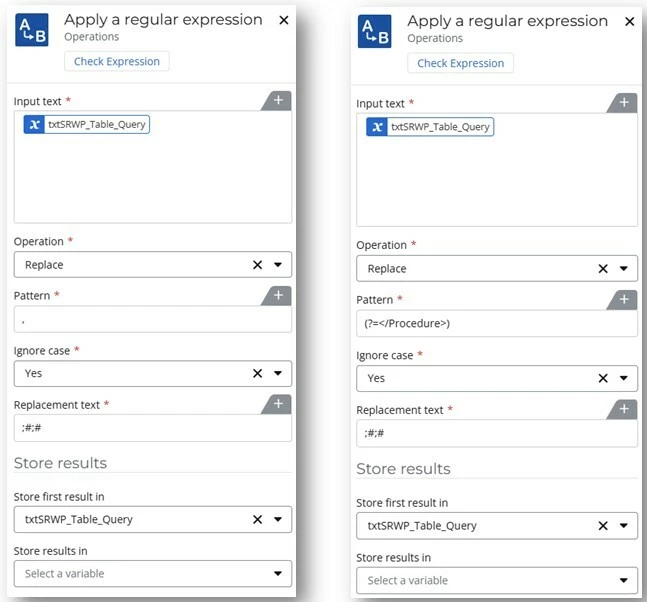
Insert the table data into the input text field. Apply the operation, pattern, ignore case and replacement text. Store into a new variable.
Next, use this new variable as the input for a second Regular Expression action to remove the ;#;# value that appears before the closing procedure tag.
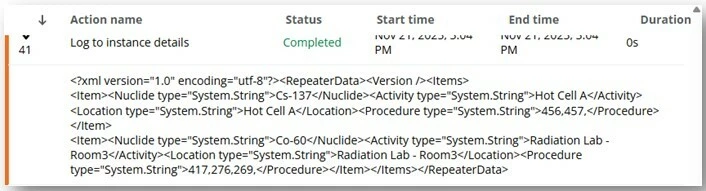
The final output will contain only the IDs, separated by commas.
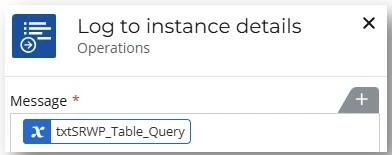
Logging to the instance is optional and only required if you want to verify that the XML was updated correctly.
Use the newly created XML stored in your variable within your Task Form.
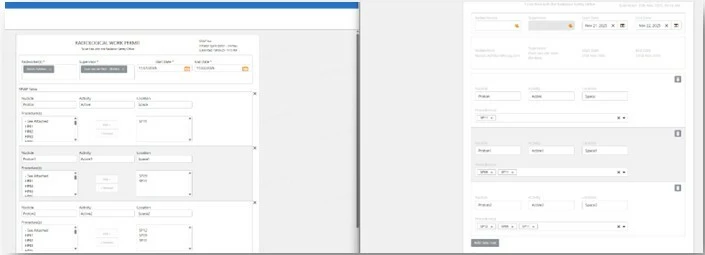
Configuring the Task Form actions:
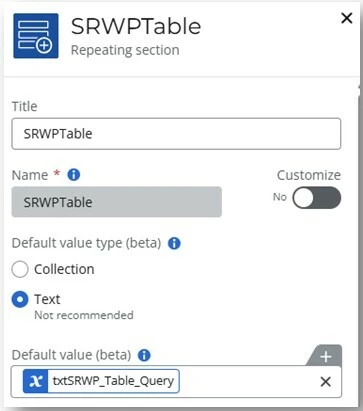
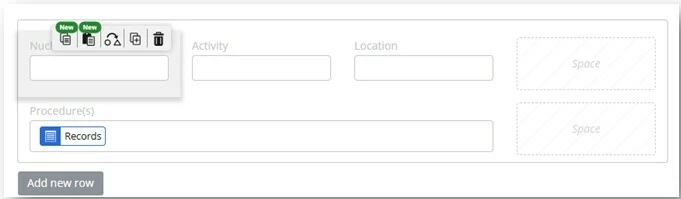
Select the repeating section action.
In the repeating section, select text followed by inserting the last stored variable XML data from above (last regular expression output) in the default value of the repeating section.
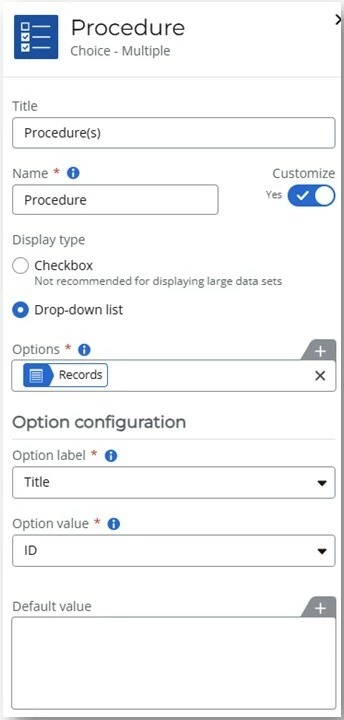
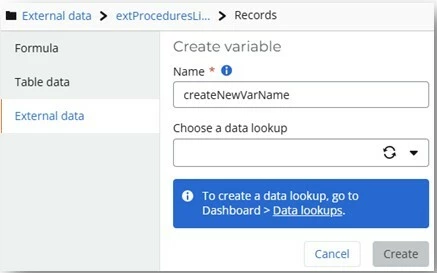
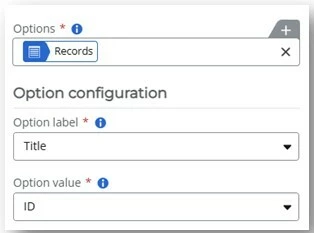
Next select the Procedure field (Choice – Multiple), click the plus on the options filed, select external data, create variable.
Go to External Data, create a new variable, choose your data lookup and select create.
Insert your collection.
Your collection will now be added into the Options field. Add the Title into the Option Label field and ID into the Option Value field.
Configure WF actions after Task Form:
Add the following actions after your task approval, but before you update the list action.
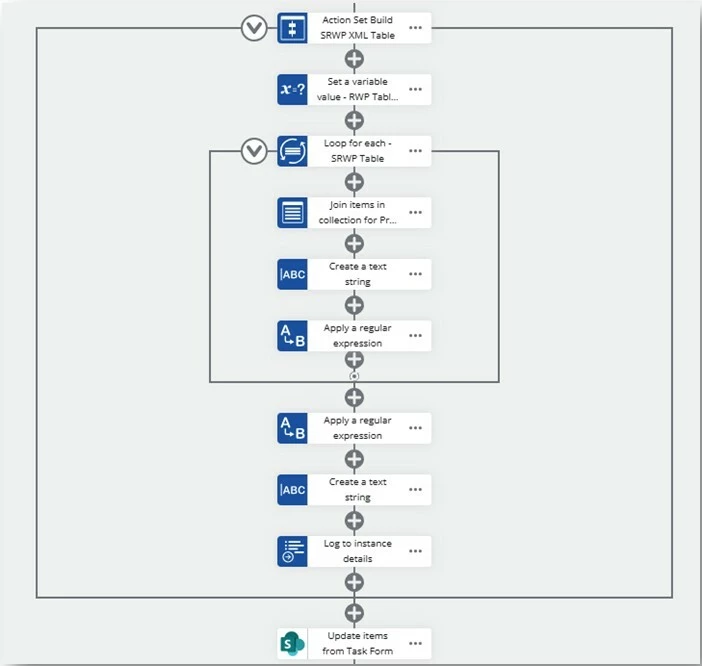
Add the task form variable in the Target Collection field.
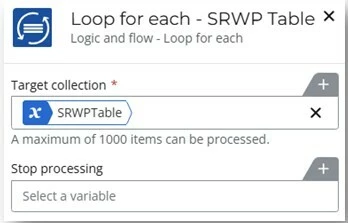
Select procedure from Loop for Each.
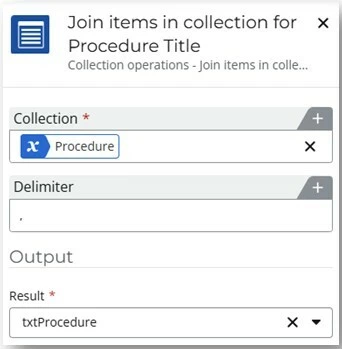
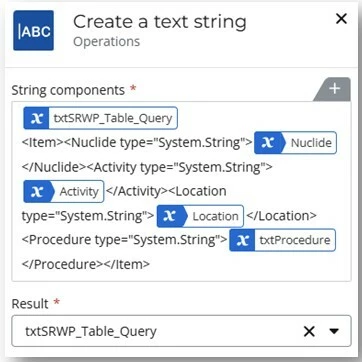
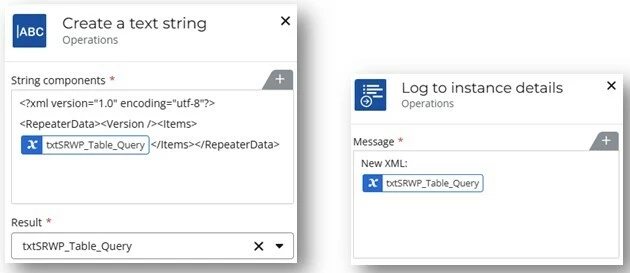
Save the result in a new variable and build your new XML using create a text string action.
Add two Regular Expressions with the following configuration.
Build the final updated XML using another create a text with string action.
Logging to the instance is optional and only required if you want to verify that the XML was updated correctly.
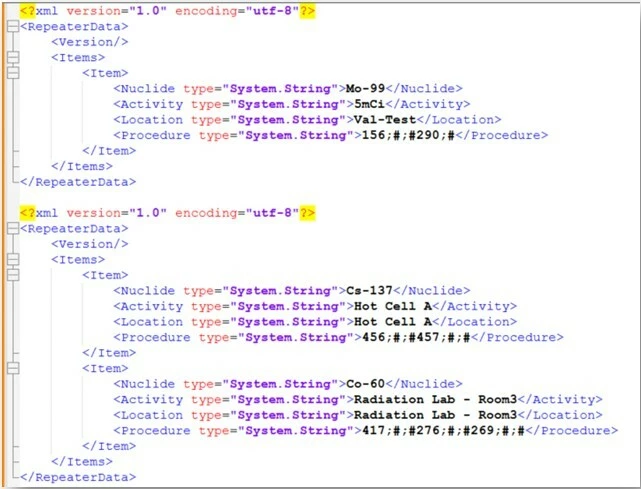
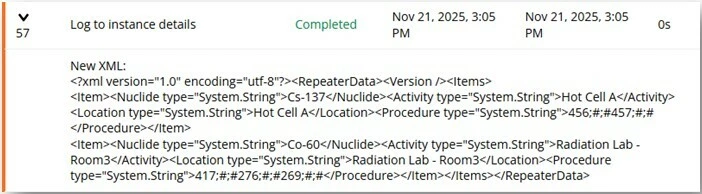
Your new XML should look something like this:
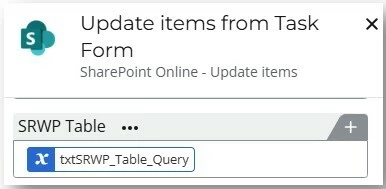
Add an Update Items action to update the XML column in the list.
Writing back the updated XML will allow the start form to pick up the new values.