How to obtain and manage K2 license keys
KB001310
PRODUCT
A K2 license key is required to register the product during installation, and you may need to manage license keys after installing K2. This article explains how to obtain a K2 license key to register the product, as well as managing license keys for K2 blackpearl, K2 Five and K2 connect after installation.
How to obtain and use a license key
To obtain a K2 blackpearl, K2 Five, or K2 connect license key, follow the steps below:
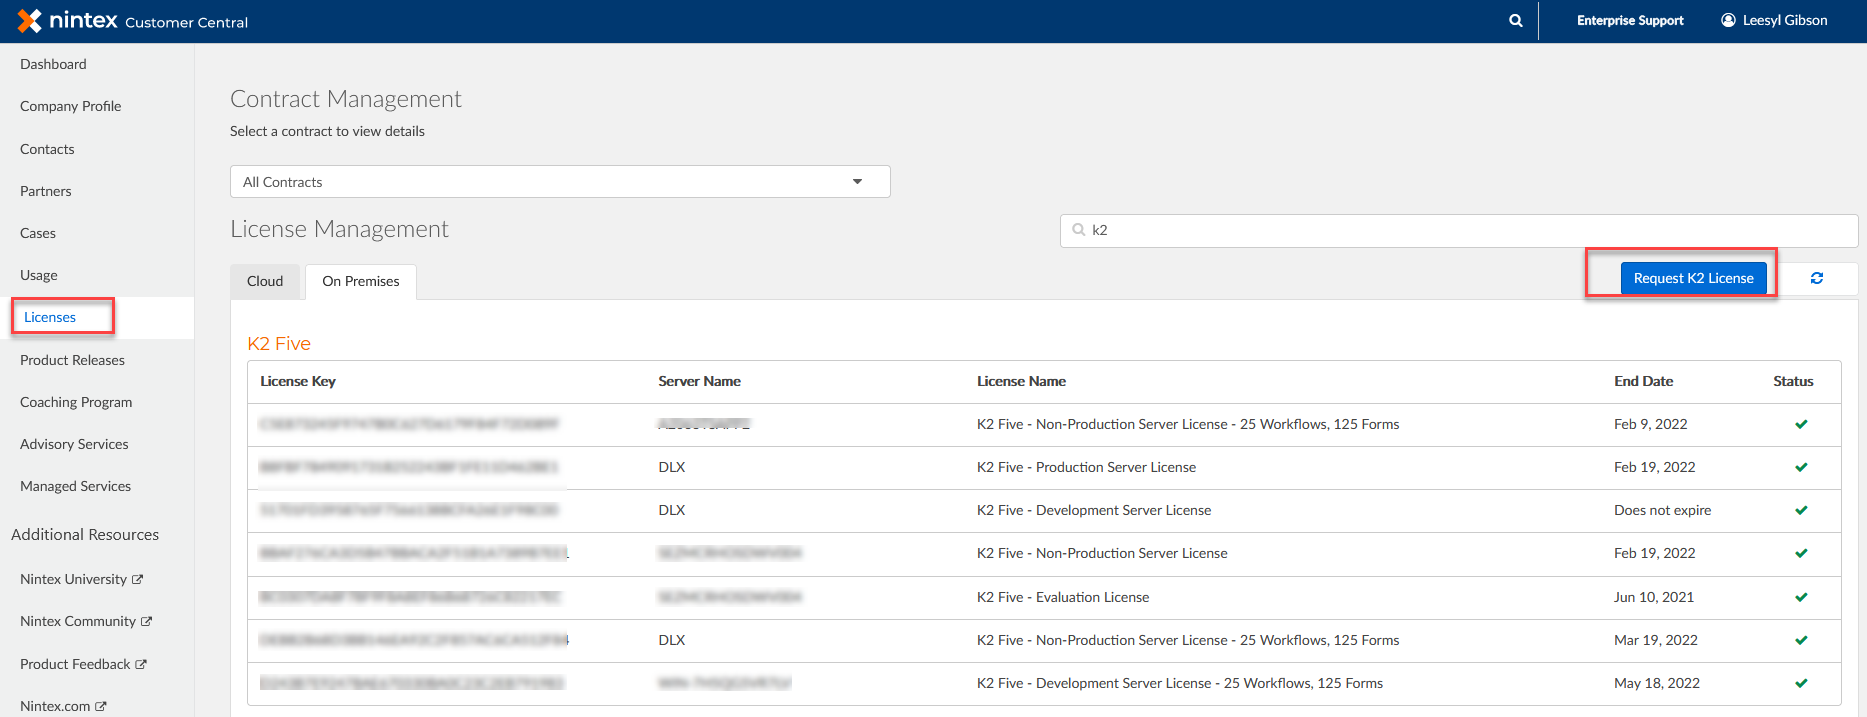
- Go to the Nintex Customer Central page.
- Click the License section.
- Click the On Premises tab.
- You see all license keys currently assigned to you.
- To get a new license key, click the “Request K2 License” button.
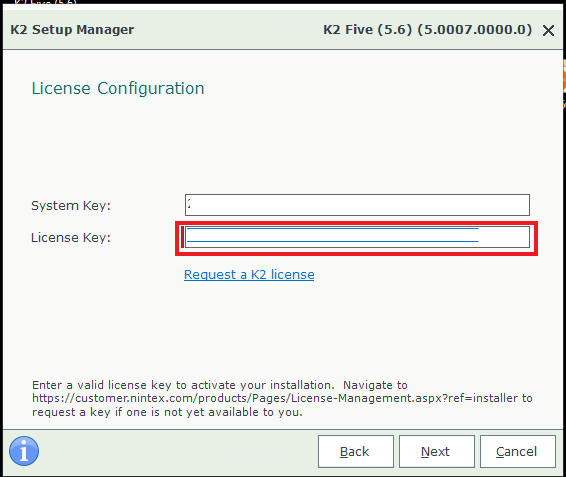
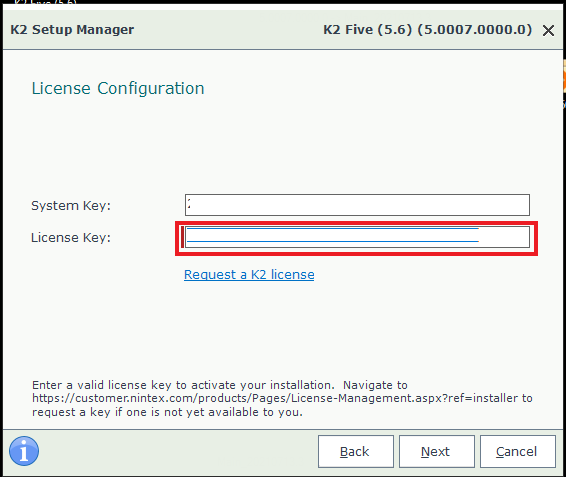
- Select the K2 product that you require. Select the License Type you need, then copy the System Key from the License Configuration page in the K2 Setup Manager and specify the Server Name.
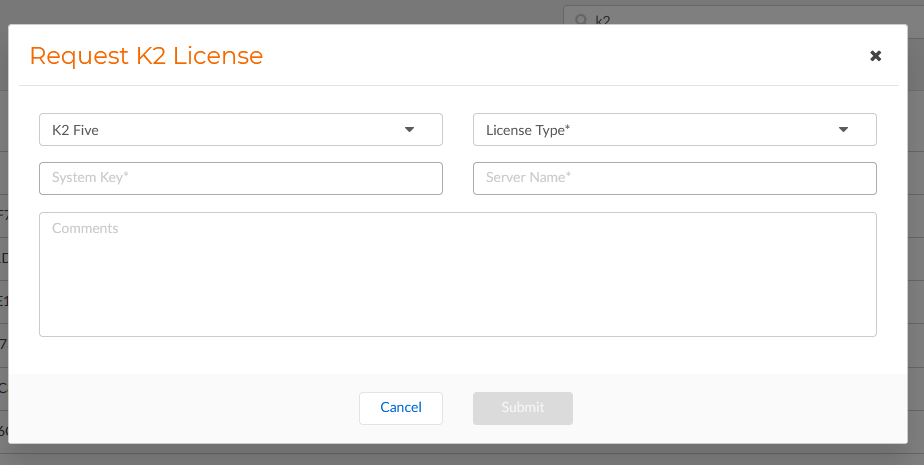
Copy the System Key to paste into the field in the Request K2 License dialog.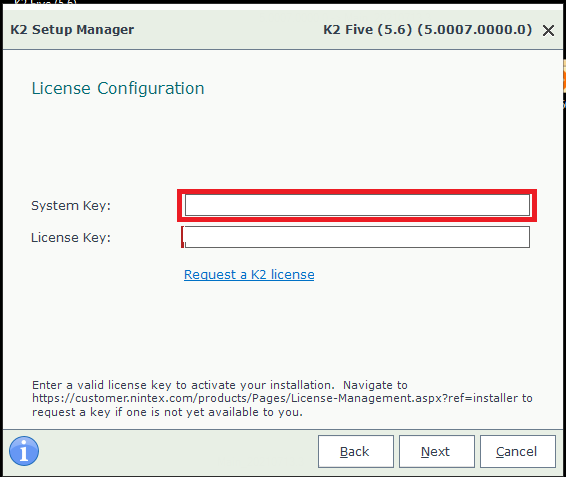
- Click Submit. You see a confirmation message, and an email is sent to you with a temporary key that you can use to continue with the K2 installation.
- Check your e-mail and copy the temporary license key into the License Configuration page in the K2 Setup Manager.
- You will receive an email, within four days of your request, that contains the authorized license key for the type of environment you selected. Use the Setup Manager or K2 Management Site to update the temporary license key with the authorized key.
Manage or update the license key in the setup manager
After installation, you can use the Setup Manager to update the license key.
To access the license key using the K2 Setup Manager, follow these steps:
- Click on the Windows Start Menu and expand the K2 folder. Click K2 Setup Manager to launch it.
- On the K2 Maintenance page, select the Configure option.
- Run through the wizard to get to the License Configuration page.
- Edit the license key and complete the installation wizard to update the license key.
Manage or update the license key in K2 Management
You can use K2 Management site to manage and update your license key See the Licenses topic for more information.
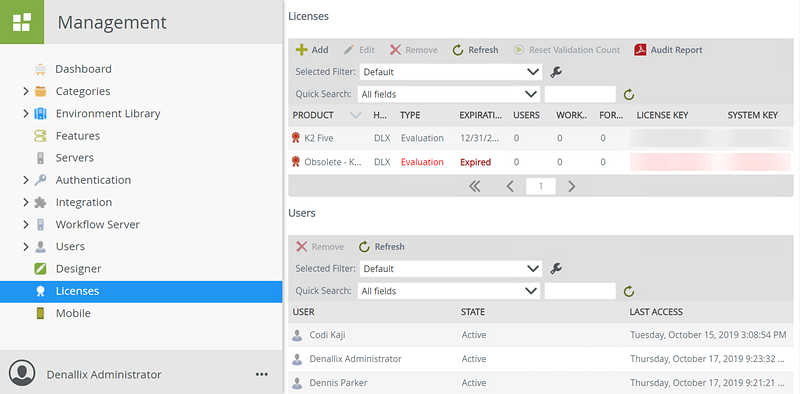
Additional license management features in K2 Management
In addition to updating the K2 license key in K2 Management, the Licenses section can also be used for several other functions.
Remove a system license
Removing a license could disable your K2 environment. For the system to function, at least one license must be active. This may be a license that enables full functionality or a limited-usage license. See the Remove a License section for more information.
If you remove all license keys from the Licenses section in K2 Management or your license has expired, you are locked out and the following error message displays:

To re-add your license, follow the steps below:
- Click on the Windows Start Menu and expand the K2 folder. Click K2 Setup Manager.
- On the K2 Maintenance page Select the Configure option.
- Run through the wizard to get to the License Configuration page.
- Add the license key on the License Configuration page and complete the installation wizard to re-add the license key.
Expired K2 license
If your K2 license has expired, do not remove the license. Follow the steps below to update your expired license with your new license:
- Obtain your new K2 license from your K2 Representative or from the License Key page on Nintex Customer Portal site.
- Click on the Windows Start Menu and expand the K2 folder. Click K2 Setup Manager.
- On the License Configuration page enter your new license key. Click Next.
- On the K2 Server Configuration page, select the Update K2 Server License option and click Update.
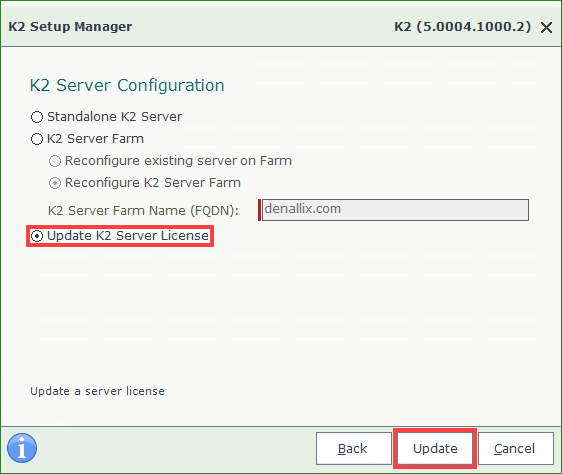
When updating a Developer license, the Update K2 Server License radio button is not present because the function is unneeded.
- Click OK on the License updated successfully message.
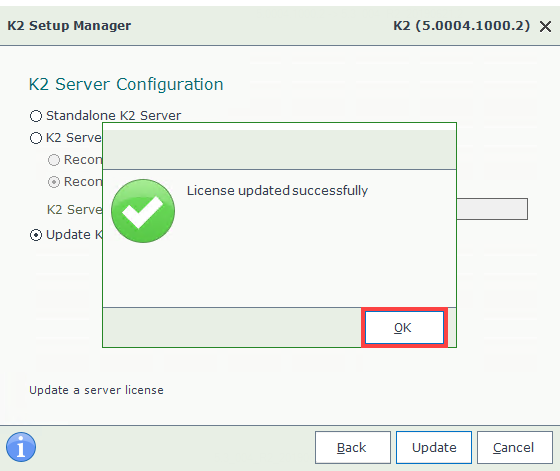
- Restart the K2 Service to apply the updated license.
Reset validation count
The Reset Validation Count option allows you to extend an exceeded license after you have cleaned out the Users view in K2 Management of users who should no longer "consume" a K2 license. The validation count keeps track of users who have connected to the K2 environment. Depending on the license type of the K2 environment, when the validation count exceeds the number of users licensed, the system will prompt you to enter a validation reset key. You must contact K2 Support for a new validation key.
See the Resetting Validation Count section for more information.
User management
The Users section in K2 Management displays cached user credentials of users who have connected to K2. From this section you can remove a user from the list. For a detailed list of user licenses occupied, see the Users section.
Audit report
The Audit Report allows you to generate a report of active and inactive K2 users. An active user is a person who has recently opened a connection to K2. You must have Administrator rights to generate the report.
See the Audit Report section for more information
Server usage report
The Server Usage report allows you to view the number of K2 artifacts, such as workflow definitions, process instances, activity instances, event instances, SmartObjects, forms and views deployed in your environment. The purpose of this report is to compare this number with your license agreement. You can use the license audit report and the server usage report to determine if you are compliant with your license agreement.
See the Server Usage Report section for more information.


