Hi Rameshbabu,
Maybe you can use this for the Header view.
Hi Rameshbabu
This is possible. The full functionality to have all the views physically on the form in the desired format is not functionality that is out of the box possible, however there are some alternatives that can be used to achieve the desired layout format. Please see the alternatives below.
Alternatives:
Solution 1 - You can make use of a combination for views, forms and content controls on your main form to help position your views in the layout you want, you will have to adjust some height and width properties for views and control controls from view and form level depending on you’re the design of the layout you want. You would aslo need to keep in mind that when calling some views or forms in a content control from a different form (Main forms) the main forms scope will not include the views or forms being called in the content control which means that you would not be able to manipulate the rules for those views or forms in the main form. Please see the below for stepsguidance.
Steps:
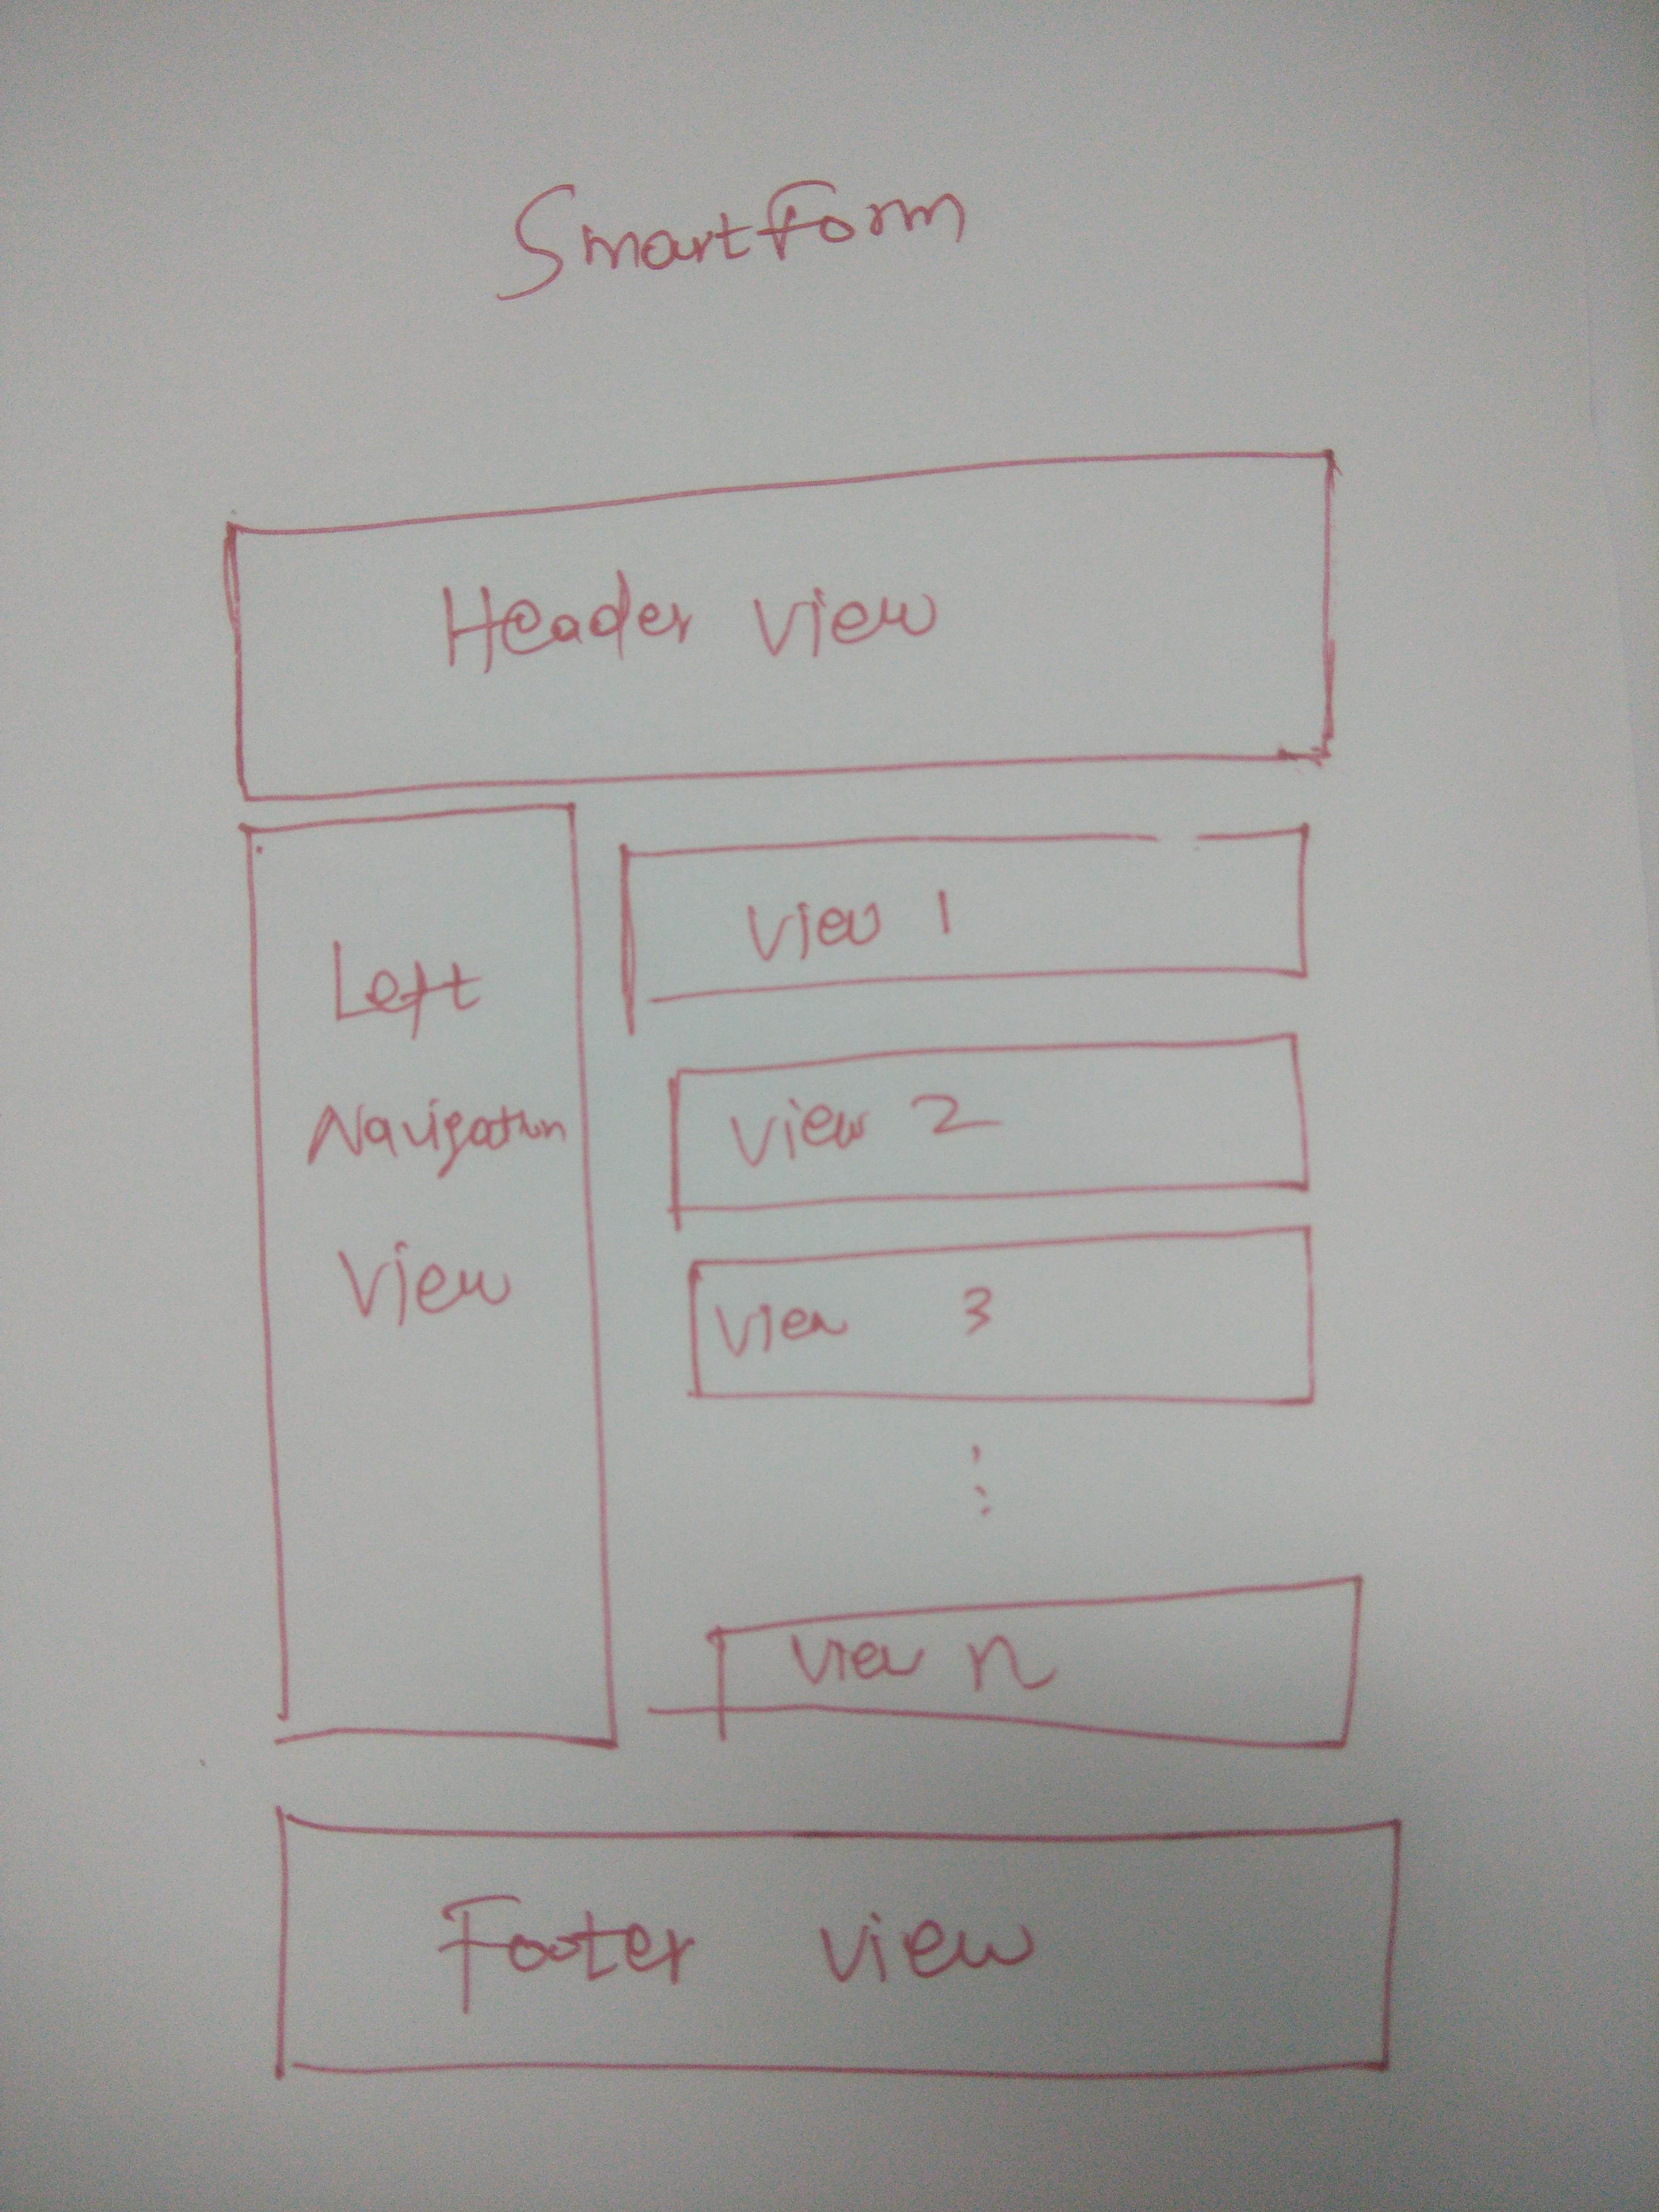
1. Create the relevant views and forms
- Header View - For testing purposes you can just add a label.
- Footer View - For testing purposes you can just add a label.
- Left Navigation View - Ensure that this control does have a few controls on it.
- View 1 - For testing purposes you can just add a label.
- View 2 - For testing purposes you can just add a label.
- View 3 - For testing purposes you can just add a label.
2. Create a Form that would contain only View 1 to 3 (We will call this the Child Form)
3. Create a main Form and follow the following layout steps:
- Add the Header View at the top in the Main Forms Design canvas
- Add the Left Navigation View below the Header View in the Main Forms Design canvas and adjust its width properties to 15% (You can change this to the required sizing)
- Add a Content Control on the right hand side next to the Left Naviagtion View. Copy the Runtime URL for the Form that was created in Step 3. than paste it in the property URL section for the content control. Now adjust the content controls height property to 380px (You can change this to the required sizing)
- Add the Footer View at the bottom in the Main Forms Design canvas
4. Save and Finish the Main Form and give it a test run.
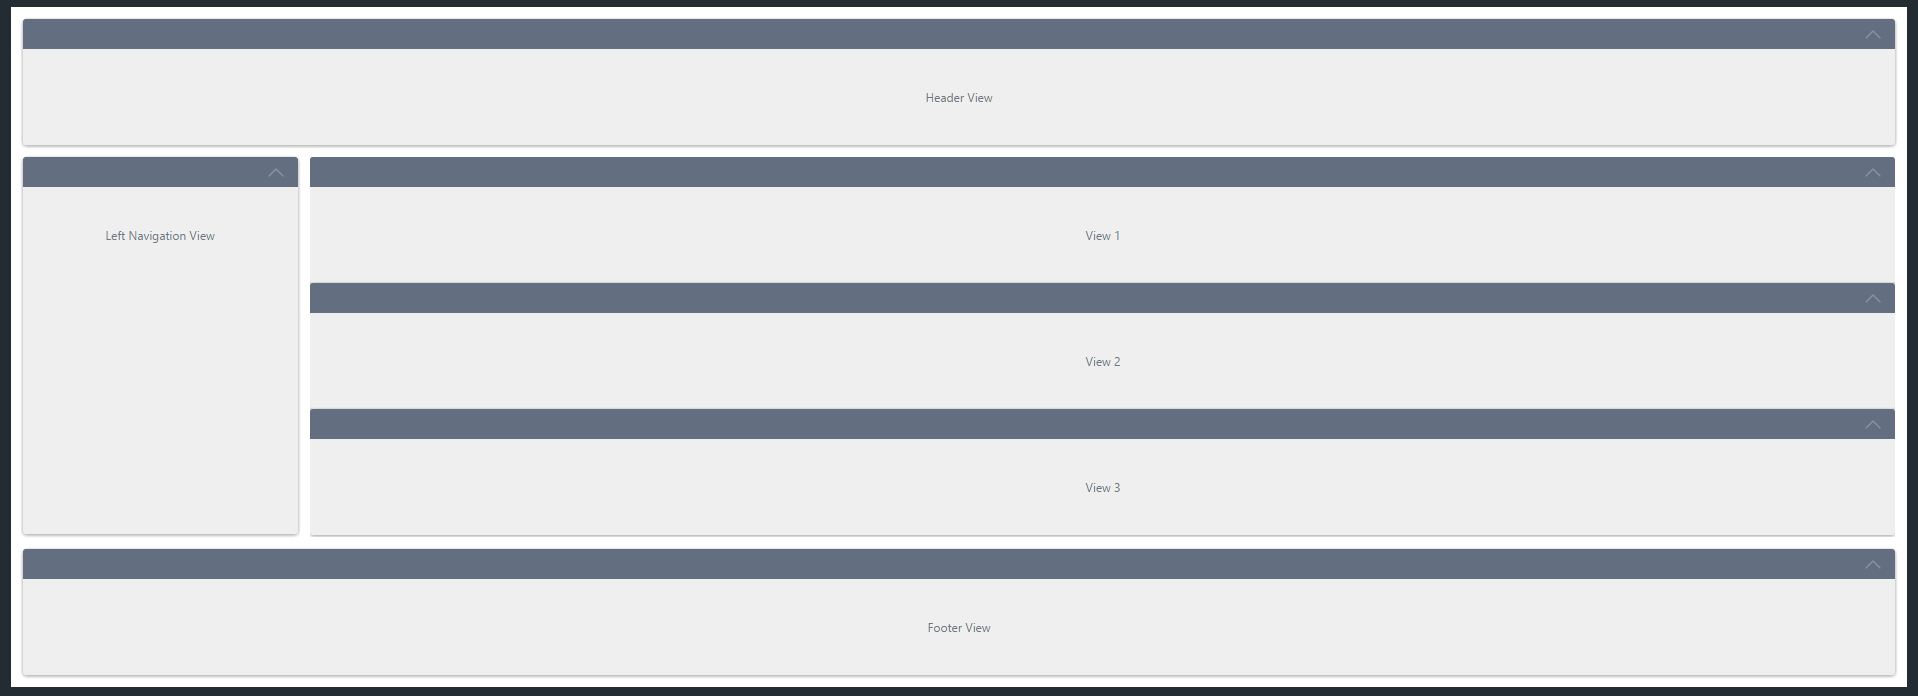
5. Your result would come down to the below screenshot:
Solution 2 – You can make use of data labels set to allow literals and manipulate the layout using javascript. This will allow you to structure your layout in the desired form however the custom code allowing you to do so will not be supported by K2 support as this is a fully Custom solution. I did not include steps for this due to the fact that it will not be supported however I mentioned it as a laternative shoudl you feel the need to investigate
Steps:
1. Create the relevant views and forms
- Header View - For testing purposes you can just add a label.
- Left Navigation View - Ensure that this control does have a few controls on it.
- View 1 - For testing purposes you can just add a label.
- View 2 - For testing purposes you can just add a label.
- View 3 - For testing purposes you can just add a label.
- Footer View - For testing purposes you can just add a label.
2. Add all the create views for a Main Form in the order above.
3. Save, finish and run the form.
4. Using the browsers "Inspect Element" option identify an unique ID for each view that you can use to munipulate the view with
- Left Navigation View
- View 1
- View 2
- View 3
5. On the Main Form you will have to add a Data Label for each of the views mentioned in step 4 and ensure that all these data labels has the "Literal" property enabled.
6. Now on the forms Initialize Rule you would need to add a transfer data rule and add the custom code to each of the Data Labels repectively to manipulate the views position in the form on initialize.
7.This might require some researching as well as trail and error.
Should you feel that this post is of use and or an accurate solution to the raised question, I kindly encourage you to mark it as such using the 'Mark as Solution', 'Kudo' andor ‘Me Too’ options.
Kind Regards
Raymond
I'm struggling with this.
I'm running the inspect elements but which ID. I'm seeing so many things.
Is it the id / target id / data-areaitemid
I have this exact need in attempting to create a fully functional dashboard with views / tabs / header / footer.
I tried using the Content Field - but it's slow.
Then when you create expressions - how do you get them to move around.
<style> div.panel {float: left}</style>
<style> id={float: right}</style>
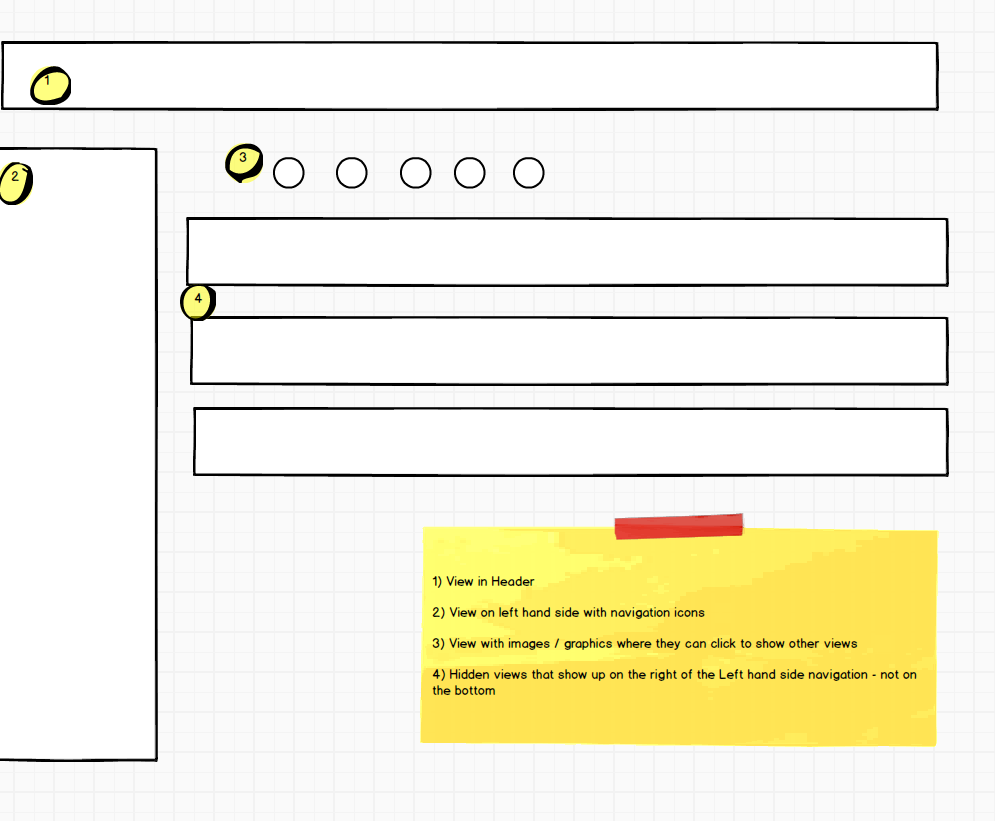
I'm trying to go for layout below.
Tried using the Content Label - which gives me the layout I want but it's slow.
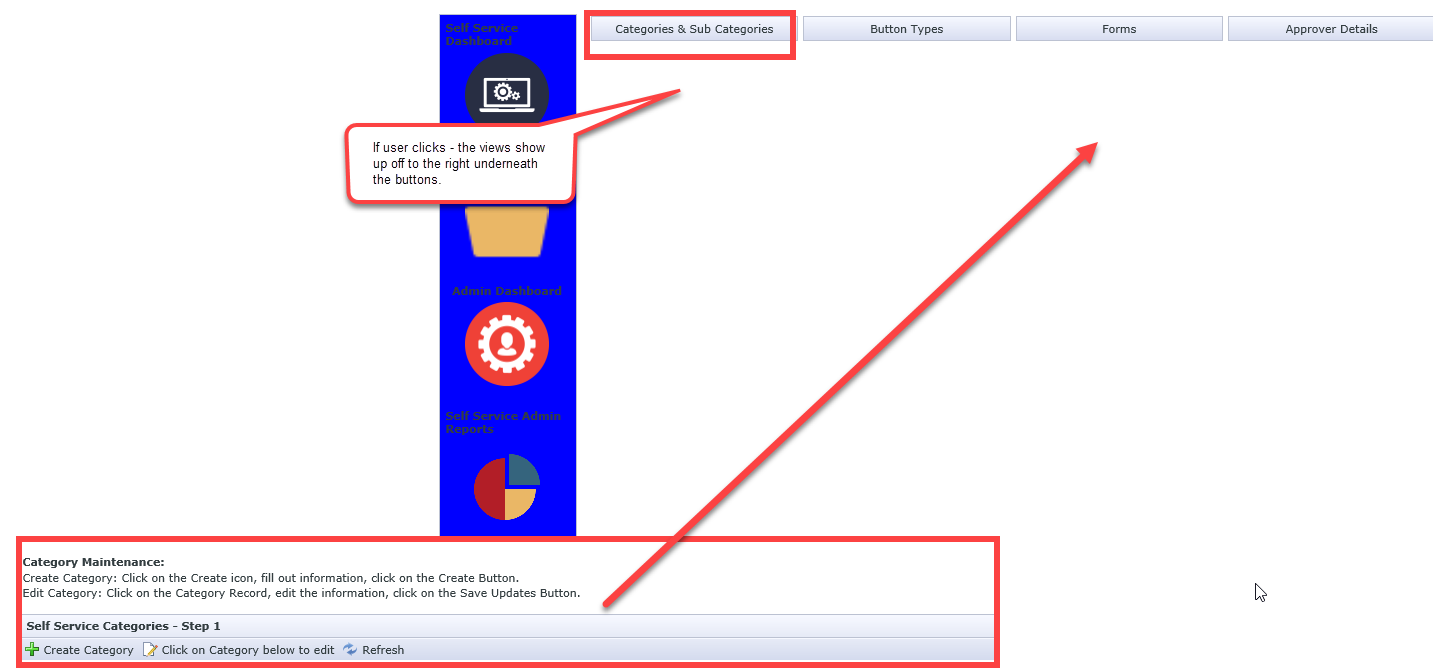
Trying to create a functional dashboard for both admin & users. Added few screenshots.