


1. Logs, Error, and Exception Handling
2. Wizard Resistance
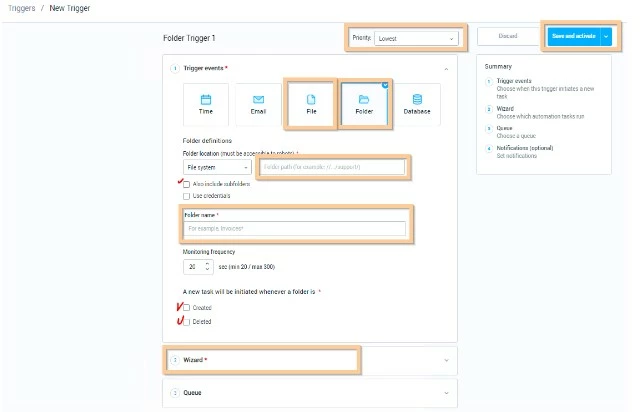
3. Creating a folder trigger and running the wizard on the robot from the console.
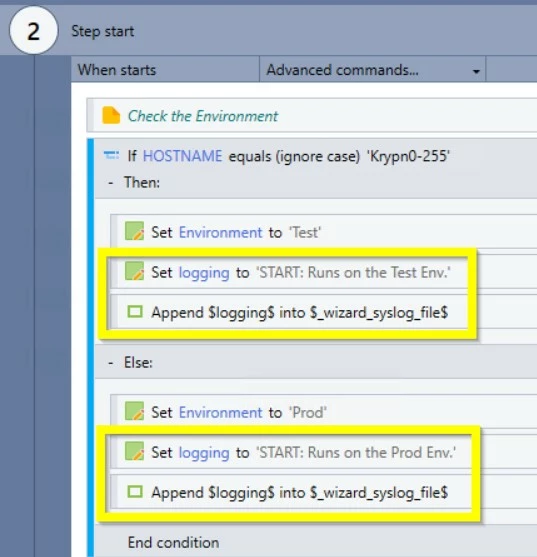
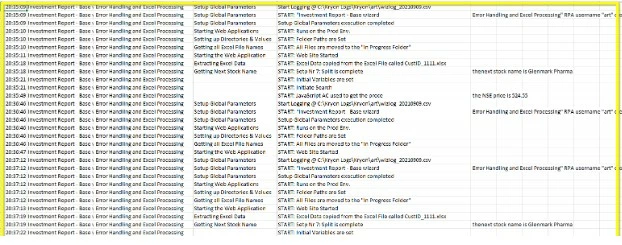
Logs help RPA developers to maintain the wizards in the case if the Bot faced unexpected issues and system changes or updates. In these kinds of situations, the maintenance team seeks to eliminate the issues and bring the Wizard back to Production. In our use case, we are going to send logs to a CSV file. In some cases, we can use also the Log action advanced command to send the invoice number or any other important reference number to the console. As you can see in the below example, using the customized Syslog, we write the necessary logs to the CSV file as well as logging some information to the Kryon console. Basically, when logging an action we can log any data, such as step name, step or action description, the status such as a successful or not failed, the value, any information that will help to understand where the wizard had any issues.
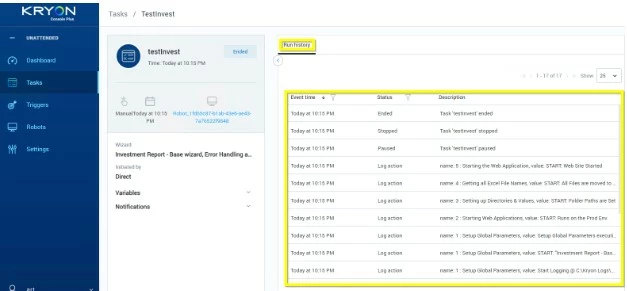
In the case of using the Log Action advanced command, you will see the mentioned log on the console under Run History:
Error and Exceptions
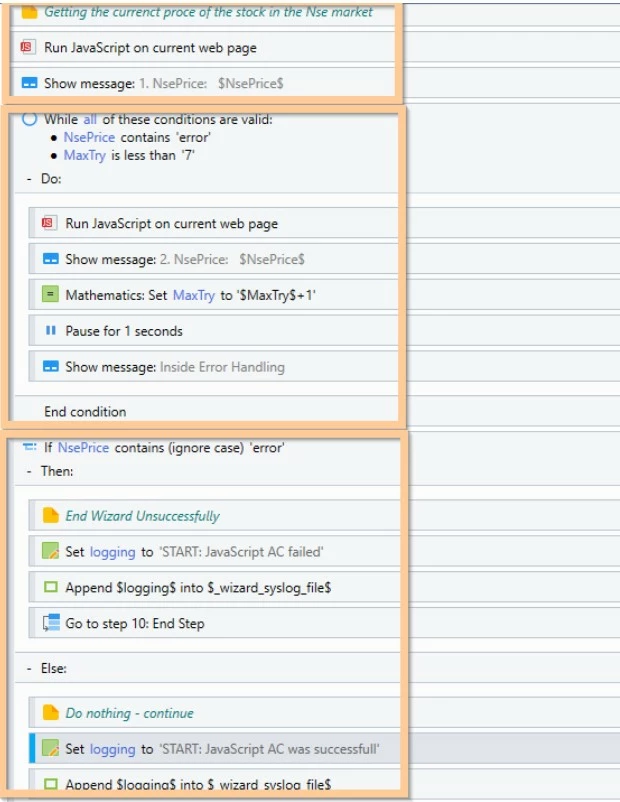
During the production run time, can be many situations when a certain command will fail or the page will not load, or any similar exceptions. For this case, most of Kryon's AC's have the option to prevent and find out if an error happened, e.g. the command failed, action not performed, object not found, and many more. In the example below, the Bot will check if any error happened when executing the JavaScript advanced command and if yes, it will try up to 7 times to get the desired object, and if the wizard will not succeed it will terminate the wizard unsuccessfully and will send and notification to the maintenance team.
1. How to use Gmail for email advanced commands?
2. Kryon Integration with Viber using Rest API and WebHooks
3. How to send a message from a wizard to Microsoft Teams channel
4. Send messages from your Wizard directly to Slack ContactChanel
This can apply to any step or Advanced command, for more error and exception handling guidelines please see the below two articles:
Creating a folder trigger and running the wizard on the robot from the console.
To create a folder trigger, you need to access the Kryon console then go to the Triggers menu then click on New Trigger:
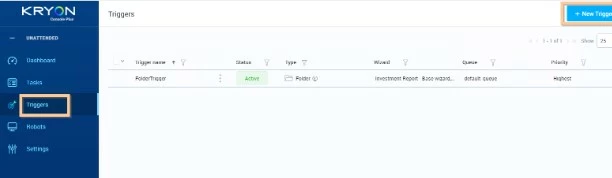
Then select the Folder or File trigger option, give a user-friendly name, give the system or SharePoint path, give the file or folder name, select the wizard and the Queue then save and activate.
Note: The wizard will be visible under-console if it is published from the Kryon Studio.Once the trigger is activated, the robot will monitor the folder or the file every 20 seconds by default unless you change the frequency. Once any new file appeared in the folder or any change is made to the folder, the robot will be triggered.

Attached you will find the new wizard, which contains the above-mentioned changes. Per your preference, you can add additional logs, error handlings with the given guides and articles. If you have any questions please write to Nintex Community.