


Topic
If you are importing data that needs to be formatted the same way, save yourself some time by using Import Templates. Import Templates will save any configuration settings that you set up during the Data Wizard. This will ensure that all the data imported into Foxtrot/RPA LE will all have the same format.
Instructions
Creating a Data Import Template
- Click on data in the top toolbar of the Bot and then open data. Open the file that you want use.
- Go through the wizard, make sure everything here is the way you want.
- **Please note this is for importing CSV files but can be used with other data files, the screens may look a little different.
- On the Data Source screen shown below (in RPA LE, it will say Data Source), change the delimiter or any of the other fields, but don't choose a template in the template box.
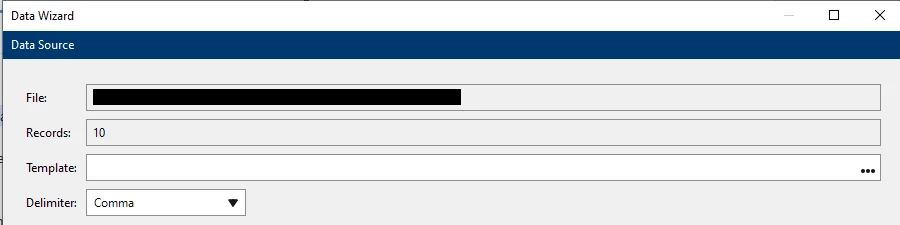
- Click Next.
- On the Parsing Definitions page, check 'Use the included field names' or leave uncheck as desired. If any of the columns are clicked, they will be grayed out which means they will be ignored
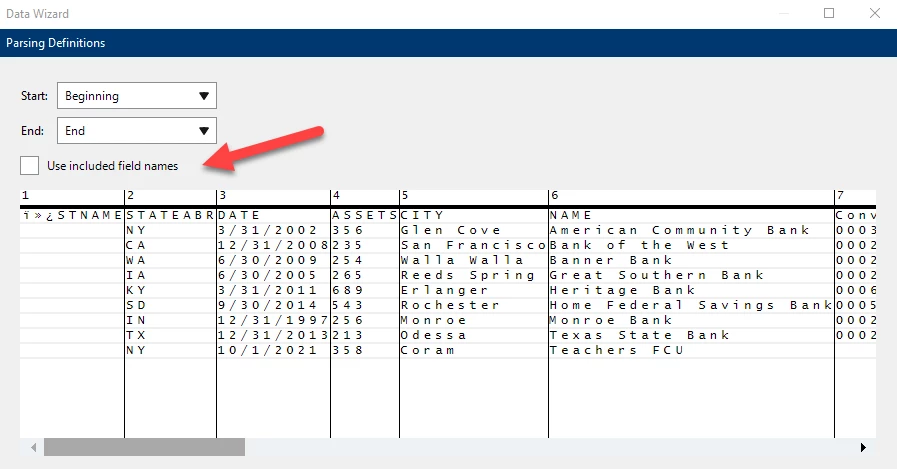
- Click Next.
- On the Fields page, this is normally where you will want to make changes such as changing the data type for each column of data or Changing the Column header.
*For example, if you have a column with numbers in it, but you want them to be treated as text, because some numbers have a zero in front, and you want the zero to show, then change the column to Text by clicking the row you want to change. Then click the arrow that only shows up when you highlight the row. In the box that pops up, change the Type to text. Any data types that you do not change will remain as they are showing. Please note, the data type is determined by the Bot at runtime.

- Click Next
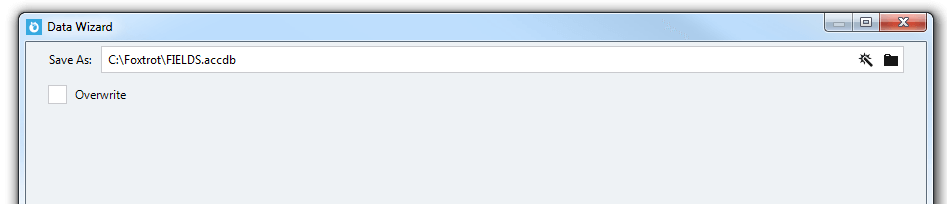
- On the Output page, choose if you want to overwrite the output file every time. If you do not check that box, then the Bot will ask you each time if you want to overwrite the output file from the last run if one exists.
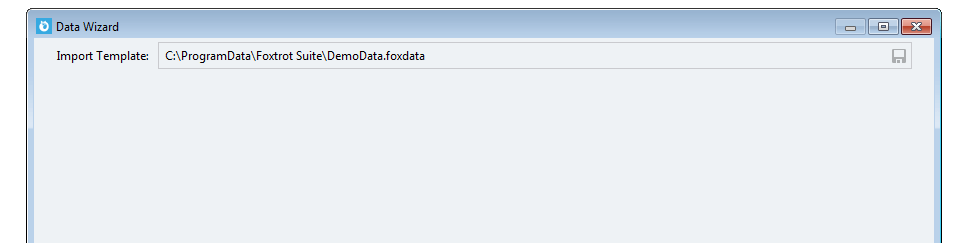
- On the last page of the Wizard, named 'Import Template Creation,' click the Save icon on the right side of the window (it may appear greyed out) and save the template. It will be saved as a FoxData type file.
- Click Done and your data will import.
- Check that your edits are correct in the Data Pane of the Bot.
- Close the data in the Bot.
- Create an Open Data action or you can manually Open Data again.
- Choose the file that you want to open.
- This time, on the Data Source screen, choose your template.
- Click Next all the way through to the end and your data will use the template with the edit you created.
Please note, that if you choose to Overwrite your output file on the Output page, the box may not be checked the second time, If you want it to be overwritten, check the box again.
If you check the box the second time through in the Open Data Action, the box will remain checked and that setting is saved in the Open Data action but not the template.
If you have any question, please send an email to Support@nintex.com and we will be happy to assist.