


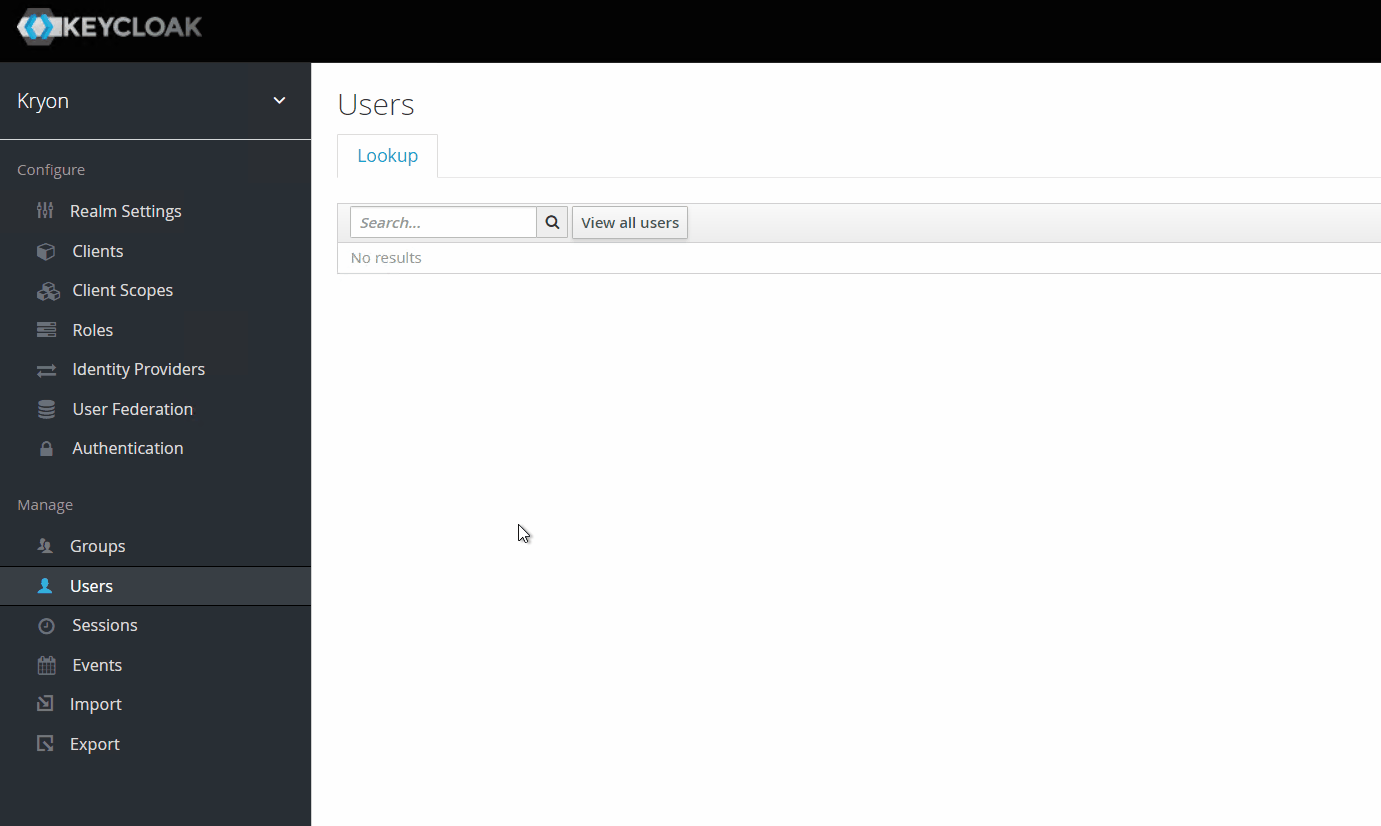
1. From the main screen, select the "Users" tab in the navigation menu located on the left end of the screen.
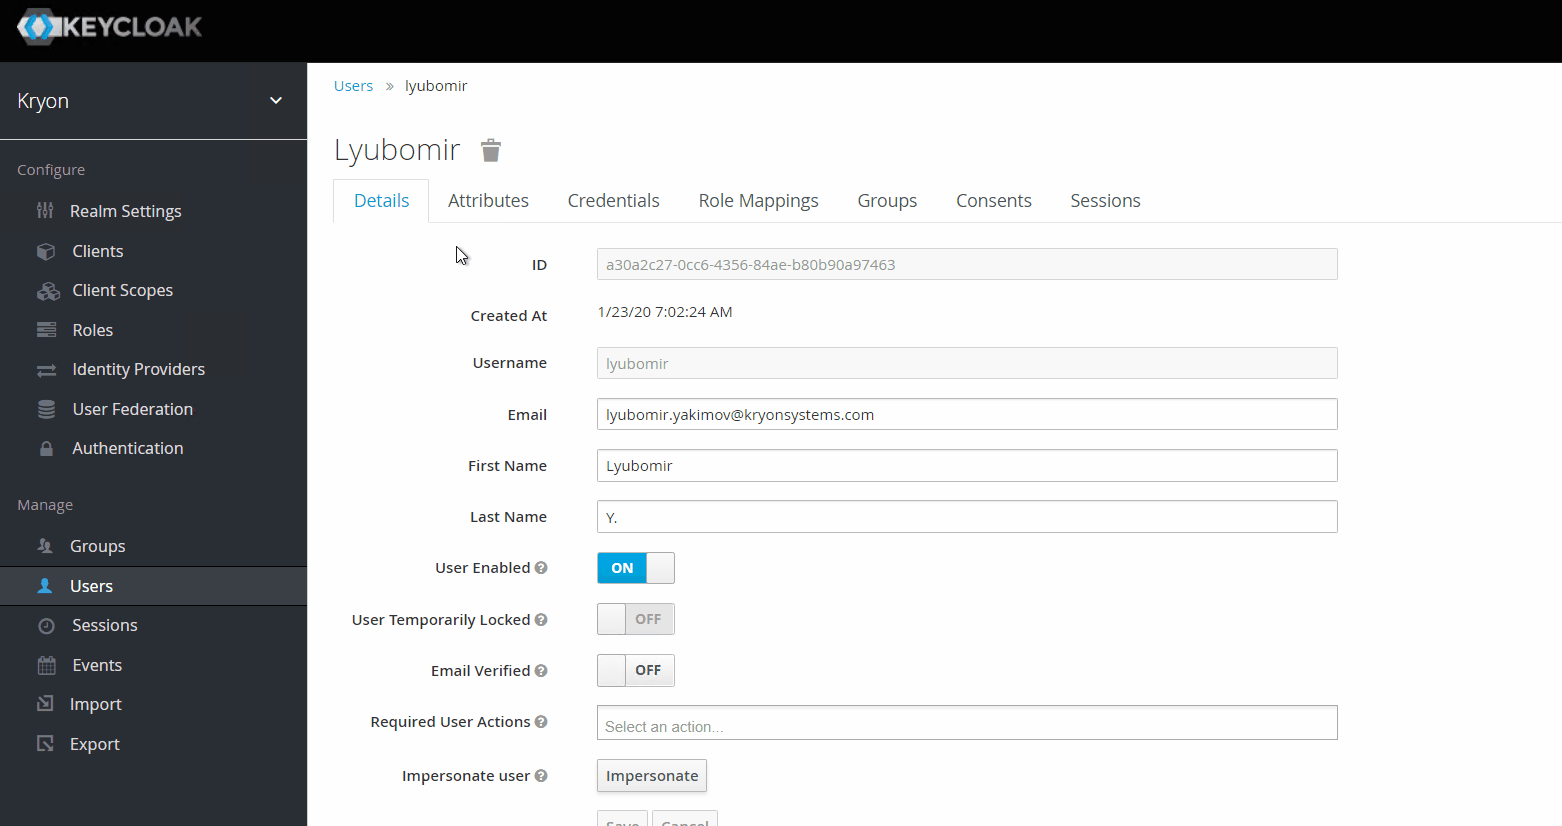
2. Then you will have to search and find the user you would like to grant permissions to. Then click on the user ID to access the user options menu.
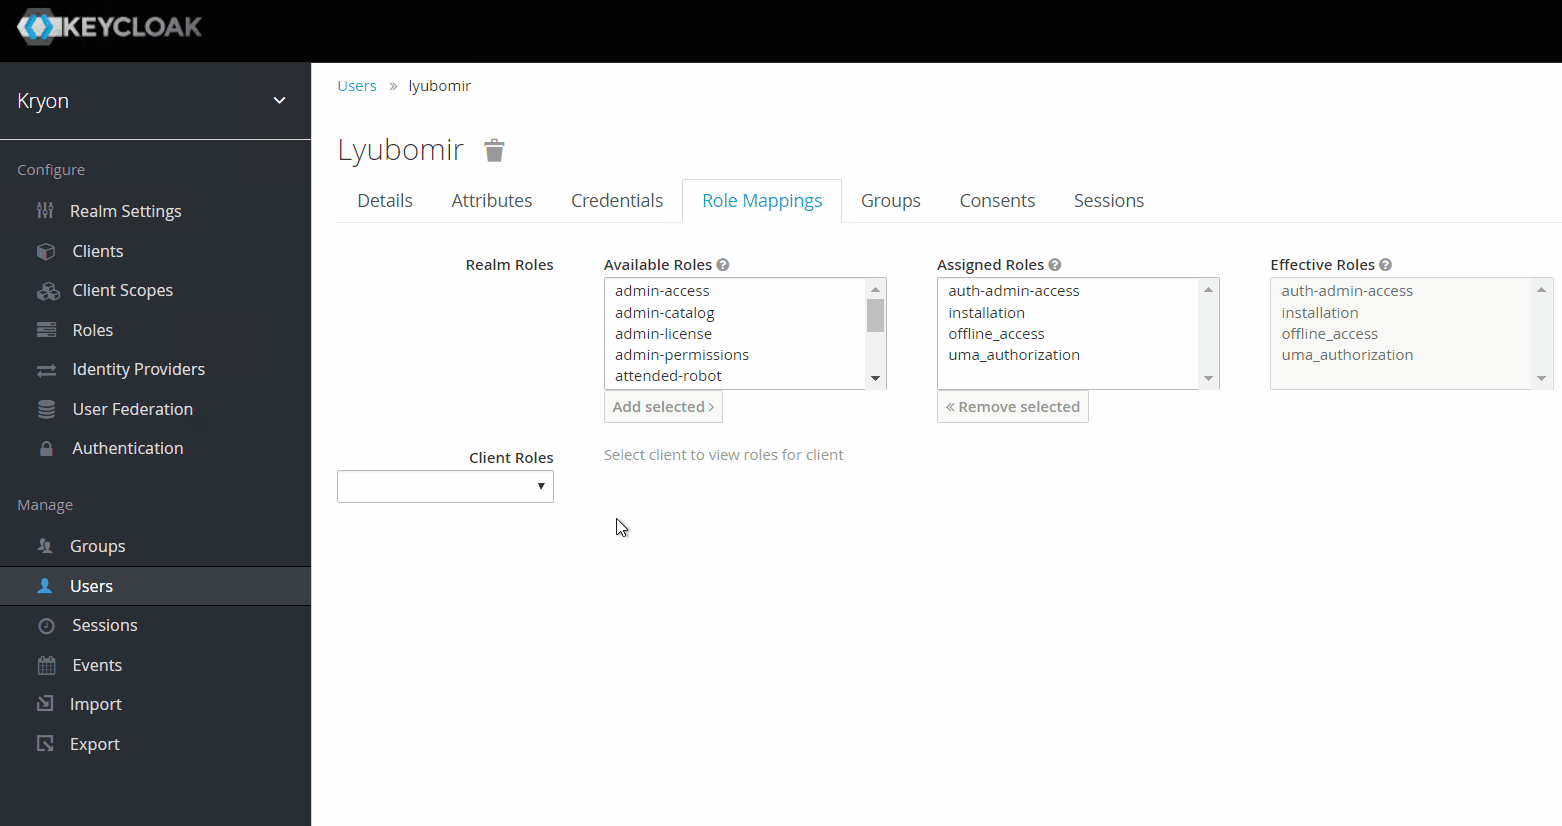
3. Once you've entered the properties section, navigate to the tab labeled "Role Mappings".
4. In the first section called "Realm Roles" you will need to scroll and find the "auth-admin-access" role and then click on the "Add selected" button below.
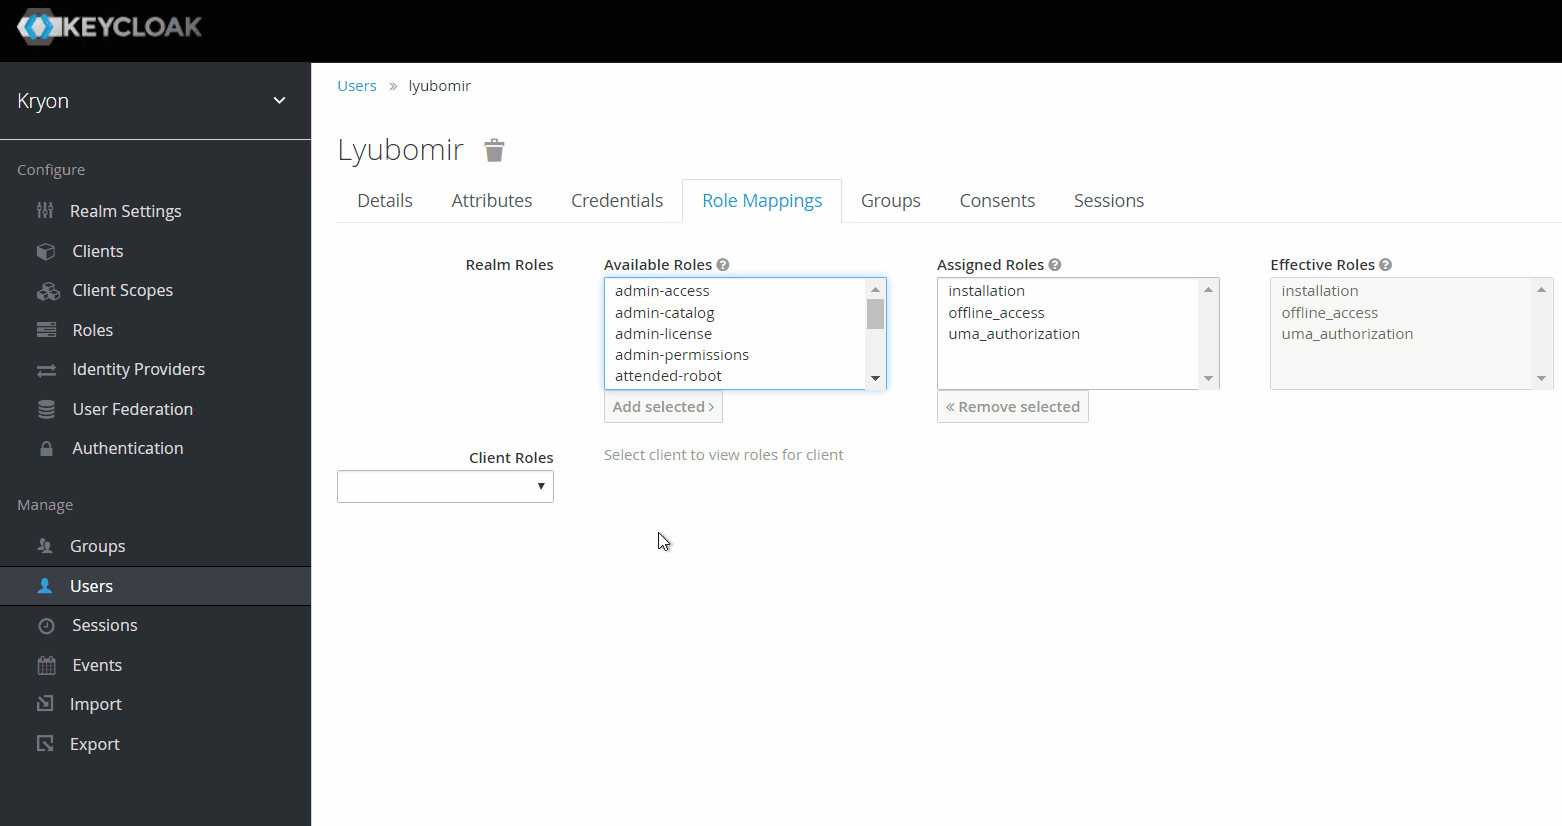
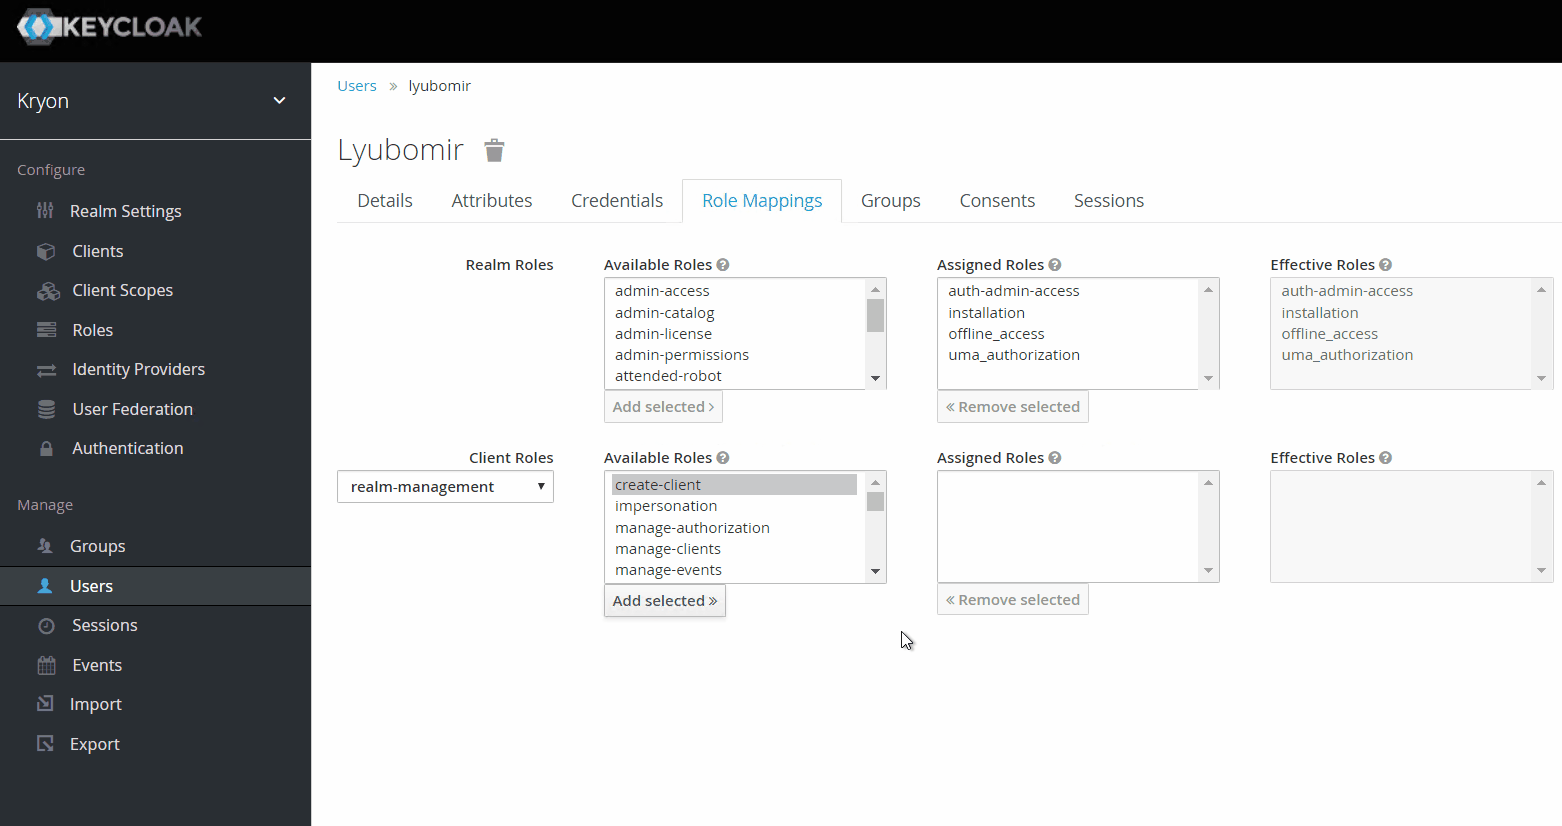
5. Then from the "Client roles" section below, scroll until you find the "realm-management".
6. From the available roles, you will need to locate the "realm-admin" role and "Add selected" button.
Now the user you have selected will have permissions to the Keycloak Administration Console.
Want to view a full tutorial? Here you go: