Hi,
Whenever I create a new view and select for it to be an 'editable list view' It doesn't show the toolbar at the top which has the 'save' 'edit' delete' options on (along with the ootb rules that go with these.
I have somehow managed to do it in the past as I have an example view which shows the toolbar but have never been able to find the option for this since and its driving me potty lol
I've looked in the settings tab for the editable list view and I have tried creating a view from within designer and also from the artifacts page under the 'new' tab but to no avail.
Can anyone pount me in the right direction?
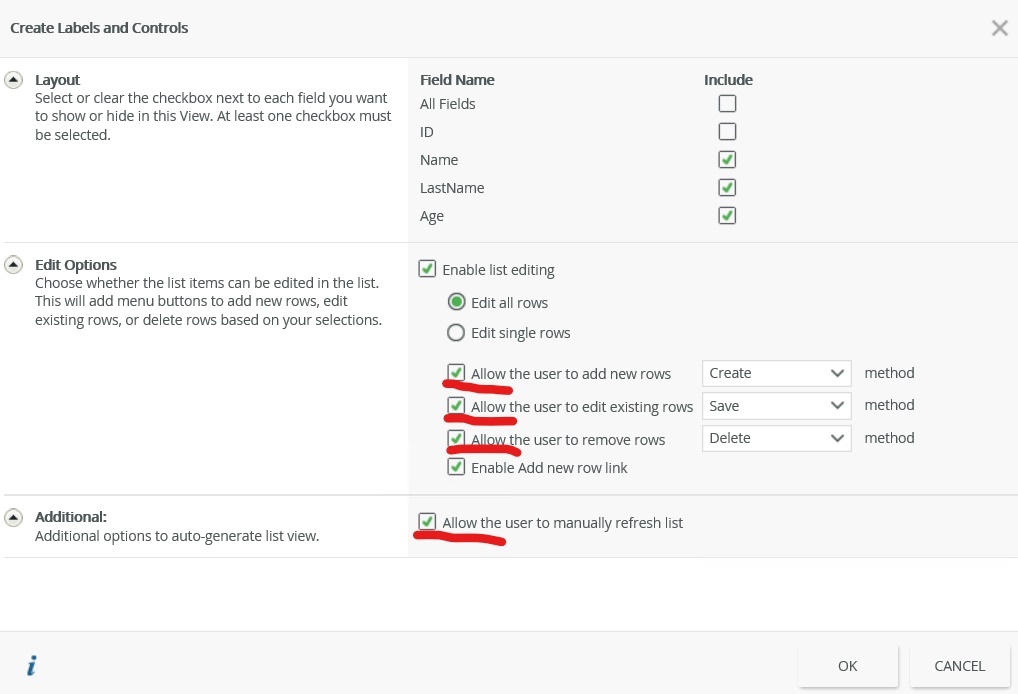
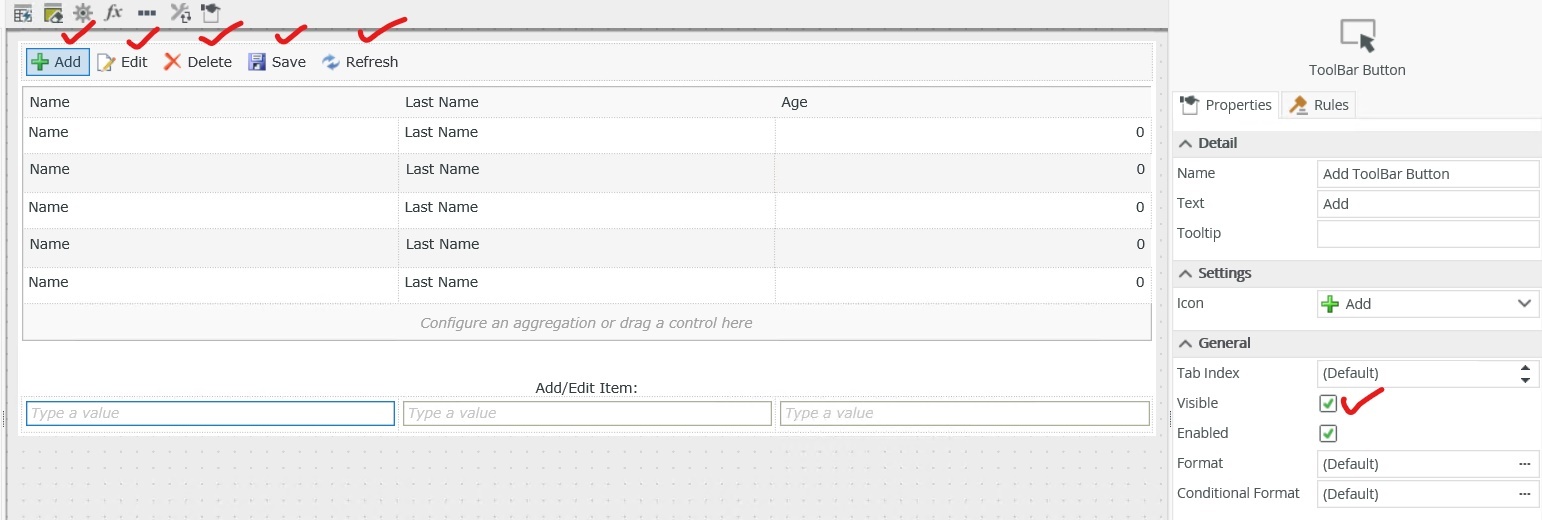
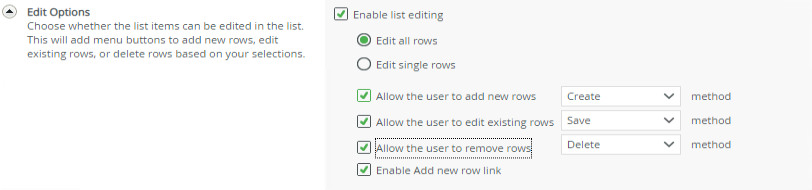
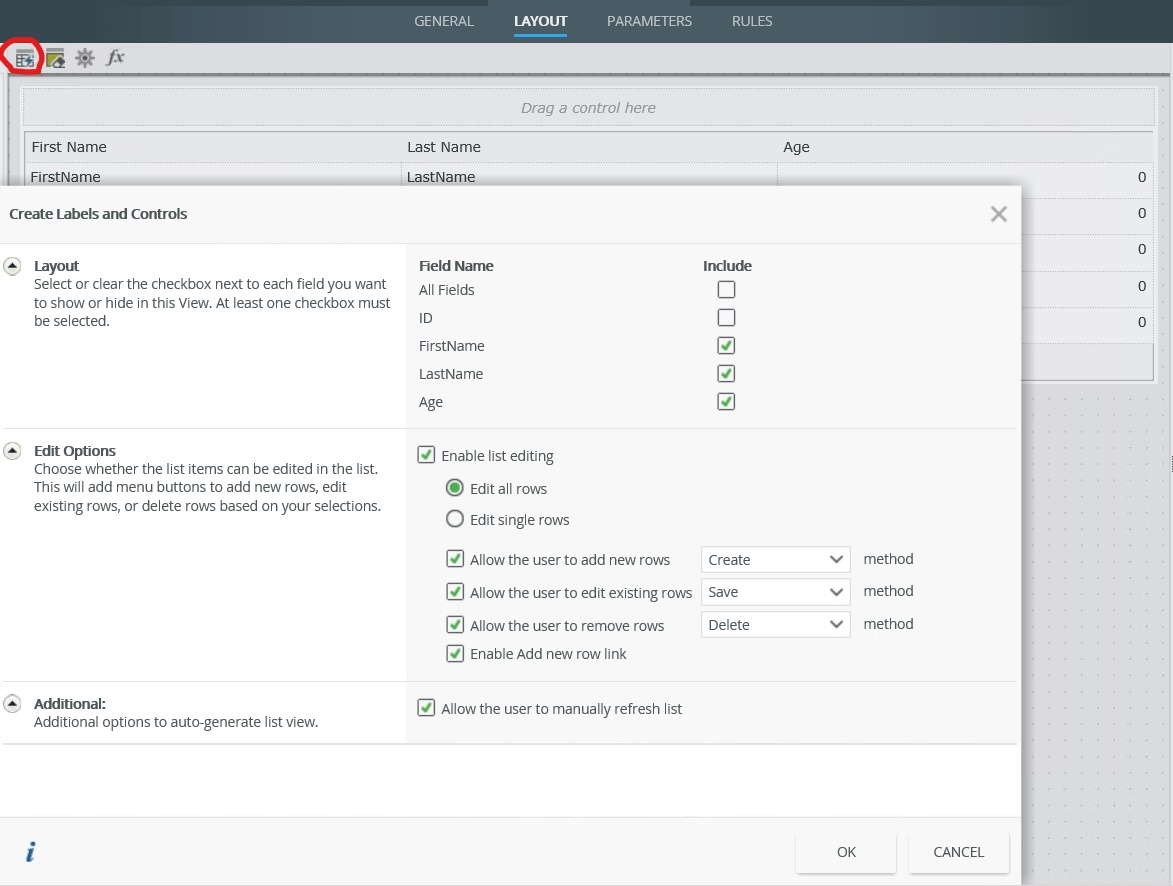
WITH TOOLBAR (which is what I want)
Thanks, Julie