Introduction
With Salesforce making the transition from classic to lightning, I wanted create this blog post to demonstrate how Nintex RPA can work within Salesforce lightning and can easily create new accounts using data from an excel spreadsheet.
Walking through the Botflow
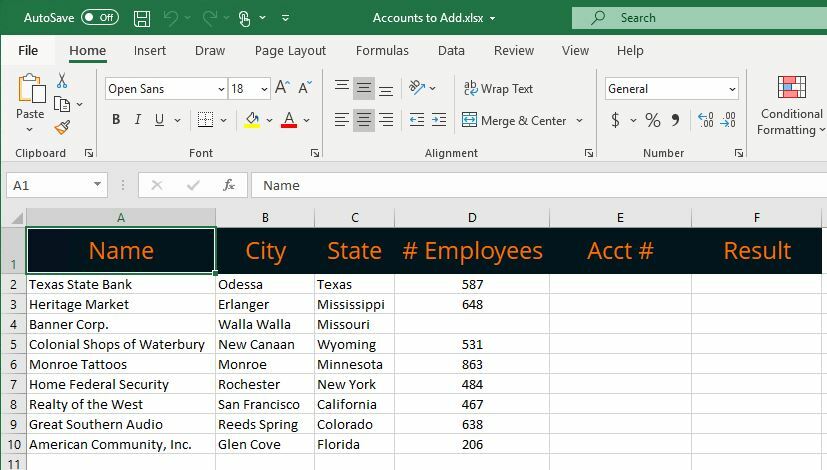
The Botflow I am walking through in this blog is available to download from our Nintex Gallery at this link. Place the folder with the spreadsheet on the desktop and you will need to update the credentials variable for Salesforce, and the variable for the Salesforce URL to point to your Salesforce tenant. Let’s say you have a spreadsheet full of new account data, maybe from attending a conference or migrating to Salesforce from another line of business system. Instead of having an employee enter 100’s or 1000’s of lines of data into Salesforce lets show you how we can accomplish this with Nintex RPA. The spreadsheet we are working with for the demo has a small subset of data that we will be using to create the account using Nintex RPA, this could be updated to contain the information that you would want when you create the accounts in your Salesforce tenant.
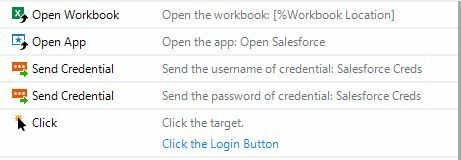
To start the bot is going to open the excel workbook, and then open Salesforce in Chrome and login in using the saved credentials.
Once logged in the bot will navigate to the accounts page, where we can begin to create the new accounts. Next we will loop through the items on the spreadsheet and populate the variables for Account Name, Number of Employees, City and State using the Get Value action.

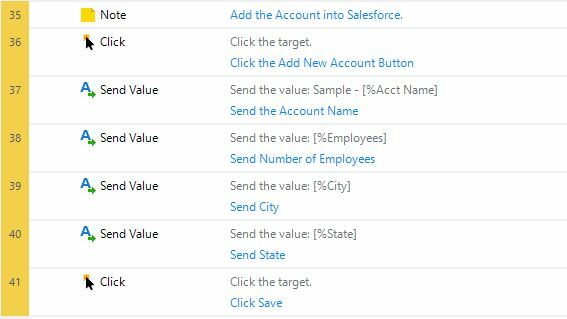
After populating the variables, the bot will then click the add new account button and send the data in the variables to the appropriate fields that we targeted on the new account page using the Send Value action.
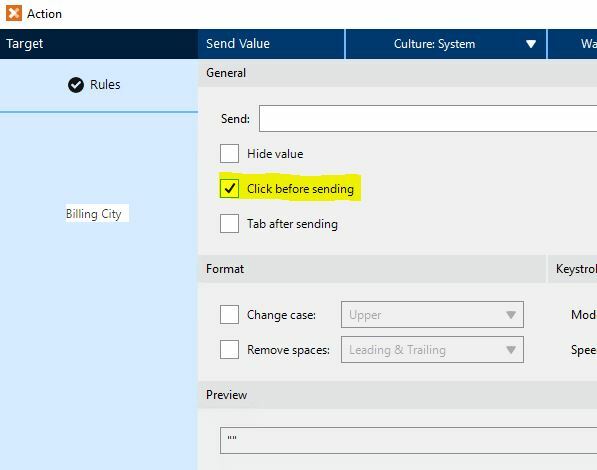
Tip: when targeting fields in Salesforce you will want to target the label for the field and then inside the Send Value action, check the box to click before sending and you get a consistent target in the appropriate fields.

In this botflow we are also using a Get Value actions to have the bot get the account number for the newly created account (which is an auto incremented field) and place it back in the spreadsheet for us. If you don’t need that functionality you can remove that functionality from the bot. The bot open the details page where the account number is located and gets that value and saves it in the acct number variable. It will also create a variable for the result and populate it with the text “Record created.”
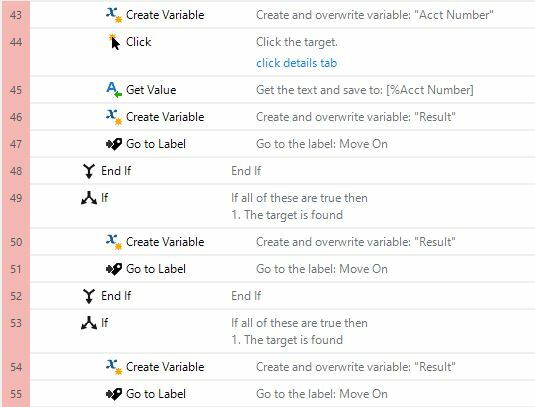
If the bot detects that it is a duplicate record it will cancel out of the new account creation and populate the result variable with “Duplicate Record”
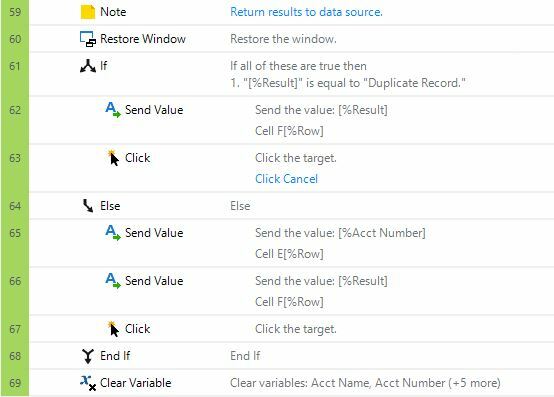
Then it will use the Send Value action to send the result and account number if a new account was created back to the spreadsheet, or just the result back if it was a duplicate record. If a new record was created, it will also close the new account window to clean up the tabs along the way.
The bot will then return back to the top and loop through the next row in the spreadsheet to populate the variables for the next account and continue this process until it has looped through all the rows of data in the spreadsheet. Once completed all the accounts from the spreadsheet will have been created in Salesforce.
RPA: Salesforce Lightning Tips


