


Transfer all data from one SmartObject to another
KBS100146
PRODUCTObjective
How to transfer all data from one SmartObject to another SmartObject.Before You Begin
1. Ensure that both the source and target SmartObject have exactly the same SmartObject properties, this also includes the data types connected to each SmartObject property.
2. Ensure that the source SmartObject does contain data and that the target SmartObject does not contain data.
How-to Steps
Complete the following steps:
1. Create your first SmartObject (SmartObject A).
2. Either create your second SmartObject (SmartObject B) OR perform a "Save As" on SmartObject A to create SmartObject B.
3. Generate an Editable List View from SmartObject A.
4. Edit the generated Editable list view.
Add a button to the design canvas and provide the button with a descriptive name (Transfer Data to SmartObject B).
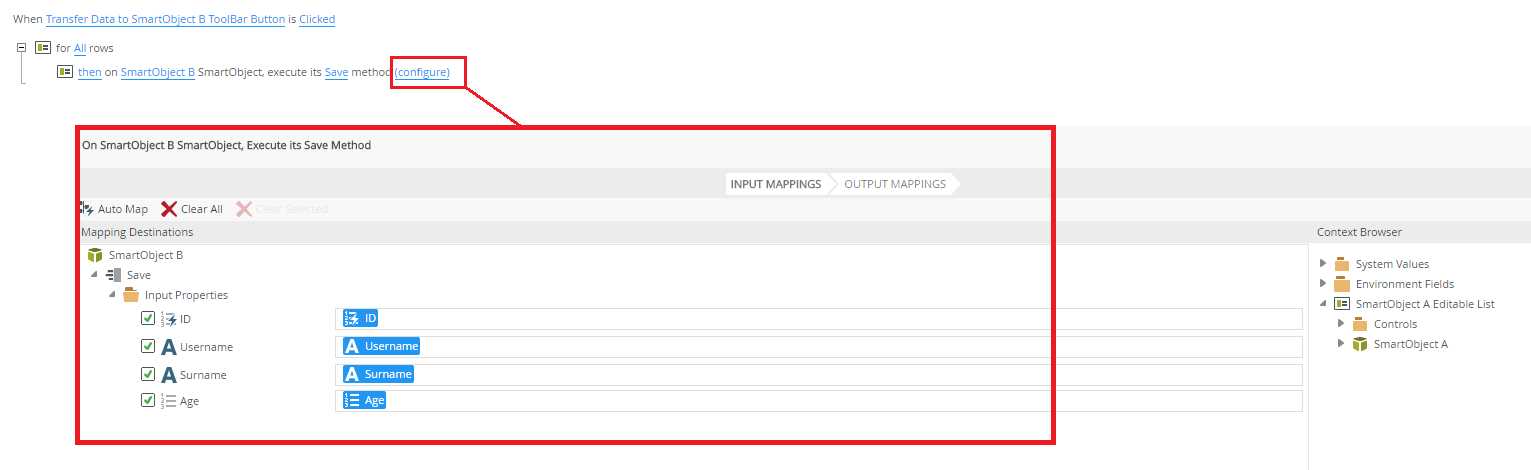
5. Add the following rule construction to the "When Button is clicked" event:
6. Generate a List view from SmartObject B.
7. Run SmartObject B's List view to make sure that the SmartObject is in fact empty.
Run the Editable List View that was created in step 4 and press the button (Transfer Data to SmartObject B).
Now when refreshing SmartObject B's List view, all the data would have been saved (transferred) from SmartObject A to SmartObject B.