How to use the Picker control’s input mappings, filters and sorting
KB001441
PRODUCT
Introduction
This Knowledge Base article describes how to use the Picker control’s input mappings, filters and sorting.
| Audience |
|
| Required Knowledge |
|
The Picker control’s input properties, filters and sorting can now be configured through the control’s data source method or by configuring a rule.
Implementation Details
When selecting to configure a data source for the control, then clicking on the ellipsis next to Method on the Configure Data Source screen of the control, the Populate Picker List Control with Data screen opens. The Picker control's input properties can be set by using fields or parameters. Filters and sorting can also be applied. This feature now allows for cascading picker controls as the input mappings can be set based on the result of another picker control's values.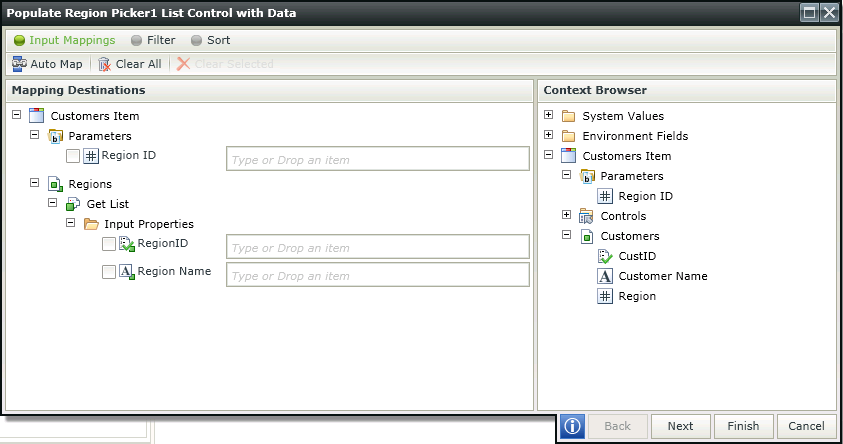
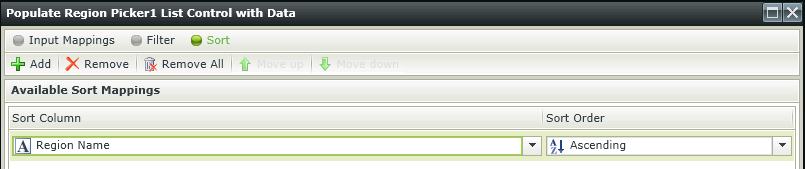
Filters and sorting can be applied to the results that will populate the Picker control. It is advised that a very strict filter is set up to limit the number of items used to populate the Picker control. The Result Limit property of the Picker control is applied to this result set as well (default is 100).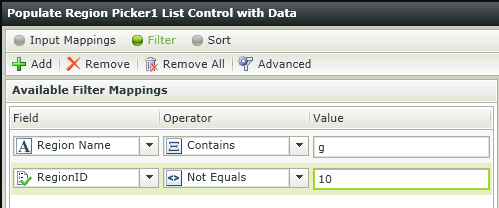
When configuring data settings through the Method field of the Configure Data Source screen, a resolving event is automatically created to populate the control using these settings. This ensures that the settings are applied each time the Picker control is requesting data at runtime.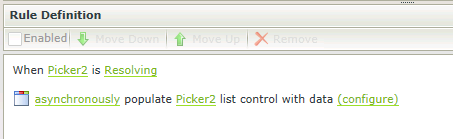
The feature to allow a filtered dataset to be used to populate the Picker control can also be used without the resolving event. To use this feature just add the populate action for the Picker control outside of the context of the resolving event. The following rule definition can be used for example: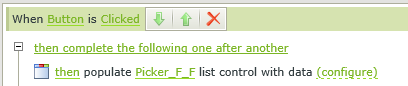
For more detailed information see the following topic in the K2 smartforms User Guide:
K2 smartforms > K2 Designer > Views > Creating Views > Layout > Toolbox > Controls > Picker Control
Example Scenario
In the scenario below we will be using three pickers that will be filtered according to the selection made on the parent picker. Follow the steps below to set up the scenario:
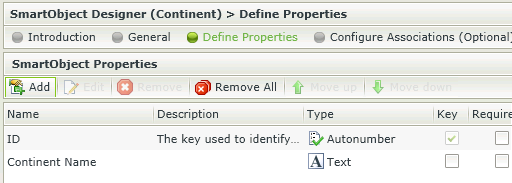
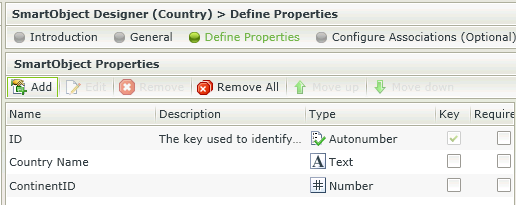
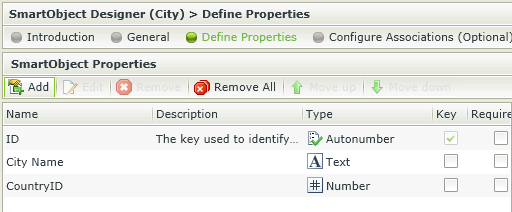
- Create the three SmartObjects namely Continent, Country and City as depicted in the images below:
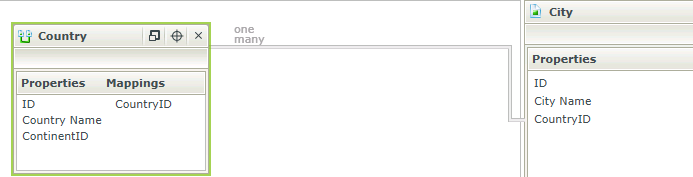
- Create the following associations:
On the Country SmartObject create 1 Continent : M Country (FK: ContinentID mapped to ID) associationOn the City SmartObject create 1 Country : M City (FK: CountryID mapped to ID) association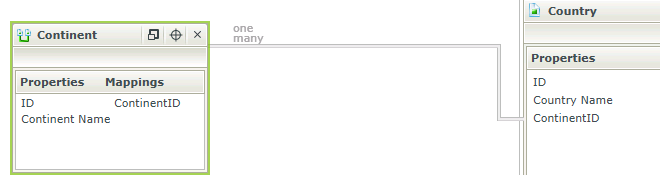
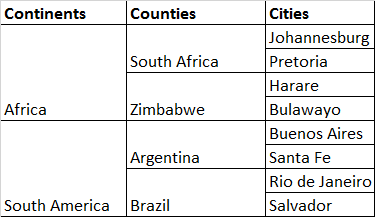
- Create an Editable List View of each SmartObject and create data to work with. The following data can be used as an example:
- Create a blank View and drag three Picker controls onto the canvas.
- Link the data sources of the controls to the Continent, Country and City SmartObjects respectively.
- Edit the data source property of the Country control.
- Click on the ellipsis next to the Method field.
- Select the filter tab at the top.
- Create a filter where the ContinentID = Picker control (representing the Continent picker) as shown below:
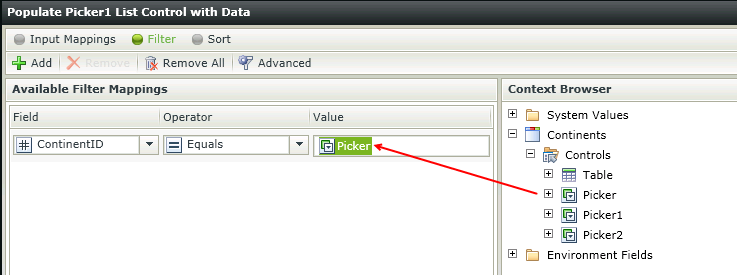
- Click Finish to save the filter and OK to save the data source configuration.
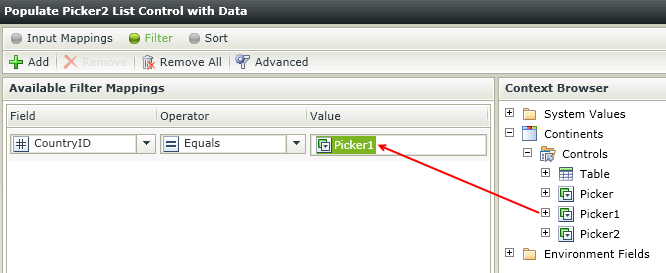
- Edit the data source property of the City control and follow steps 7-10 to create a filter where CountryID = Picker1 (representing the Country picker) as shown below:
- When using controls to filter on, it is best practice to set the Allow Multiple property to false. In this instance, we are filtering on the Continent and Country controls. Deselect the option in the Allow Multiple properties of these controls.
- Finish and run the View.
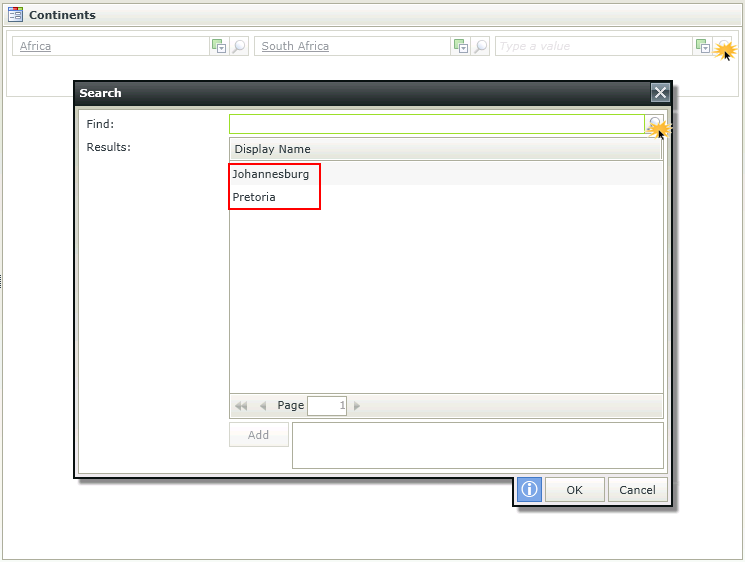
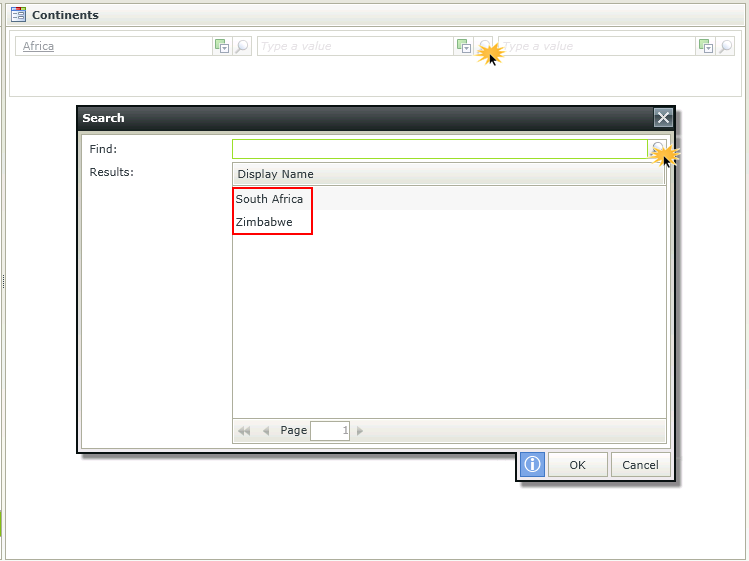
- Select a continent from the Continent picker.
- Click on the search icon of the Country picker and click on the find icon as shown below. Note how the results are filtered to only display countries belonging to the continent selected.
- Select a country and do the same for the City picker. Note how the results are filtered to only display cities belonging to the country selected.