


Topic
This is the second article in a two-part series that explains how to work with data from a repeating section used in a Nintex Form. This article will show you how to display the data using an Assign a task to multiple users action form and in Send an email message bodies with an HTML table. In Part 1, you learned how to capture the repeating section data in XML and prepare it for use in workflow actions.
Assumptions
This article assumes you have read Part 1: Work with repeating data from SharePoint based Nintex Forms to learn how to build necessary collection variables to handle repeating data in your workflow. This article will continue to build upon the expense claim and expense items scenario.
It is also assumed that you know how to work with:
- XML data
- Nintex Automation Cloud collections
- Microsoft SharePoint lists
- Nintex Forms with a repeating section for a SharePoint Online list
- HTML code for building tables
- Branching workflow actions
Instructions
After loading the repeating section control's XML data into the group of collections, the next step is to iterate through the group of collections and build an HTML table for displaying the data.

HTML Table Header Row
Let's look at how to build the HTML table header row by using a text variable in the following steps.
- From the Operations group of actions, drag Create a text string over to the design canvas just below and outside of the Run parallel path action. Give the action a meaningful name for building the table header.
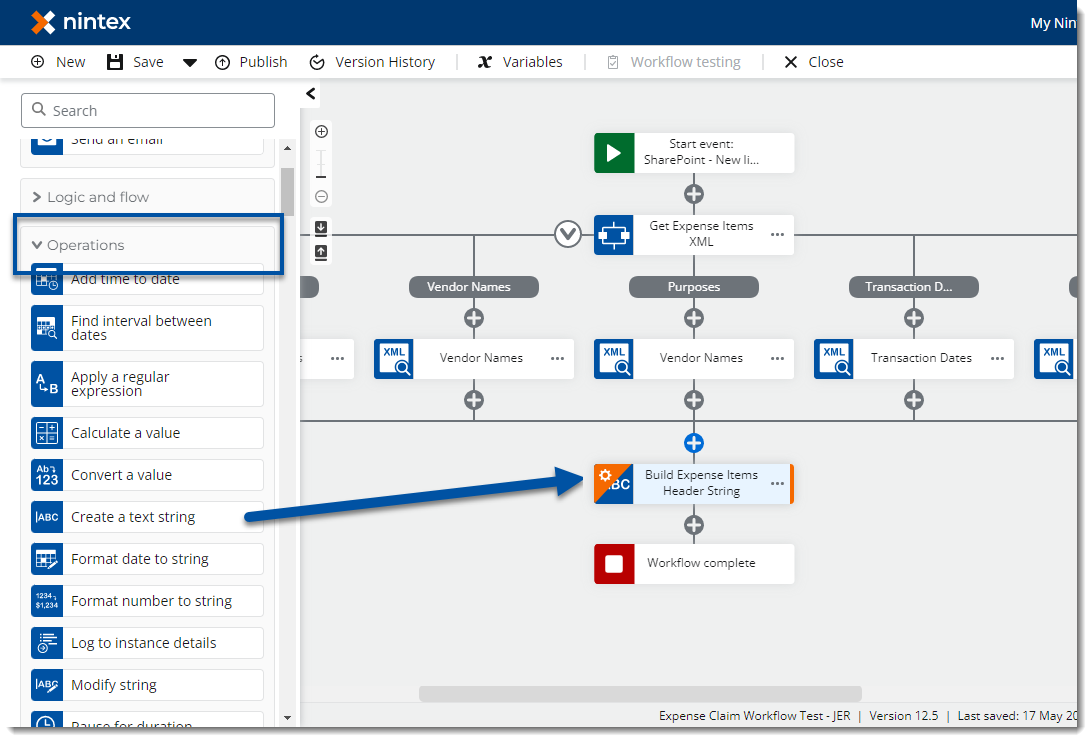
- Insert HTML table code into the String components property and create a Result output text variable. The following example shows code for the opening tag of the table element and a header row. In this example, a variable called "txtExpensesHTML" will hold the string as the workflow builds the table.
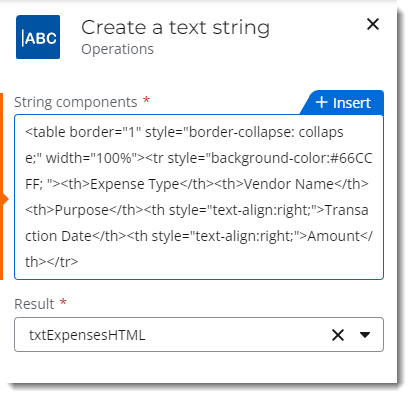
Code Sample
The following HTML code can be used to get you started. Be sure to change the column header titles as per your requirements. The table element will be closed later in the workflow.<table border="1" style="border-collapse: collapse;" width="100%"><tr style="background-color:#66CCFF; "><th>HeaderColumn1</th><th>HeaderColumn2</th><th>HeaderColumn3</th><th style="text-align:right;">HeaderColumn4</th><th style="text-align:right;">HeaderColumn1</th></tr>
Build Additional Rows
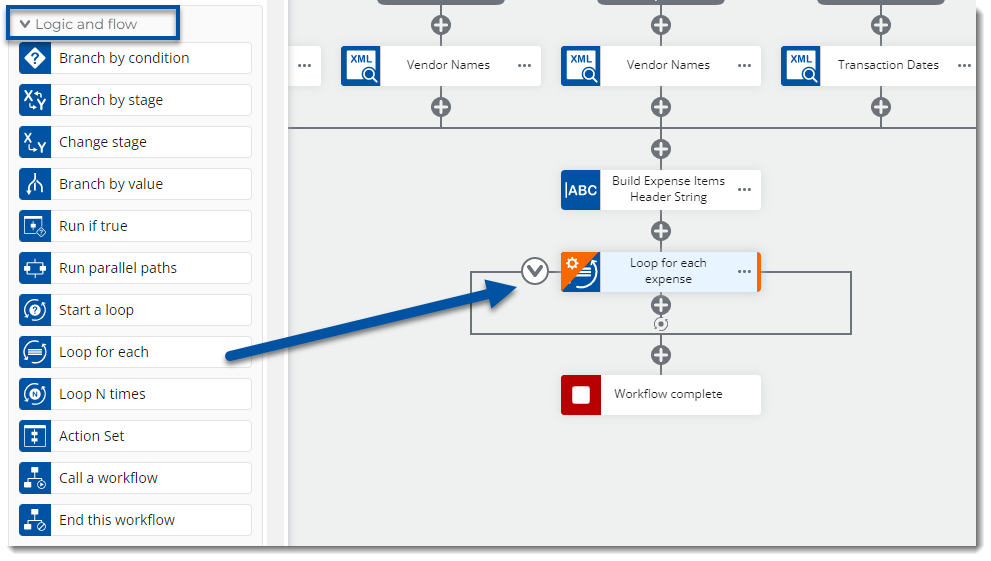
Next, loop through the collections to add data to additional rows in the HTML table by using a Loop for each action.
- From the Logic and Flow group of actions, drag Loop for each over to the canvas and drop it below the Create a text string action. Give it a meaningful name.
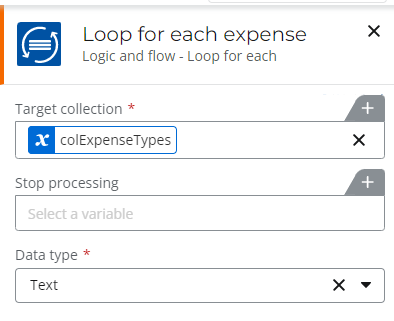
- In Loop for each, Set the Target collection property to one of the collections that was built earlier in the workflow. In the example below, the "colExpenseType" collection variable is the first column to display in the table, so that will be used to count the loop iterations. Data type is set to "Text" for this property. The loop should run through the whole collection, so Stop processing is blank.
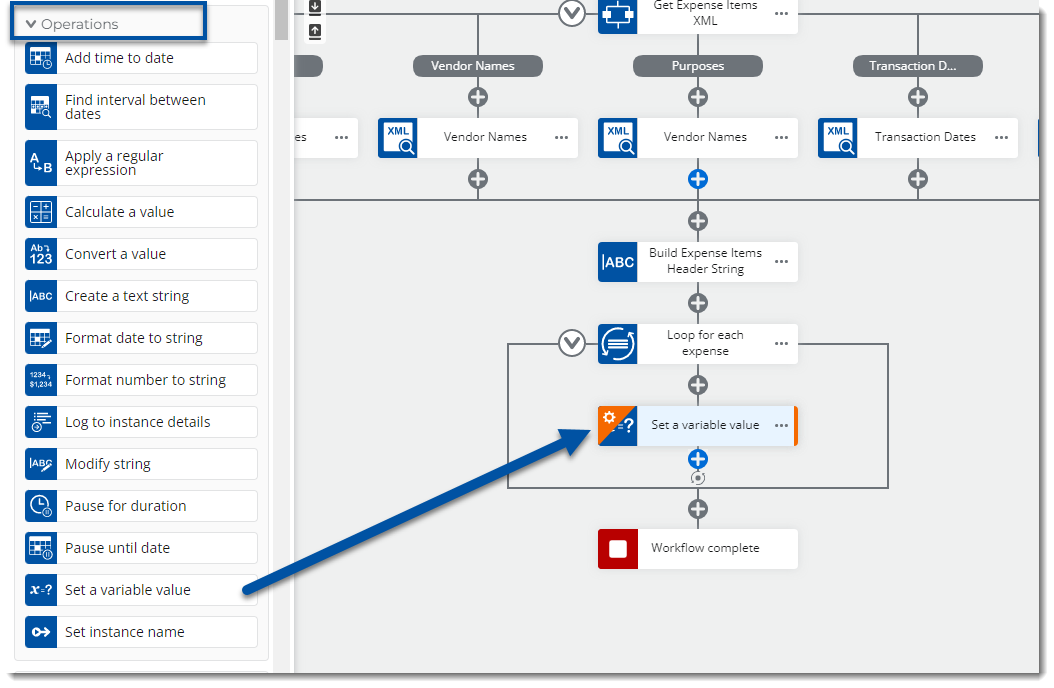
- From the Operations group, drag the Set a variable value action to the design canvas and drop it inside the Loop for each action group. This is needed to capture the current value from the collection being looped upon.
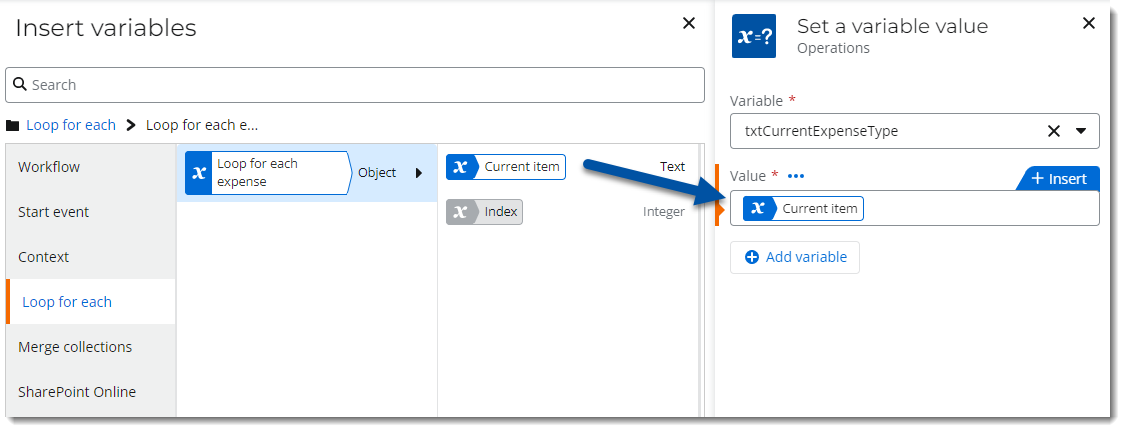
- In Set a variable value, create a text variable to hold the current value for the collection that the Loop for each action is processing through. Set it to the Current item variable from the Loop for each variable list.
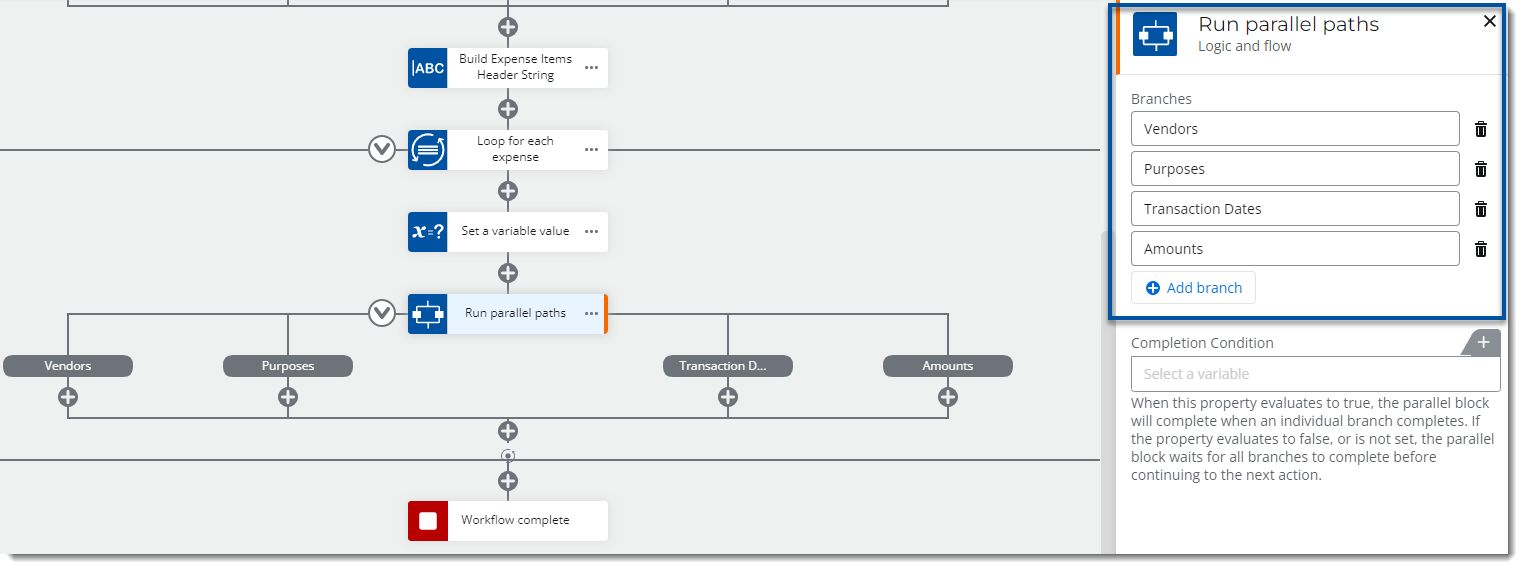
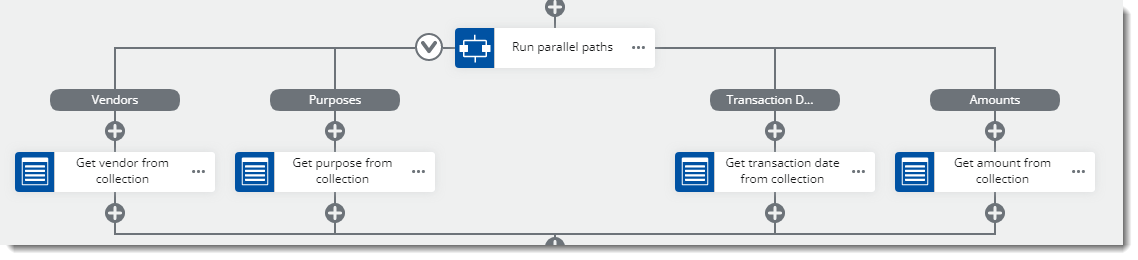
- Add another Run parallel paths action to the canvas just below the Set a variable value action. Create branches for the additional collections for processing. In this example, four more branches are created to get values from each collection.
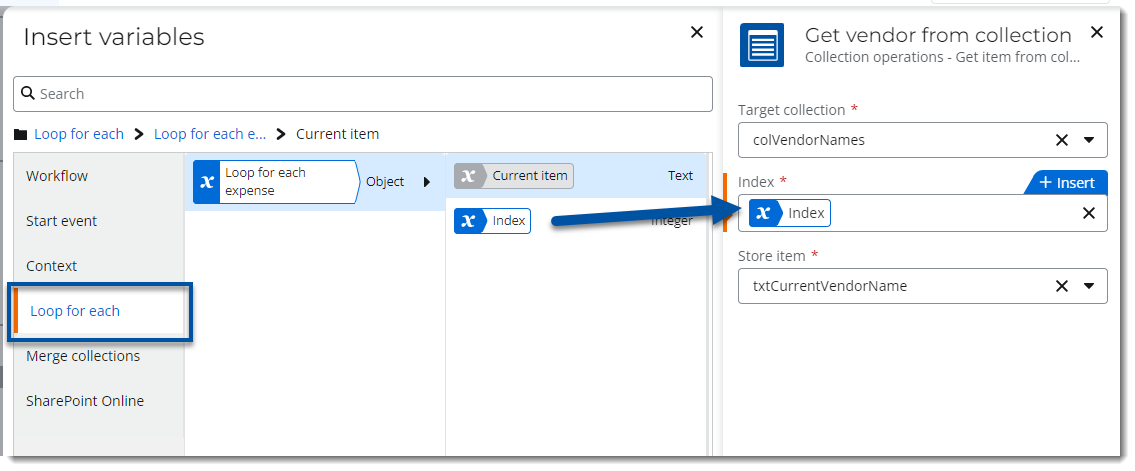
- From the Collection operations group of actions, drag the Get item from collection action over to the first branch in the parallel paths action. Give it a meaningful name based on the collection name you want to access.
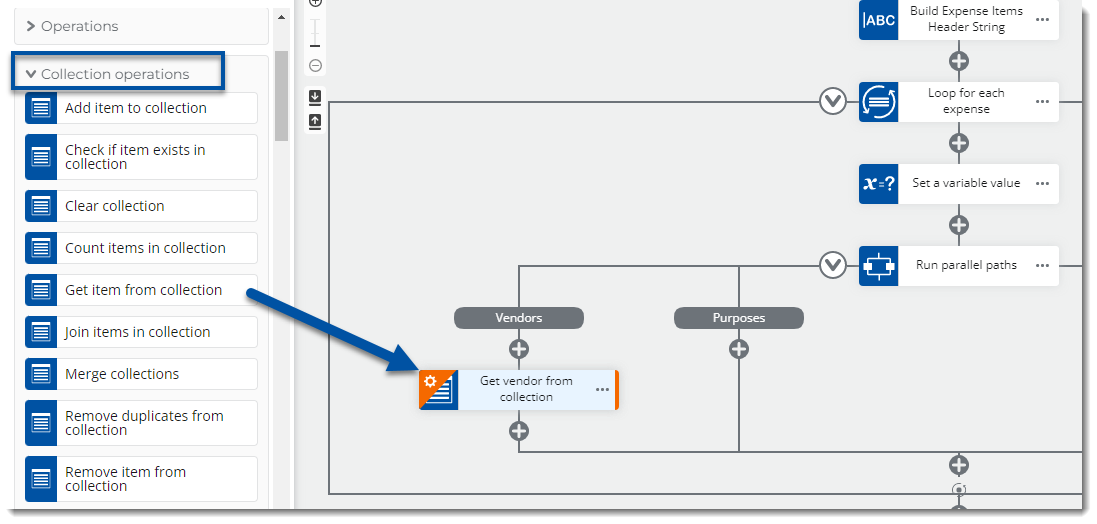
- Set the Target collection property to a desired collection that was created earlier in the workflow. Use the Index variable from the Loop for each variable group, then create a text variable to hold the current value for the Store item property. Name the variable something like "txtCurrentVendor" and be sure to set the variable's type correctly. e.g. Text, Datetime, Decimal.
- Repeat steps 6 and 7 for the other collections needed in the table.
- Add another Create a text string action to the canvas just below the parallel paths grouping but still inside the Loop for each action.
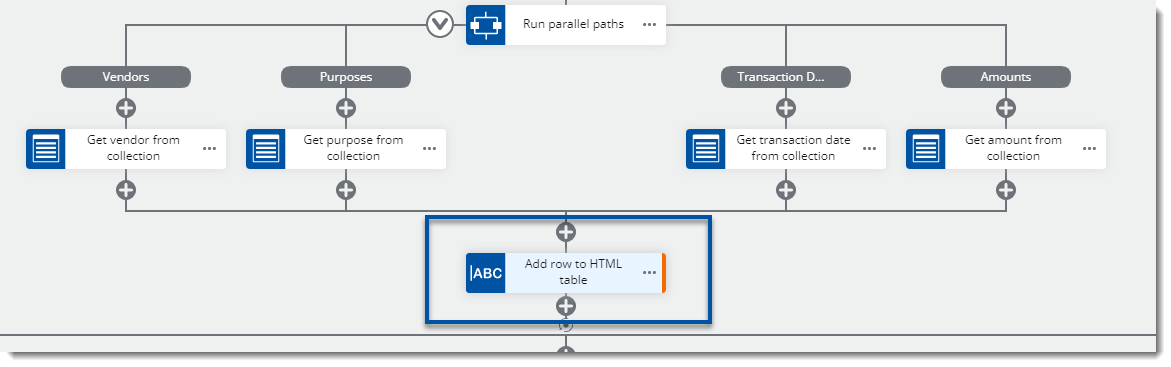
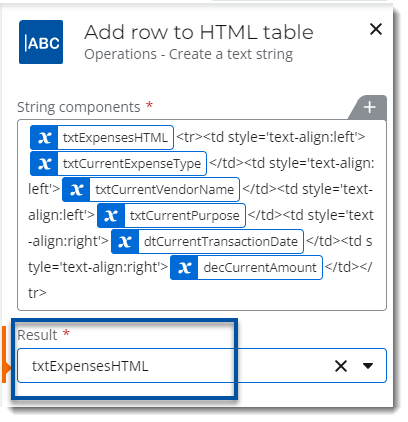
- In the Create a text string action properties, insert the string variable holding the HTML table header code to the String components property. Then add in HTML code after that variable to build a new table row with cells for each column that comes of the parallel path to build the rest of the HTML table. Select the text variables (not the collection variables) for each column that represents the current value in the loop's current iteration.
Code sample
The following HTML code can be used to get you started. You may have more or less columns. Replace "Column1", "Column2", etc. with variables.<tr><td style='text-align:left'>Column1</td><td style='text-align:left'>Column2</td><td style='text-align:left'>Column3</td><td style='text-align:right'>Column4</td><td style='text-align:right'>Column5</td></tr> - Add the HTML table text variable in the Result property. This needs to be done in order to append each new row to the current text stored in the HTML storage variable.
Close HTML Table
Add one more Create a text string action after the Loop for each set of actions. Set the String components value to the HTML table text variable along with a closing "</table>" tag. Then set the Results property to use the HTML text variable to store the text in the HTML table variable.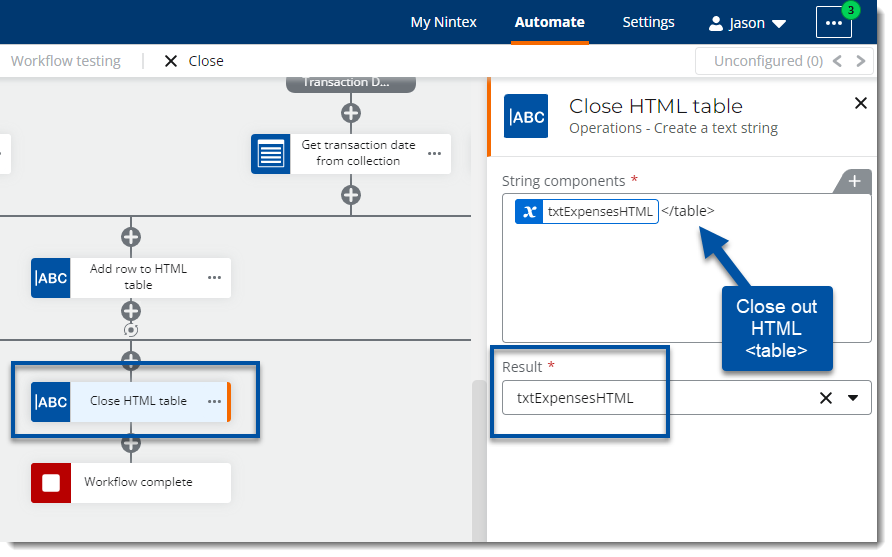
Use HTML Table in Other Actions
The HTML table string variable can now be used in actions like Send an Email or Assign a task to multiple users.
Send an Email
You can insert the text variable anywhere you want it to be positioned in the Message body property.
Example Email with Repeating Section Data

Assign a task to multiple users form
HTML text can be displayed on Nintex Forms by using the Label form control.
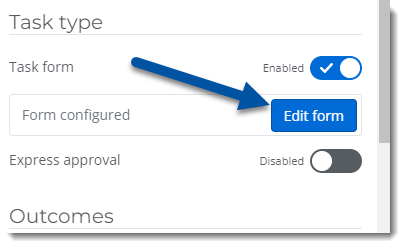
- Open the Task form on the Assign a task to multiple users by clicking the Edit form button from the action's properties pane.
- Drag a label control over to the design canvas for the form. Then add the text variable holding your HTML over from the User Defined variables group.
- Your task form should now display the data from the repeating section.
