Scenario
How to upgrade a Nintex for Office 365 workflow to Nintex Workflow Cloud that uses the action, Office 365 Upload file.
After Upgrade
- Your start event Connection property will need to be updated with an existing connection to SharePoint in your Nintex Workflow Cloud environment.
- The action, Office 365 Upload file, becomes the action, SharePoint Online - Store a file.
- You will need to review and reconfigure this action.
- You will need to include additional actions to get files for storage along with updating field values for that document.
Differences
- The SharePoint Online - Store a file action does not automatically retrieve a file from another document library like the Office 365 Upload file action does. Files you want to store in other document libraries will need to come from file variables that are created within a Nintex Workflow Cloud workflow by actions like SharePoint Online - Get a file or Generate Document.
- Fields to populate with values will be updated by using the action, SharePoint Online - Update items.
- XML will not be supported for configuring fields.
Configuration
In order to get to the desired file to store in another location in Nintex Workflow Cloud, you must use a combination of actions to retrieve the file and store it inside a file variable within the workflow instance. In the following example, a SharePoint Online - Query a list action will be used to get the ID value of a document living inside a document library based on the name of the file. Then a SharePoint Online - Get a file action will be used to load the physical file into a file variable by using the ID value in a filter. After that action gets the file, the SharePoint Online - Store a file action will be used to store the physical file in another document library designated as an archive library.
- Reset the Connection property in your start event to point to an existing SharePoint connection. By doing this first, other SharePoint related actions may automatically use this connection later in the workflow when you reconfigure them.
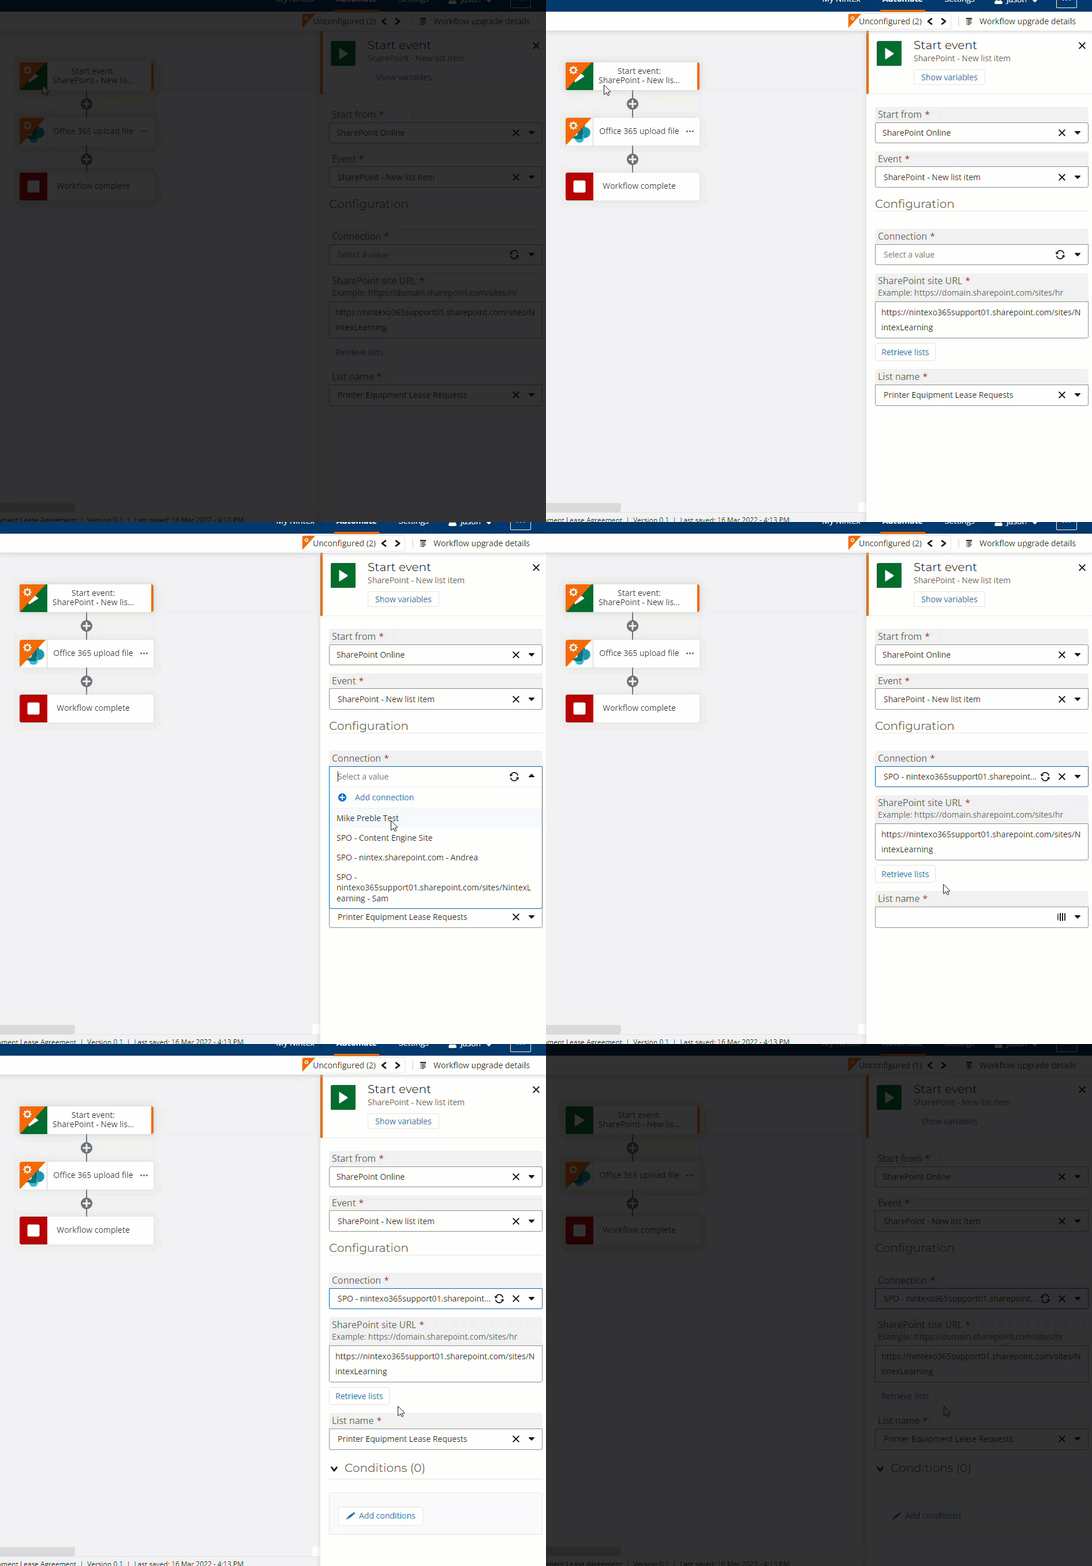
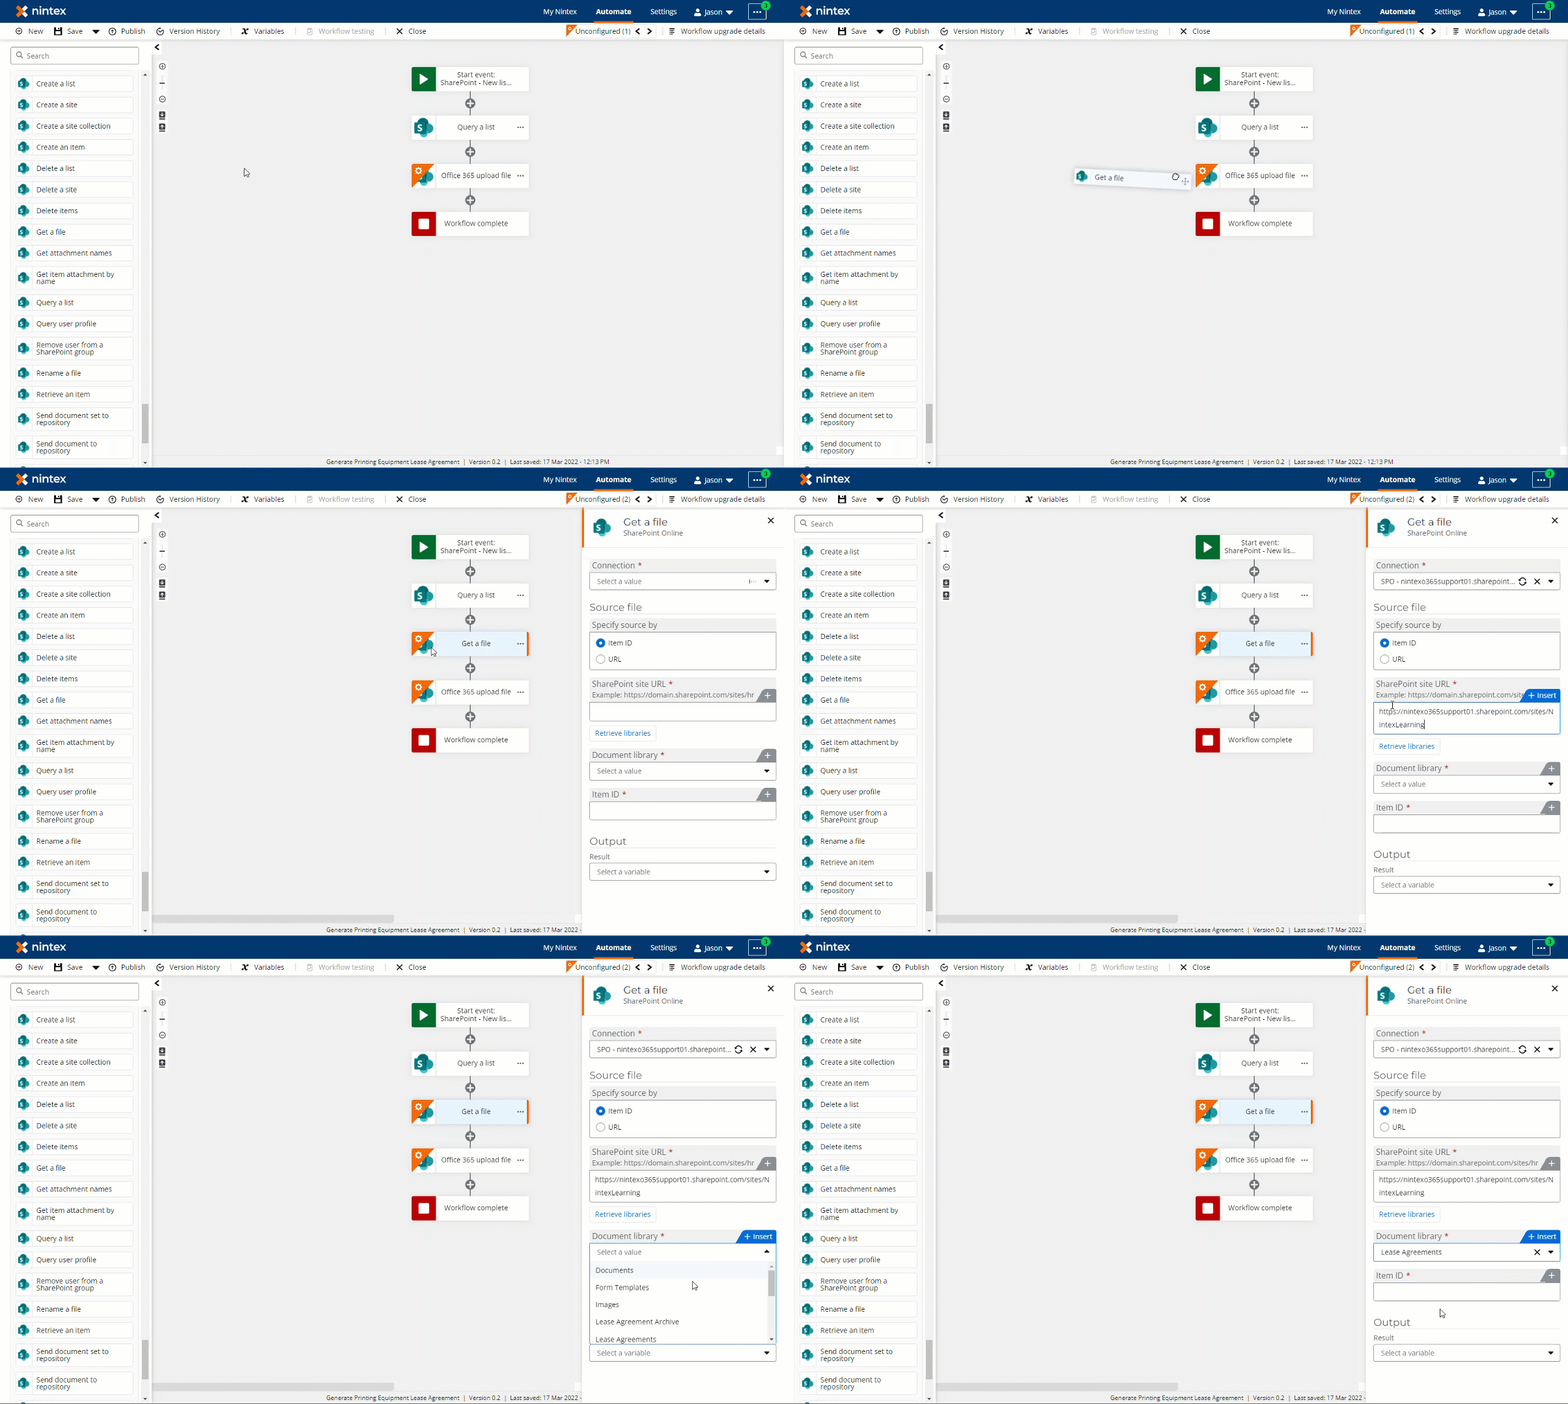
- You will need to get the ID of the document you want to store from SharePoint because the Get a file action needs this value when it runs. You can get this by adding the action, SharePoint Online - Query a list, onto the design canvas. Enter in the SharePoint site URL where your library lives and select the library from the List name property. In the following animation, we're pointing the action to a Lease Agreement document library.
See step 2 below.
- Next, add a filtering Condition where Name equals the name of your document, then create an output result variable to hold the query results. This will give you access to the ID column value in SharePoint for the specific document you want to download. In this example, the item details for a lease agreement document is pulled in by using the Agreement Number value.
See step 3 below.
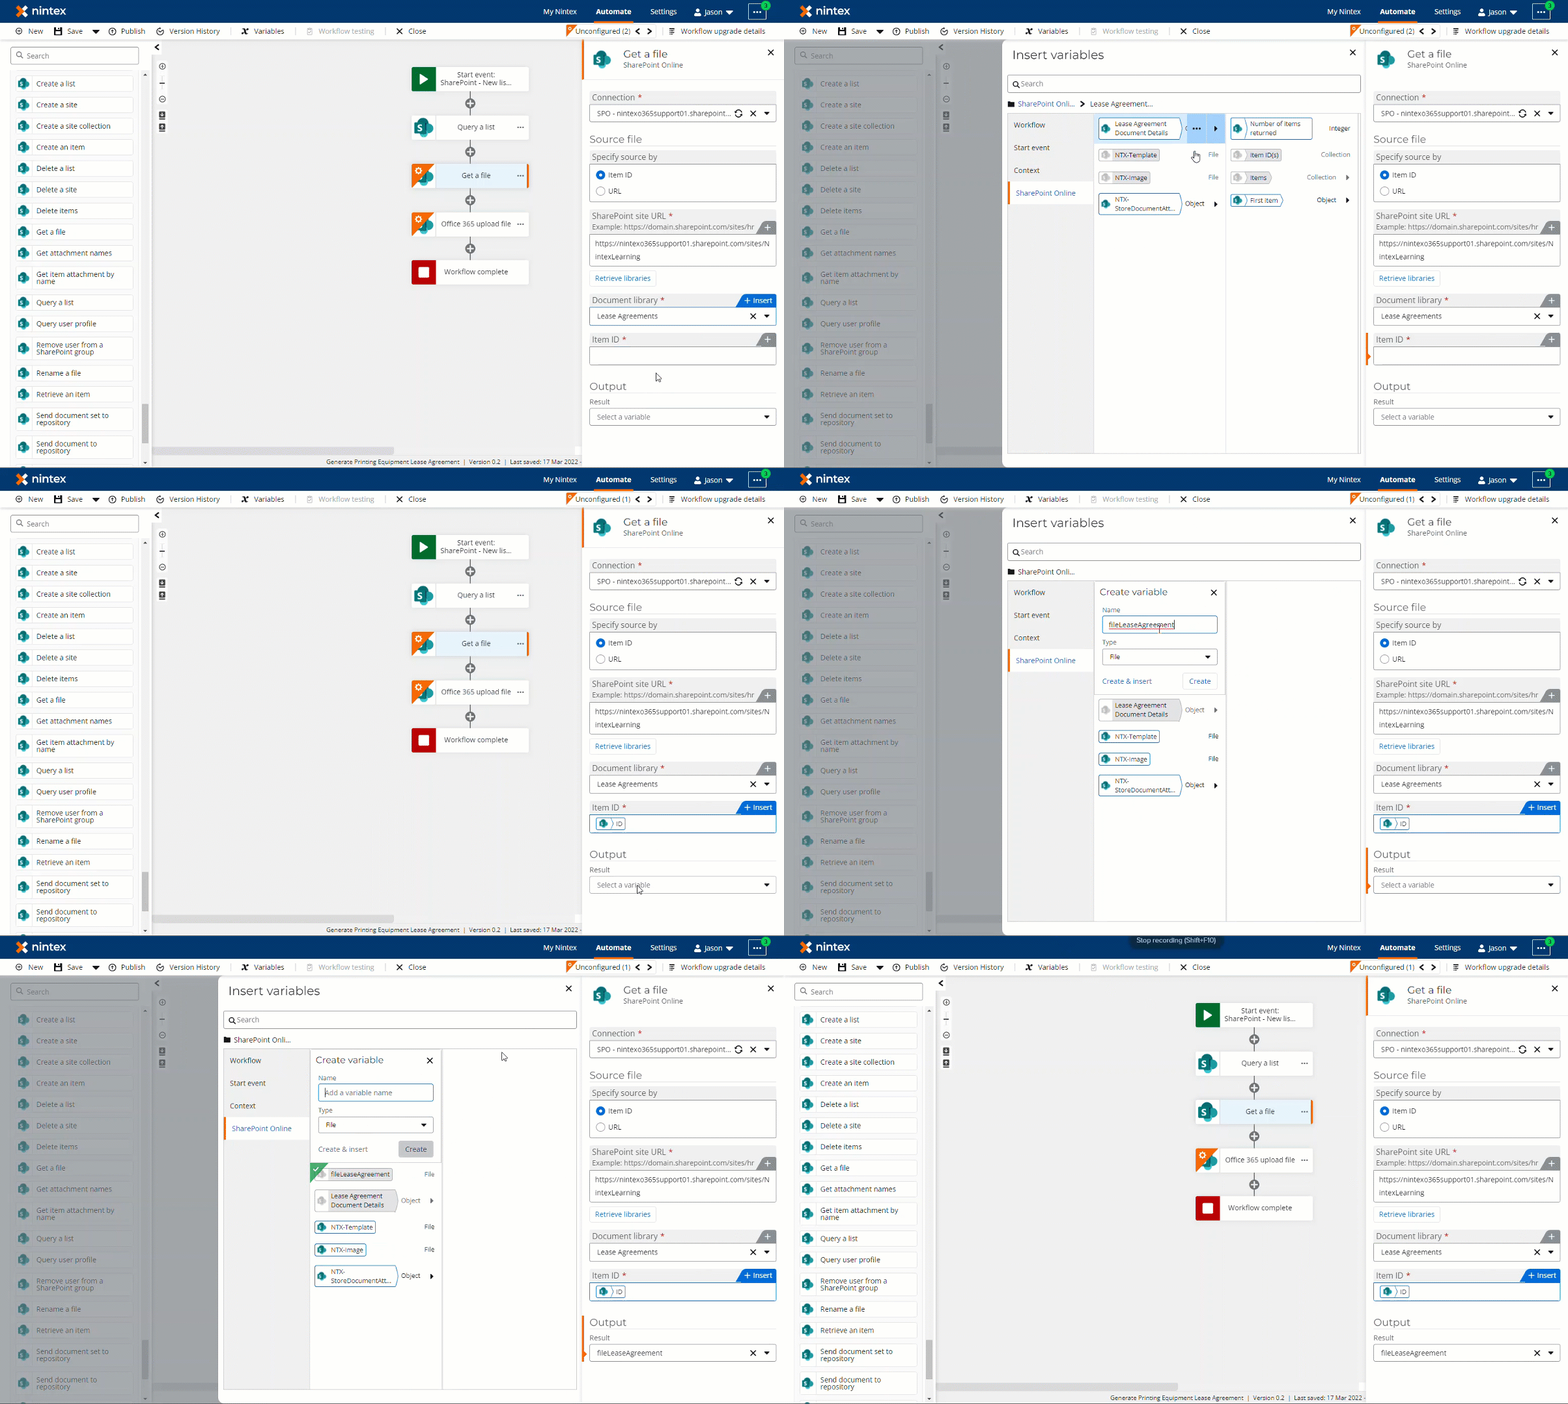
- Next, add the SharePoint Online - Get a file action, configure the Connection property. It may set itself to the connection used in the start event. Set the SharePoint site URL property to point to your desired site, then click the retrieve library button to populate the Document library drop-down list. From there select your desired document library from the list.
- Set the Item ID property to the ID value that comes out of the output variable from the earlier SharePoint Online - Query a list action. Create a result output file variable to store the file in for use later in the workflow. In this example, the SharePoint Online object variable that came from the query action contains the ID we need in the First item object variable. Note, you may also use the URL to the document if you have it available.
- Configure the action, SharePoint Online - Store a file, to add your file to your document library of choice. Enter in the SharePoint site URL and select the desired library where the document will live. In the following example, the Destination location information is configured so that it stores the file in a Lease Agreement Archive library using a Folder path and allowing for overwriting the file.
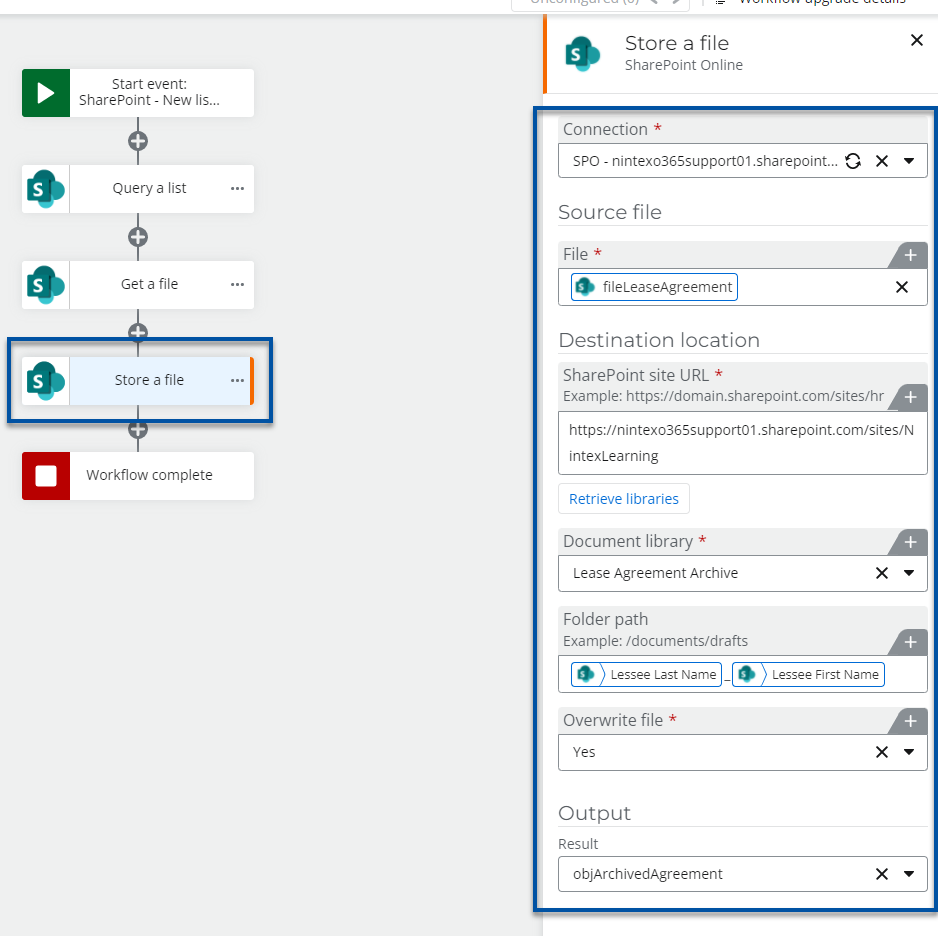
- Notice, the output results variable created in the previous step for this action contains information pointing to the file in the document library by using an object variable. This can be used in actions later on in the workflow such as Log to instance details.
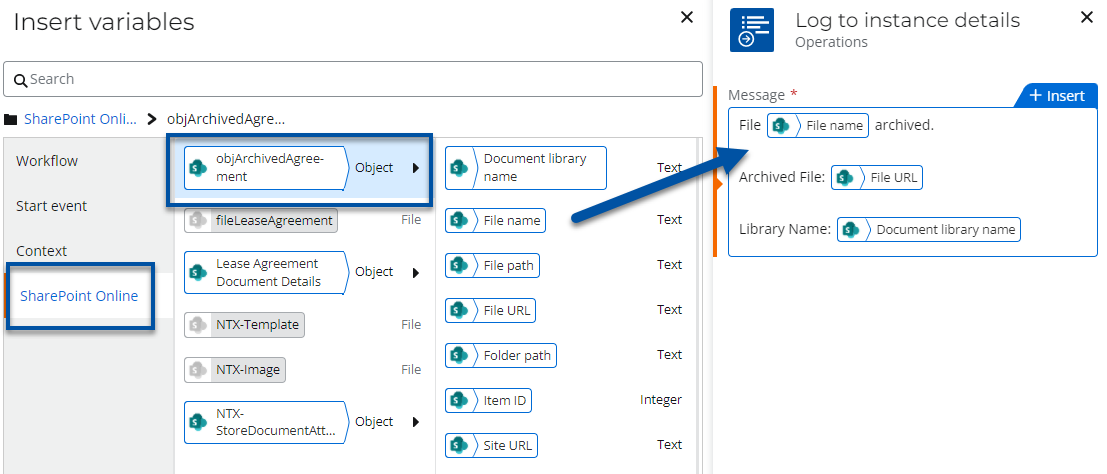
-
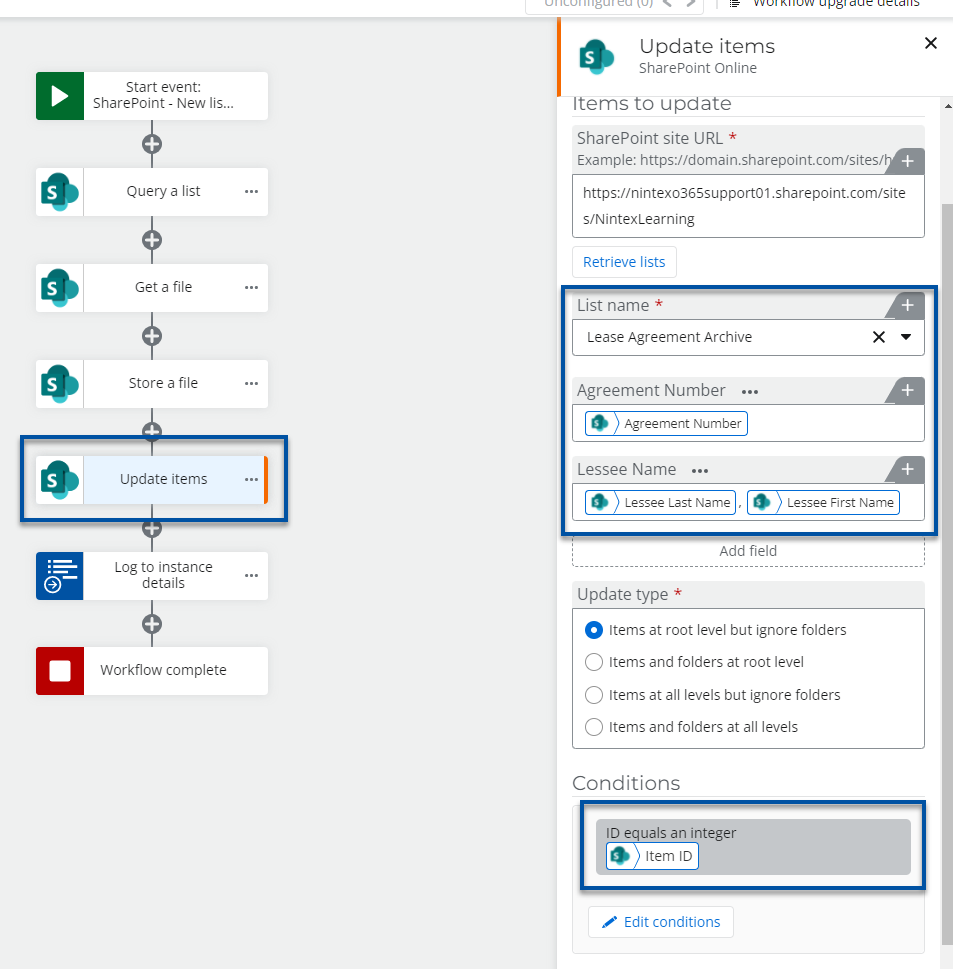
Use the action, SharePoint Online - Update Items, to update column values for the document that was stored. In this example, the Agreement Number and Lessee Name fields are updated by using the Item ID of the stored document in the Condition statement. Add fields as needed and select the Update type property based on if folders should be included.
