Configure AAD and K2 Services for Inbound OAuth
KB002784
PRODUCTThis article is only relevant to the following cumulative updates:
- Nintex K2 Five (5.5) with the March 2022 Cumulative Update
- Nintex K2 Five (5.4) with the March 2022 Cumulative Update
- Nintex K2 Five (5.3) with the January 2022 Cumulative Update
- Nintex K2 Five (5.2) with the June 2022 Cumulative Update
- Nintex K2 blackpearl (4.7) with the April 2022 Cumulative Update
If you have installed one of these cumulative updates, and intend to upgrade your system to either K2 Five (5.4) or (5.5), you must only use one of these product builds:
Using any other product builds will render your K2 installation unusable.
This article explains how to configure your K2 environment to use inbound OAuth tokens for online apps to retrieve workflow and SmartObject data from K2. It is recommended that you use OAuth instead of basic authentication when calling the K2 Workflow REST or SmartObject Data APIs from online apps (such as Microsoft Flow or your own custom app) because OAuth is more flexible, more secure, and automatically works with Multi-Factor Authentication (MFA).
Before you begin, review the terms "Inbound OAuth" and "Outbound OAuth" to determine what configuration is required for your needs. These terms refer to the direction that OAuth tokens are flowing, and the direction is described from the perspective of the K2 server.
- Inbound OAuth: this means 'incoming' integration where third-party systems need to interact with K2 APIs. Examples include custom applications that need to start workflows, retrieve and complete workflow tasks, or execute SmartObject methods via K2 APIs. In this scenario, the bearer token is verified and used by K2 to authorize the incoming request. These incoming tokens are not cached by K2. This article describes how to set up and use inbound OAuth.
- Outbound OAuth: this means 'outgoing' integration where K2 needs to interact with other systems through SmartObjects, and the underlying Service Instance for the SmartObject is configured to use OAuth authentication. In this scenario, K2 acts on behalf of an AAD user using Refresh Tokens, issued by AAD (or some other identity provider) and cached by K2. Examples include when K2 needs to interact with a third-party service such as SharePoint, Exchange, and CRM and pass through the OAuth credentials of a connected user. For more information about outbound OAuth token flow, see Outbound Authorization and OAuth in K2.
Configuring your environment to use inbound OAuth involves the following steps:
- If AAD is not already configured as a user manager in your K2 environment, set that up first. If you are a K2 Cloud customer, you already have AAD configured and you do not need to perform this step. Step 1: Using AAD as a User Manager in K2
- Add the K2 API permission scope to your AAD app or apps that need to connect to K2. If you're a K2 Cloud customer, you already have apps in your AAD tenant, but you must still configure your AAD apps with the K2 API permission scope. Step 2: Add the K2 API permission scope to your AAD apps
- If the Bearer Token OAuth resource is not already configured in K2 for your AAD app, use Step 3: Configure the Bearer Token OAuth resource in K2 to configure it.
- Enable the APIs. Step 4: Enable the relevant K2 API
- Integrate a third-party app such as Microsoft Flow with K2, or write code that uses OAuth to authenticate with the K2 Workflow REST API or the SmartObject OData service. Step 5: Using OAuth
Configuration Steps
Use these steps to set up an incoming OAuth token flow.
Step 1: Using AAD as a User Manager in K2
This step is only necessary for K2 Five customers. If you have integrated your K2 Five environment with SharePoint Online using the K2 for SharePoint app, this configuration is done for you automatically. If you do not use SharePoint Online, you must manually configure K2 to integrate with Azure Active Directory. See Manually Configure K2 for Azure Active Directory (AAD) topic in the Installation and Configuration Guide for instructions on configuring AAD as a user manager in K2.
Step 2: Add the K2 API permission scope to your AAD apps
Add the K2 API permission scope to your Azure AD apps. If you configured AAD integration manually, add this permission to your custom AAD app.
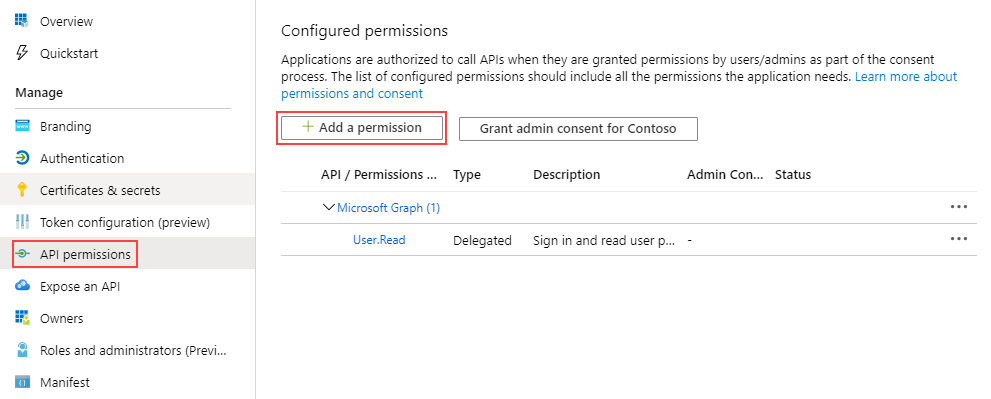
- Open the AAD app that you're using to retrieve a token for the K2 API resource and click API permissions.
- Click Add a permission
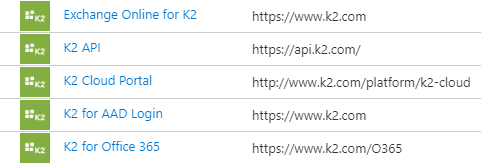
- Click APIs my organization uses and search for K2 API:

- Select the K2 API from the list. Note that you may see K2 API App or other K2-related permission scopes in this list. Select only the K2 API permission scope.
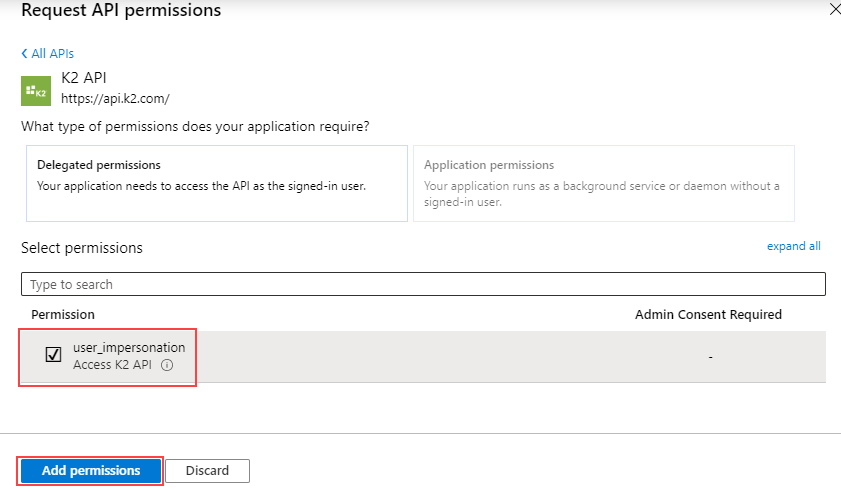
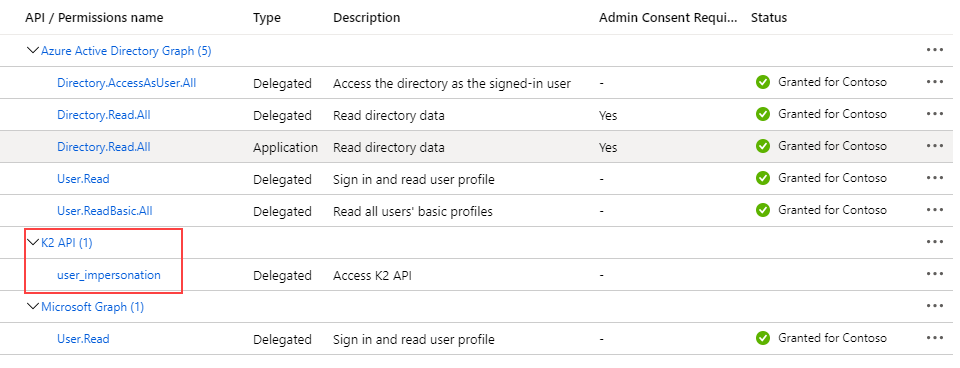
- Under the Select permissions section, select Access K2 API.
- Click Add permissions.
- You see the K2 API listed in the list of permission scopes.
- Click the Grant admin consent for [tenant] button so that your users will not be prompted to consent for the K2 API app.
- Add a Client Secret to identify this resource when you configure your client. In your AAD tenant, click Certificates & secrets under the Manage menu for your app. Then click New client secret under the Client secrets section. Type a Description for the key and select an expiry time. Click Add to generate a Key Value. The Key Value is your Client Secret - copy it for when you configure your client.
 You cannot retrieve this value once you leave the blade so make sure you copy and store it now.
 - Repeat these steps for any additional AAD apps that need to call K2 services.
Step 3: Configure the Bearer Token OAuth resource in K2
The K2 API permission scope uses the URL https://api.k2.com/ which is, in turn, linked to the Bearer Token OAuth resource audience as shown here. This link allows K2 to read the incoming token and grant access to the API.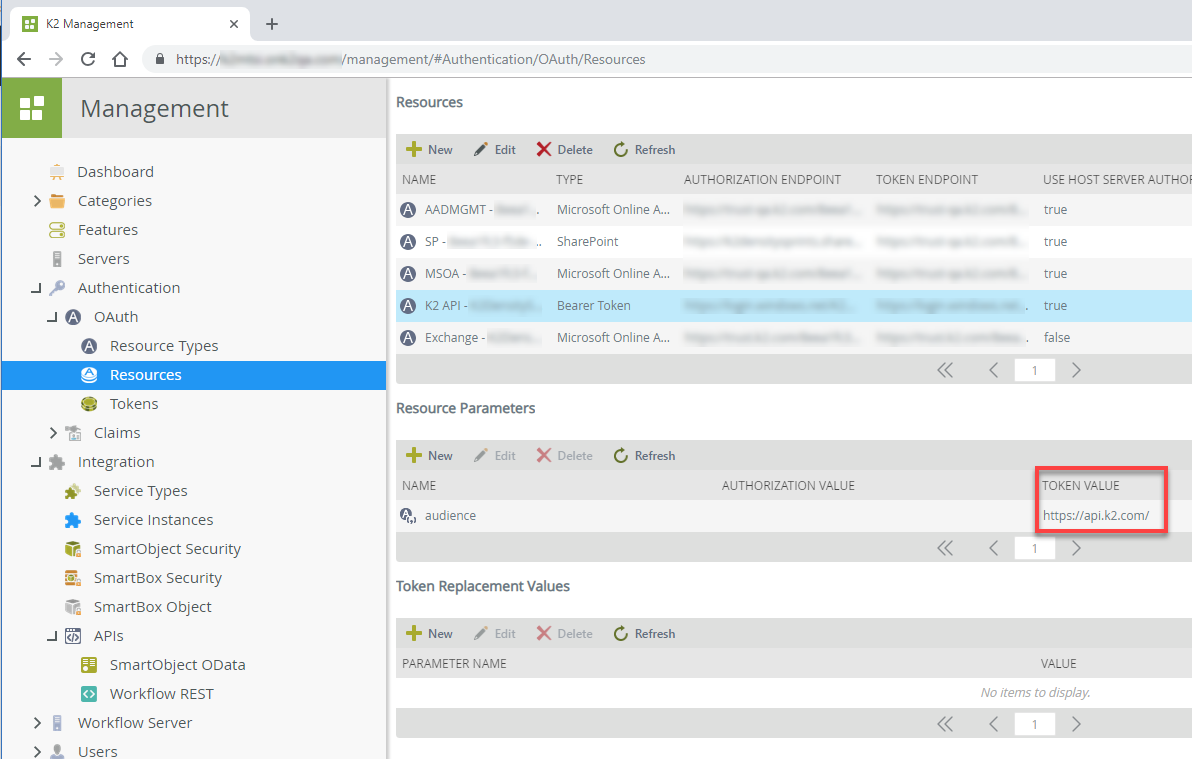
If your environment does not have the Bearer Token OAuth resource type with the https://api.k2.com audience token, create it manually by doing the following.
- Click on New resource and enter a name, for example K2 API.
- Select Bearer Token as the resource type in the drop-down box.
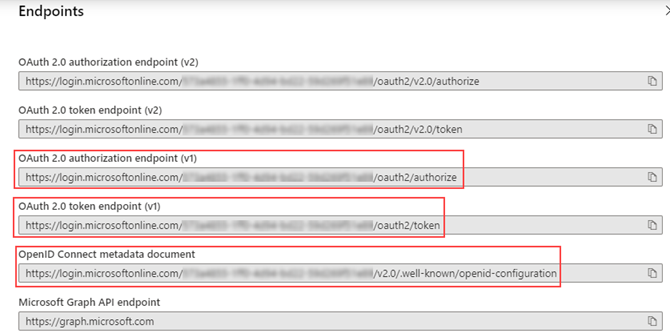
- Enter the Authorization Endpoint, this is the OAuth 2.0 authorization endpoint (v1) value for your app in AAD. For example: https://login.microsoftonline.com/{Tenant_ID}/oauth2/authorize
You can get the endpoints for your custom AAD app by clicking Overview and selecting Endpoints like in this image.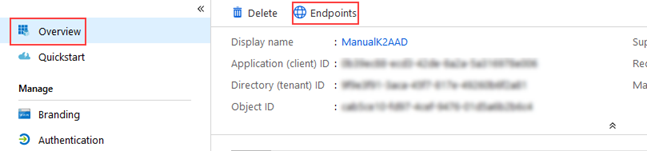
- Enter the Token Endpoint, this is the OAuth 2.0 token endpoint (v1) for your app in AAD. For example: https://login.microsoftonline.com/{Tenant_ID}/oauth2/token
- Leave the Refresh Token Endpoint field empty.
- Enter the Metadata Endpoint. This is the OpenID Connect metadata document endpoint for your app in AAD. As K2 uses v1 of the endpoint, ensure you delete the v2.0/ section when you copy and paste the endpoint. For example: https://login.microsoftonline.com/{Teanant_ID}/.well-known/openid-configuration
- Leave the Use Host Server Authorization Endpoint checkbox unchecked and click OK.
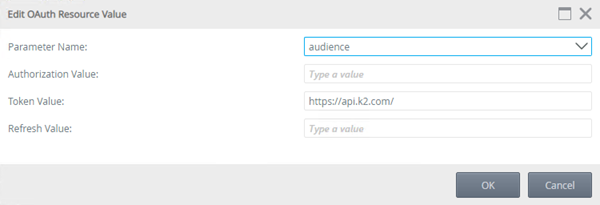
- Select your new resource and select audience in the Resource Parameters section and click New.
- Select audience in the Parameter Name drop-down and enter https://api.k2.com/ as the Token Value and click OK to finish.
- Reset IIS by performing an iisreset from a command prompt.
Step 4: Enable the relevant K2 API
If you have not already done so, use the K2 Management Site to enable the API you want to integrate with. See the K2 Five Product Documentation or K2 Cloud Product Documentation for more on enabling the Workflow and SmartObject REST APIs. Once you have enabled the relevant APIs, you should set up AAD consent.
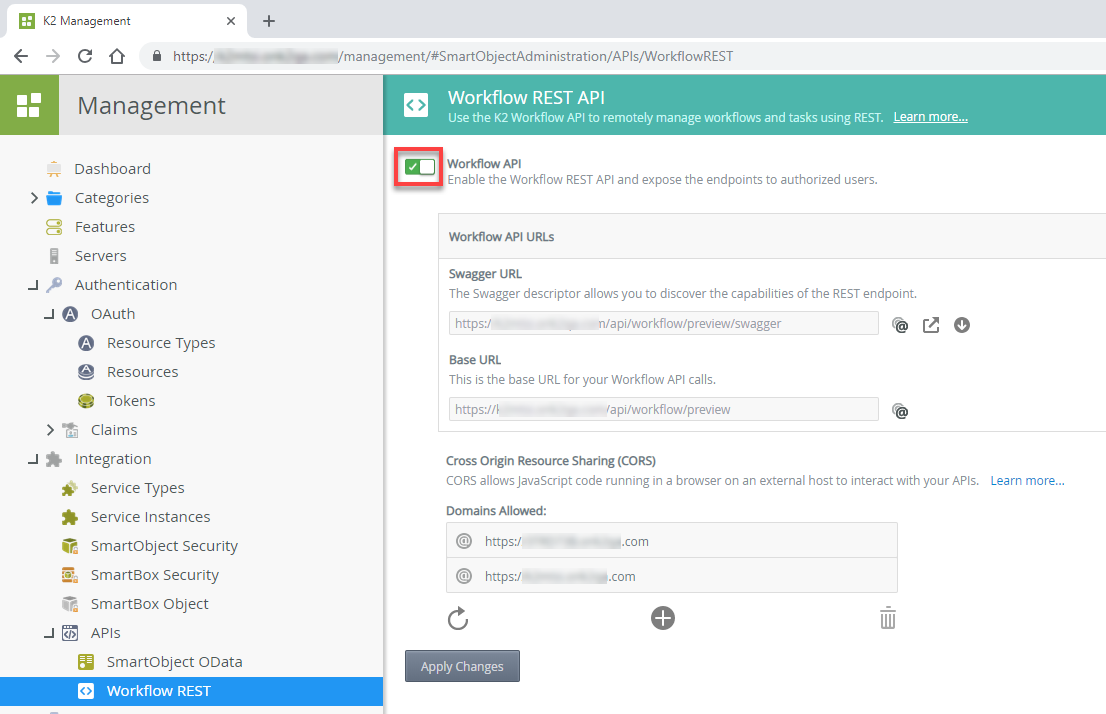
To enable the Workflow REST API:
- Open the K2 Management site
- Go to Integration > APIs > Workflow REST
- Click the Workflow API slider to turn on the service as shown here:
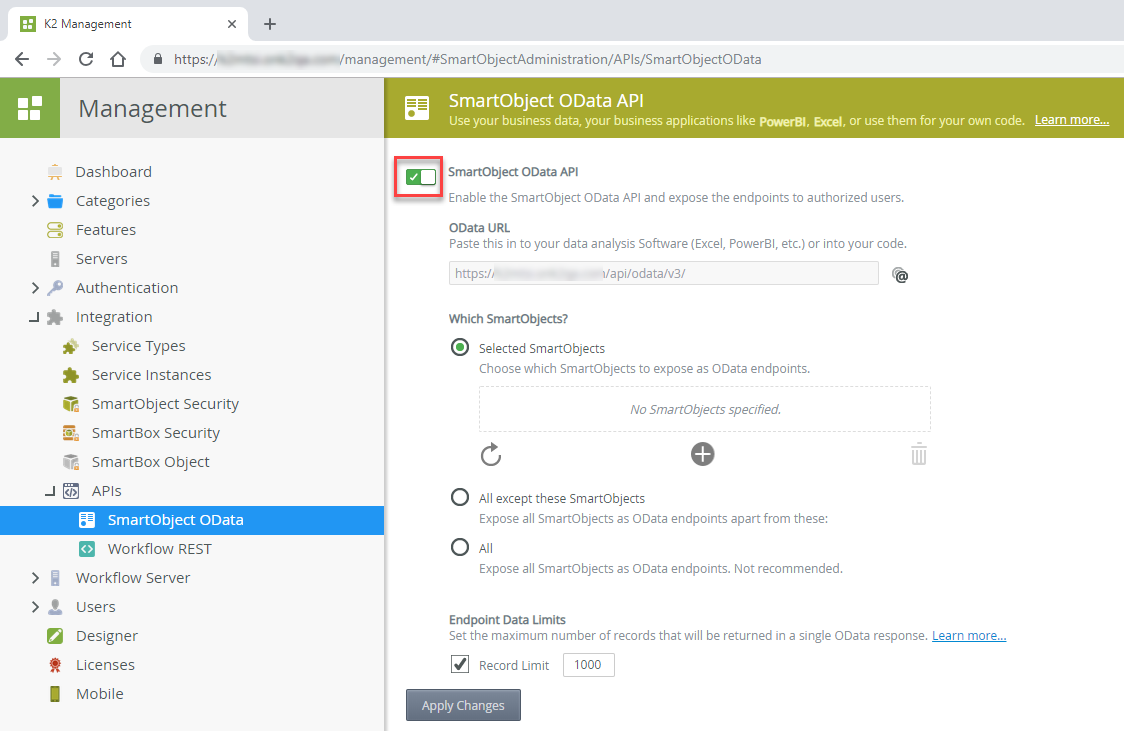
To enable the SmartObject OData API:
- Open the K2 Management site
- Go to Integration > APIs > SmartObject OData
- Click the SmartObject OData API slider to turn on the service as shown here, and configure the service to expose the SmartObjects you want to interact with:
To set up AAD consent:
https://login.microsoftonline.com/{YourTenantID}/oauth2/authorize?client_id=57928c92-7074-45f8-b89e-fe2556ac187f&response_type=code&redirect_uri=https://help.nintex.com/en-US/HELP_DOC/AADpages/AADSuccess.html&resource=https://api.k2.com&prompt=admin_consentIf you did not configure AAD manually, continue with the steps below.
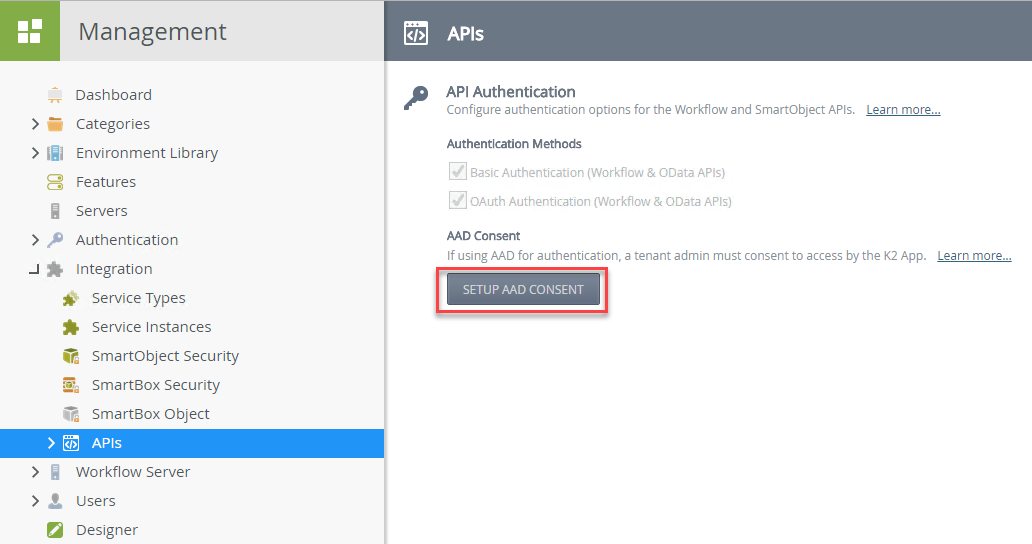
- Open the K2 Management site
- Go to Integration > APIs
- Click on the SETUP AAD CONSENT button to run through the wizard to grant consent for the APIs to access AAD. You be an AAD Tenant Admin to grant consent.
Step 5: Using OAuth
Once your AAD apps include permission to access the K2 API and your K2 environment is configured to validate OAuth tokens, you can integrate with online applications like Microsoft Flow or write code to interact with the K2 services. See the following links for more information:
- Integration with Microsoft Flow
- K2 Five Developer Reference: K2 Five Workflow REST API code samples
K2 Cloud Developer Reference: K2 Cloud Workflow REST API code samples
If you're using Postman to test your configuration, you must add ?resource=https://api.k2.com/ to the end of your Auth URL in the Get New Access Token dialog as shown here: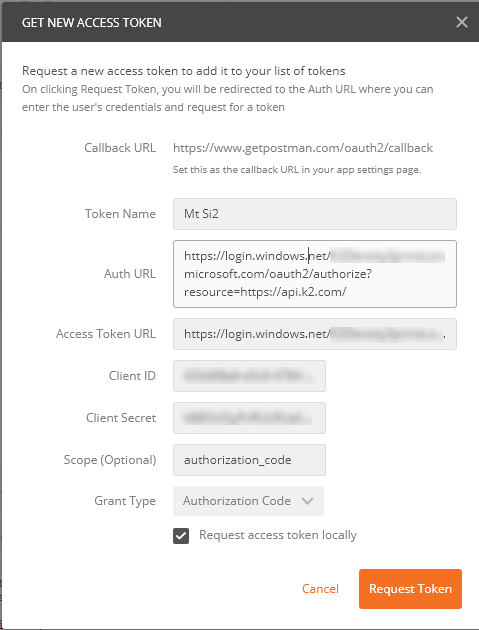
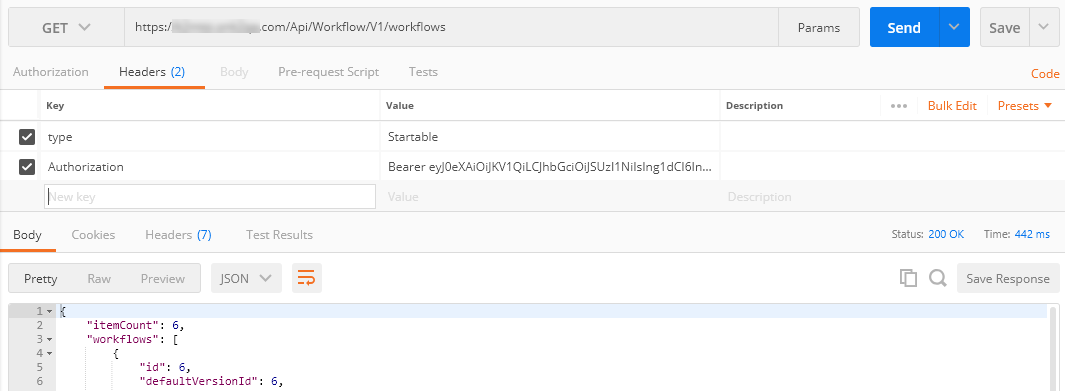
Once you get the token, use it to make a GET call to the workflows endpoint as shown here. This retrieves a list of the workflows deployed to your K2 server and is a good test to see if the K2 server is handling the incoming OAuth token properly. For more information about using Postman, see How To: Use Postman to Test the Workflow REST API using OAuth.