The Users section is used to add users and edit their rights.
Create a new user
Create a new user by clicking on the New icon, and entering the basic elements required for access to the system:
- Click new to assign the following for the user:
- Enter a user name
- AssureSign standard usernames must be an email address.
- Usernames may also use comments in the email address as long as the comment is the last portion before the @ character. For example, "localpart(comment)@domain". The comment portion is stripped out for any email notifications. This form allows multiple unique user accounts to share an email account.
- Select from the drop down list to assign a role. This assigns as a starting point the configurations present in a role that you may have added for ease of user maintenance. When a specific right is set to "Inherit" it means it will use the role's settings. Changing the setting in the role will change the setting for all users that inherit that setting.
- Enter the first & last name of the user
- Enter a new password & confirm the password (enter up to 16 characters) or you may select to generate a new random password for the user automatically (which should only be done when also selecting 'send user login information via email')
- Require password change after next login (This will force the user to change their temporary password upon first successful login to AssureSign.)
- Send login information to user via email (This will send a one-time email to the specified user email address that contains login information such as URL, username, and password).
- If your account is configured for allowing users in a large organization to access various subaccounts, "Allow access to different accounts" may be available.
- Click "User Accounts" (Floating User Account - account(s) that the user has access to)
- As a starting point, it is possible to select to "Allow All" or "Deny All" settings for a user. Additionally, "Inherit All" will use the settings for the role to which a user has been assigned.
- If the rights or access levels should differ for the user in certain areas, click on the radio button for each option for Allow, Deny or Inherit within the following sections:
- Document Templates
- Documents
- Reporting
- Site Administration
- For a review of the security implications of certain settings, see User Creation Security Considerations
- Enter a user name
Note: If your account is configured for "Per Seat" billing and you have reached your user limit, you will receive a message to use the provided "Contact Us” box to request more seats.
Floating User: A floating user is a user configured to operate within multiple accounts with administration access to all the accounts or the ability to send documents on behalf of multiple accounts. The accounts where floating users may be used must be configured with the setting "Multiple Account Access for Users", and a user who may "float" must have "Allow access to different accounts" turned on.
Understanding Multiple Account Access for Floating Users:
- The email address / username for each "linked user" will match the username of the primary "floating user".
- Each account the linked user has access to can be assigned to a role and be given explicit permissions (irrespective of the role or permissions granted to that user within the original account).
- Changes made to the email address, first name, last name, or password of the primary floating user will be automatically propagated to linked users.
- Deleting or inactivating the primary floating user will propagate to linked users. Deleting or inactivating a linked user will only affect that particular linked user.
- A floating user will be able to log in using the credentials provided in their root account. Once logged in they will have the ability to switch account contexts (via a menu dropdown). Switching contexts will essentially re-log the user in using the context of the selected linked user.
- When editing a linked user in an account, any changes to common properties such as the first name, last name, and password properties will propagate to the parent floating user as well as any other linked users. However, it is still possible to set the role and individual user permissions as well as to delete or inactivate the linked user (without affecting the parent floating user or other linked users) from within this context.
Edit an existing user
Click edit and enter the value of the field you wish to modify for the user name (username must be a valid email address) first & last name, or password. (You can type over the existing value or highlight and delete it to enter the new value). If you want to change the access for the user within a specific area, locate the section using the scroll bar and click on the radio button to select the access level (allow, deny, or inherit (allow)).
To modify a standard users access to multiple accounts check "Allow access to different accounts". When the option is selected, the User Accounts link becomes visible. Clicking on the link brings up a modal wizard dialog that can be used for giving the user access to additional accounts. The account selection dialog includes a list of all of the accounts/roles the floating user has been assigned to.
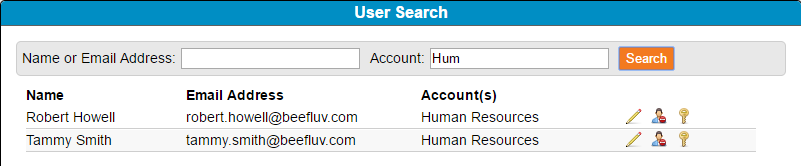
Search for a user
Select the Search tool.

- Enter the name (first or last name) or user name
- You may also enter part of the account name, alone or with part or all of the user's name
- Click Search
Use the tools to edit, enable, disable, or unlock a found user.