


Introduction:
To start the development of the first thing that we need to do is to plan/design the workflow of the process. For reference, you can take a short look at the introduction of the Use Case, the relevant excel data can also be found in this article.The Use case is about sending the report of the stock prices. The idea is the company has a number of clients for whom they need to send stock price reports several times on a daily basis. This is a time-consuming and mundane process that can be automated. In this use case, the main applications will be www.moneycontrol.com, Excel, and outlook.
Workflow Design:
Before starting the actual development, it's important to have the Design Document of the process. The Desing document should describe how the Wizard looks like, it should contain the trigger option, key decisions, folder orders, the process sequence, etc. The below diagram describes our Design document of the Wizard.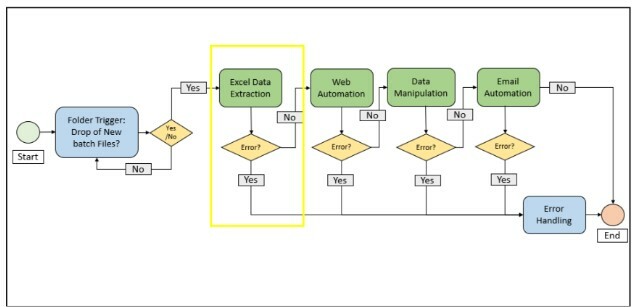
Important to mention that each block like the one highlighted in yellow can have its detailed sequence design, as in many cases the same exception handling will not apply for the whole wizard, you may need to use a specific error handling for the Excel part or another one for the Web part.
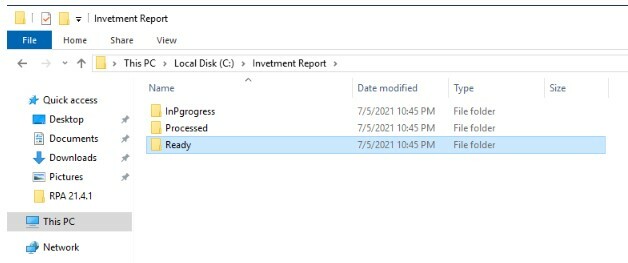
As a part of workflow design, we will have specific folders for storing the files, as a best practice we will use three folders:
- Ready - which is being monitored by the trigger and where the new batch files will be dropped.
- InProgress - where the files will be moved whenever the Robot works on that files
- Progressed - where all processed files will be moved by the robot.
As a best practice, it's always better to keep the folder paths identical in all environments, such as Dev, Test, and Production to make the changes minimal when moving the wizard from one environment to another.
Creating Project in Kryon Studio:
Once we have the process design and sequence design ready, we can start the project creation in Kryon Studio. To do that we need to access Kryon Studio and navigate to the respective catalog, select or create a new category.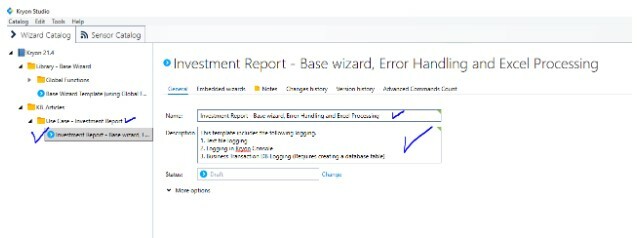
In our example as we are going to use the Base Wizard Template, we don't need to create a new empty Wizard, instead, we need to duplicate the Base Wizard Template to our category and give it a new name in our case it would be "Investment Report - Base wizard, Error Handling and Excel Processing".
Integration of Base Wizard Template:
In this use case, we are going to integrate the Base Wizard Template. In this article, I will not cover how to integrate the base wizard as there is a detailed description and documentation of the usage of the Base Wizard Template. However, it's important to mention that in our example we will use the latest version of the Base Wizard Template. If you use the trial version of Kryon or an earlier version make sure to download the template that is compatible with your Kryon Studio. There are two Base Wizard Templates, for RPA versions before 20.9 and RPA version after higher than 20.9.In short, the use of the Base Wizard template gives us the following benefits:
- Consistent error message updated in custom logs either in CSV file, DB table or under the Kryon Console
- Step in which error occurs
- Error code and category
- Screenshot of the window where the error occurred
- Centralized End Step
- Global Exception handling
For more details refer to the following article.
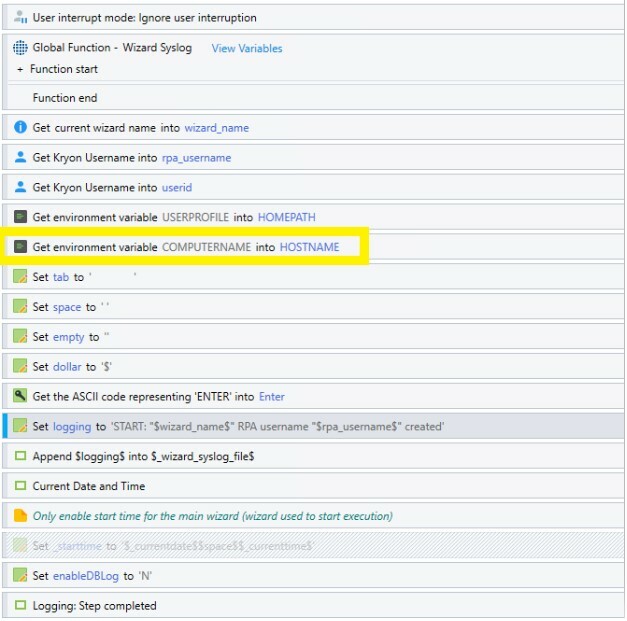
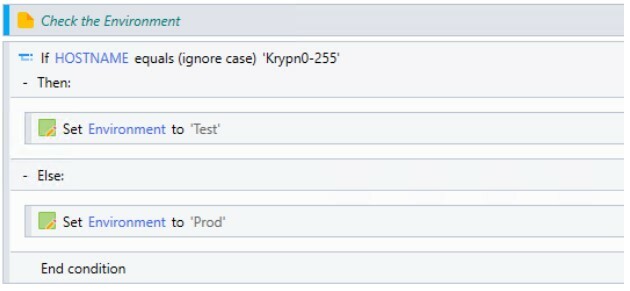
If you already are familiar with Base Wizard Template, then you know that with this template our new steps need to be added between the two steps of the Template. Many important action items are taken care of already, such as setting up the default variables, custom logging, etc. However, I want you to pay attention to the Advanced Command (AC) called "Get environment variable" with this variable we can make a decision on which environment the wizard is running therefore use the respective directories and web pages, etc.
As it's possible that not only one file will be dropped to the Ready folder, in the fourth step, we will use "Get Files" AC to retrieve all the file names dropped to the "Ready folder". When using this AC, we will be using a unique delimiter to make sure that this won't appear in the file names. This is important as we will get a List value separated by the delimiters and this value will contain all the file names. Later on, by splitting this value with the highlighted delimiter we will start extracting the data from the respective excel files.
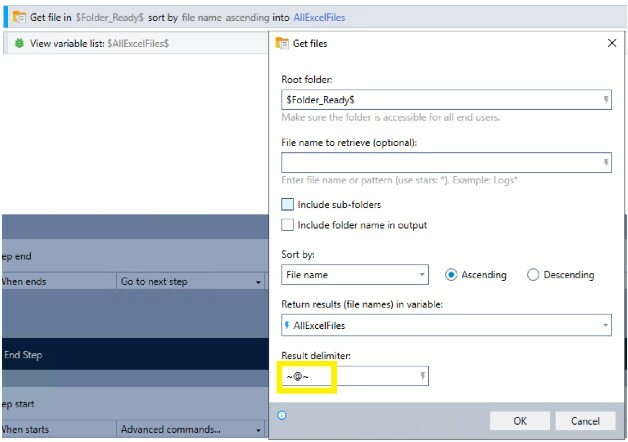
Below is the value of the above AC.

Afterward, all the files will be moved from the "Ready" folder to the "InProgress" folder using the combination of Split and Loop ACs.
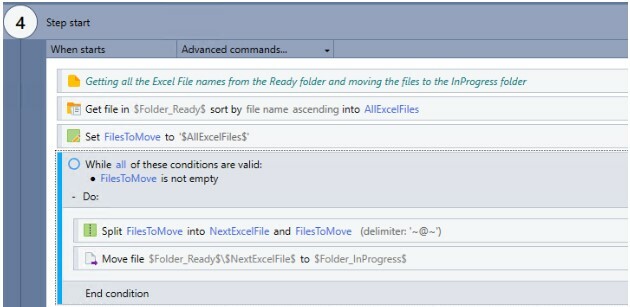
In our use case, we will process one Excel file at a time, meaning that once we extract the stock names of the current Excel file, the Wizard will go till the end to perform all the steps including data manipulation web and email automation then it will proceed to the next Excel file.
With the next AC, the list value will be split to get the next Excel file name to process:
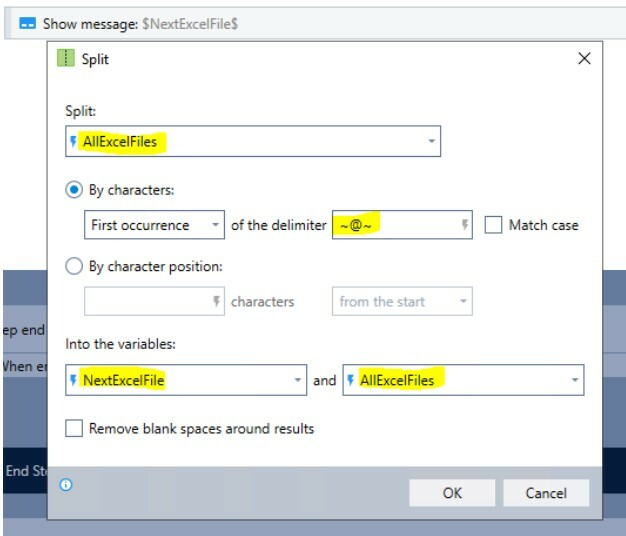
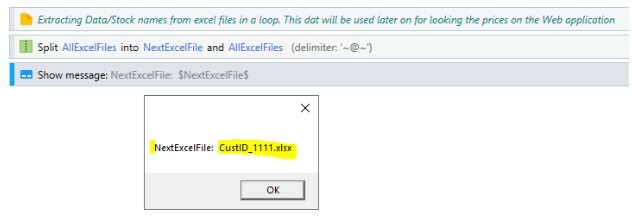
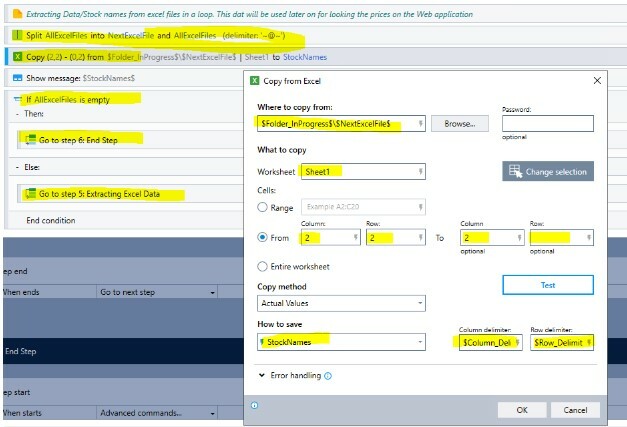
In Step 5, apart from splitting the List variable to get the Excel file name, the Copy From Excel AC will be used to get the Stock names of each file. Once we have the Stock names, the Web automation part will start.
In the next article, we will cover the topics such as Web Automation and Data Manipulation.
Also see:
Part 2
Part 3
Attached you will find the Wizard in both .lwiz and .dwiz formats which are developed up to this stage, as described in this article, if you have any questions please ask on the Nintex Community.