Nintex Community Menu Bar

Resize Signature in Nintex Responsive Form

  • February 11, 2020
  • 5 replies
  • 126 views
  • Translate

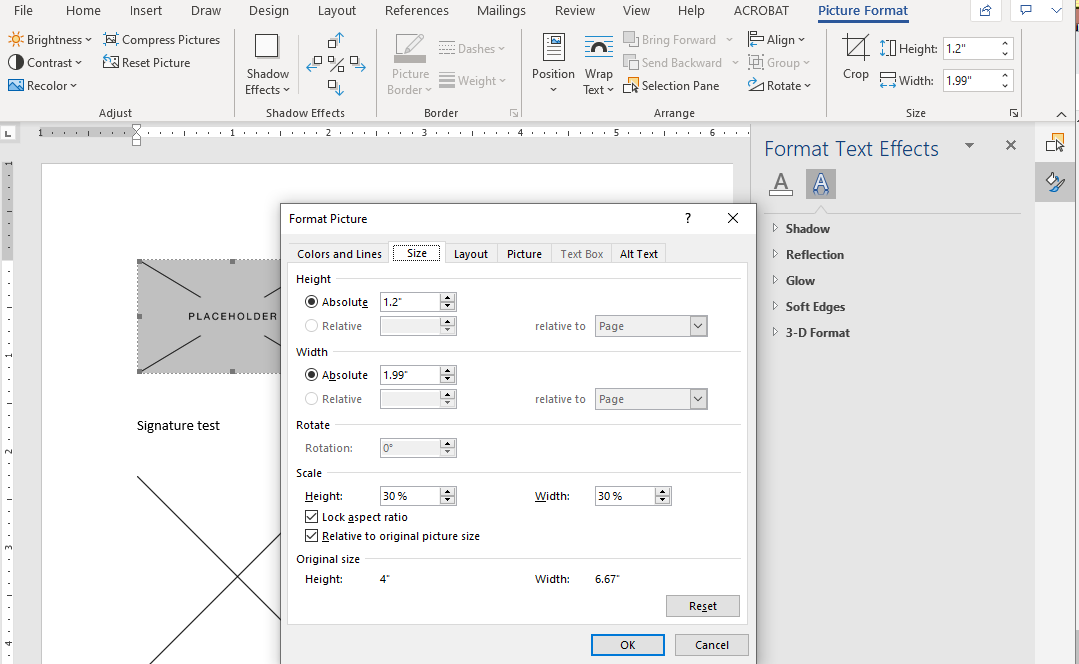
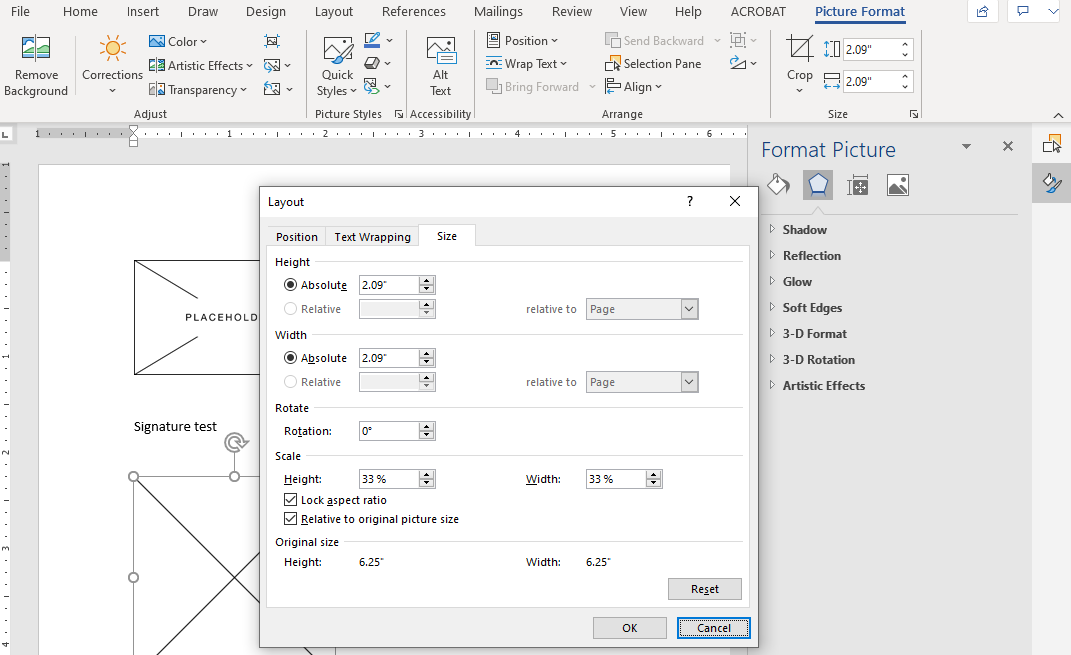
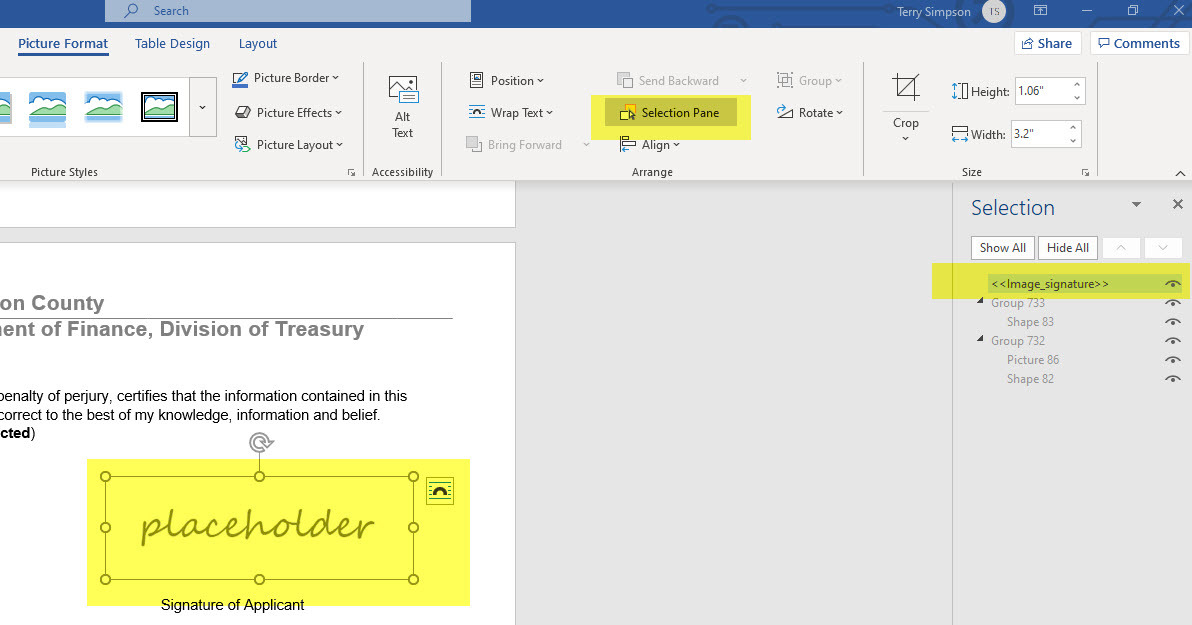
Periodically users will generate a document inside of Nintex Workflow Cloud or SharePoint Online Nintex and place a signature in that document.  When you tag the document, that signature will be very large.  Here is how you resize that signature image.  The key is in the Word document under "Picture Format" to select "Selection Pane" and put your tag in that pane.


6439i353938C3DA1D50C8.jpg

Video below to see it in action.

Did this topic help you find an answer to your question?

5 replies

  • 14 replies
  • December 2, 2021

While trying this out, after generating the document, it seems to not replace the placeholder image with the signature. Currently at a loss as to why that is happening. I put the tag in the selection pane when I select that image.

Translate

  • Author
  • Nintex Employee
  • 2 replies
  • December 2, 2021

Make sure on the Document Generation action in Nintex Workflow Cloud that you have added the image under the images section.  This will create the image variable that is used.  Let me know if this doesn't work.  Happy to help troubleshoot.

Translate

  • 14 replies
  • December 21, 2021

Sorry for the delay in response and thanks for the quick response. Yeah, unfortunately, I'm still having issues after making sure the image is added under the images section. 

Translate

  • 14 replies
  • January 9, 2022

After revisiting this and trying it out again, I was able to finally figure out why. It appears that Nintex is picky with what you use as an "image" placeholder for your signature. Apparently, if you use what is supposedly an image (but is also considered text effects), it will not work. You need to make sure it is actually an image and considered nothing else. See images below to see what I mean:


So you may ask, well, what exactly is the difference between the 2 placeholder images besides what they look like? The answer to that question is below.


When selecting the first placeholder image (doesn't work with Nintex):


When selecting the second placeholder image (works with Nintex):

Take note of the different tabs in the properties box and the different options for Format picture in the ribbon bar menu as well as showing Format Picture while the other says Format Text Effects in the right side bar.


Hope this helps anyone that may run into a similar issue!

Translate

  • 14 replies
  • January 10, 2022

Also to add to my previous comment, if you notice that every picture you add to the document is not properly showing the usual picture format options, then check to make sure your template document is not in compatibility mode. I just found out mine was in that mode for another document and it was not properly allowing me to make use of all features for the embedded images in the document.


Hope this helps.


Translate

Reply


Cookie policy

We use cookies to enhance and personalize your experience. If you accept you agree to our full cookie policy. Learn more about our cookies.

 
Cookie Settings