Introduction
Lists are a great tool to utilize while building out your botflows. They can help simplify complex logic, serve as a data source or as a quick lookup to help translate values. While we have a lot of great documentation on the actions themselves, I thought it would be very helpful to put together a reference on how to get the most out of Lists in Nintex RPA. For the sake of length, I’ll split this up into a series. I’ve published one a little out of order in Creating Randomized Data with Nintex RPA, which really should have been published after this one.
This blog will serve as an introduction, with either one or two follow ups to cover more in-depth utilization of Lists.
Creating a List
“Sounds like Lists are great, and they can do a lot, but how do I actually USE one?” you might be asking. Well, for starters you’ve got to actually have a List made before we can reference it. Now, there are quite a few ways to create a List, so let’s break each of them down.
Manually
Make a List manually by adding it to the botflow, and creating Rows and Columns as needed. This is pretty straight forward. You can find details on this in the Help article linked above.
You might do this if you’re doing simple lookups or more advanced “translations” (think turning data into a series of keystrokes). The key here would be there are known values for each column and row, and your willingness to invest the time to create each of them yourself.
Create List action
Using the ‘Create List’ action you can make a new List on the fly in your botflow. There are two types of Lists you can make with this action, either a “Custom” list or a “Files and Folders” list.
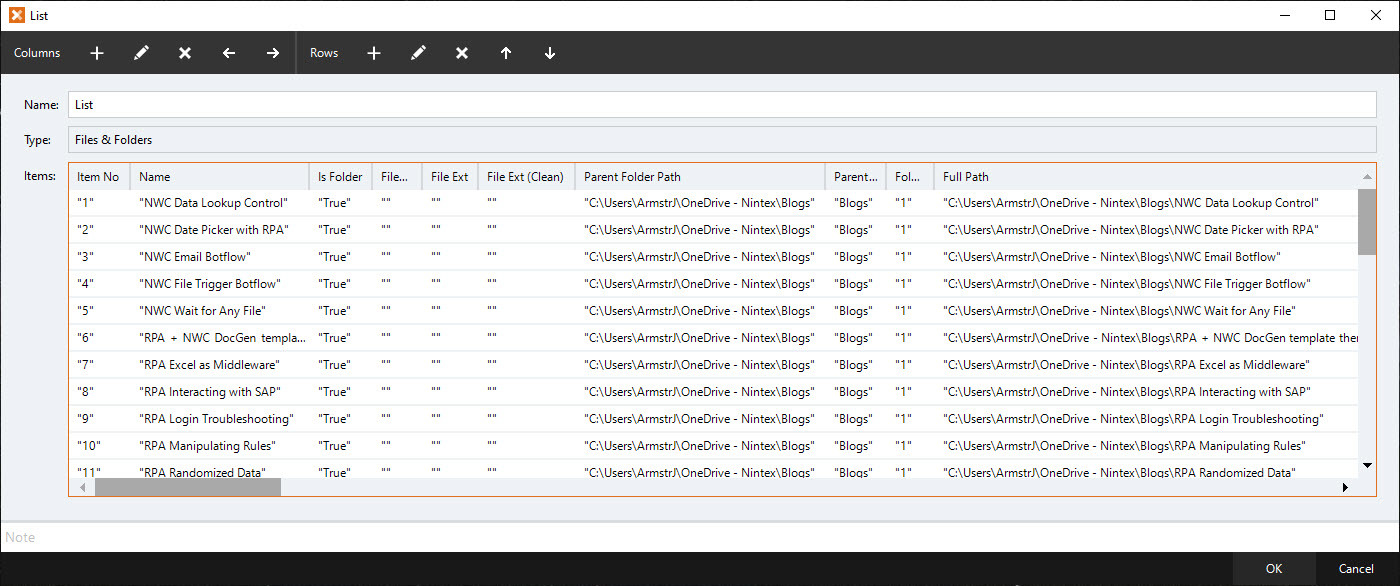
A “Files and Folders” List makes things extremely simple if you need to work with a group of files or folders, for example to move them around or work with them one by one. Think of this as essentially a data set that contains all the information you need about the files or folders in a specified folder path. The botflow will automatically pull in information such as the file name, file path, and other file properties that can be referenced later in the botflow.

Using the “Custom” List type is a bit more work. Using the Create List action to make a “Custom” list will only give the basic shell of a List with columns, and will require you to use other actions later on in the botflow to flesh it out more. You’ll be asked to name the List and provide columns for the List to begin with. From there, you will need to use Create List Row and Set List Value actions to populate the List with the data you need. This type of List would be useful if you’re building a List as the botflow progresses, and not necessarily from a single source of data such as a web table (see below for more on that).
Get List action
The Get List action allows the botflow to create a List from a specified target. There are quite a few possible targets to find the action, so I’ll name a few but I am sure I will miss some:
- Web table
- Dropdowns
- Multi or singles select pick lists
- Excel tables
After selecting one of these (or another) eligible targets, you should see the Get List action available, if not then you’ll need to change to the Professional or Expert user level. When this action runs, it will make a copy of that target into a List in the botflow.
These can come in handy when you need to Loop through the values from that dropdown, or if you want to use a table of values as a data source. This action can also be used if you want to save some time building a List manually, just by creating the List as a Table in Excel and deleting the action immediately afterwards.
Other Actions
There are a few other actions that can create a List in Nintex RPA and they’re all extremely situational. I’m not going to spend any time covering these specifics actions, as working with the Lists they produce will be exactly like any other List.
Referencing a List
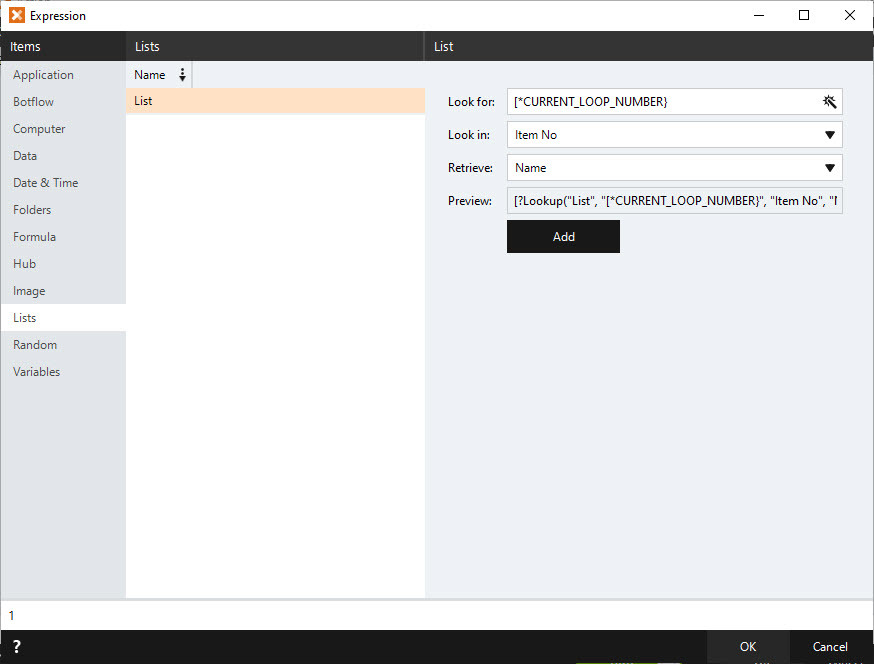
Now that you’ve got a List in your botflow, we can talk about how to reference it to pull out values. You can access the List lookup tokens in the Expression Builder , so let’s walk through what each field means.

Look for: This is the value that you want to search for specific column for. Most popular is using another token, such as the [*CURRENT_LOOP_NUMBER] or a Variable, or it could be a hard coded value such as “Florida” or “1”.
Look in: This is the column that you want to search in, in order to find the value specified above. It is a dropdown and cannot be controlled by another token.
Retrieve: Once the lookup has found the appropriate row, the value from the column chosen here will be retrieved. Once again this is a dropdown so it cannot be controlled with a token.
Wrap Up
Just a very simple introduction for this one. Keep a look out in the future, maybe in a couple weeks, for the next blog that will go a bit more in depth on utilizing Lists in your botflows.
As always if there are any questions, please comment below! If there is anything you want to see in future blogs, I am always interested in that feedback as well. Drop a Kudos if you found this useful, they're much appreciated!
Thanks,
- John.


