In part one of this series we reviewed using a Google Doc as a template with the Generate Document action in Nintex Workflow Cloud. In this example we'll go into some more detail around adding Document Generation tags into a Google Sheet and appending rows using the new Google Sheets actions before generating the document. As was the case with the Google Doc setup from the previous post, we will be using the Google Workspace Export Xtension from the Nintex Process Accelerator gallery.
If you'd prefer to watch a walkthrough rather than read about it, please check out the video below.
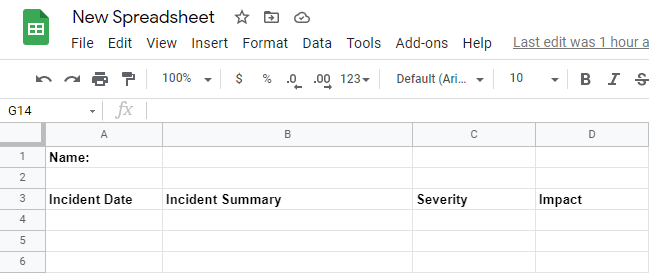
To start, you will want a Google Sheet to work with. In my example I've created a new Google Sheet titled 'New Spreadsheet'. Within this sheet you can put some header information where you might be including repeating data. Additionally you may want to configure some labels for static data. In my example, I included a 'Name' label in the cell next to where I plan to bring in data.
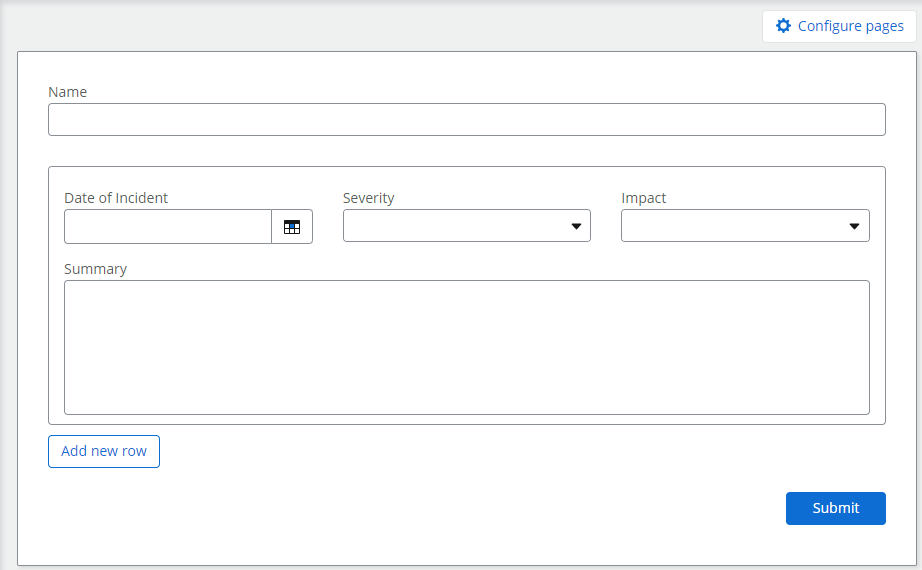
Once the Google sheet is configured, the next step is to configure the workflow to input data into the sheet. First, you'll need to create a new workflow in Nintex Workflow Cloud. In my example I am using a Form as the start event that has one single line of text field (Name), and a repeating section with incident data inputs (Date, Summary, Severity, and Impact) corresponding to the information I set up in my Sheet.
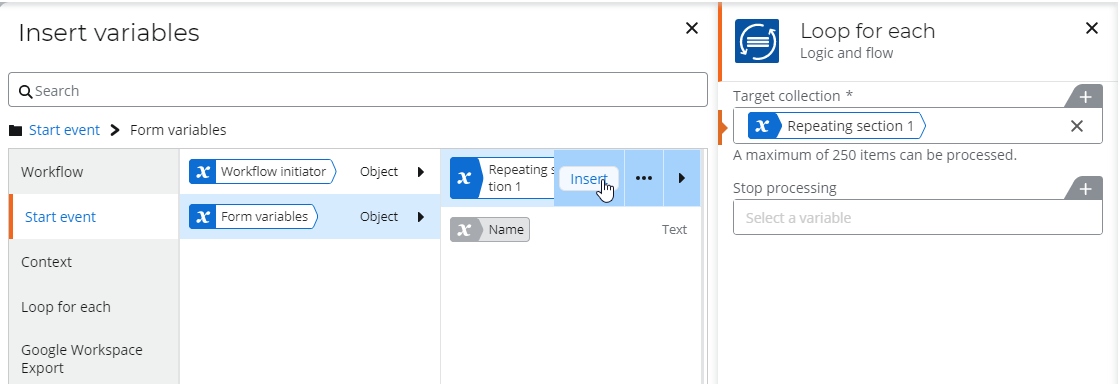
Once the form is configured the next step is to setup the workflow. Because we are using a repeating section, the first action we will need to add will be a 'Loop For Each'. This will allow the workflow to retrieve each line entered in the repeating section. For the 'Target Collection' you will want to select the repeating section you configured on your start form. As a note, this example we are walking through is not limited to a form based start, the same concepts could be applied for data retrieved from another system (eg Salesforce related records, SharePoint lists etc).
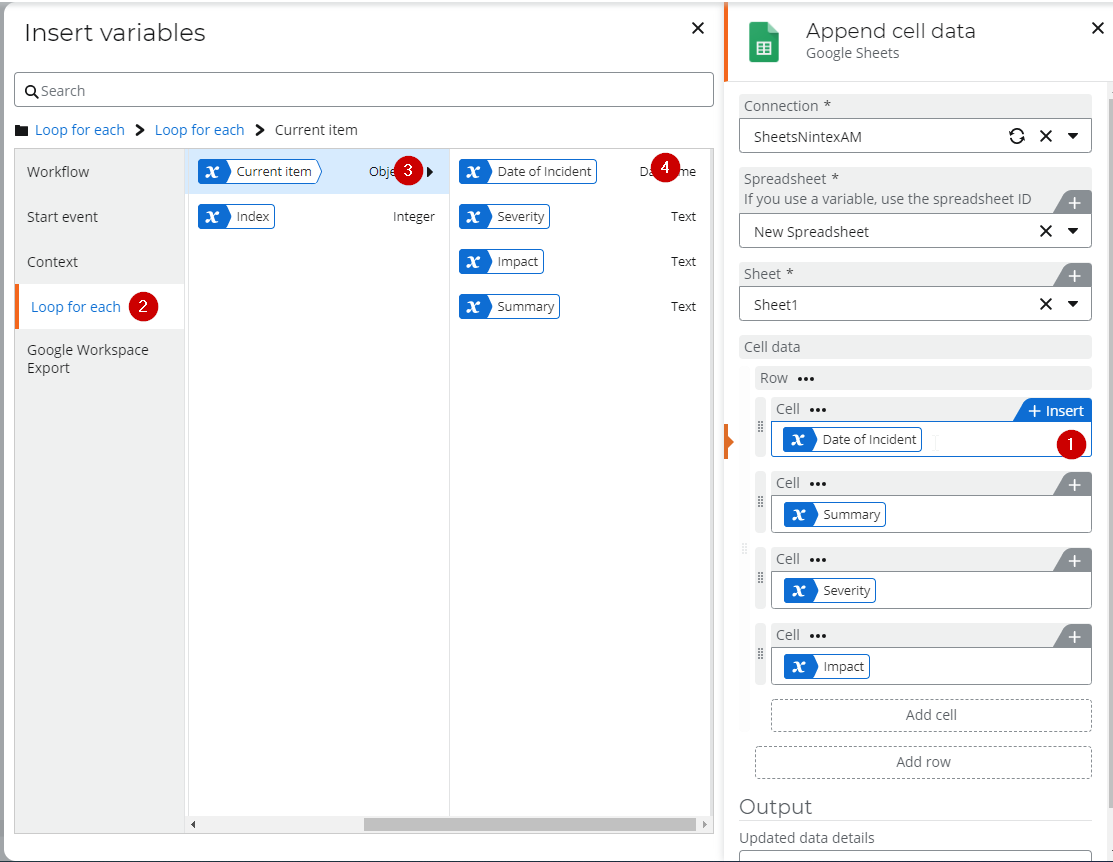
Within the 'Loop For Each' action you will want to add an 'Append Cell Data' action. You will need to configure the connection, select the Spreadsheet you created and the Sheet you updated (can be found in the bottom left corner of when the Spreadsheet is open). From here, you'll want to click on 'Add Row' then 'Add Cell'. For each piece of information within your repeating section you will want one cell. Once the cells are added the next step will be to insert the variables so the data is written to the sheet. You will want to select the 'Loop For Each' option to then insert the appropriate variables based on how you setup your headers in the sheet. In my example the order was Date, Summary, Severity, Impact, so I will put the cells for this row in the same order.
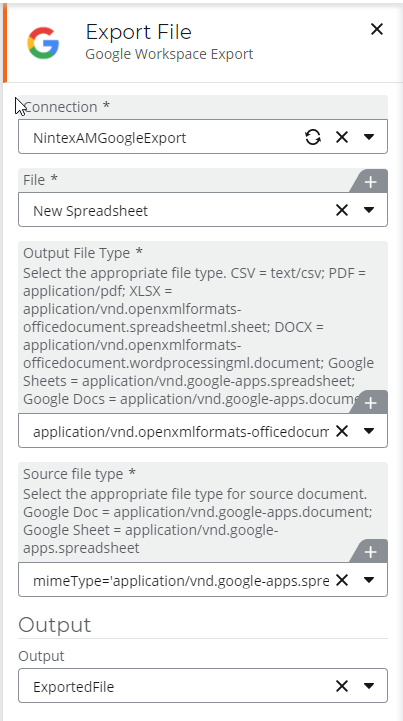
As it stands now, the workflow will run and will append that cell data to the next empty row. For this example though, we want to take it a step further. First you will want to add the 'Export File' action from the Google Workspace Xtension to export the Google Sheet as an XLSX file. Ensure you are using the correct MIME types for the source (application/vnd.google-apps.spreadsheet) and output (application/vnd.openxmlformats-officedocument.spreadsheetml.sheet). For the output of this action you will need the file variable for use in the Document Generation action that is configured next.
Next you will add a 'Generate Document' action to the canvas. The Template will be the File Variable you exported from the 'Export File' action. The name can be a variable (using the Name from the form). For basic configuration of the action, you will also want to input a collection variable for the 'Store All Files' option.
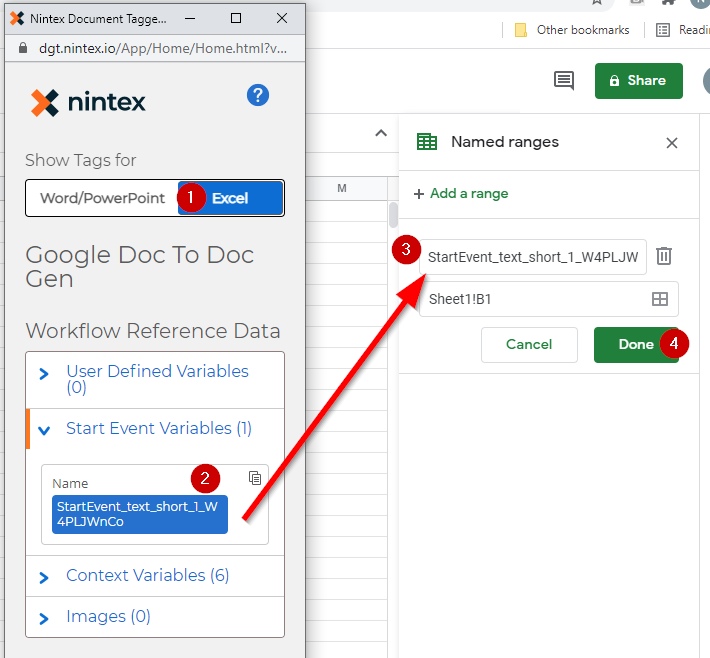
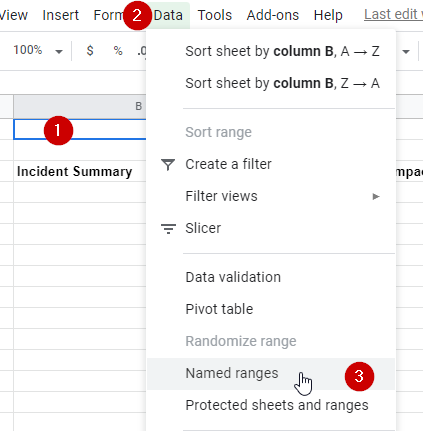
The most important part for this scenario will be using the Nintex Document tagger to add information to the sheet. Google Sheets will operate very similarly to Excel in that you will be able to configure named ranges, and those will transfer to Excel when the Sheet is exported as an Excel file. For tagging an Excel document, you will use the Excel tags from the tagger and add the tag as the named range for cell where you want to input the data. The same concept applies here. In Google Sheets, you will click on the cell where you want the data to show up, click the 'Data' tab, then click 'Named Ranges'. From there you will click 'Add a Range' then open your Nintex Document Tagger from the 'Generate Document' action and you will click on the value you want to add, paste the tag into the range box and click done.
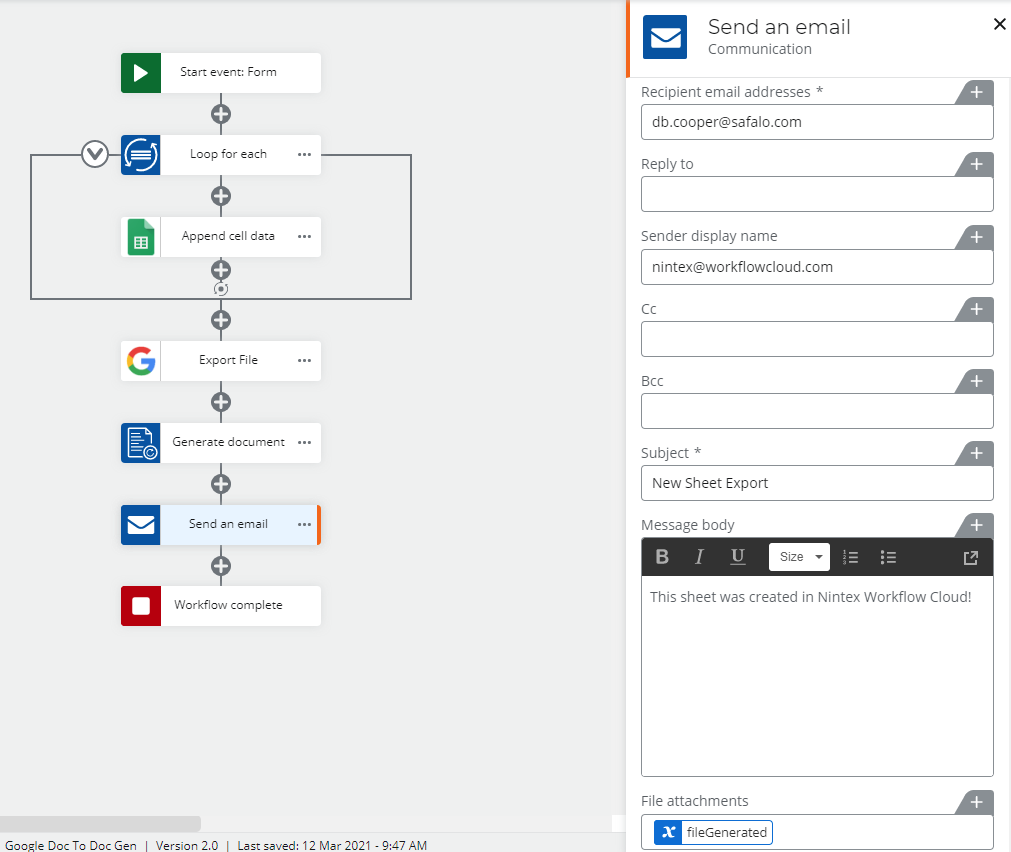
From here, the Sheet is saved automatically, and you will be able to finish building the workflow! In my example, I add a send email action to send the finalized document out.
As a note, this is using a static sheet, so the Append Cells action will continue to add data on each run. For my next entry in this series, I'll be walking through how work with a template sheet and create inline row replication.
Related Posts:
Google Workspace + Nintex DocGen Part 1: Google Docs as templates