


Nintex App Studio provides us with the ability to create a mobile application specific to the scenarios/use cases you are automating. This is made up of a combination of aesthetic changes (logos and colour schemes), tailored content (showing only the forms relevant to the use cases) and extra features not available on the standard Nintex mobile application (custom content).
This post will focus on the custom content that you can add. What do I mean by custom content? Your app can contain any type of "file" that your mobile phone can read. e.g. Pdf documents, MS Office documents, videos, pictures, and here's where it gets interesting, HTML files/web pages.
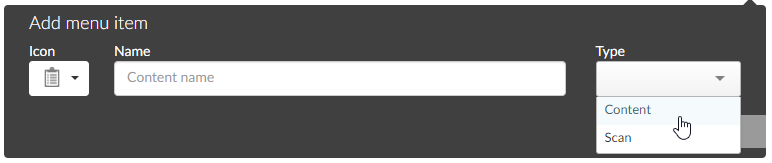
To add any content, add a menu item and select "Content" as the type:
I recommend naming the menu item using a single word without spaces e.g. CompanyPolicies. You can use spaces however some devices will have trouble linking to this.
Once you have created this menu item, you can add any of those files I mentioned above up to 50MB worth. If you have more than 50MB of content, then create more menu items and add your content to those.
If you add multiple items to a content menu, they will be displayed in-line when you access that menu item. If you add just a single piece of content to the menu, it will be opened automatically which is really cool if you wanted a video to auto-play for example.
HTML Pages
HTML/web pages are used to customise the app - they can be used as menu items, to display information and instructions or even interact with the device such as sending a SMS message. Nintex mobile will render most of the HTML and CSS that you throw at it (within reason). If you are deploying to an Android device, it will use the Chrome engine and if you are deploying to iOS, it will use Safari. This provides a lot of flexibility as it will link to other web pages in the app and any of the menu items that are part of the app. It can even link to external sites but please remember that anything that it links to externally will not be available in offline mode.
The Home Page
I always create a home page using HTML which will be displayed as the welcome page and main menu. An example home page is attached to this post along with all the examples we'll go through. You can modify this file to your heart's content to create your own pages. It's not flash though as I'm certainly not a UX person but it will give you a good start. It contains a link to a company logo and then a bunch of links that are rendered as buttons. If you double click on the file, it should open in your browser where you can test the basic layout and flow.
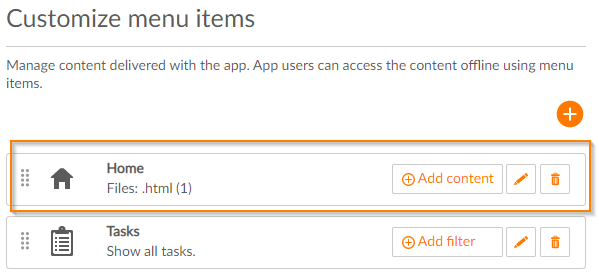
I set up my home page by creating a content menu. It doesn't matter what you call this menu. I called it Home because that makes sense to me. You must also make sure that this menu item is at the top of your list because the mobile app will always open the first item in the list by default.
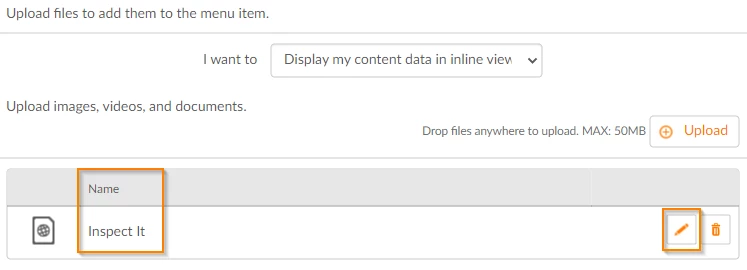
Then you upload the HTML page that you are going to use for your home page. App Studio will use the filename to name the file e.g. Home.html. I always rename this to the name of the application as this is displayed in the app. In my example, my app is called Inspect It so that's what I name the home page to.
Other internal web pages
At a minimum, most of us make just a single a home page written in html but you don't have to stop there. If you have other web pages that you want to display locally in the app, go ahead and create them. Keep these rules in mind:
- Create one html page per menu item. That way when you reference the menu item from other web pages, your web page will load automatically. If you place multiple web pages underneath a menu item, Nintex mobile will show a list of the pages.
- Name your menu items with a single word (no spaces). As mentioned previously, some web browsers will handle spaces in the name but for maximum compatibility with most devices, I'd recommend using a name with no spaces in it.
You can see this example in the sample HTML I have provided. We have two other web pages in the device:
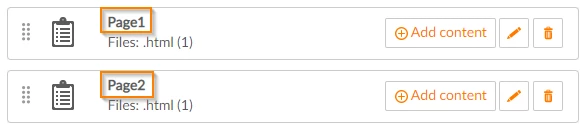
We can reference this in HTML as follows:
<p> <a href="inspectit://Page1" class="button">Page 1</a></p><p> <a href="inspectit://Page2" class="button">Page 2</a></p>
The HTML is not case sensitive.
Other external web pages
 How about an external web page? Do any of you use Nintex Promapp? If you don't, you really should - it's a brilliant platform to document, communicate and collaborate on processes. Often your custom app is supporting one or more processes, wouldn't it be handy to not only fill in forms and respond to tasks related to those processes but also see what they are so you know exactly what is required or where it's going next after you have completed your piece? Nintex Promapp has all that plus it can publish processes for external viewing using what we call minimode links. Go and create your minimode link and then reference it in your app. It will appear by default in a nice mobile friendly format.
Or you can view the traditional views. All pictures and documents (assuming they are saved to Nintex Promapp) will also be available.
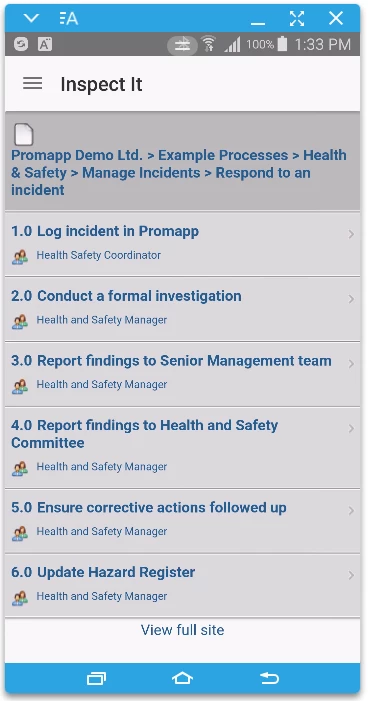
Here's an example using a Nintex Promapp minimode link. This will open the Nintex Promapp process inside your Nintex mobile app. Cool huh?
<p> <a href="https://demo.promapp.com/chrisben/Process/Minimode/Permalink/Fue8mjUVDq4XAvjiOhM1iW" class="button">Promapp Process</a></p>
Other Nintex mobile elements
If you wish to access any of the standard menu items that come with Nintex mobile, your syntax is:
appName://ElementName
For example, assuming you are using the default Nintex Mobile names, to load tasks, your HTML will look like the below:
<a href="inspectit://Tasks" class="button">Tasks</a>
If you renamed "Tasks" to "MyTasks" then your HTML will look like this:
<a href="inspectit://MyTasks" class="button">Tasks</a>
Here are the others:
| Element | HTML |
| Tasks | appName://Tasks |
| Outbox | appName://Outbox |
| Sent Items | appName://Sent |
| Draft Items | appName://Drafts |
| Settings | appName://Settings |
The barcode scanner isn't created in the app by default but assuming you named the menu item "Scanner"; you get the idea:
appName://Scanner
Forms
If you want to open a form, we have slightly different syntax depending on the type of form. When you build a form, you get to choose whether to use the classic, responsive or new responsive designer. If you know what designer you used, you're good to go. If your form was built in the Nintex Workflow Cloud, your form type is always the new responsive designer.
If you have a classic or responsive form, your syntax is:
appName://form?ntx-name=formName
If you have a new responsive form, your syntax is:
appName://universalform?ntx-name=formName
Please check out this help topic that provides even more examples of what you can do with forms also check out @Dan_Stoll's first and second posts about deep linking where you can prepopulate form data.
Other things to try
Finally, if that wasn't enough, if you're planning on running this on a phone did you know you can interact with calls and texts?
Here's an example of how to make a call using the "tel" command:
<a href="tel:+61-3-1234-5678" class="button">Call Safety Team</a>
Here's an example of sending a SMS message using the "sms" command:
<a href="sms:+64-21-123-4567?body=Hello,%20This%20is%20a%20test%20message" class="button">SMS Safety Team</a>
Go forth!
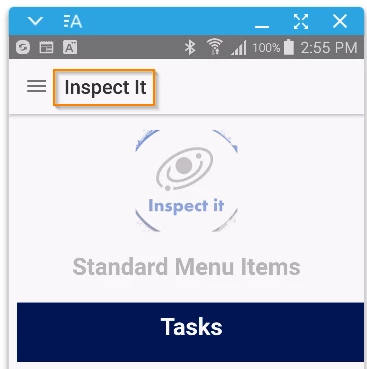
I hope you have found this post useful. Do check out the attached HTML Home page as I've provided more information in the comments. Here's the layout of my mobile app that corresponds to the items in the Home Page: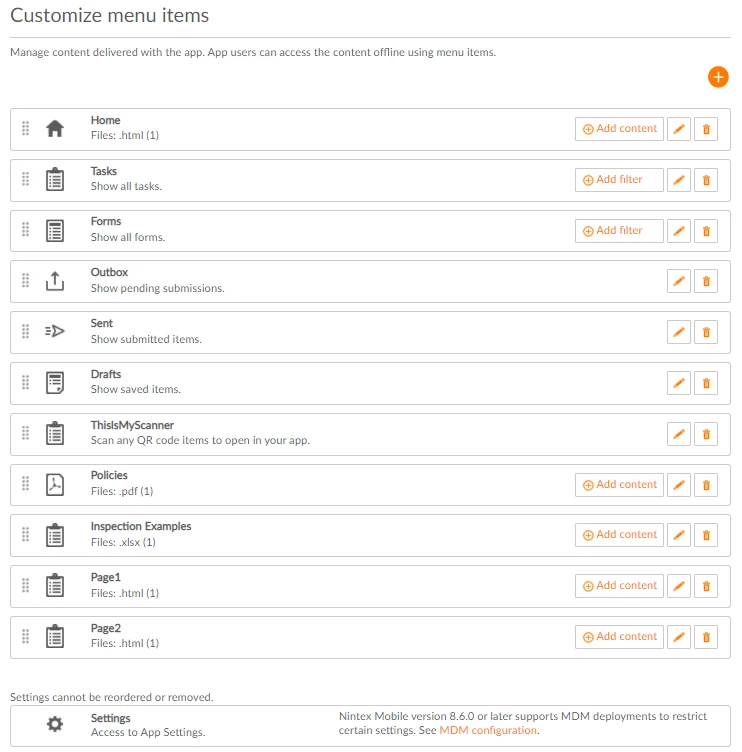
Have fun creating your custom apps!