Topic
This article is part two in a three part series of Nintex for SharePoint upgrade related articles that shows you how to extract workflows from your on-premises environment, import them into Nintex Automation Cloud, and upgrade them to ensure they work in their new home.
Recap
Let's quickly step back to part one for a recap. In that article you learned how to run the workflow extraction script in report mode to create a comma delimited data file that can be opened in Microsoft Excel or another reporting tool to help you determine the current picture of your environment. Then you learned how to extract those on-premises workflows into a package file that can be imported into the Upgrade Center of your Nintex Automation Cloud environment.
Example scenario
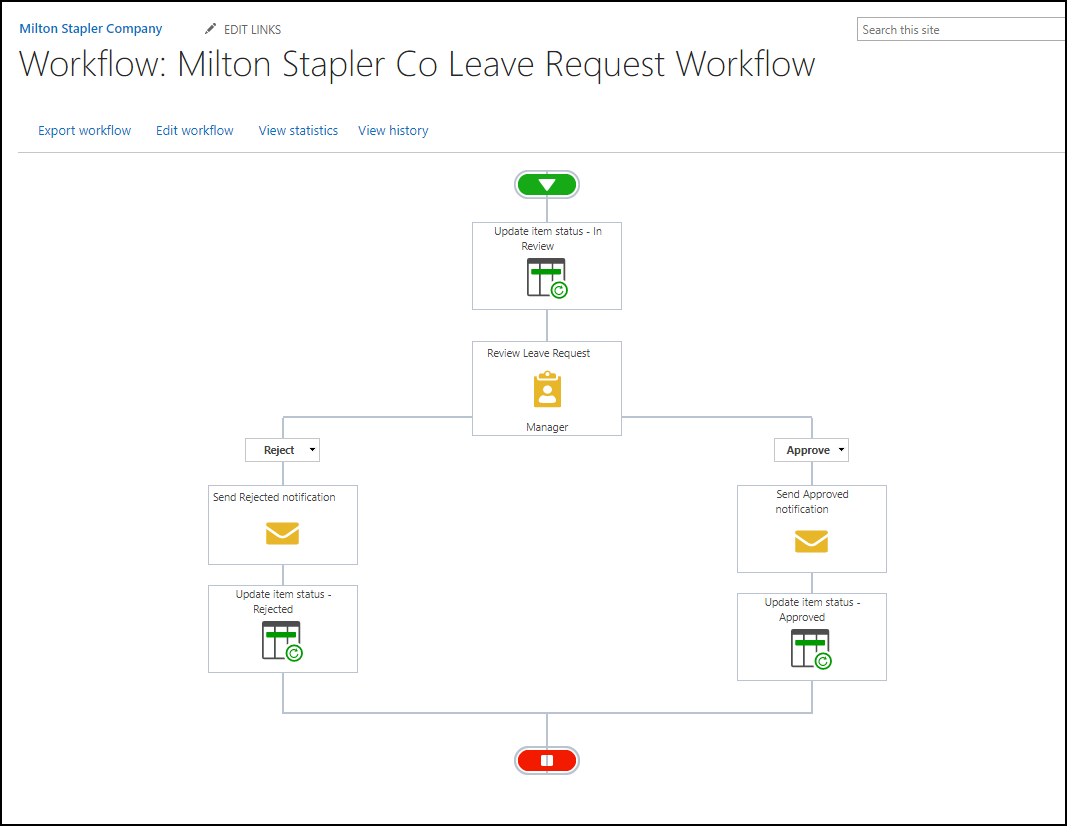
In this article, I'm going to look at how to upload workflows from that extract package file into Nintex Automation Cloud. To make this a little more interesting, I'm also going to focus on a simple Leave Request workflow that is coming over from my Nintex for SharePoint On-Premises environment in the package file. This will set the stage for part three of this series of articles where I'll show you how to actually run through and upgrade a workflow with the Leave Request example.

Nintex for SharePoint On-Premises Leave Request Workflow
Go get the package file
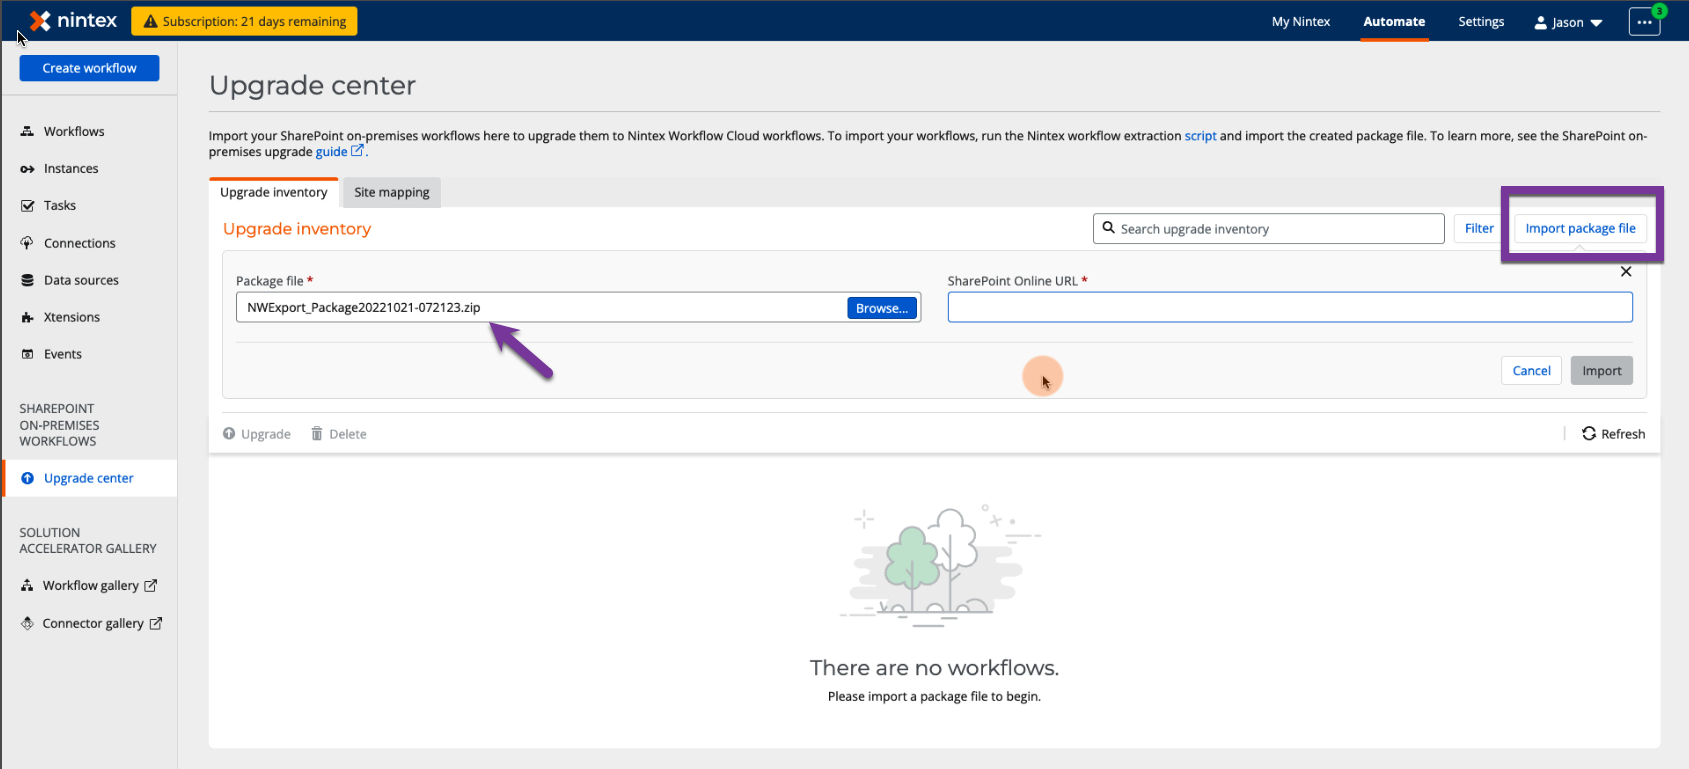
Ok, so I have a package file consisting of a few workflows sitting in a folder, now what happens? Well, starting from inside the Upgrade center I will click the "Import package file" button, select my package file, and fire up the import process. The example here shows my file selected, but before I can click the "Import" button I have to enter a link to a SharePoint Online tenant in the SharePoint Online URL textbox. Let's move on to see what site mapping is all about.

Map the site
When importing a package file for the first time in your Nintex Automation Cloud tenant, you will want to make sure you enter the URL for the SharePoint Online tenant where your on-premises data has been migrated. In my example here, when workflows are upgraded, the upgrade engine will use this mapping to change all the SharePoint actions in workflows to point to the SharePoint Online site URL.

Time to import - but not upgrade
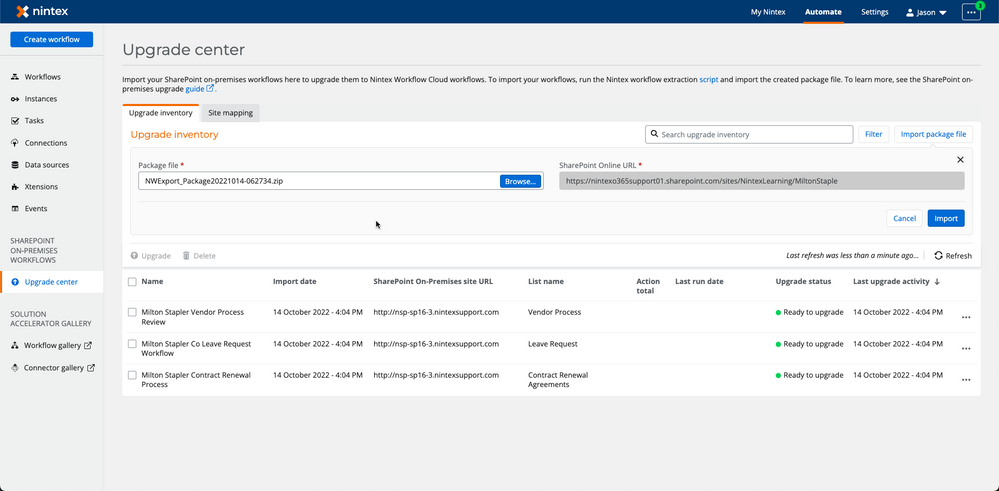
I have the SharePoint Online URL value set so now it's time to import. Clicking the "Import" button from here is going to load all the workflows from the package file into the Upgrade Center upgrade inventory list. Note, this does not upgrade all the workflows automatically at this point in time, I am just loading the workflow definitions into Nintex Automation Cloud and essentially staging them for upgrade at a future point in time when I'm are ready.
Interested in seeing it in action? Take a moment to watch the following video for a walkthrough showing how the import works.
Video
What next?
Ok! I have workflows sitting in the Upgrade Center's upgrade inventory list within my Nintex Automation Cloud tenant. Check. I also have my lists and libraries with data setup in my SharePoint Online tenant. Check. Site mappings look good in the site mapping tab. Check. That means most of the big boxes are checked off. Now I'm ready to upgrade one of these workflows!

Imported workflows in Upgrade inventory list
Upgrade a workflow
In part three of this article series titled, Part 3 - Upgrade from Nintex for SharePoint to Automation Cloud: Upgrade a workflow, I will show you an example of how to upgrade a simple Leave Request workflow. This will give you the chance to see what happens in an upgrade scenario with a SharePoint start event, update list item events, a flexi task for task assignments, as well as send email steps. You can head over to that article when you're ready!
Additional Information
Links
Nintex Automation Cloud Help - Upgrade workflows from SharePoint On-Premises


