Scenario
This How To article describes the steps needed to upgrade a Nintex for Office 365 approval workflow to Nintex Automation Cloud and display the original list attachments within the task approval form. This scenario is one that the Nintex Upgrade Center team has encountered, with technical specialist Godwin Pirame providing a solution.
After Upgrade
-
You will see that some actions are unconfigured. Click the Workflow upgrade details link in the upper right corner of the screen. The Workflow upgrade details panel opens and displays the items requiring additional configuration before publishing.
-
The Assign a task action must be configured. Click the Design Form button to open the form designer. The form designer opens and displays the Forms upgrade details panel, displaying any items requiring additional configuration before the form is saved.
Differences between Nintex for Office 365 and Nintex Automation Cloud
-
The form associated with the Assign a task action in Nintex Automation Cloud does not automatically display the related list item attachments.
Configuration
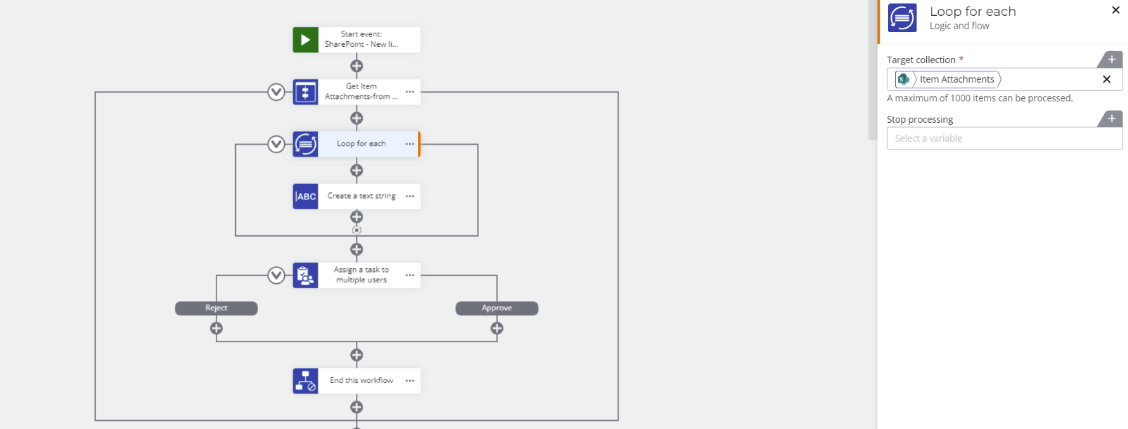
- Use a Loop for each action and insert the Item attachments collection variable from your object/start event.

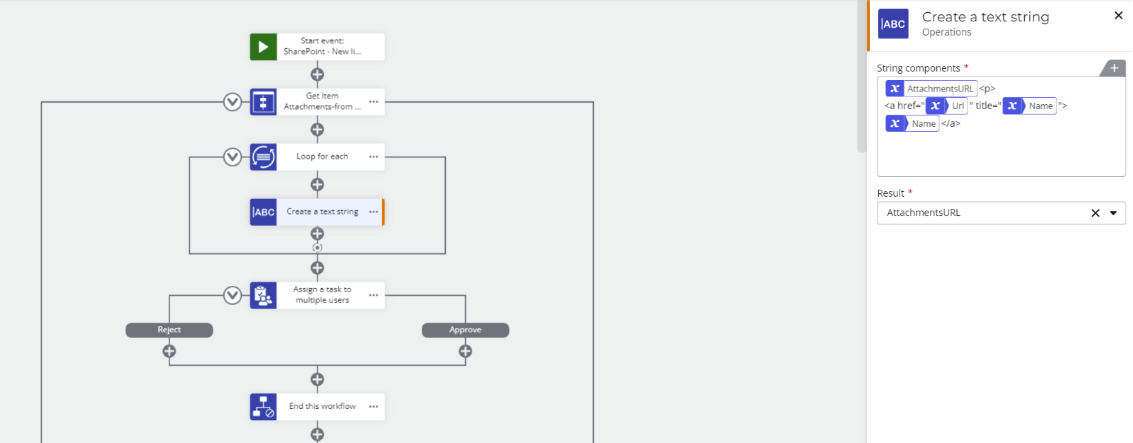
- In the Loop for each, use a Create text string action, create a text workflow variable (in this example, I created the variable called AttachmentsURL. This is the variable that will store links to the item attachments that we will use on the task forms.

- Within the create string, build out the string as shown in the image above. The Name and URL variables are found in the loop for each section in the variables panel. Output the result in the same variable created previously in Step 2.

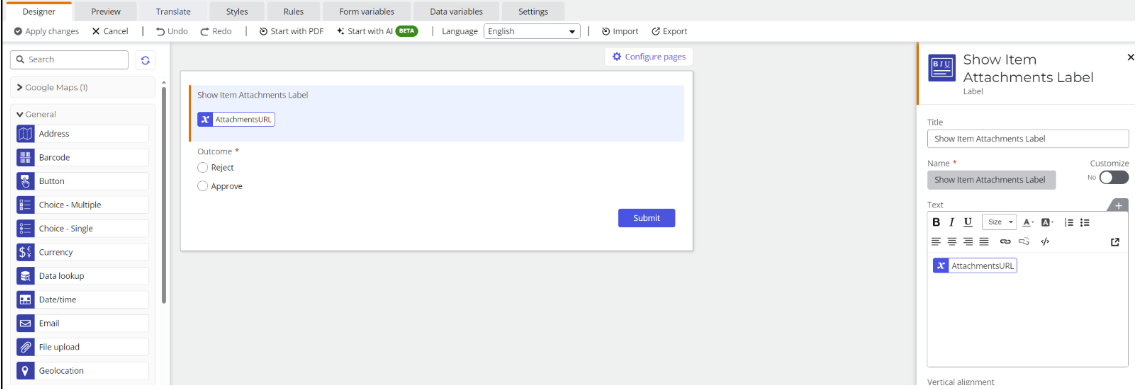
- Insert the variable created in Step 2 into a Label control in your task form. The variable can be found under User defined variables on the task form.


