Topic
This article will explain how to use the Nintex Scheduled start, start event, in Nintex Workflow Cloud. Use this start event when you want to automate the start of a workflow for things like nightly data processing tasks, posting daily or weekly reports, or for any process that requires the ability to run automatically either once or on a recurring basis.
Instructions
- Click on the start event to open the configuration panel and select the "Scheduled start" option from the Nintex group of start events under the Start from property.
- Set the Timezone and Start date and time properties based on the date and time you want the workflow to start new instances within a selected time zone. Nintex Workflow Cloud will observe these settings from the moment you publish the workflow.
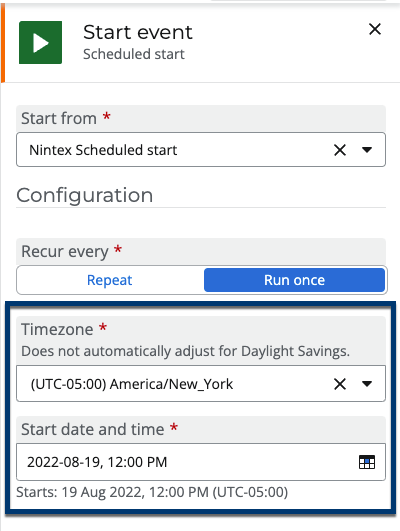
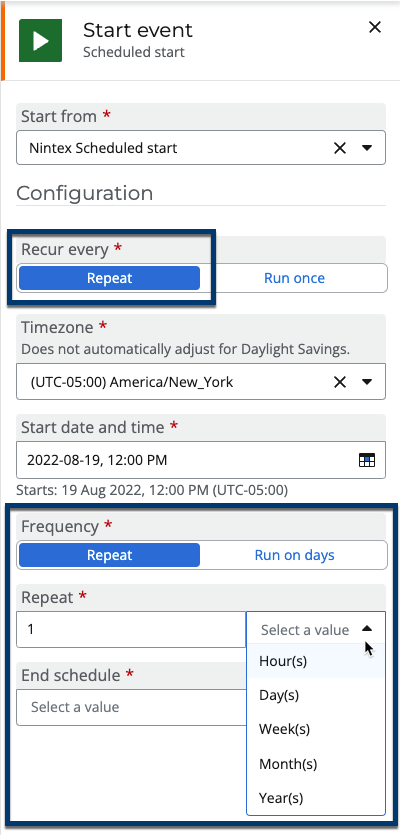
- Set the Repeat property based on how many times you want the workflow to run. You can set it to Run once, or repeat Hourly, Daily, Weekly, Monthly, Yearly beginning from the Start date you set above.
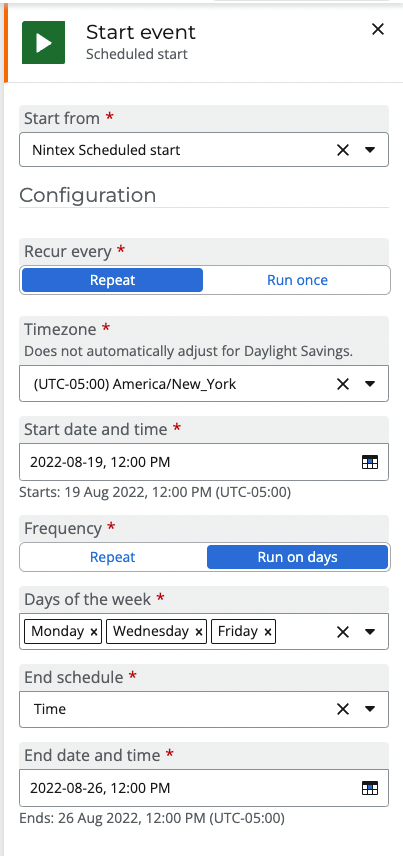
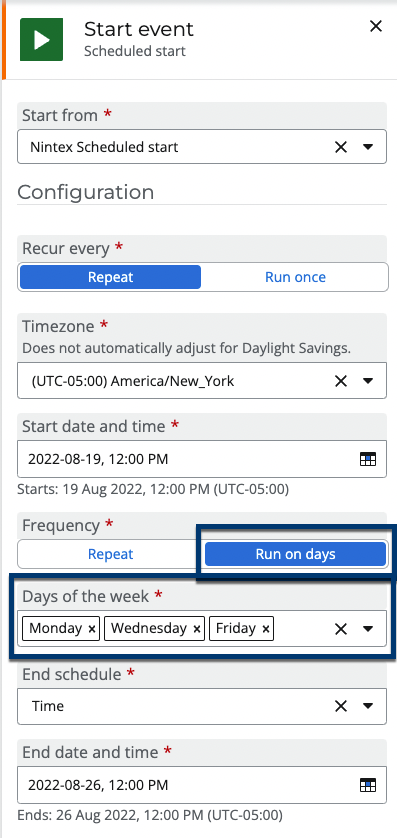
- When Day(s) is selected you can specify the days of the week you would like the schedule to run. Multiple days can be selected.
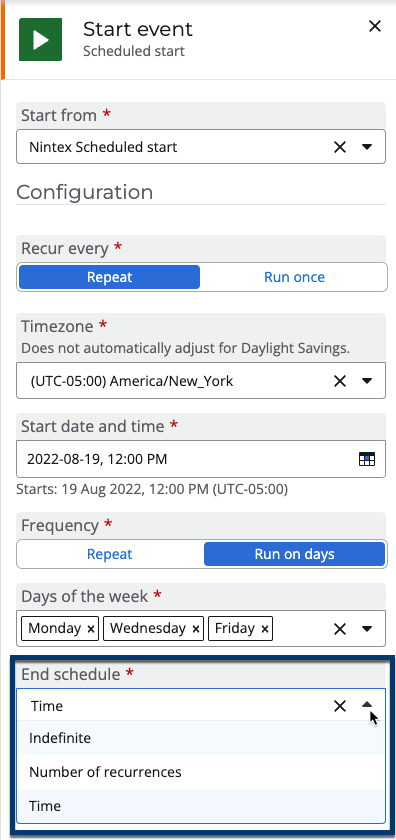
- You can specify when you would like the schedule to end. You can have the schedule run Indefinitely, for a number of occurrences or until a specific date and time.
- For context, the following example will run an approval workflow at lunch time New York time on Monday's, Wednesday's and Friday's for a week.