Topic
This article will cover how to create a simple "Test Workflow" to be used for troubleshooting email issues. At times, Nintex Support may request that a workflow similar to this be built in order to better isolate the scope of an email issue that may be affecting your environment. Having this already built will save time in the troubleshooting process.
Instructions
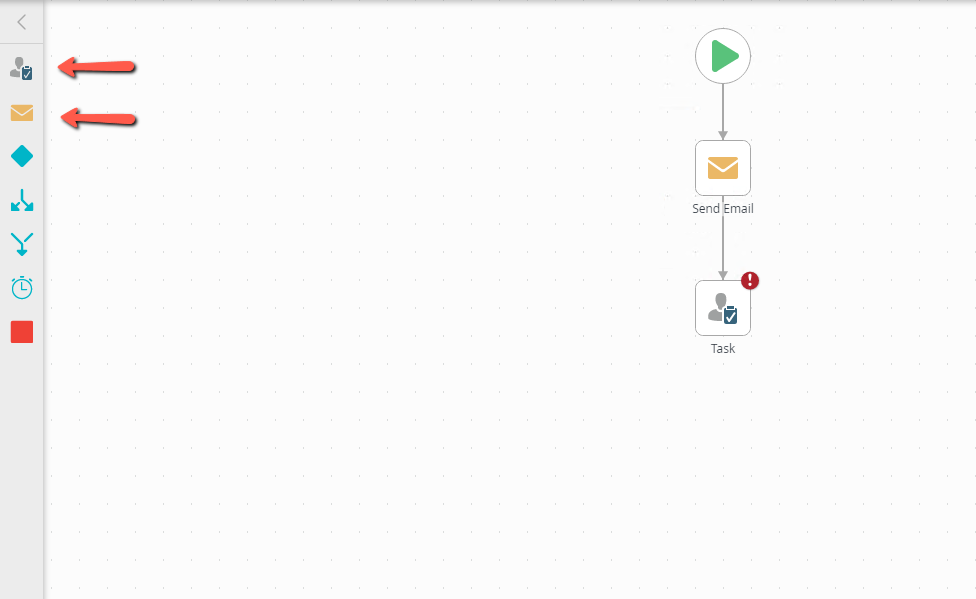
Using the HTML5 Workflow Designer, create a new workflow and name it something descriptive such as "K2 Email Test". If desired, create a separate category for the workflow prior to this. Drag both a 'Send Email' and a 'Task' step onto the canvas, and connect them together.

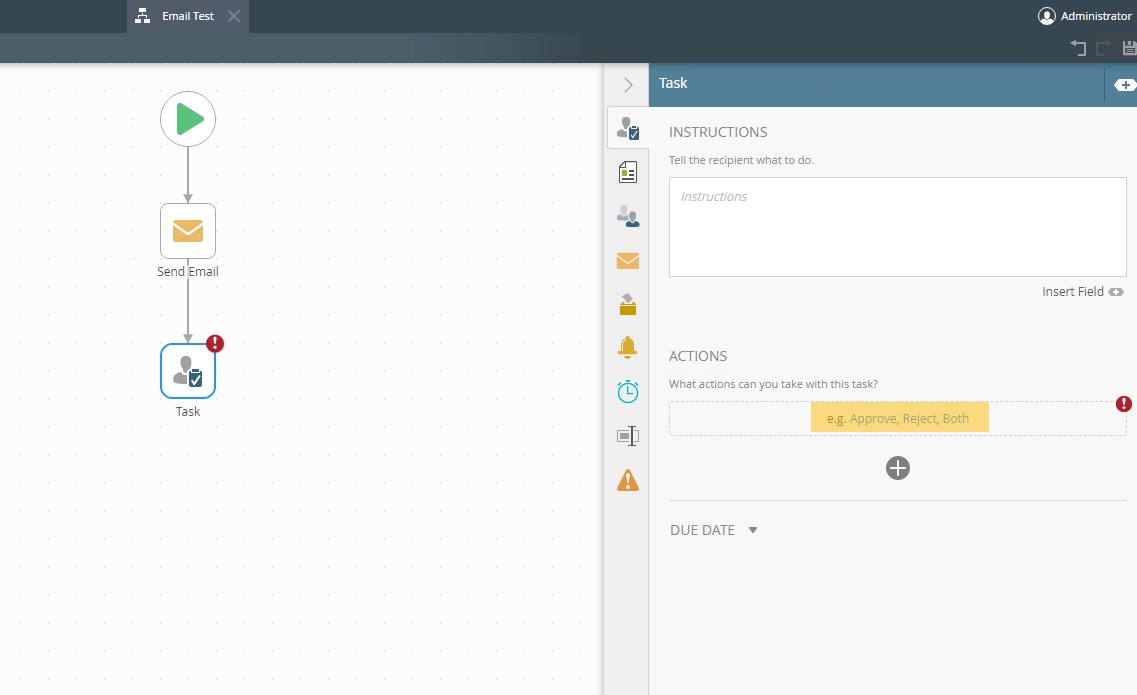
In the 'Task' step's Instructions tab, specify an 'Approve,' 'Reject,' or 'Both' option (note that this shouldn't matter when executing the actual troubleshooting tests, but one is required to select in order to deploy the workflow).

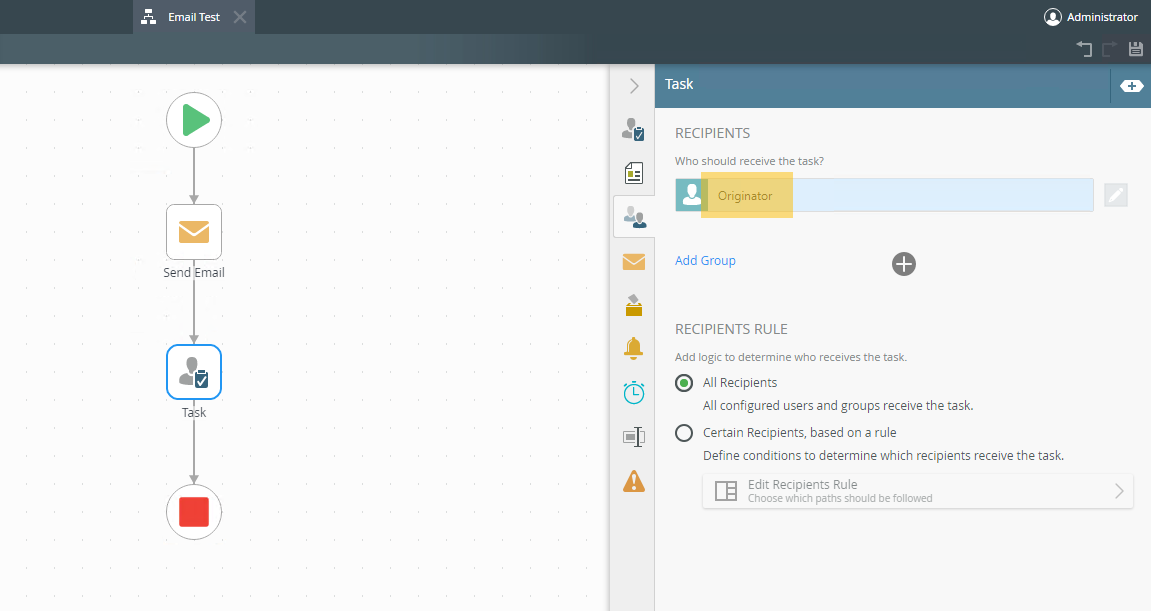
In the 'Task' step's Recipients tab, specify which account the Task should be sent to. 'Originator' is set as default, and this will attempt to send the Task to whichever account starts the workflow instance.

Afterward, deploy the workflow to the Workflow Server.
Additional Information
The purpose of this test workflow is to help narrow down the scope of an email issue that may be occurring on the environment. Task notifications and emails from Send Email steps are treated differently in K2, and often times one can be successful while the other is not. Knowing this information can change the direction that Support will take with troubleshooting, and should save time. Additionally, if both email types send successfully using the Test Workflow, then this would generally indicate a design or timing issue with the original workflow or workflows that lead to the issue being discovered originally.


