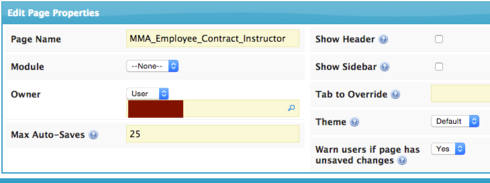
- Create a new Skuid page and uncheck the “Show Header” and “Show Sidebar” boxes

- Put a “Panel Set” on the page and set the “Panel Set Type” to “Custom Width” and the “Scrolling Mode” to “No Scroll Bars”.

- Delete the right hand Panel and set the only panel left to a width of 900px

- Now build your page as you normally would, but do not use tabs. You will need to use one separate skuid page, for each document that you want to create as a pdf. Put all of your components into this one 900px panel.
If you need columns, you can put another Panel Set inside the first panel.
If you use tables, set the “Default Mode” to "Read Only"and uncheck the “Show Export Button”. On the “Display” settings for the table, for pagination>visible rows, select “view all”. Delete the standard row actions “Edit Rows Action” and “Flag for Deletion Action” as well as the standard mass actions “Mass Update Selected Rows” and “Flag Selected Rows for Deletion”. To get rid of the text at the bottom of each table that says “showing ___ of ___records”, add an “In-Line” css
.hidetablefooter .nx-list-footer {
_ display:none;_
}
To get rid of the little pop out Skuid edit box create this in-line CSS
#skuidEditBtn {
background-color: #666;
color: #fff;
border-radius: 5px;
border: 2px solid #fff;
padding: 7px 25px 7px 6px;
cursor: pointer;
-webkit-box-shadow: 0 2px 10px rgba(100,100,100,.4);
-moz-box-shadow: 0 2px 10px rgba(100,100,100,.4);
width: 75px;
display: none;
}
If you do not want your hyperlink fields to be blue, you may use this in-line CSS
a { color: black;
}
When you page is finished, you may preview it and then right click to select “print” in your browser.
If you are on a mac…In Chrome: When the print window opens, Click “More Settings” then, be sure to unselect “Headers and Footers” and “Background Graphics”
Then, select “Open PDF in Preview”
Save and send!
