KB001751 - OAuth authentication with Azure OData Web Services
KB001751
PRODUCT
This article describes how to:
- configure an OData web service (hosted in Microsoft Azure) to authenticate using OAuth
- configure an OAuth resource in K2 for the OData Service in Azure
- use the OAuth resource to configure a service instance of the OData EndPoint Service Broker to interact with the OData service in Azure using OAuth for authentication
First setup a Visual Studio project using the article Creating an OData v3 Endpoint with Web API 2.
When creating the project follow the steps below:
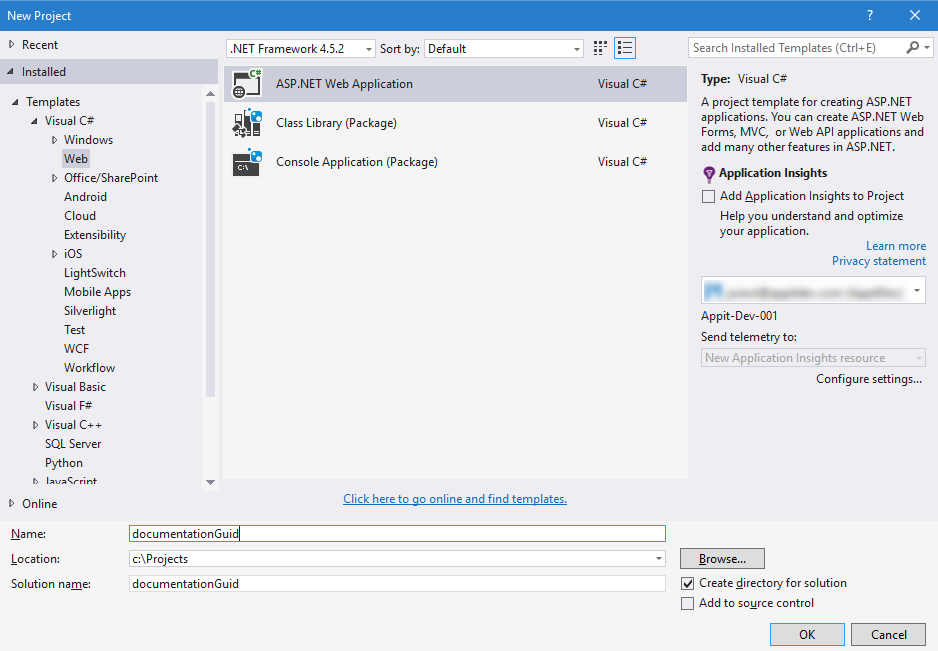
- Open Microsoft Visual Studio and create a new Visual C# ASP.NET Web Application project from the following path in the New Project screen Installed> Templates> Visual C#> Web>ASP.NET Web Application.
- Provide a Name, Location and Solution name for the project. Click OK.
- On the New ASP.NET Project page, select the MVC Template from the ASP.NET 4.5.2 Templates section, check the Web API check box. Make sure the App is hosted in Azure by checking the Host in the cloud check box and select Web App in the Microsoft Azure section.
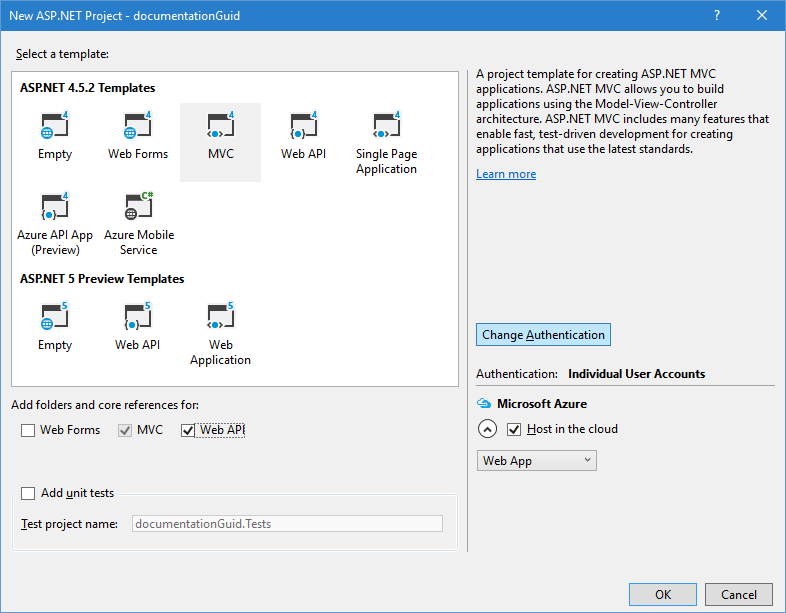
- Click the Change Authentication button.
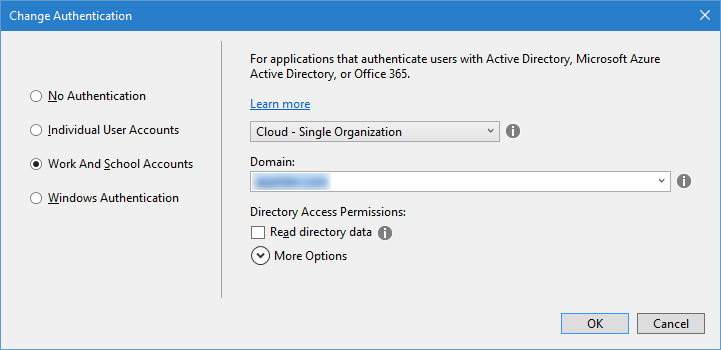
- On the Change Authentication page, select the Work and School Accounts option. Specify your domain, such as "http://contoso.cloudapp.net", in the Domain field and click OK.
- Click OK.
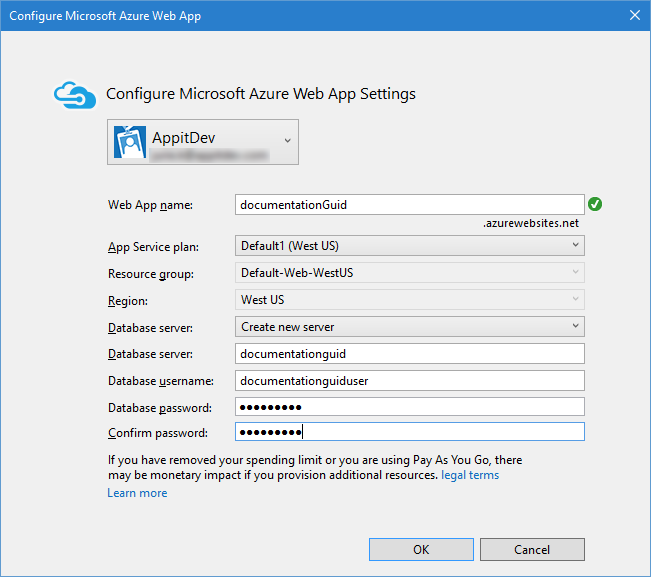
- On the Configure Microsoft Azure Web App page, specify the database details and click OK. Visual Studio will now setup the Project and Azure configuration.
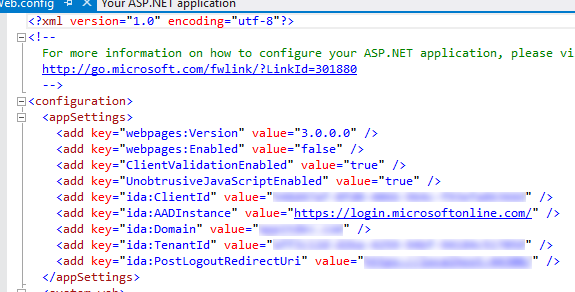
- Next, open the web.config file of the Web Application. The details for the OAuth resource setup are available in the config file.
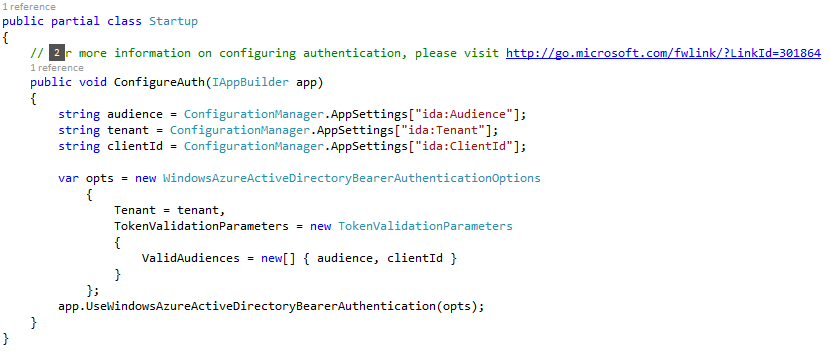
- Open the Startup.Auth.cs file and make sure that it looks like the following example. If not, update it to reflect the code example.
- Follow the rest of the guide from the Add an Entity Model section of the article Creating an OData v3 Endpoint with Web API 2.
- Update the OData controller with the Authorize attribute and publish the project.

In order for K2 to integrate with the Web API using Azure AD, a separate Azure AD Application is required in your Azure tenant.
- Create the Application in Azure
- Add the K2 Identity Web Service as a RedirectUrl
- Generate a secret
- Browse to https://portal.azure.com and login.
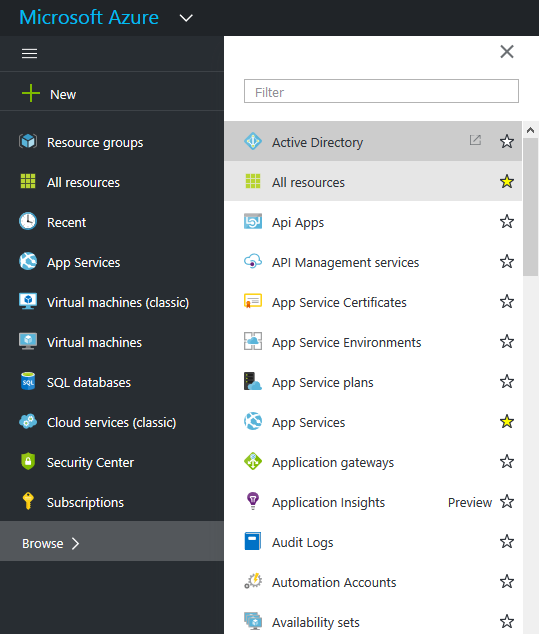
- Next, select Browse > Active Directory. This will open the management portal for Azure.
- Click the Applications tab from the top navigation.
- Click the Add button.

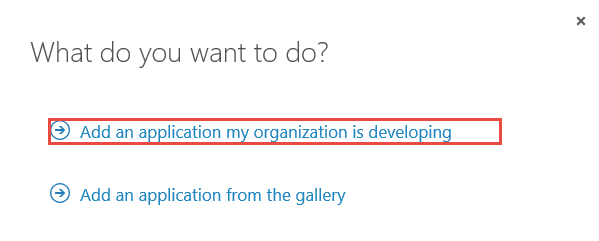
- Click the Add an application my organization is developing link.
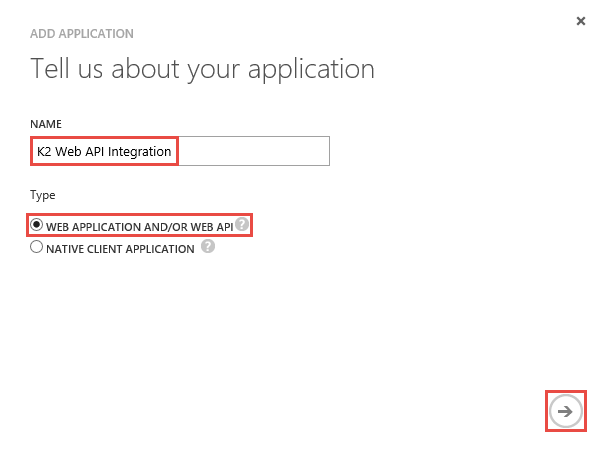
- Give the application a name, for example K2 Web API Integration, and select WEB APPLICATION AND/OR WEB API. Click the arrow to continue.
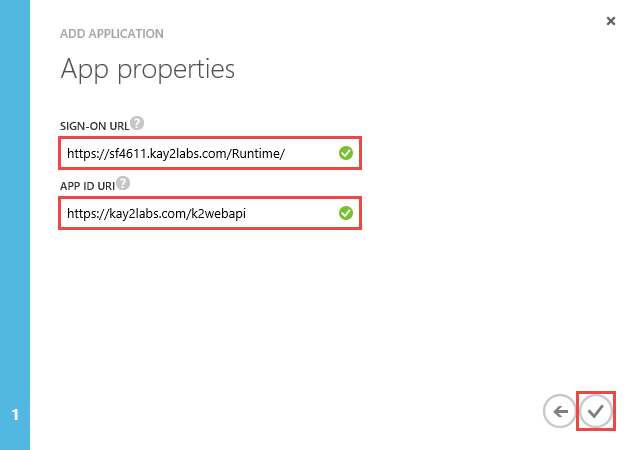
- Specify a Sign-On URL(this is not used so any valid URL will do) as well as the APP ID URI (also not used but make it something valid and identifiable). Click the mark.
- When the application opens on the splash page, click the Configuration tab.

- Scroll to the permissions section and click the Add application button.

- In the Show drop-down, select All Apps and search for your Web API app.
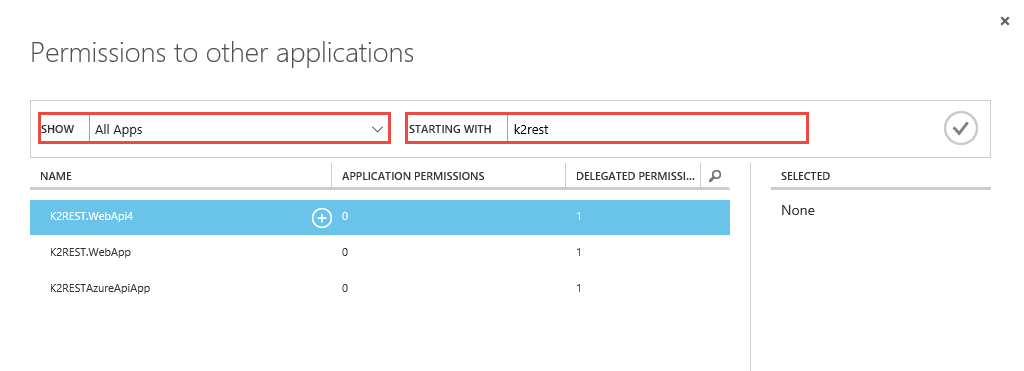
- Select the Web API’s / Azure API’s you want to access and click the check mark.


Note: If your API is not listed here, make sure that you have created and Azure AD App for the Web API – just deploying a Web API / Azure API App does not automatically create a corresponding Azure AD App. - The selected apps are now listed under the permissions section.
- For each app, assign the delegated permissions section.

- Under keys section, select the expiration period for the ‘key’ (also called app_secret, client_secret or app_key) and click the Save button for the value to be generated.


Note: This value is never shown to you again, so make a record of it somewhere safe. - Take the K2 Web Service URL value found in Environment Library, append ‘Identity/Token/OAuth/2’ to it, and add it in the REPLY URL list.

- Click the Save button.

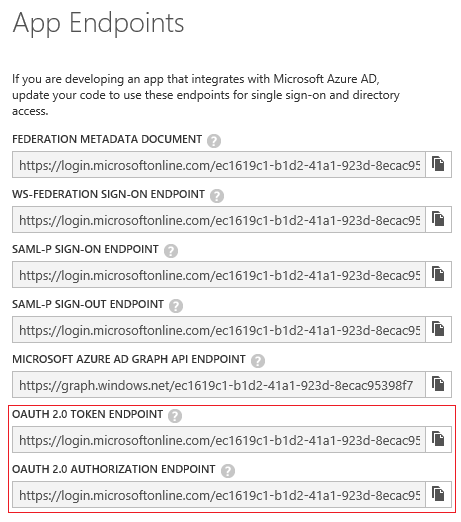
- Click on the View Endpoints button and save the values for the following endpoints:
- OAUTH 2.0 TOKEN ENDPOINT
- OAUTH 2.0 AUTHORIZATION ENDPOINT
- Create a new OAuth Resource via the K2 Management site as outlined in the next section.
Follow these steps to configure the OAuth resource.
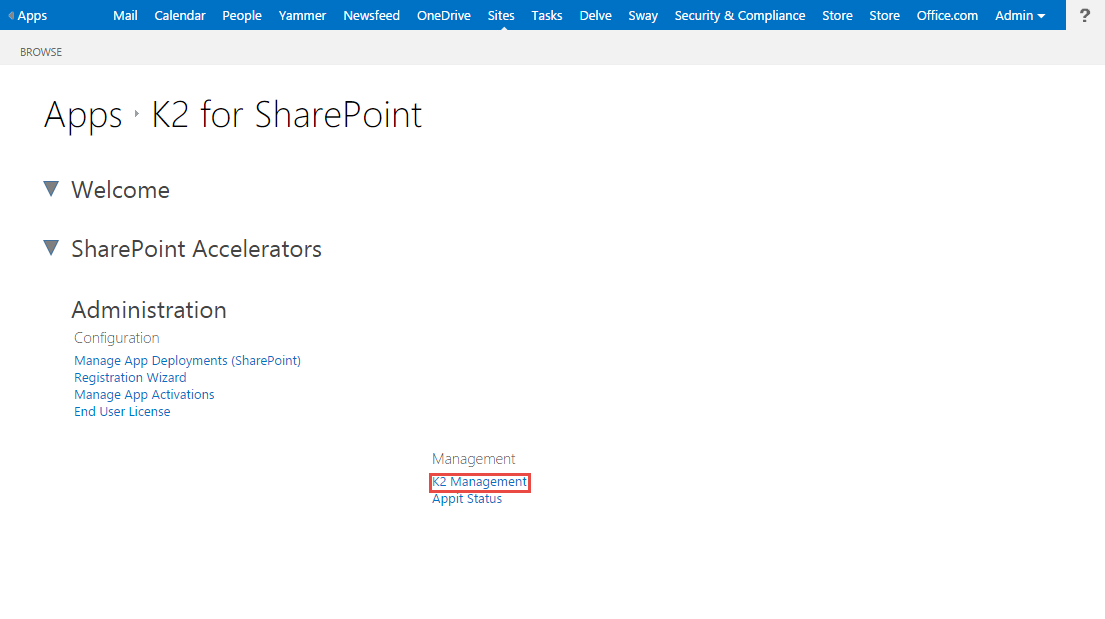
- Log in to your Appit instance and click the K2 Management link in the Administration section on the Settings page of the K2 Appit for SharePoint app. (Alternatively open the K2 Management site and locate the OAuth > Resources page)
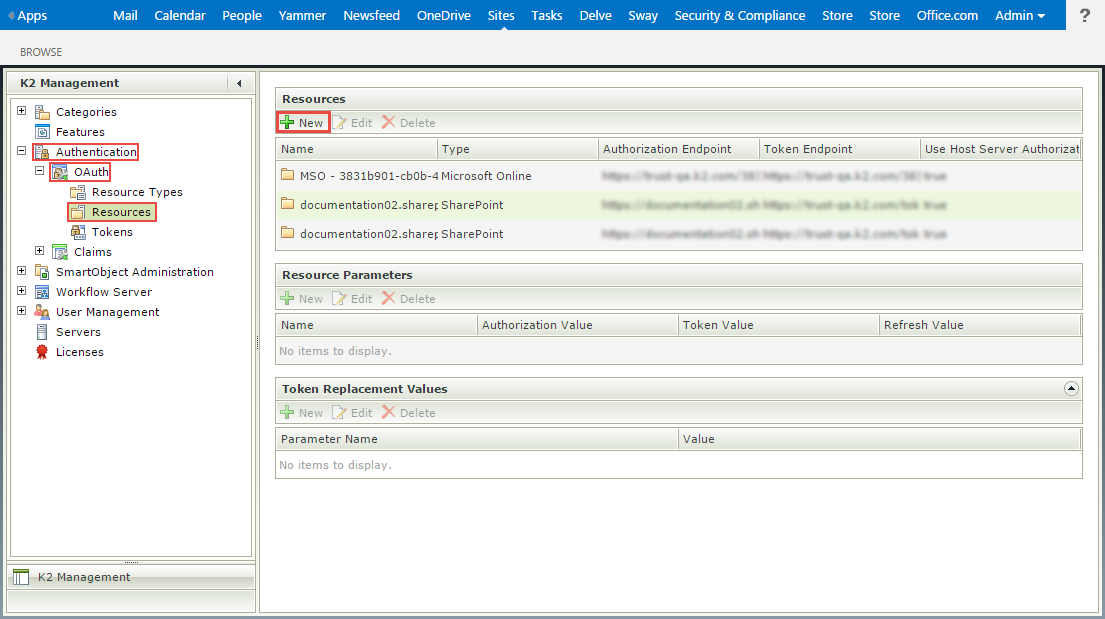
- Go to Authentication > OAuth > Resources on the K2 Management page and click the New button in the Resources view.
- Provide a Resource Name, Resource Type, Authorization Endpoint , Token Endpoint and check the Use Host Server Authorization Endpoint check box. Click OK.
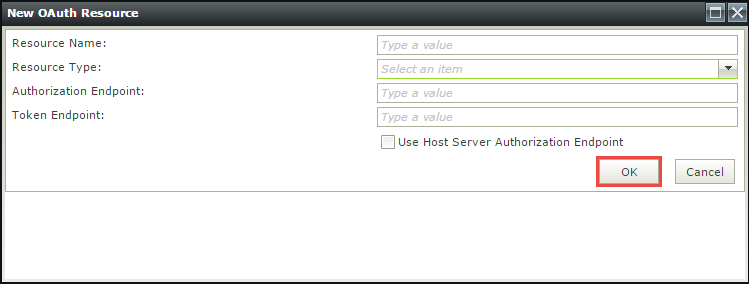
Field Description Resource Name Provide a unique and descriptive name for the Resource. Resource Type Select the Microsoft Online as the Resource Type . Authorization Endpoint The authorization endpoint is the endpoint on the authorization server, and is the URL used to make OAuth authentication requests to the underlying system. This URL depends on the system that provides the authentication and usually looks something like this:
https://login.service.com/services/oauth2/authorize
or
https://service/authorize/oauth/2/requestCheck with the target system administrator or its documentation to determine the URL for that system's Authorization endpoint.
Token Endpoint The token endpoint is the endpoint on the authorization server where K2 exchanges the authorization code, client ID and client secret for an access token. This URL depends on the system that provides the access token and usually looks something like this:
https://login.service.com/services/oauth2/token
or
https://service/token/oauth/2Check with the target system administrator or its documentation to determine the URL for that system's token endpoint.
Use Host Server Authorization Endpoint Indicates that this Resource uses trust.k2.com. Uncheck the check box. - Next add the following values in the Resources Parameters view for the OAuth Resource:

Field Value grant_type Leave as is. client_id This value can be found in the Azure AD App that was created above. The client_id needs to be specified in the Authorization, Token and Refresh columns. redirect_url https://[kuid].appit.com/Identity/authorize/oauth/2 api_version Leave as 1.0 for Authorization, Token and Refresh Values. response_type Add the word code in the Authorization Value resource App ID URI from the Azure AD App created above.
Follow these steps to create the OData Service Instance via the K2 Management Site:
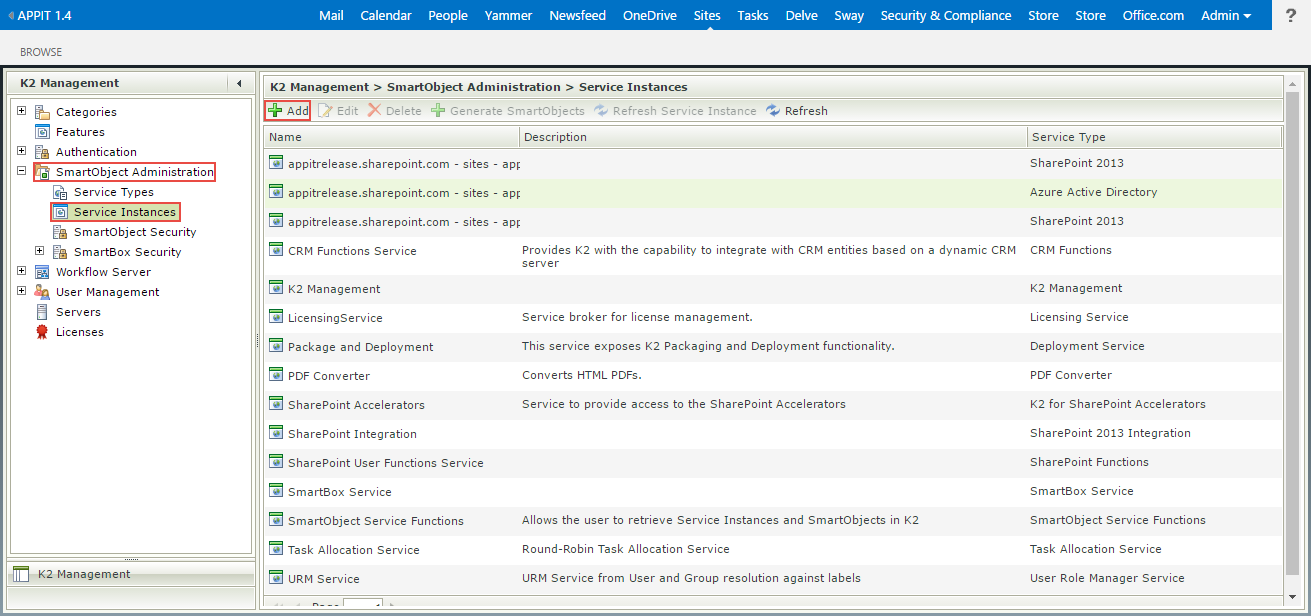
- On the K2 Management site go to SmartObject Administration > Service Instances and click the Add button.
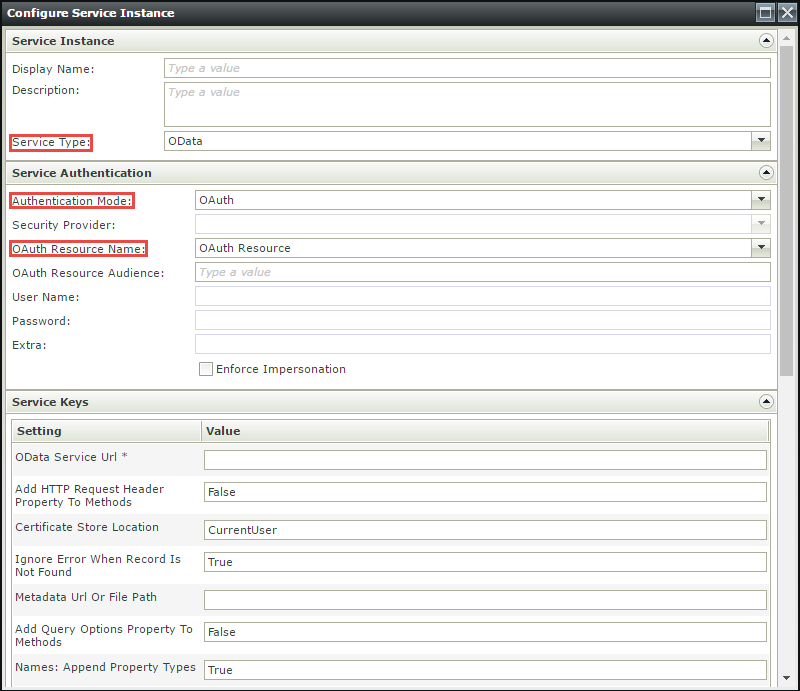
- On the Configure Service Instance page, specify the Service Type as OData, the Authentication Mode as OAuth and select the newly-created resource as the OAuth Resource Name and specify the OAuth Resource Audience as the web service Client ID or App ID URI which can be found in the web.config of your web service.
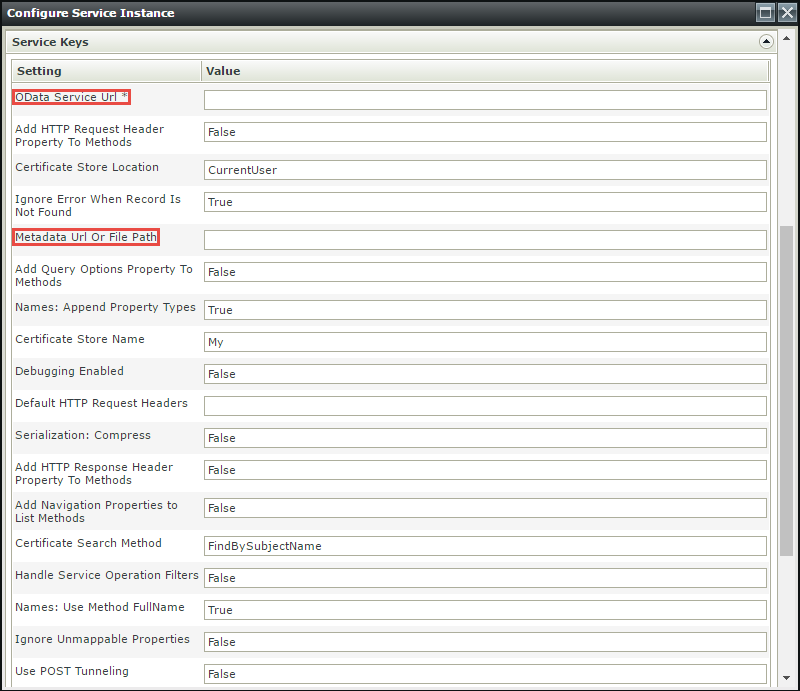
- On the Service Keys section, specify the OData Service URL and the Metadata URL.
- Configure other required fields and the OK button to register the Service Instance.
- Create the necessary SmartObjects and test/use them as desired.


