How to save a Form as PDF and Upload to SharePoint
Objective
This KB article will take you through the steps to utilize the Save as PDF control to save your Form and then upload this PDF to SharePoint.
Before You Begin
Ensure you have your Form configured and ready to go.
Also, make sure you have a Button or some way to kick off the saving of the Form as a PDF and that you have your Save as PDF control configured properly.
Lastly, if you would like you can actually create a new PDF File SmartObject to store the PDF if you would like to have a separate repository for each application. This can be done by creating a new SmartObject with a File property.
How-to Steps
1. Make sure you have the Save as PDF control and rule configured. If you have not done this, please follow the instructions below:
https://help.k2.com/onlinehelp/K2Cloud/UserGuide/Update_10/default.htm#Create/K2Designer/Controls/SaveAsPDF/SaveAsPDFControl.htm
2. Create a rule when the Save as PDF control is complete. This way we wait for the PDF to be generated before uploading it.
Use the "When a Control on the Form executes a method" rule. Select the Save as PDF control and choose Complete for the method. Also make sure you have an Attachment control to save the PDF back to the Form for uploading to SharePoint
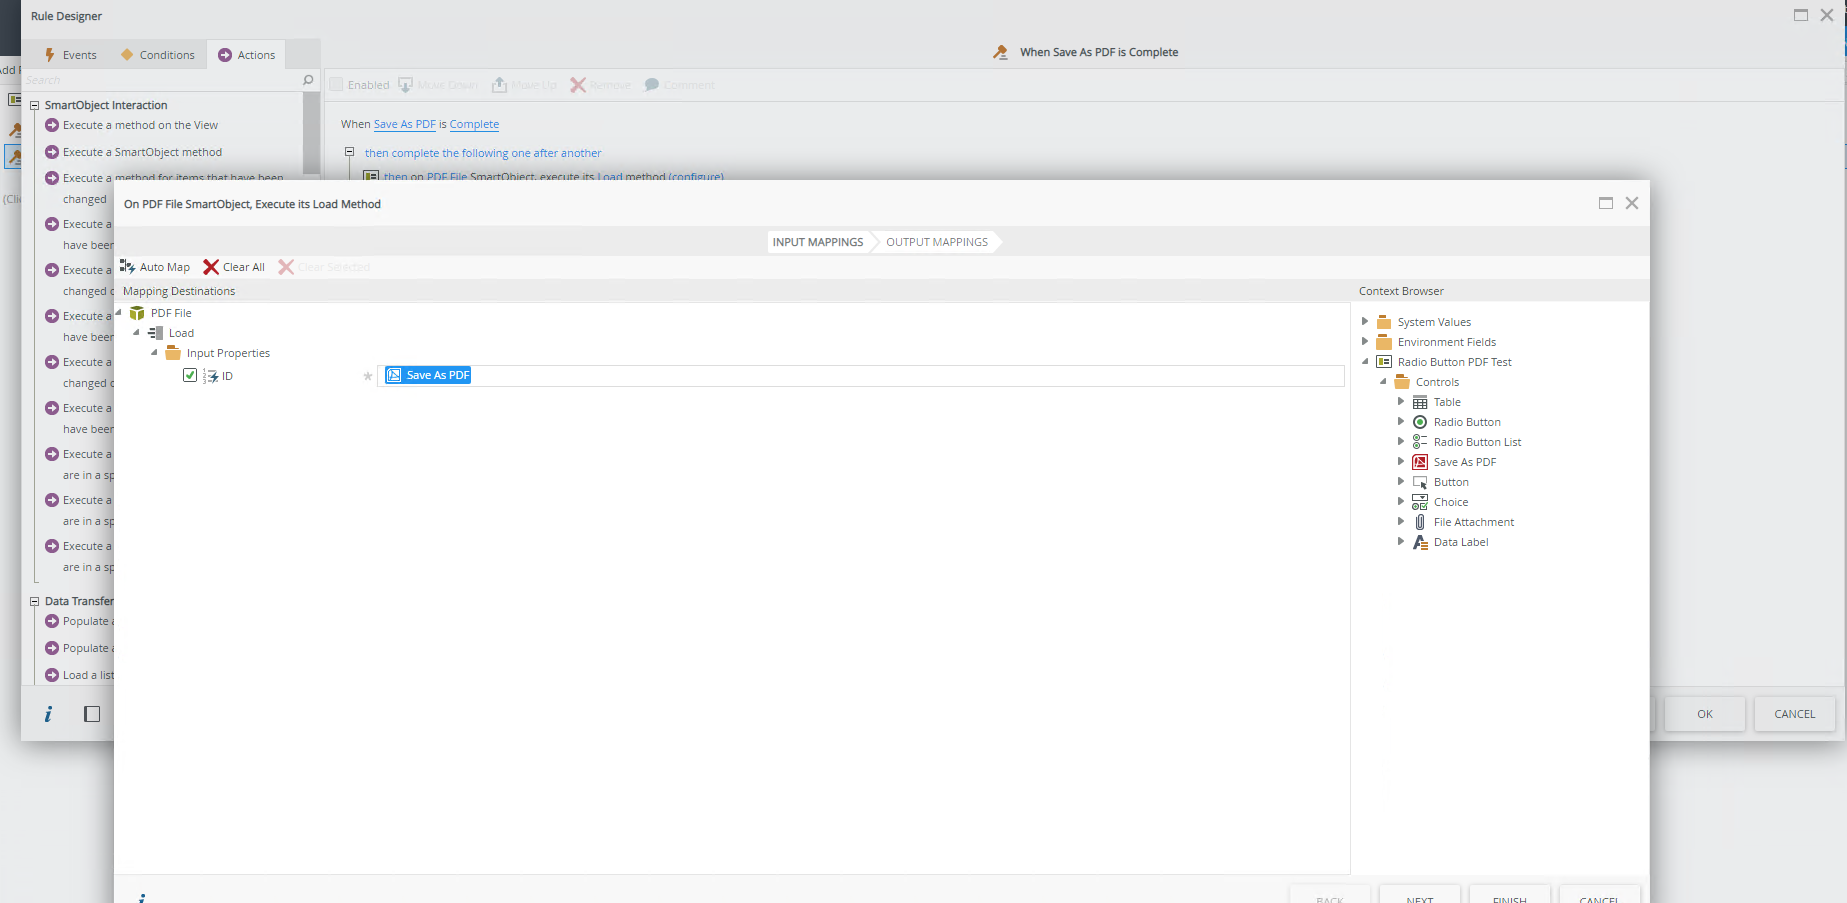
3. Add the rule to load the PDF into the Form. Drag the Save as PDF control into the ID (The Save as PDF control saves the ID). See the screenshot below.
Use the "Execute a SmartObject method" rule targeting the PDF File SmartObject (or custom SmartObject if you created your own). Select the Load method.

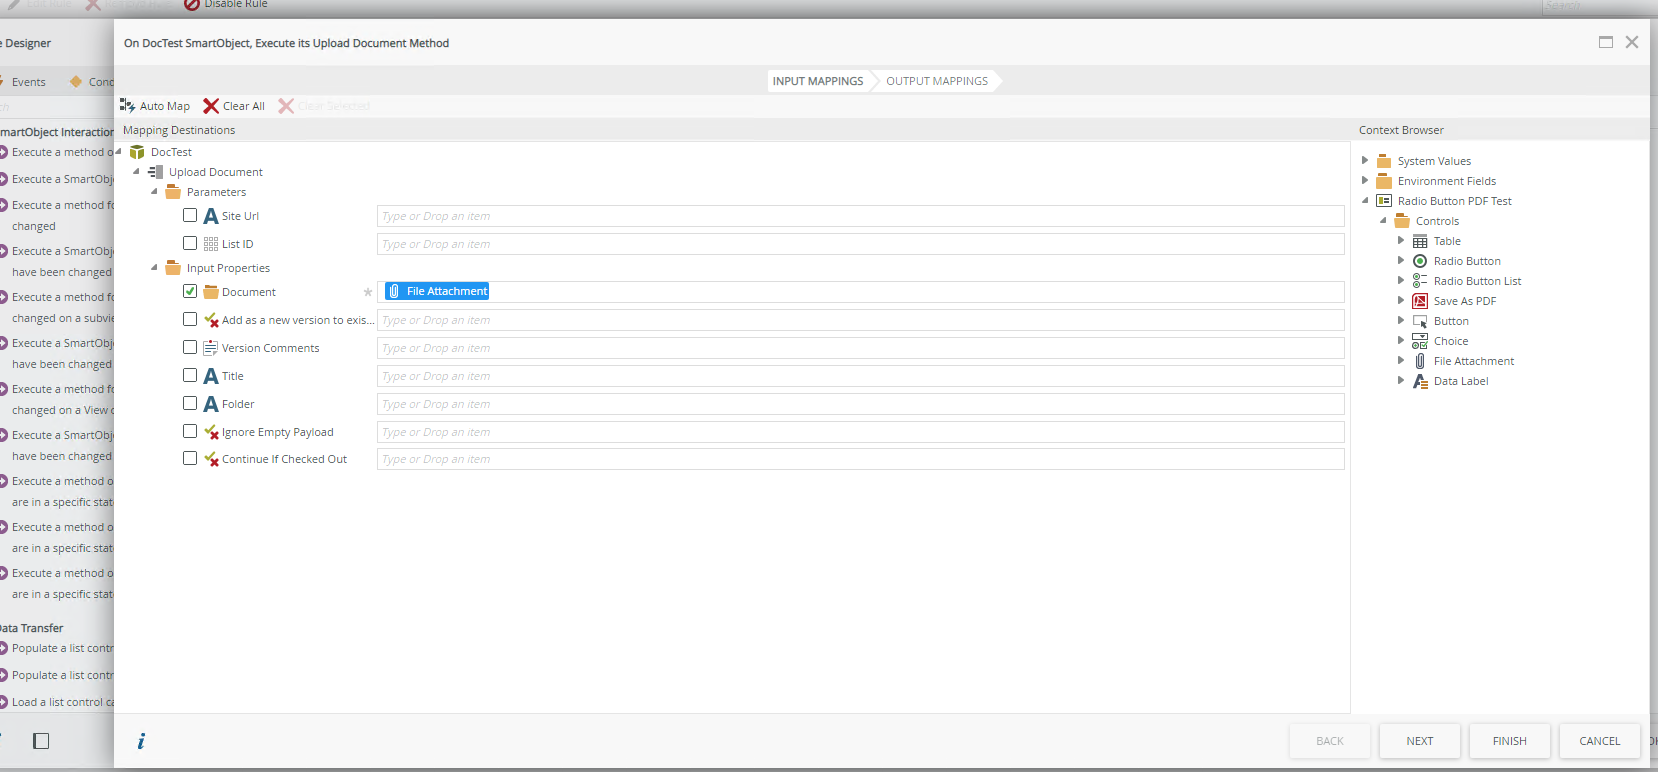
4. Create the Upload Document rule. Drag the Attachment control into the Document property. See screenshot below.
Use the "Execute a SmartObject method" rule targeting the Document Library SmartObject. Select the Upload Document method.

