


A common request over the years has been the ability to translate text into multiple different languages using a Nintex Worklfow. In this example, I've created a new Xtension that will interface with the Google Cloud Translate API, providing native translation services within your workflow. If you'd like to see a video walkthrough of this Xtension in action, please check out the embedded video below:
To download this Xtension or to get more details on how your Google Cloud account needs to be configured to use this Xtension, please check out the page for this Xtension on the Nintex Process Accelerator Gallery.
For this example, I'll be running through a baseline request where we're translating some text and sending it via email.
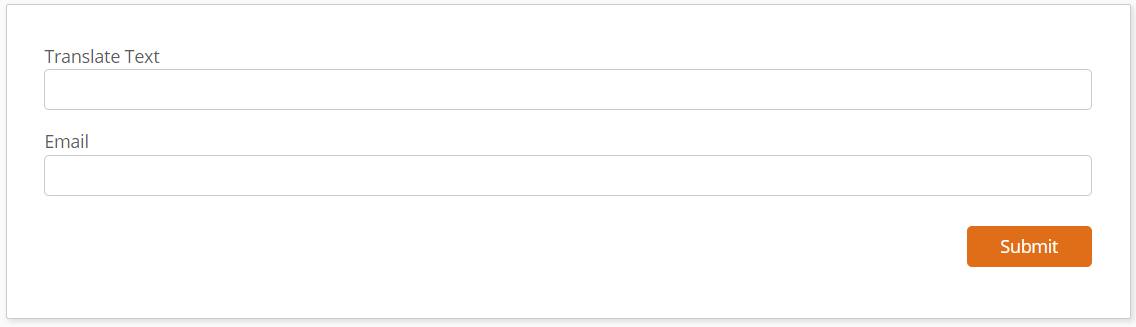
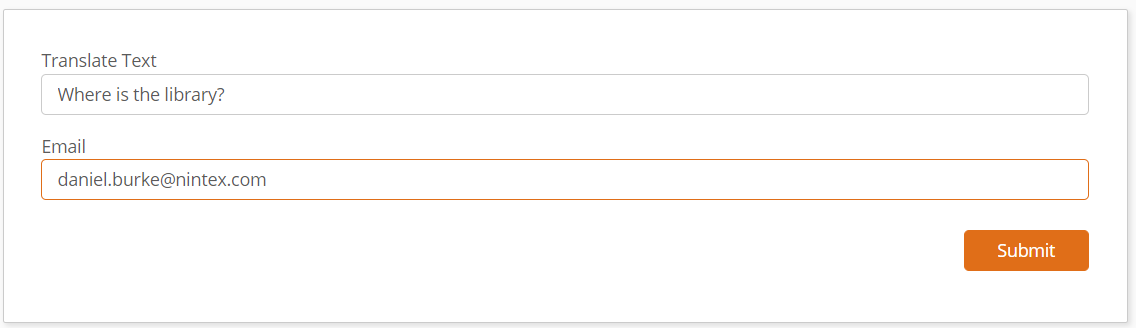
To start, I have configured my start event to be a form with two fields. 1) Translate Text (where the text I want to translate will be provided) and 2) an email (to send the recipient the translated text via email).
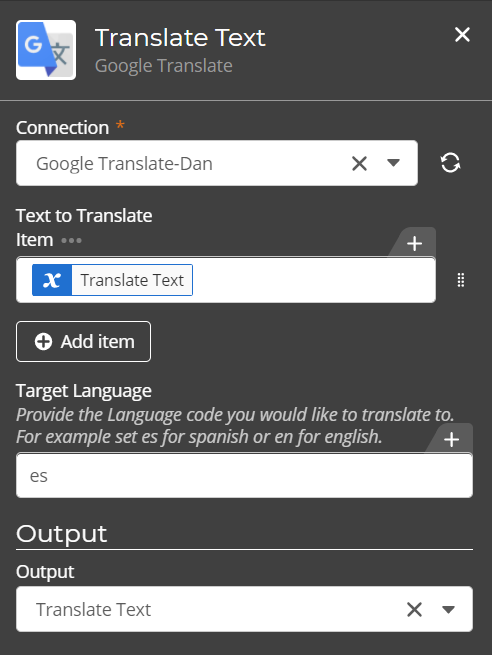
Next I'll configure the Translate Text action. You will configure your connection using an account with access to the Google Cloud Project, and it will use Oauth to authenticate. In this action I've configured the 'Text to translate' using the start event variable. You'll notice that this provides us with the ability to add multiple items for translation. The Google Cloud Translate API allows for multiple pieces of text to be translated during one call to the API. We are using the Advanced preview of the Complex Object User interface for this action. Beyond that, we've configured the language as Spanish using the ISO-639-1 Language code. For available languages, please see the Google Language documentation.
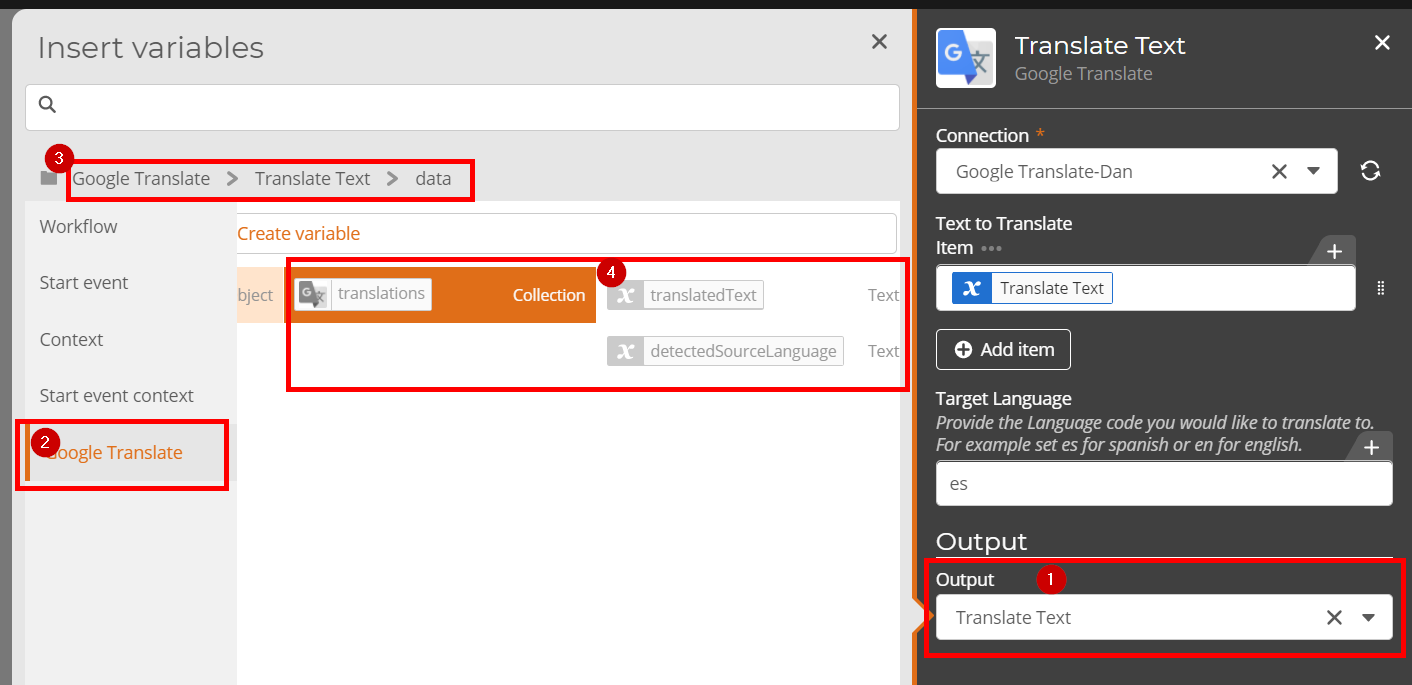
For the output, you will notice that the choice is only setup as one variable. This is also using our new object framework. The standard response from this API includes an array of translations along with the detected language. We've defined that in the Xtension to allow for capturing all of this information into a single object variable. This also allows us to interact with the information in different ways within the workflow.
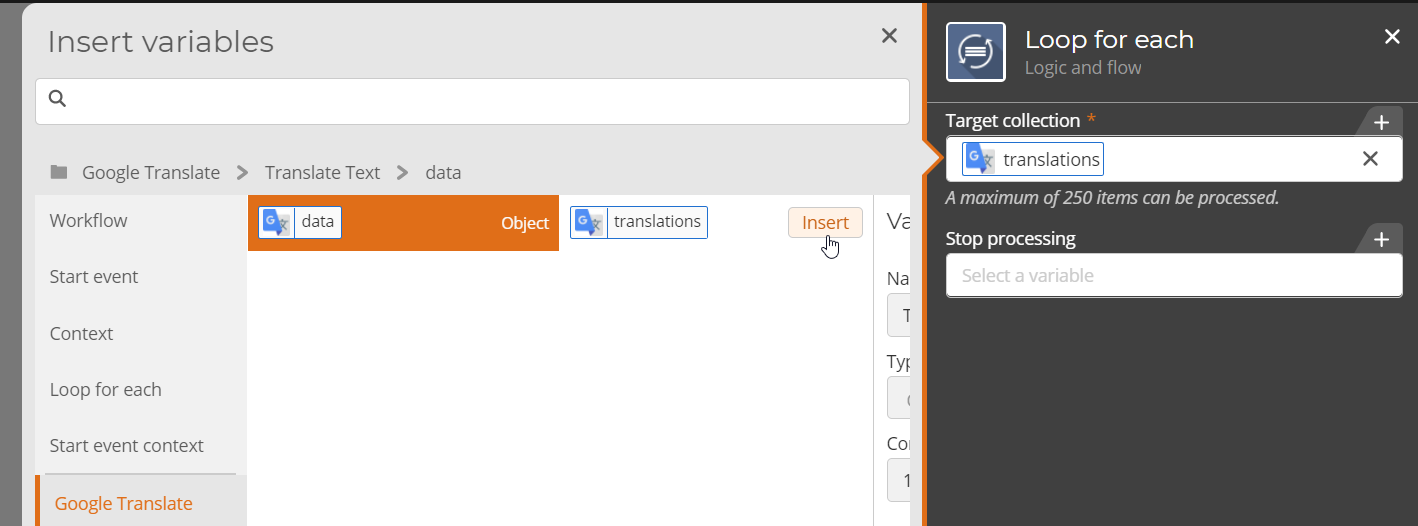
Now that the translate text action is configured, we'll need to grab the information and send it out. In this example, we are using the 'Loop for each' action to get the translated text. This will be configured with the 'Translations' collection that was stored in our object. This helps in two ways, 1) it will pull the object (detected language and translated text) for each value that was translated, and 2) it provides a consistent way to get the data out of the object structure.
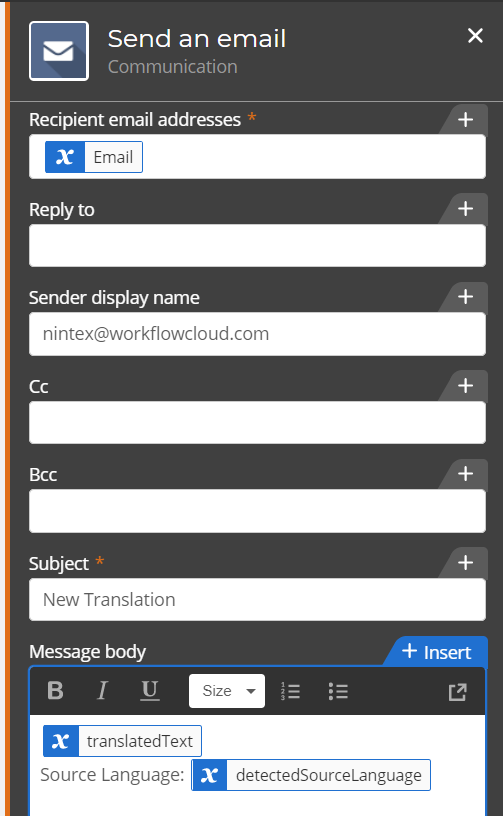
Now that we've configured the loop, we can either set variables for each piece of text we've translated or we can send the email. In this instance, because it is just the one variable, we will nest the email action within the Loop. I've configured the email to use the email we configured in the start event as the send to, and I've configured the body of the email to use the values for the translated text and detected source language.
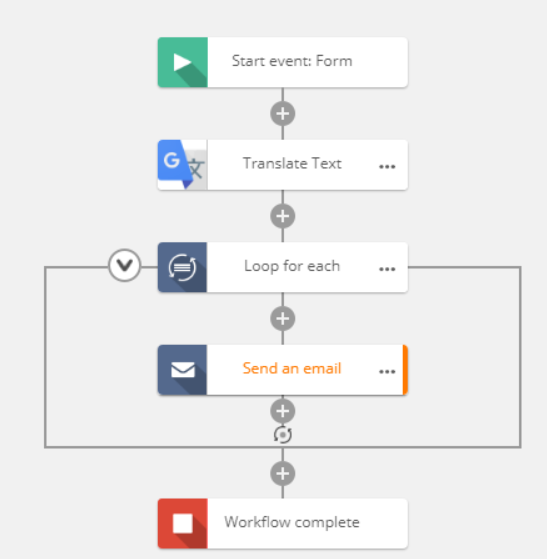
The final workflow looks like this:
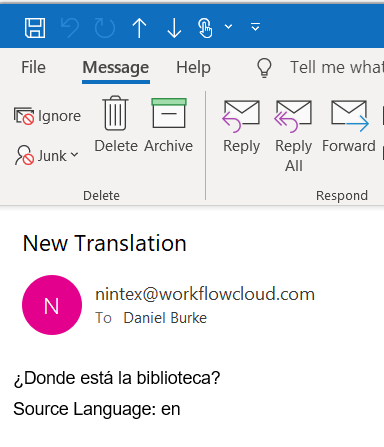
Now we can run the workflow and get our translated text value in our email!
If you would like to see any other custom connectors built for Nintex Workflow Cloud, please visit the Nintex Process Accelerator Gallery. If you have any questions, please feel free to comment below!