

How would you like it, if I told you there is an incredible BPM tool that could, do the following and so much more?
- Enable consistency
- Improve staff efficiency
- Enable compliance with industry standards and regulations
- Reduce the risk of critical failures
- Improves customer satisfaction
Well, if you are like me, then you should be saying sign me up please (www.promapp.com)
With the rigorous demands placed on organizations, to standardize and manage their business processes, there is critical need for a BPM tool that is easy to use and adaptable as well, hence Promapp :)
Now, before we get started, I have a question for you: Have you downloaded a trial of Promapp yet…? No worries if you have not yet, I am sure you will once you have finished reading this blog
Welcome to Promapp
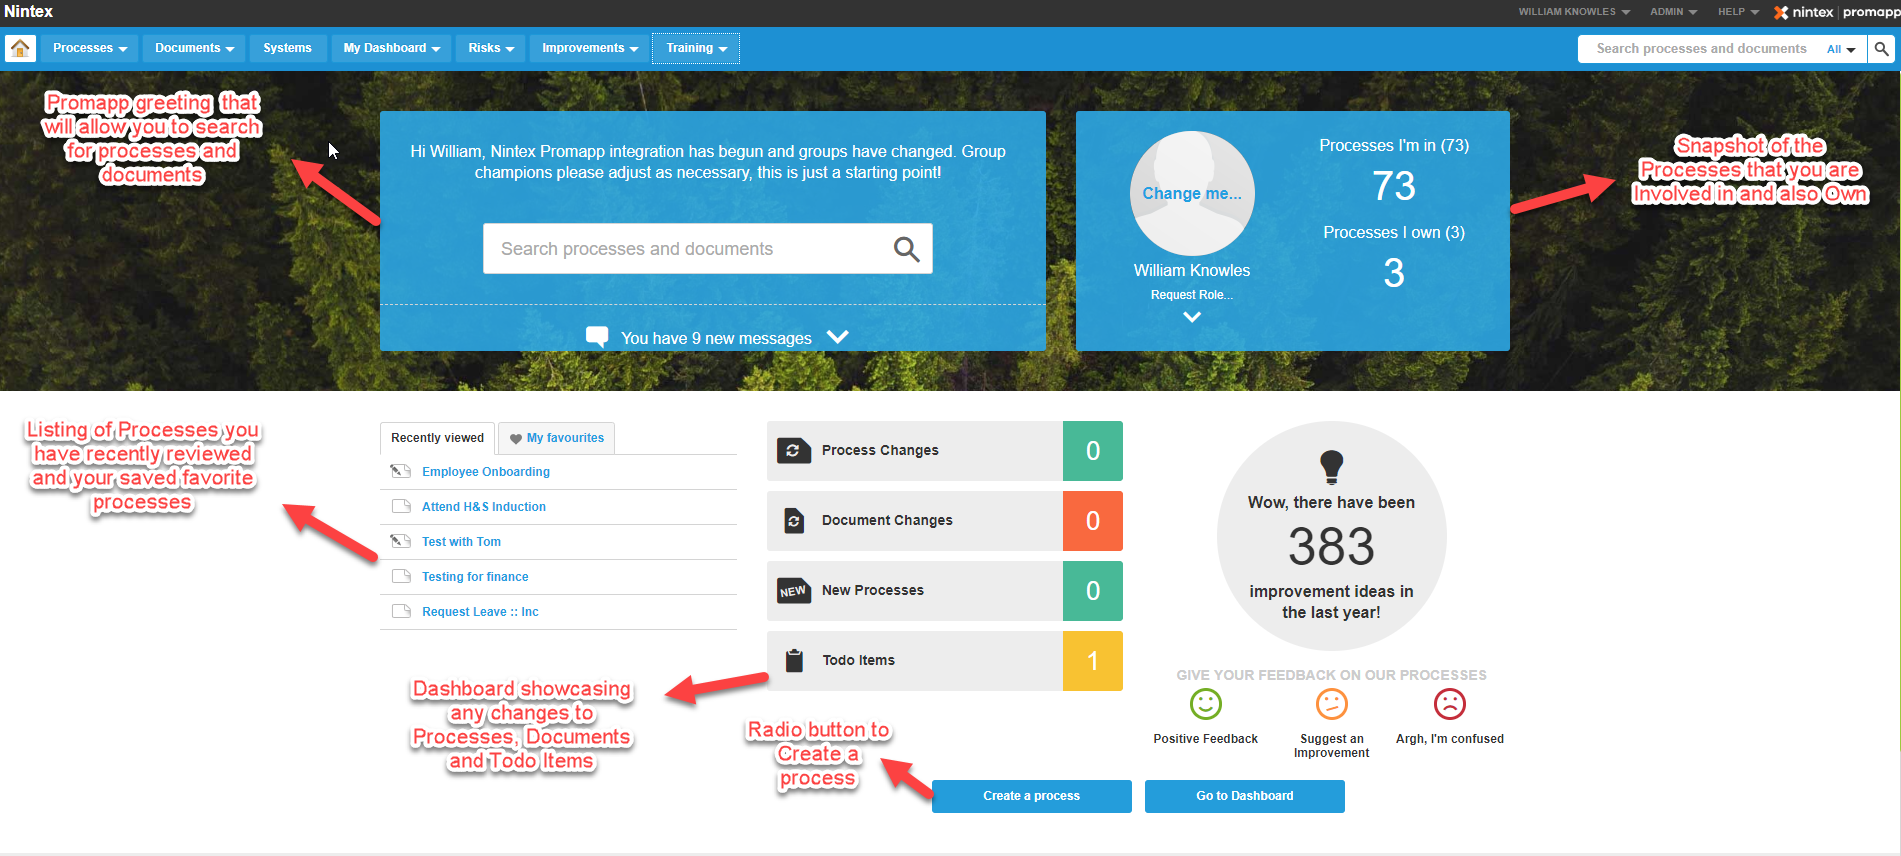
When you first log into Promapp, the following home screen will appear:
Navigation within Promapp:
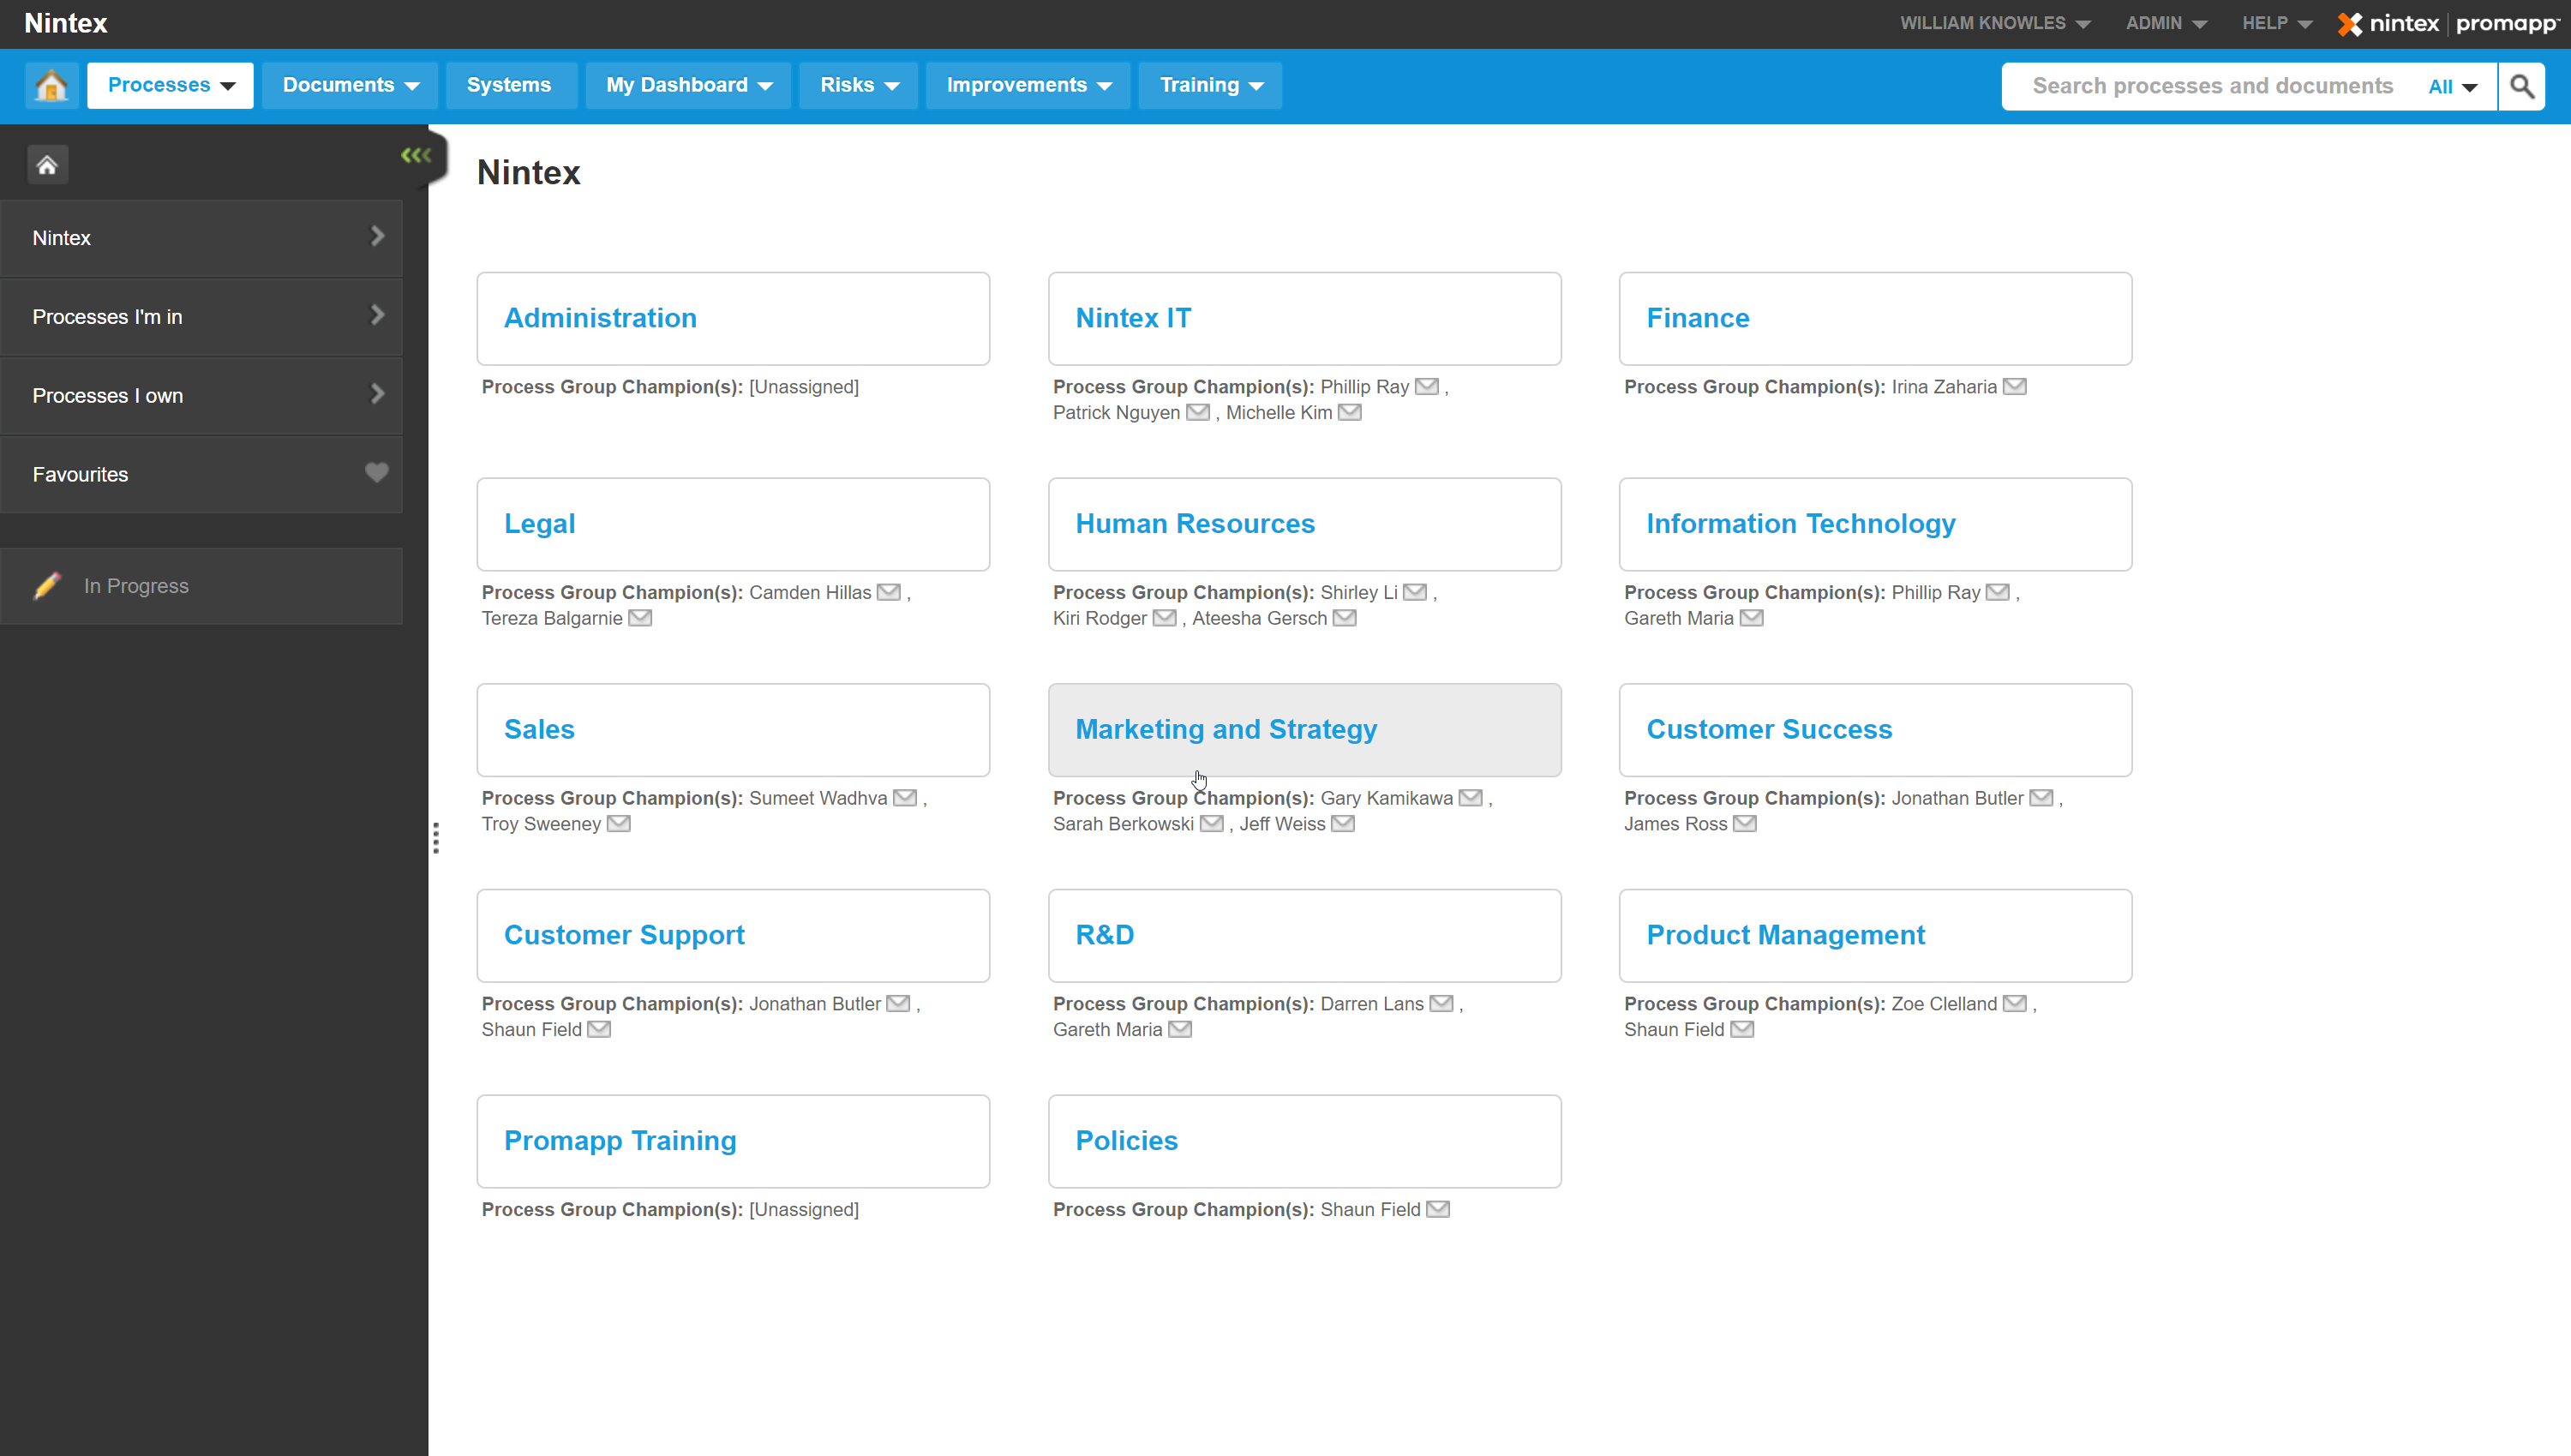
Processes: This tab will highlight all of the Process that you are Involved in (Process Owner or Process Expert), Own (Processes that you have created), Favorites (Pinned Processes listed as your favorite for easy accessibility):
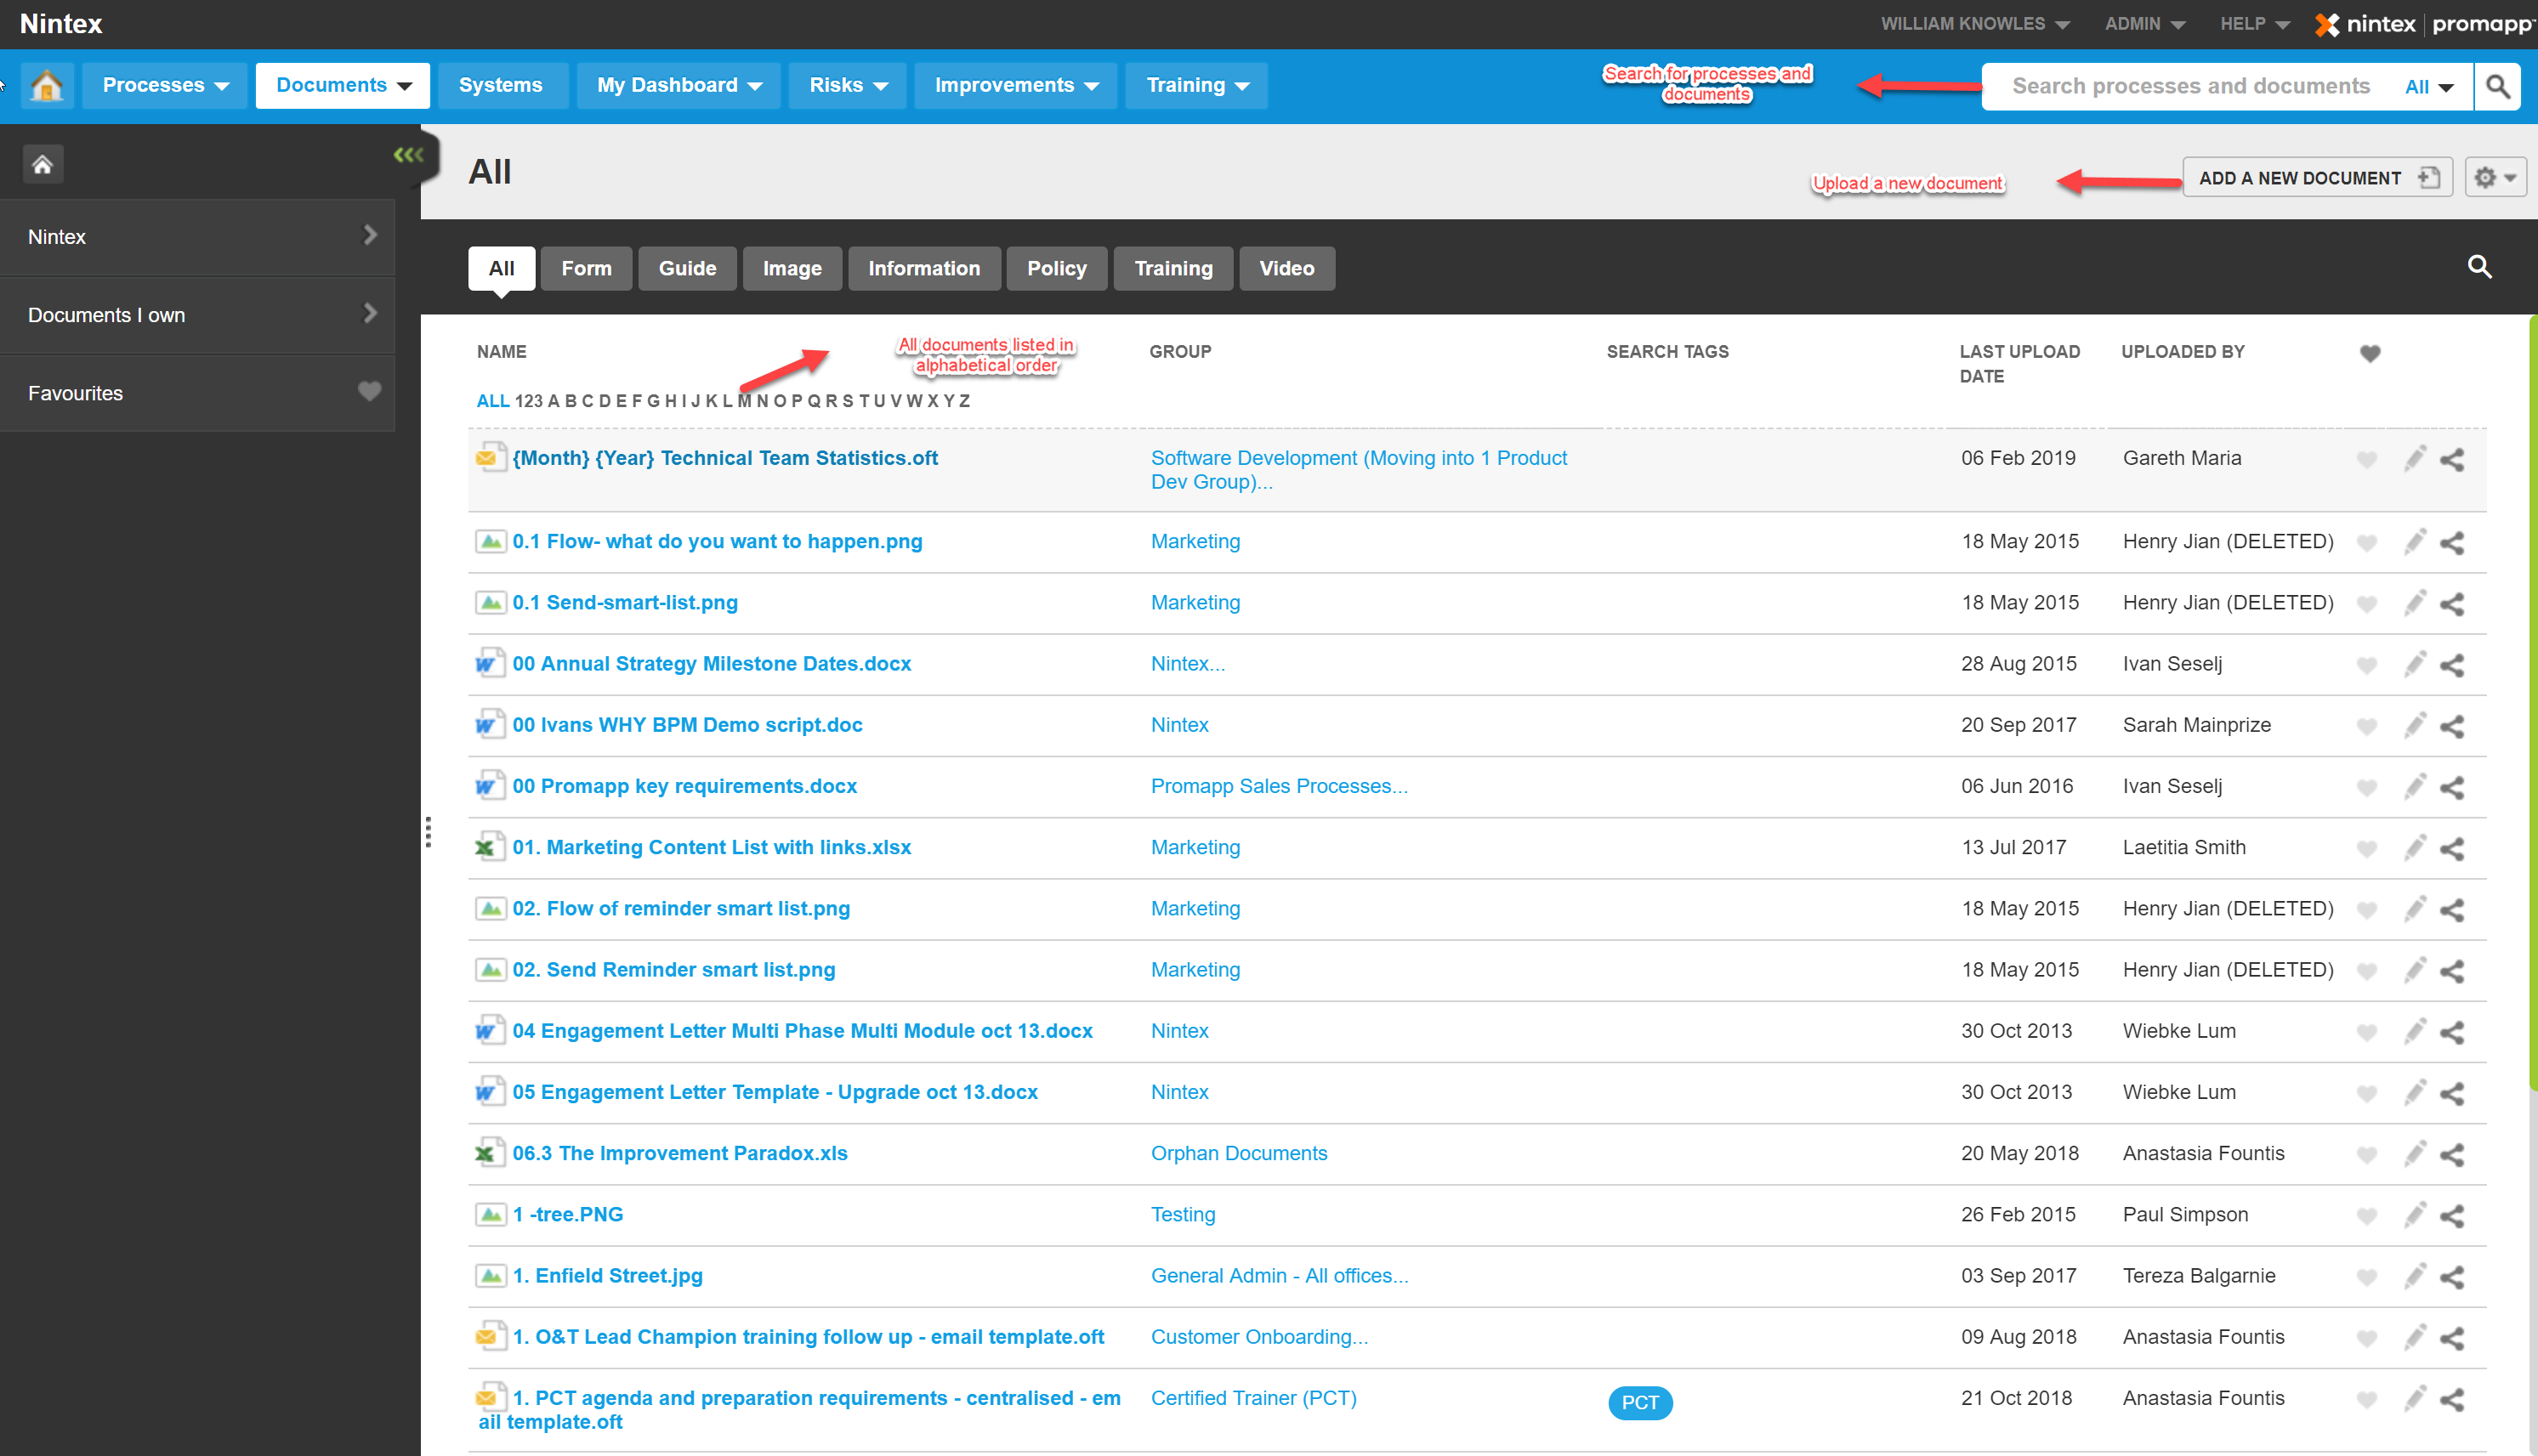
Documents: All documents and correspondences that you add, to support/link to your processes. This can include a Form, Guide, Image, Information, Policy, Training and Videos:
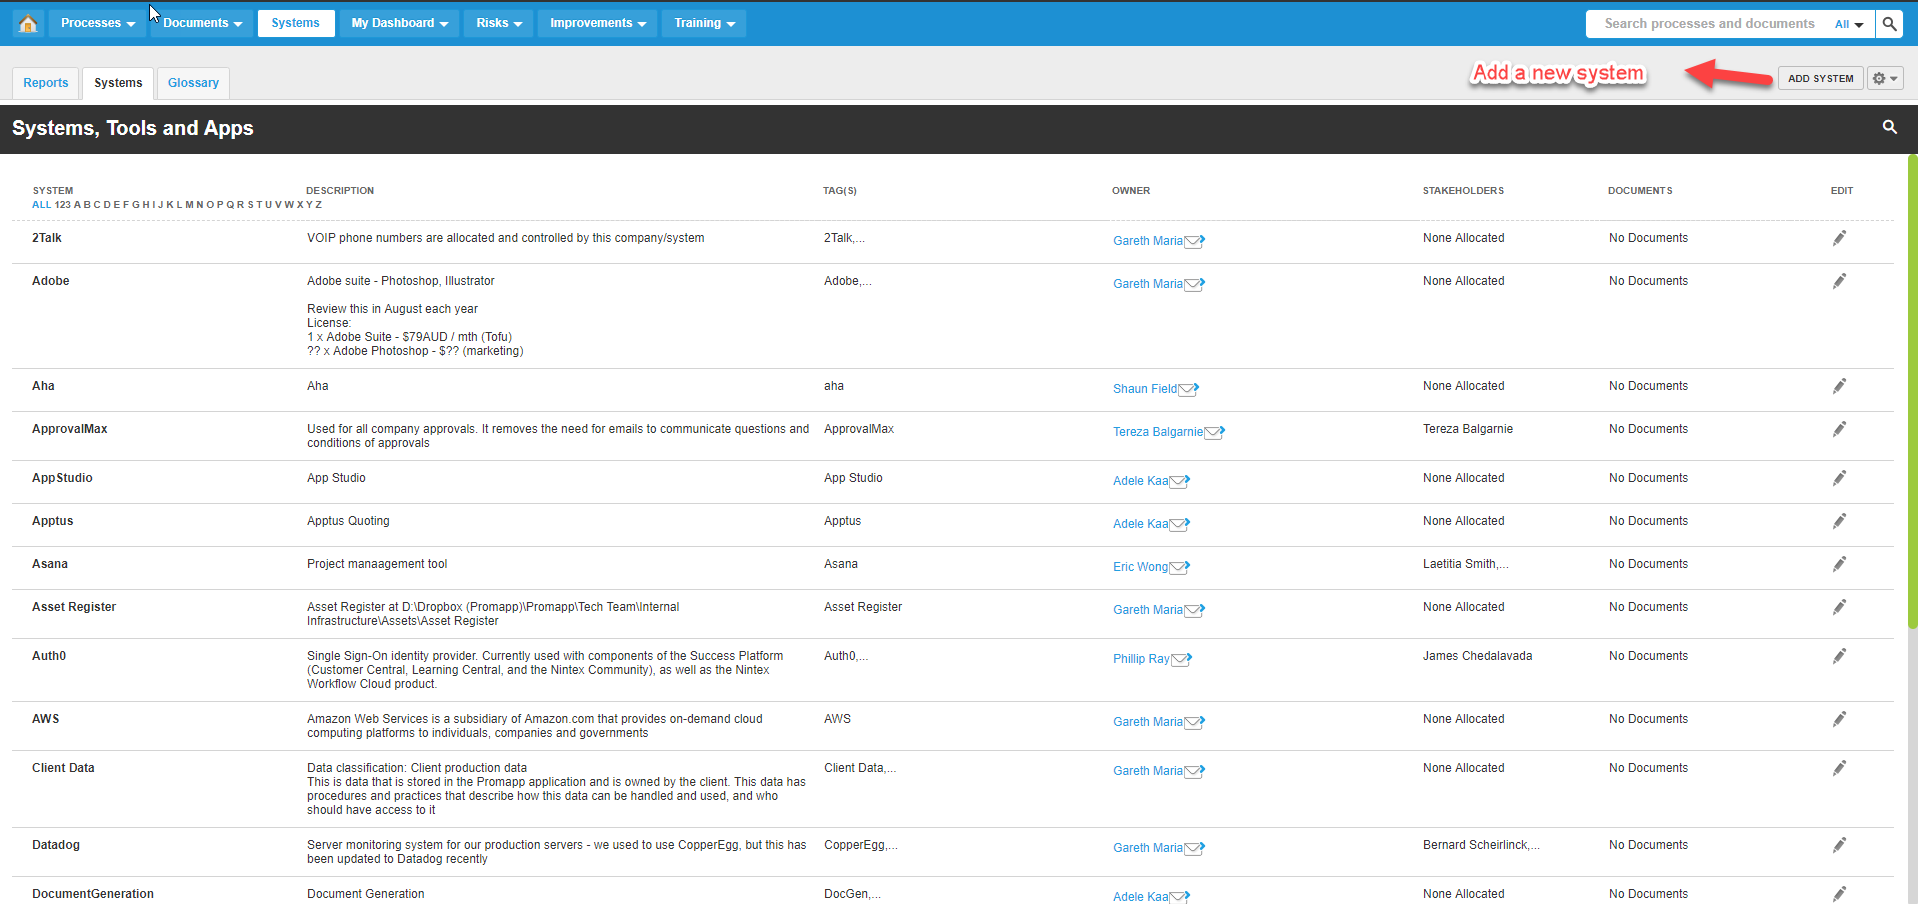
Systems: Systems that support your business processes are here. Systems are in alphabetical order:
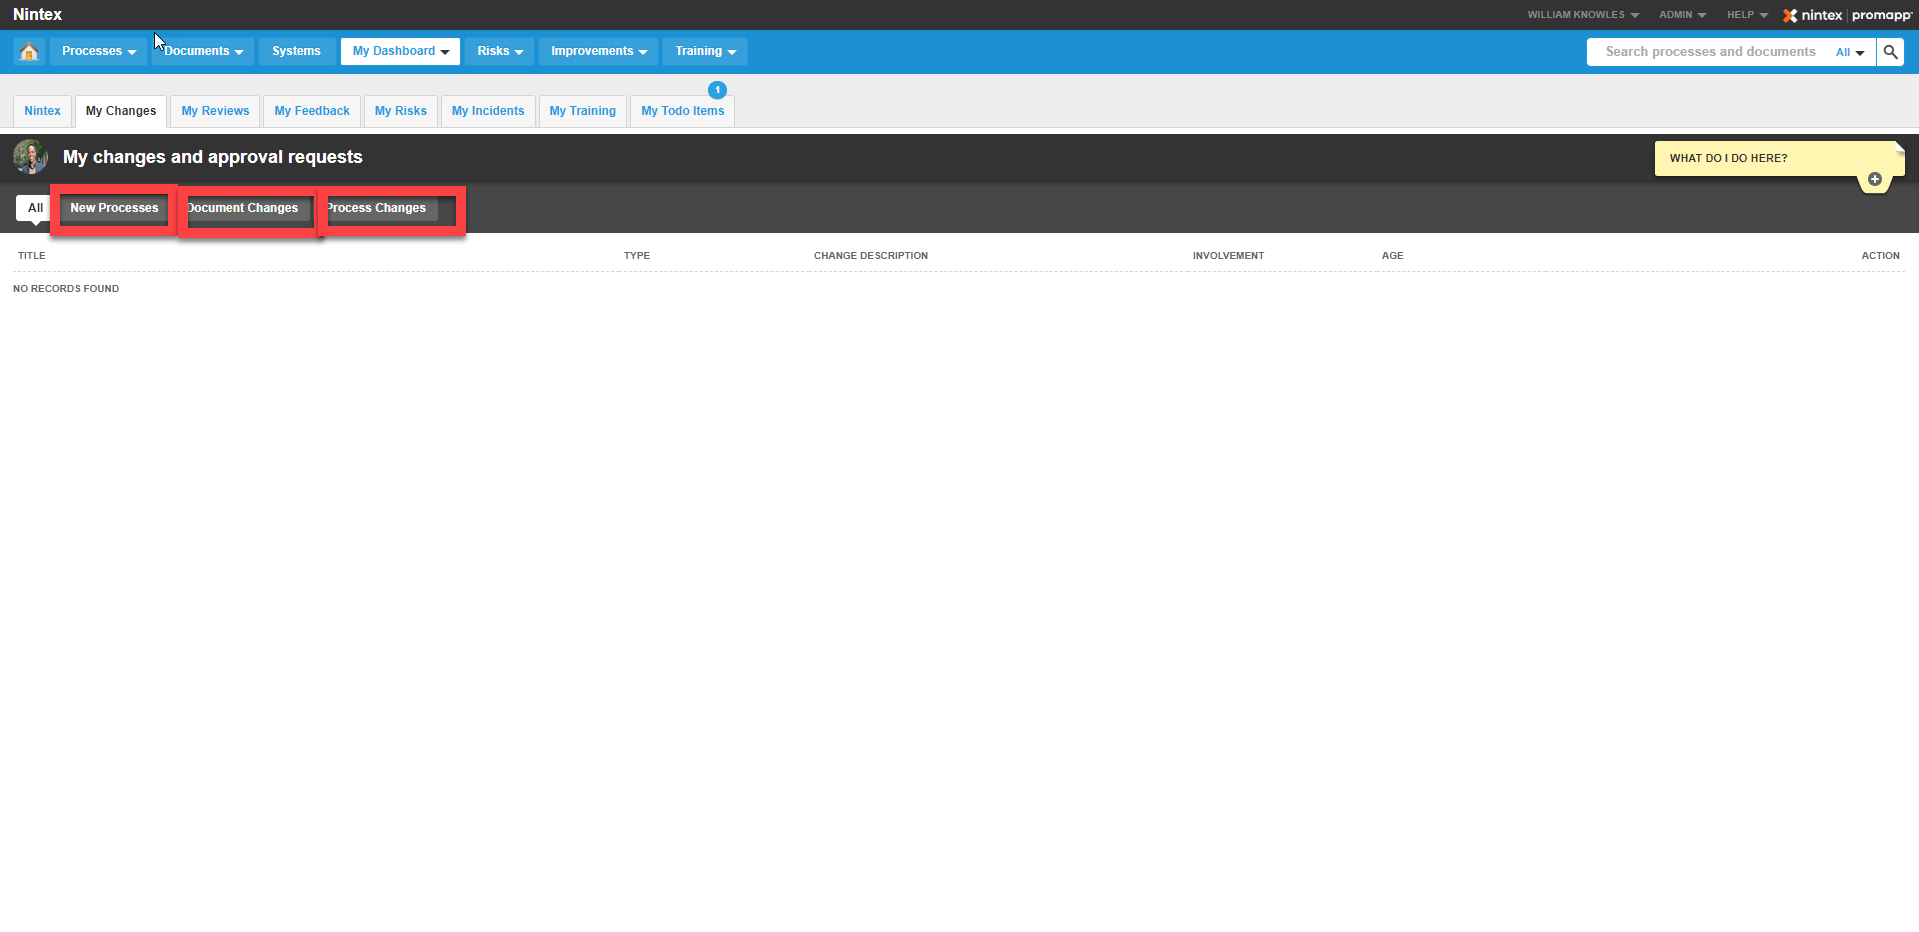
Dashboard: Dashboard view New Processes, Document Changes, and Process Changes:
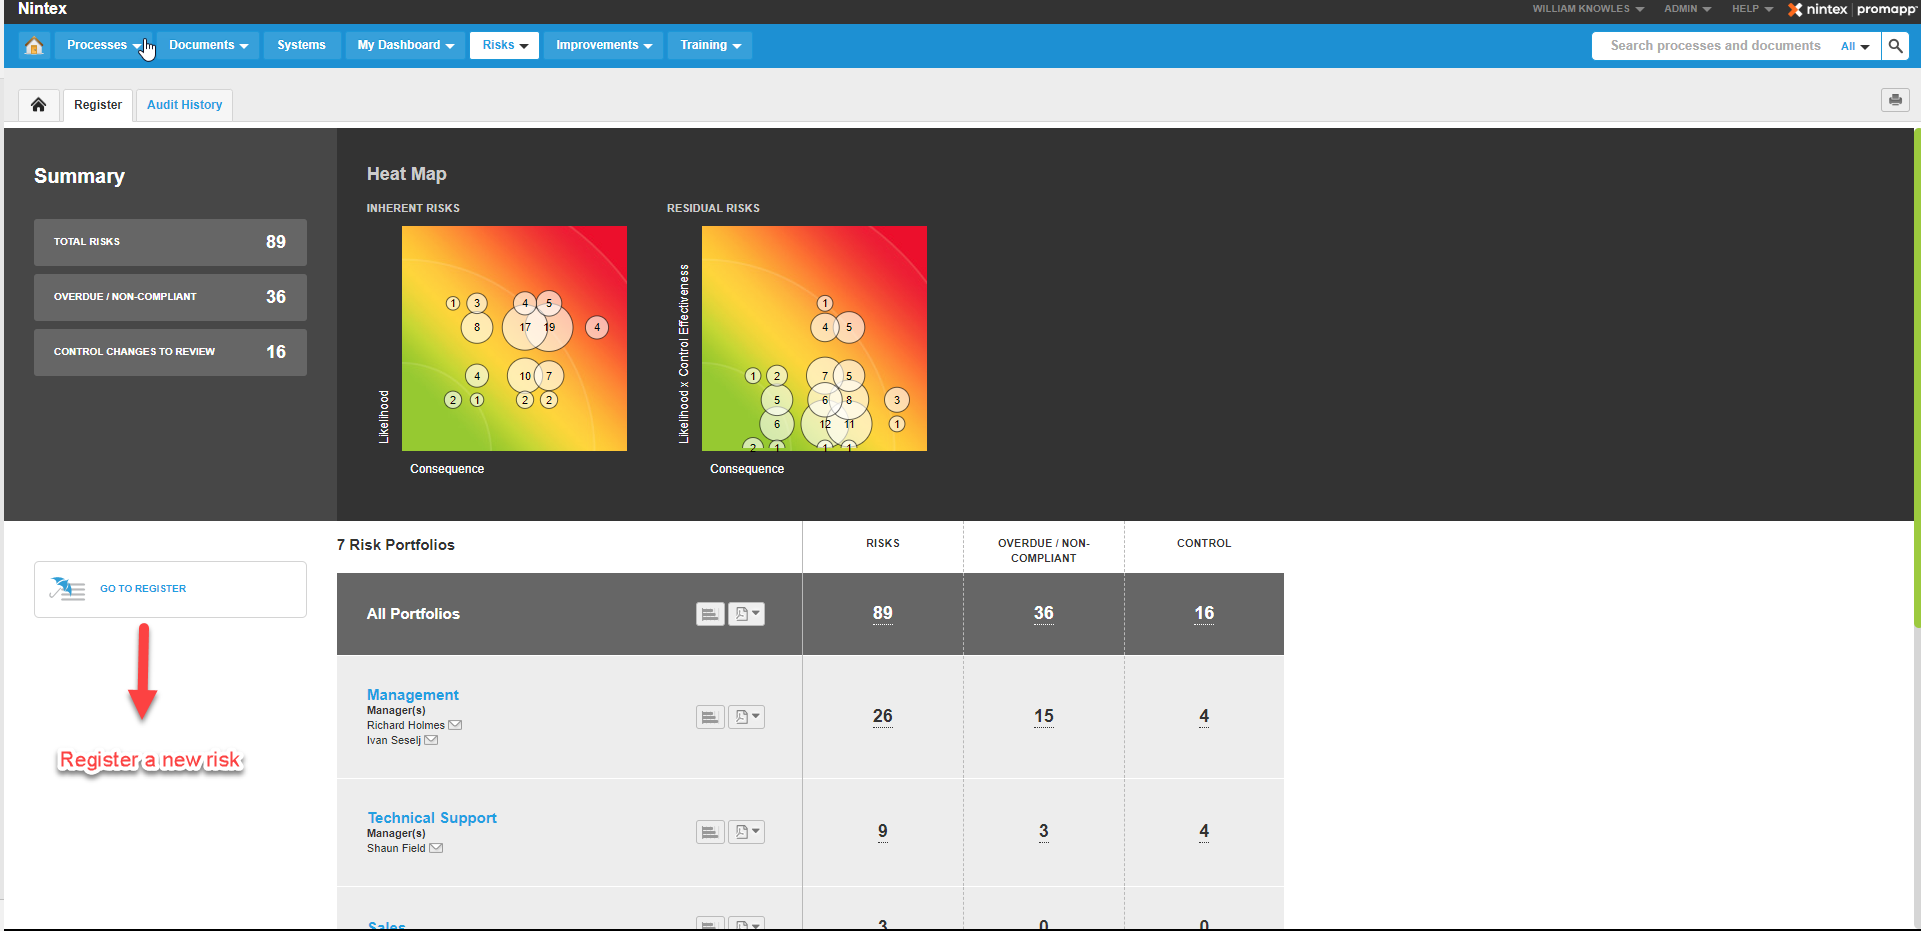
Risks: Any Risk associated to a process are located here, to include, Overdue Risk and Control Changes to Review. Additionally, you can register new risks, by clicking on the “Go To Register” radio button:
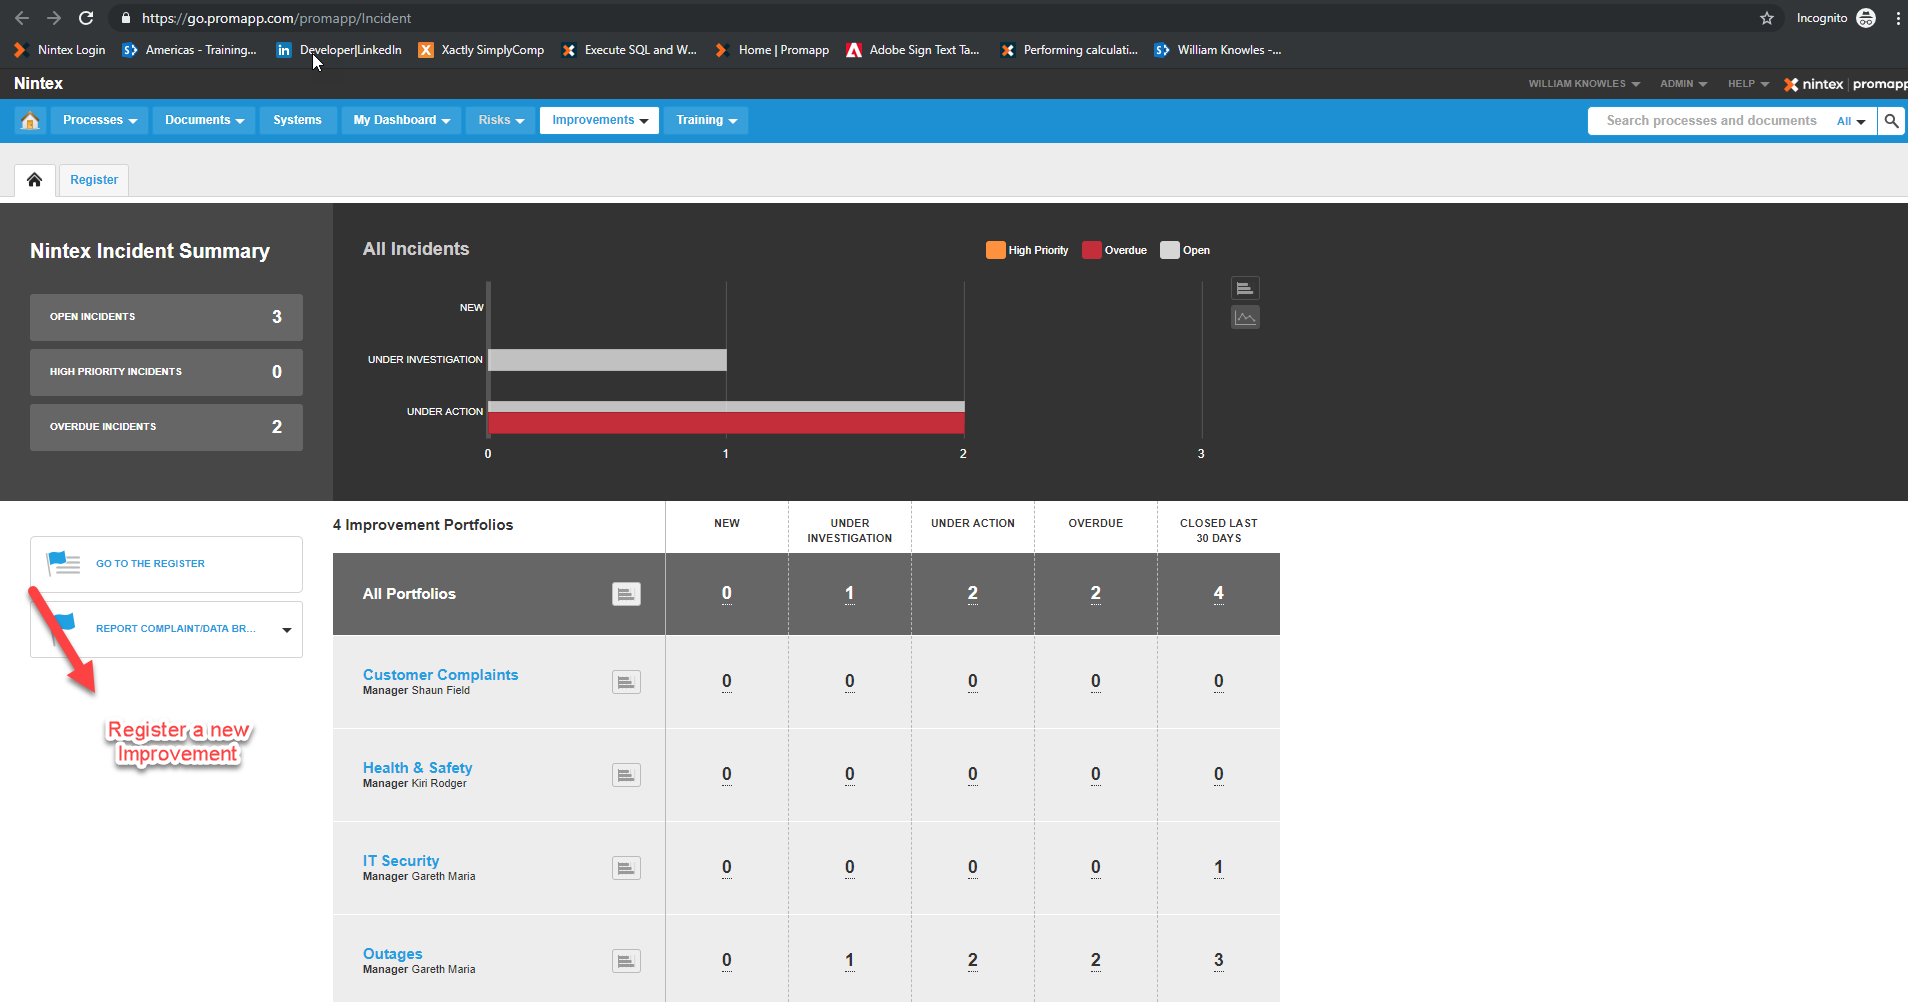
Improvements: A listing of improvements for your process, to include, Open Incidents, High Priority Incidents, Overdue Incidents. To identify an improvement click on the “Go To The Register” radio button:
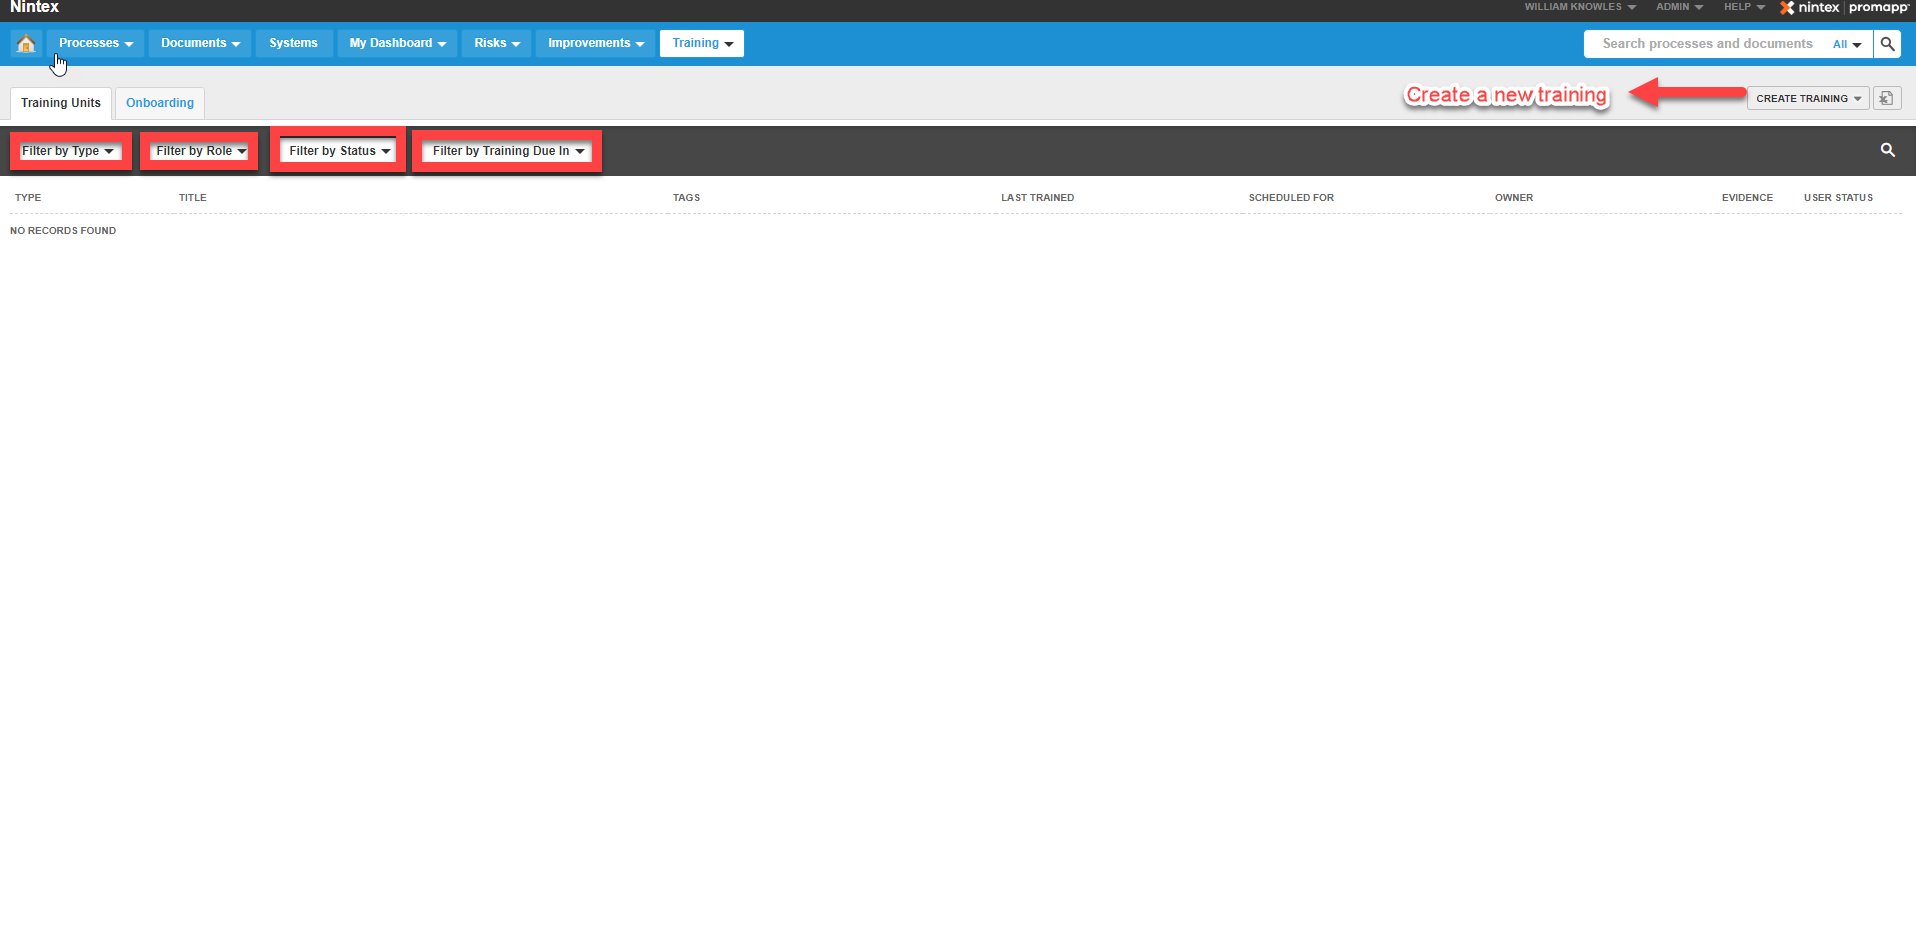
Training: A listing of trainings, to support your processes. To add a new training, click on the “Create Training” radio button. You can filter trainings by Type, Role, Status, and Training Due In:
Now that we have covered the fundamentals of the ribbon control, let us get to building :)
For this exercise, we will build an Employee On-boarding process:
- On the Home Screen, click on “Create a Process” radio button:

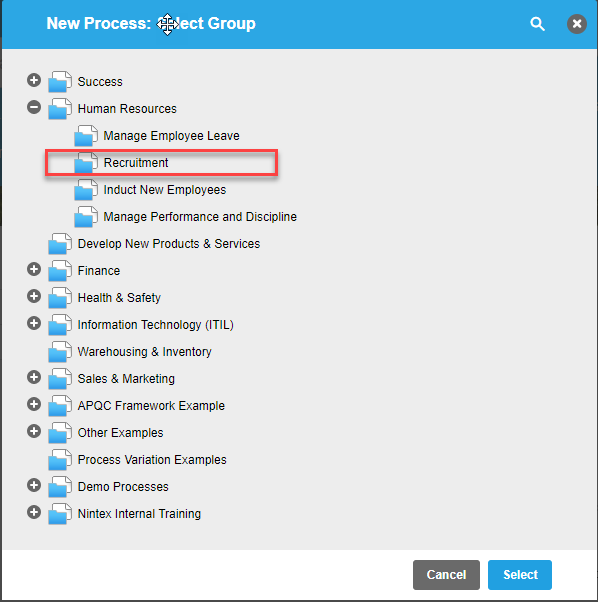
- Select the group, which your process aligns with. For Employee Onboarding, select Human Resources, then Recruitment:
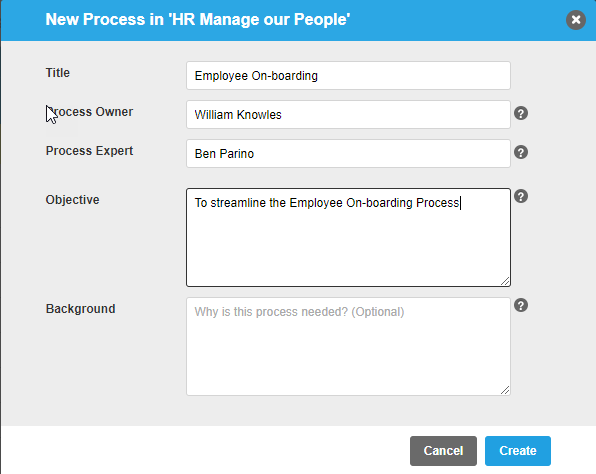
- Fill in the following information that supports the Employee On-boarding process:
- Title: Name of the process we are creating “Employee On-boarding”
- Process Owner: Person who currently/ or will own the process. This is a people picker control pulling from Active Directory
- Process Expert: Subject Matter Expert (SME) of the process
- Objective: What does this process achieve?
- Background: Why is this process needed? (Optional)
- Click on “Create” when information is filled in
The following landing page wiill incompass a lot, so be sure to pay attention to detail :)
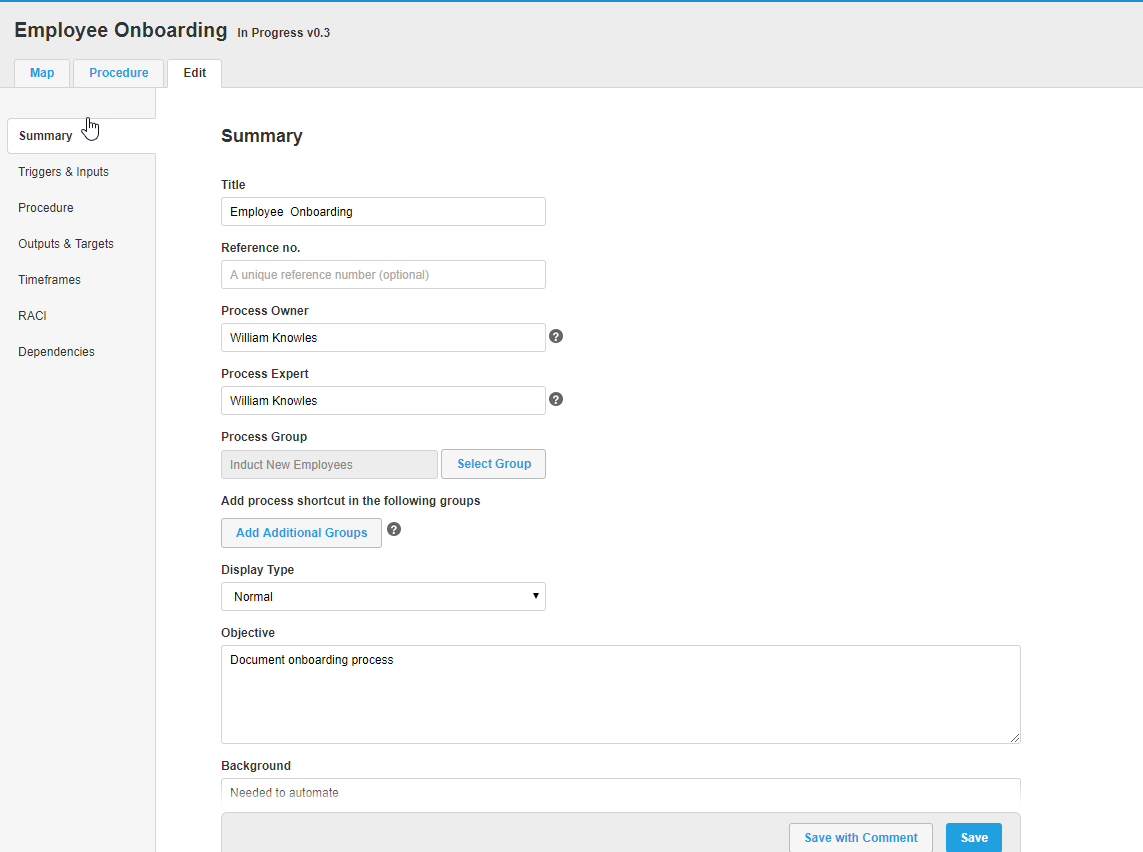
- Summary: Over all summary of the Employee On-boarding process that we just created:
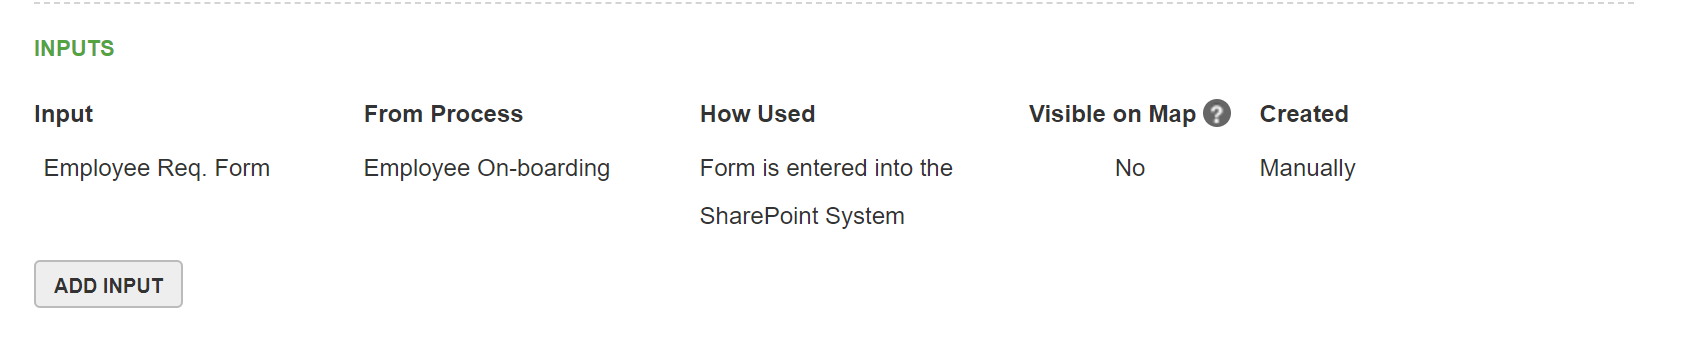
- Triggers and Inputs:
- Trigger: A start event for the process. For Employee On-boarding, it will be a Department has a New positon or Back Fill position open. Frequency can be daily, monthly, or Ad hoc. Volume is an estimated per meaningful period.
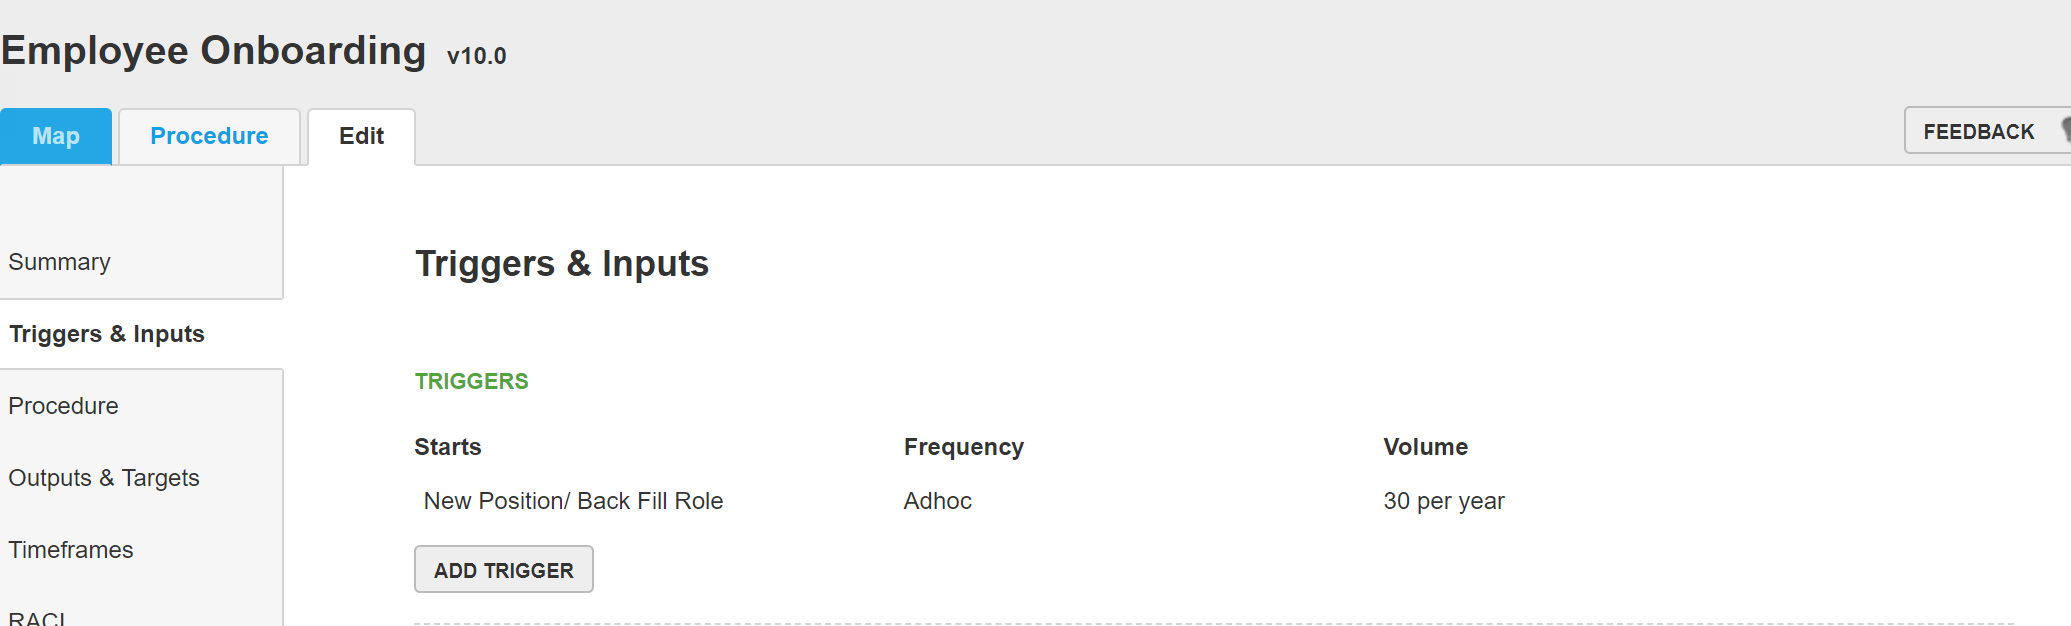
- Input: Where will input for this Trigger be coming from. For Employee On-baording, Input will be coming from a Requisiton Form, that is identified in the Employee OnBoarding Process:
- Trigger: A start event for the process. For Employee On-boarding, it will be a Department has a New positon or Back Fill position open. Frequency can be daily, monthly, or Ad hoc. Volume is an estimated per meaningful period.
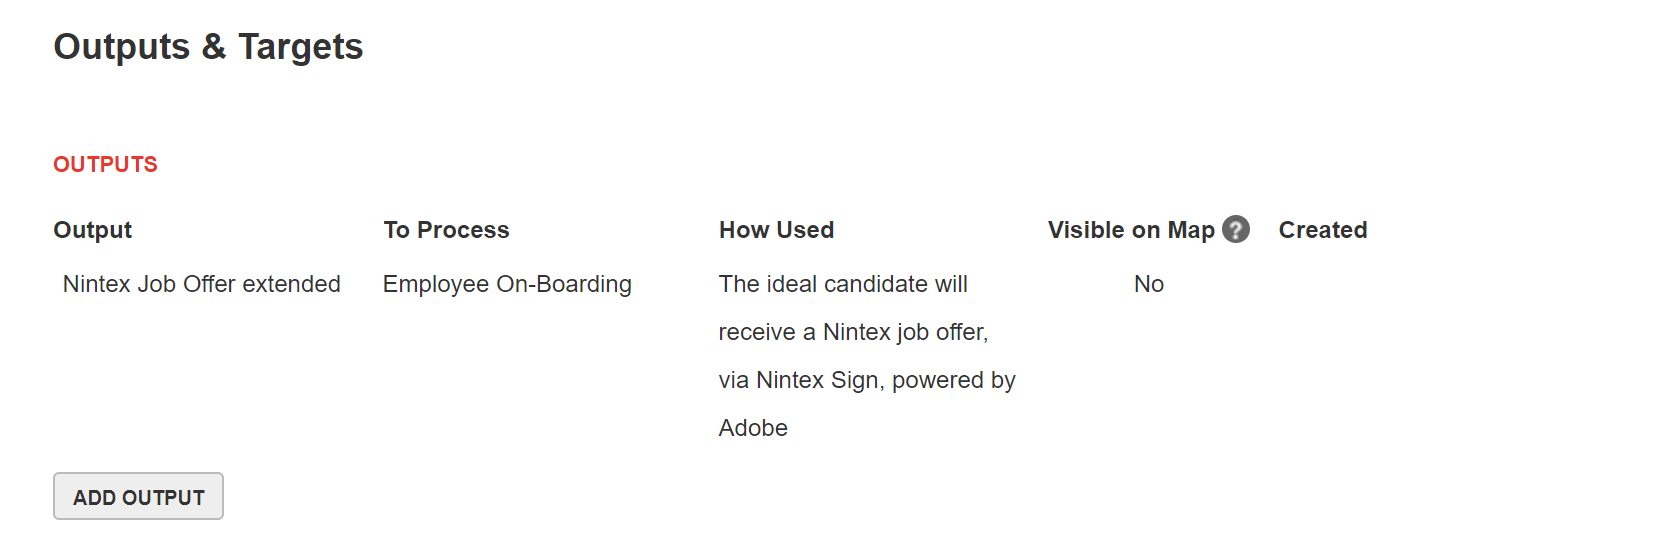
- Outputs & Targets:
- Outputs: What should be the expected outcome of this process? For the Employee On-boarding process, it should be a Nintex Job Offer is extended to the ideal candidate, via Nintex Sign, Powered by Adobe.
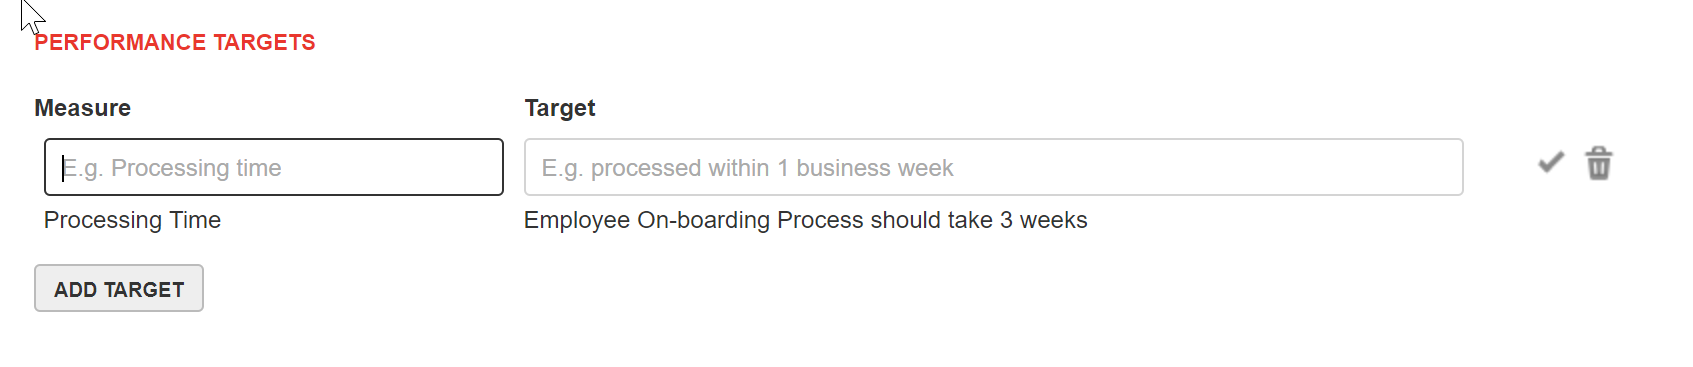
- Performance Targets: Performance measurement of the process. For the Employee On-boarding process, it will be Process Time and should take 3 weeks to complete.
- Outputs: What should be the expected outcome of this process? For the Employee On-boarding process, it should be a Nintex Job Offer is extended to the ideal candidate, via Nintex Sign, Powered by Adobe.
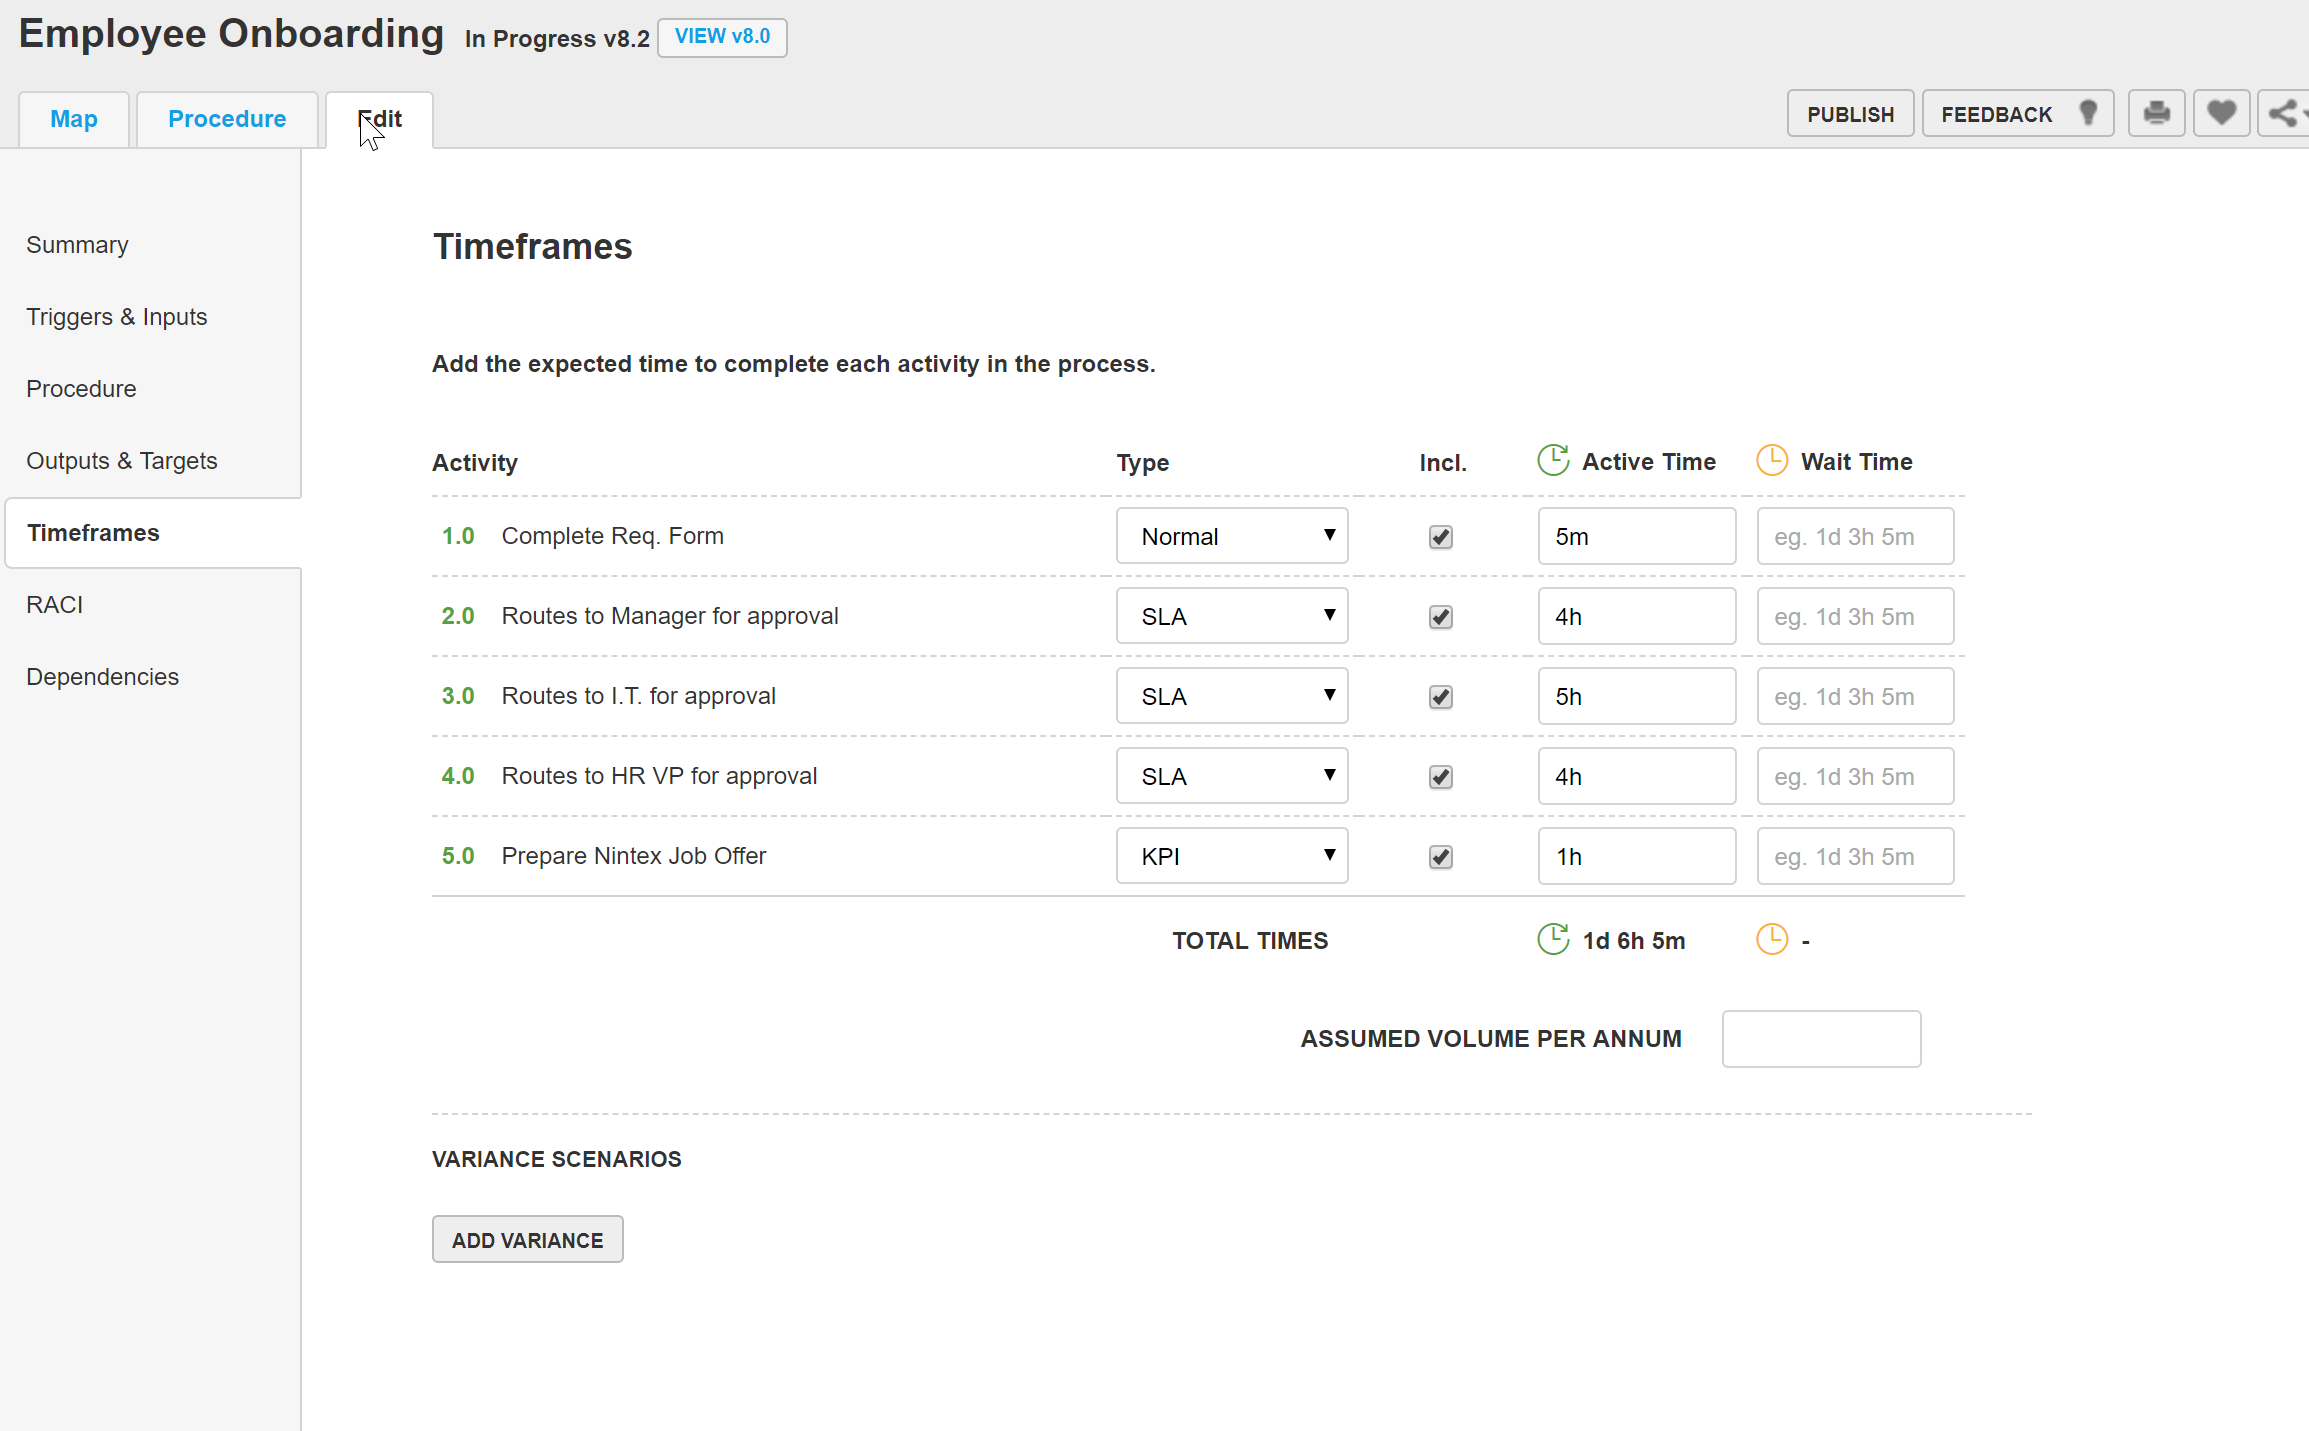
- Timeframes: Add the expected time to complete each activity in the process. For Employee On-boarding, you will notice that there are 5 steps listed with expected time duration for each activity. You can also add in a Variance scenario as well:
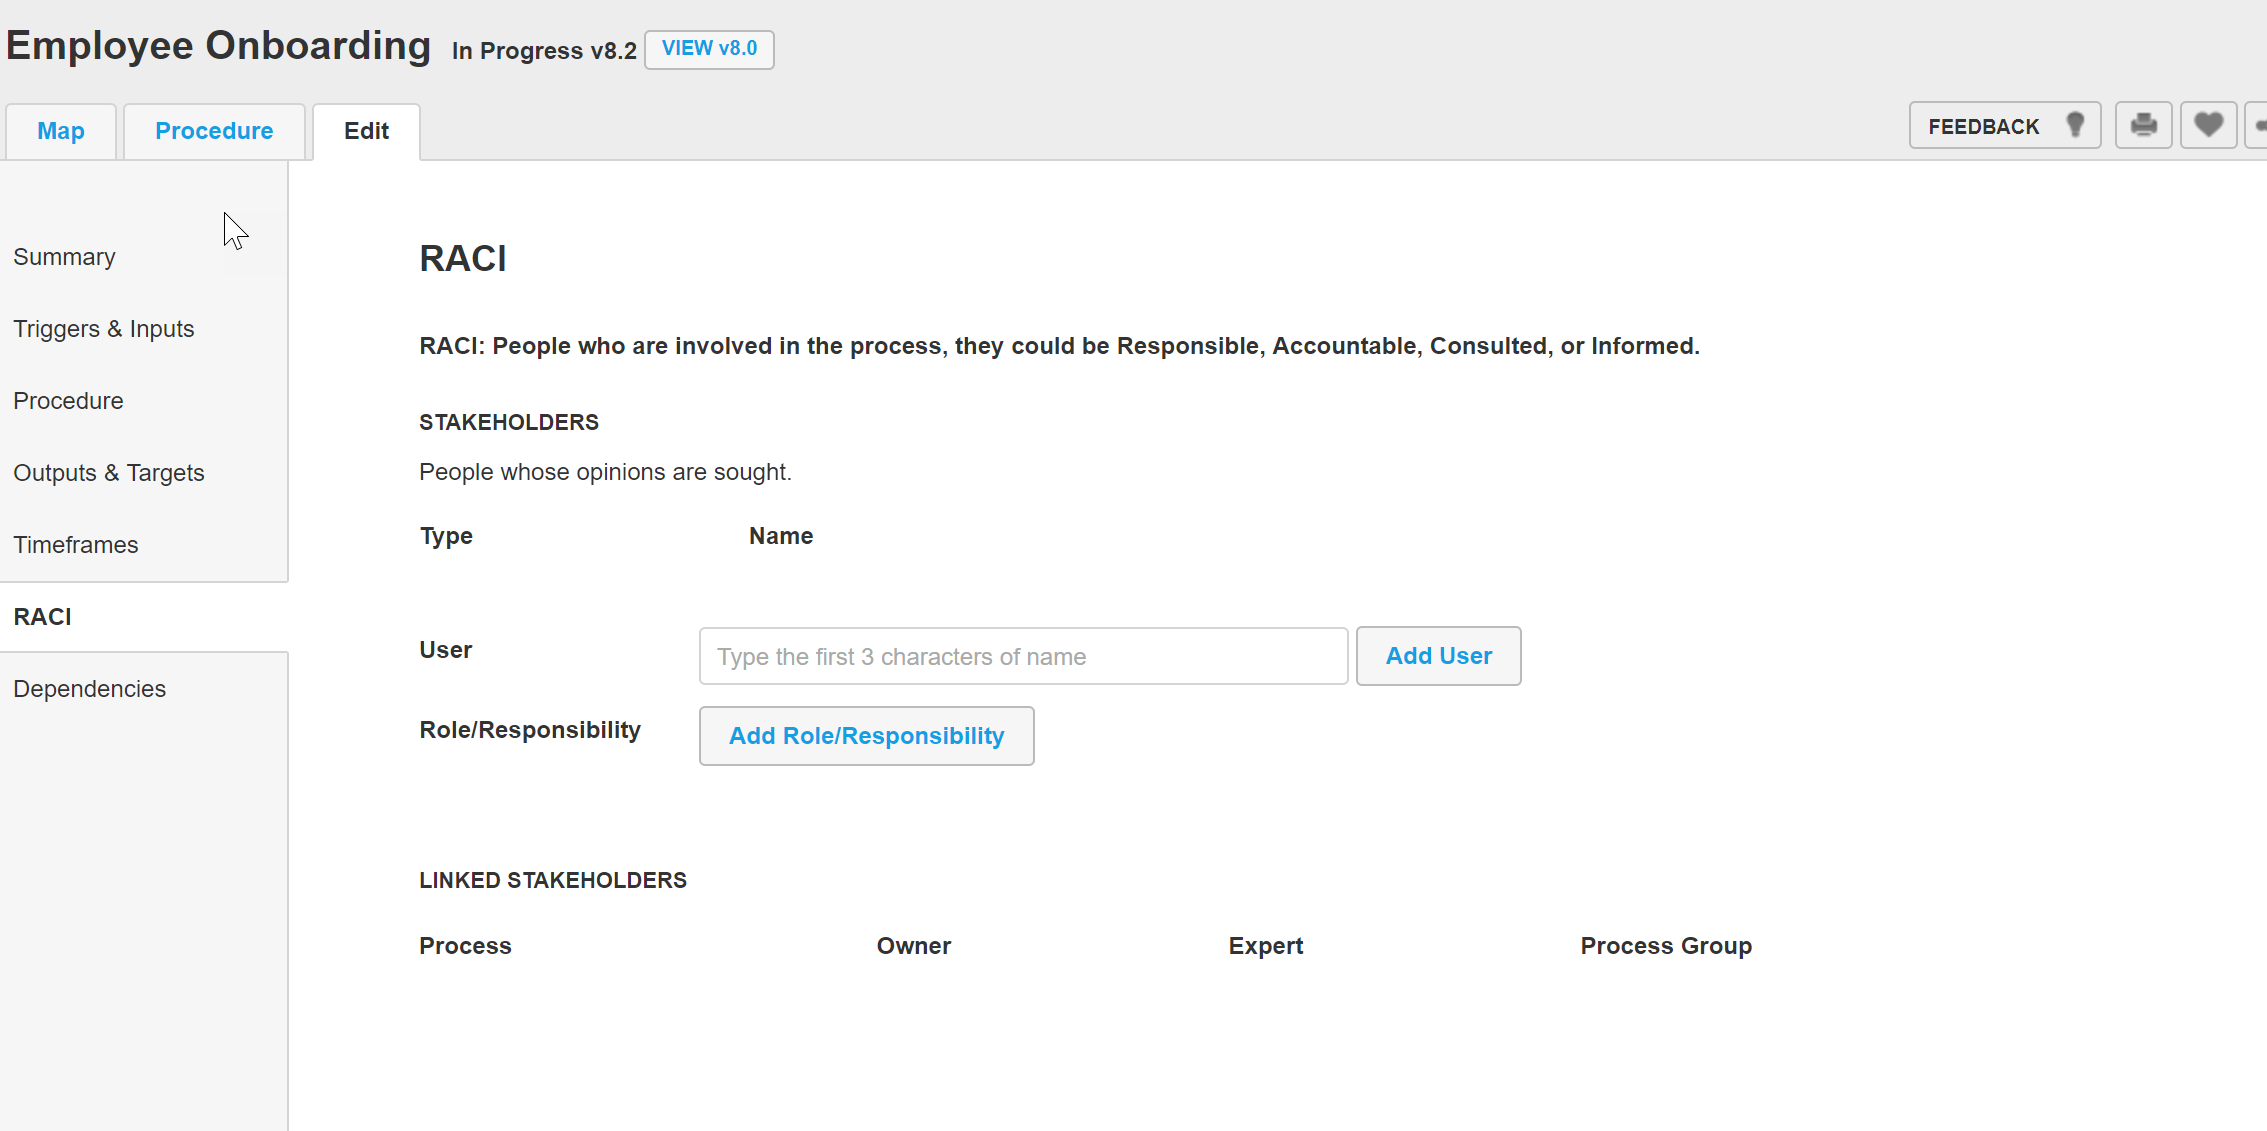
- RACI: People who are involved in the process, they could be Responsible, Accountable, Consulted, or Informed. Select a user from active directory, and add the role/responsibility:
- Dependencies: Other processes that could be dependent/ linked to this current process:

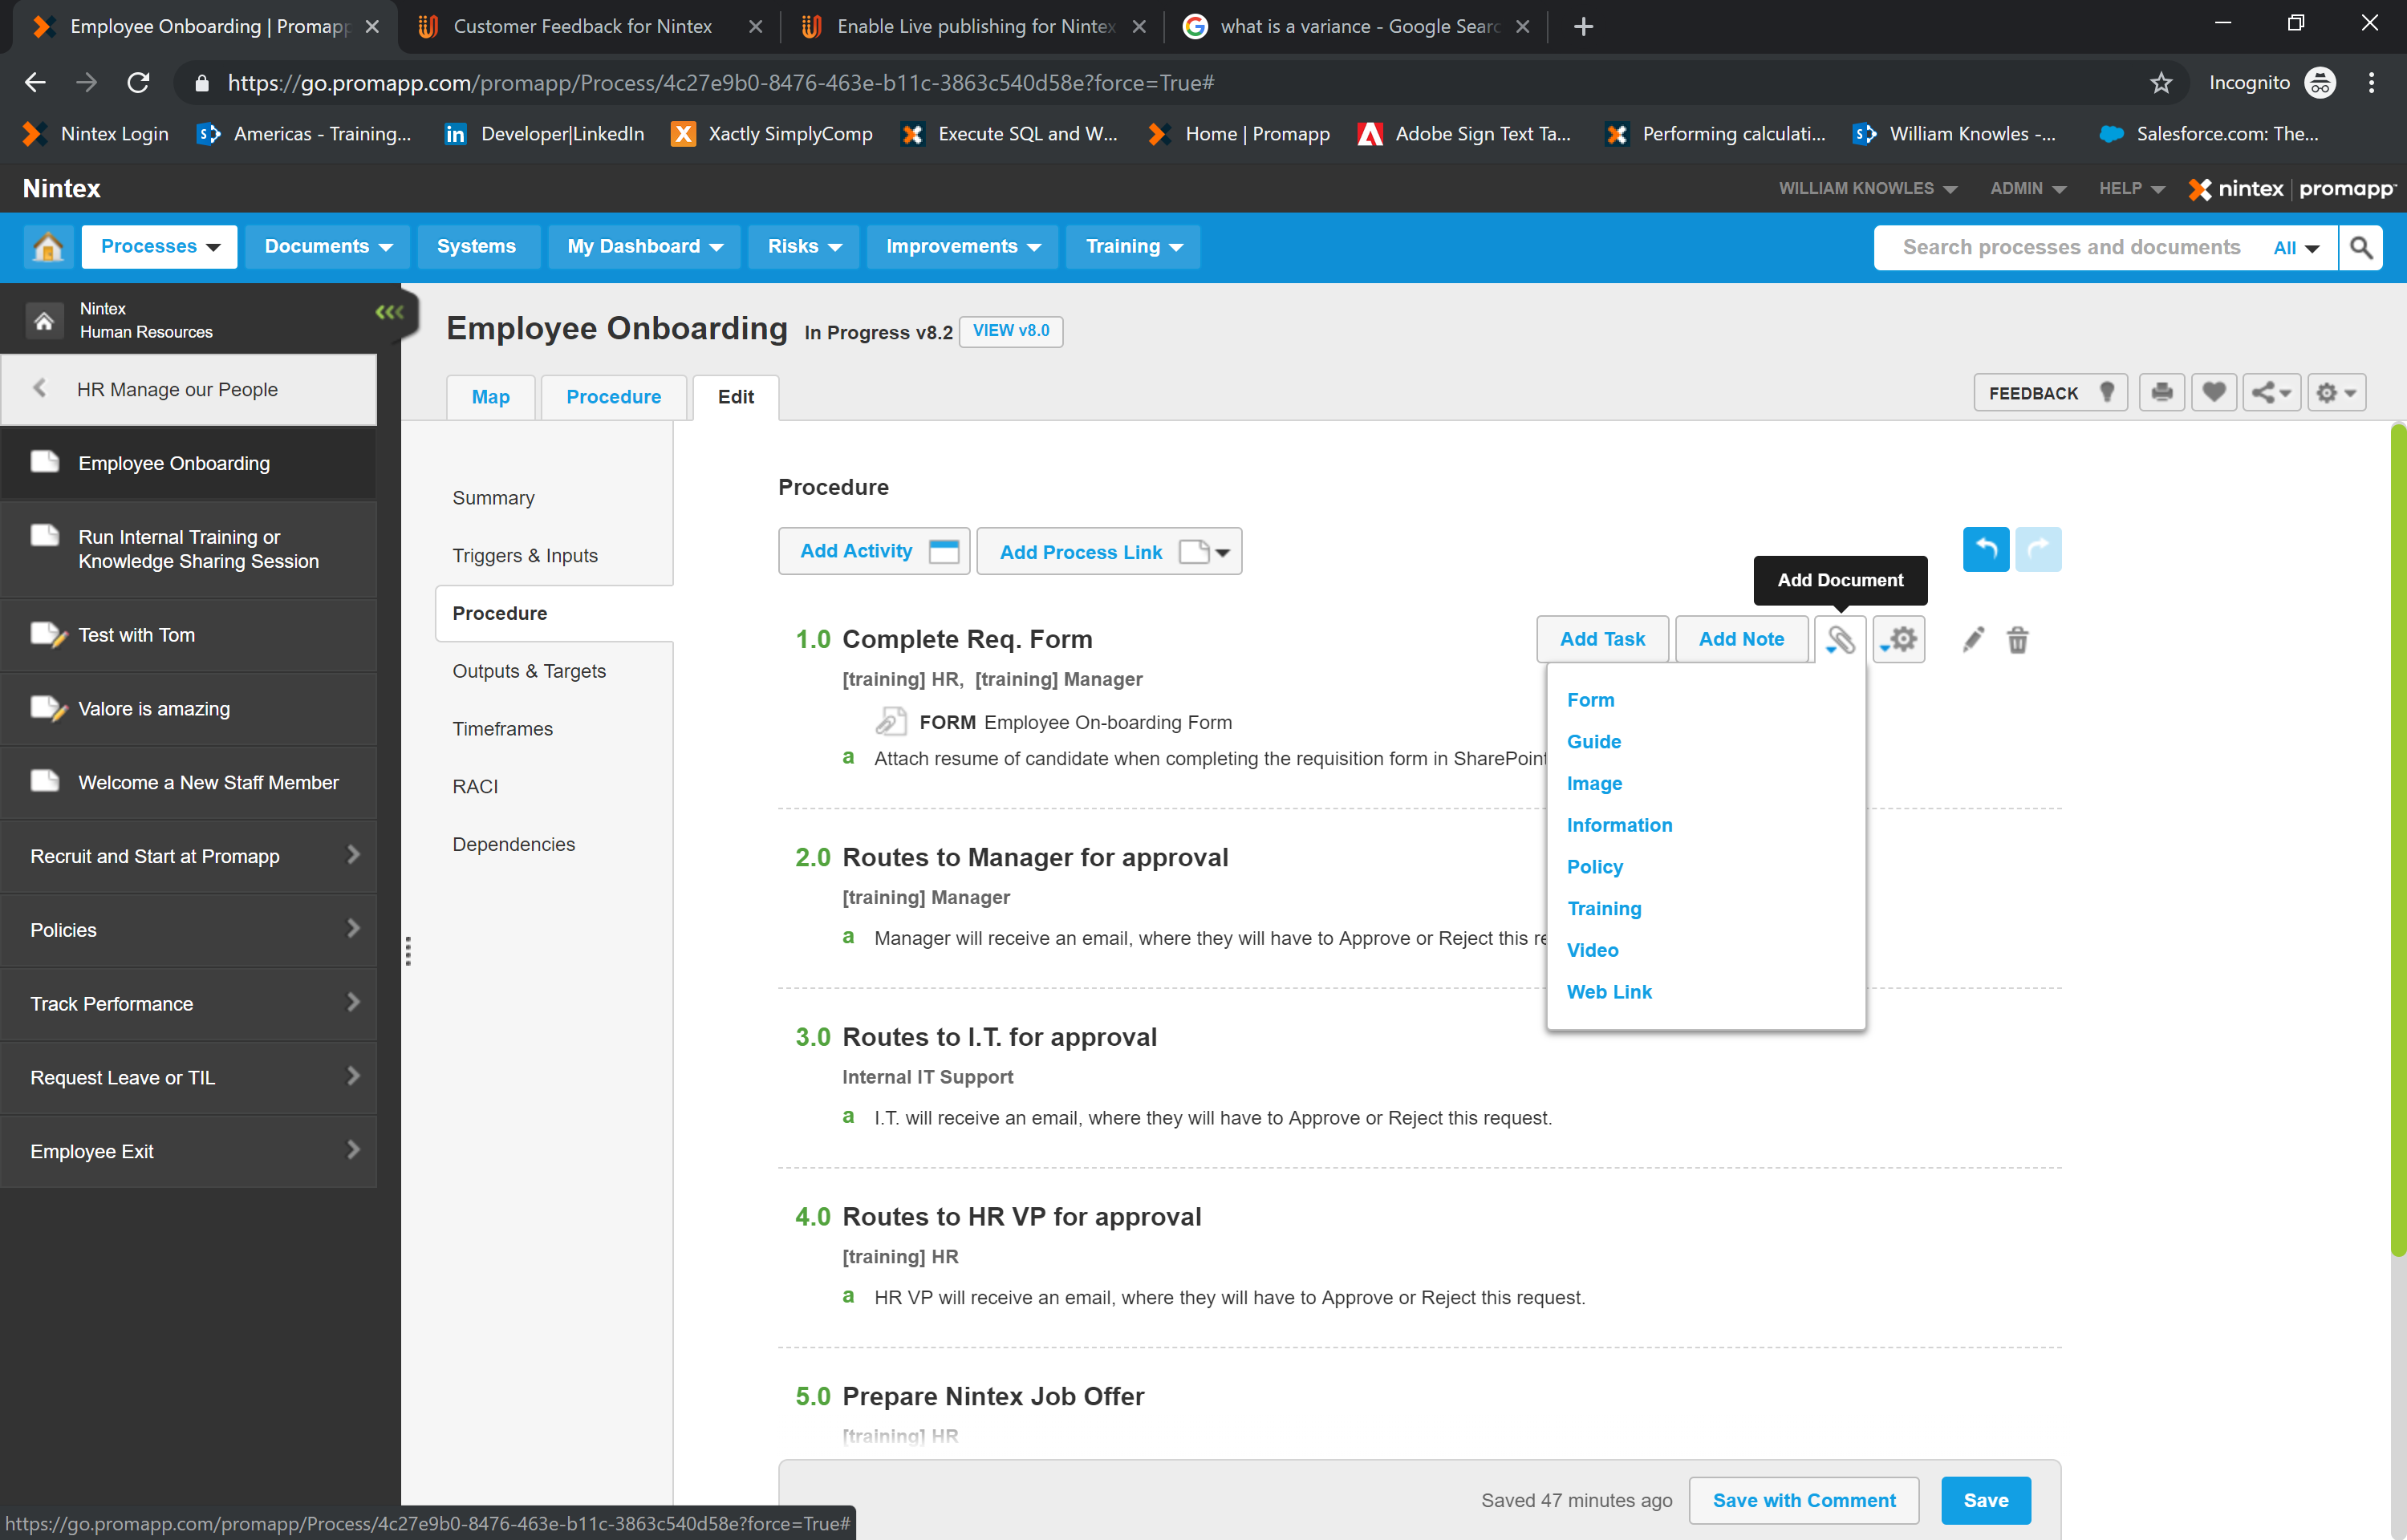
- Procedure: Yes, I know, I went out of order, and that is done on purpose, because this is where we build the process :)
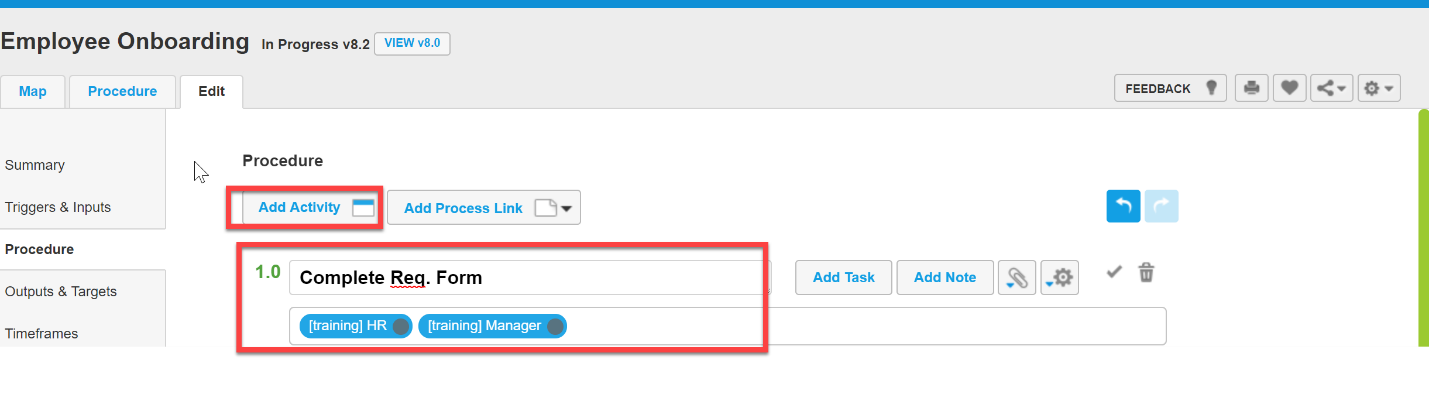
- Add Activity: Think of this as a “Major Step” within the process. Best practice is to not exceed more than 10 Activities when process mapping. If you are going to exceed 10 Activities, you may want to consider breaking your process into sub processes.
Once you click on Add Activity first describe the active for this step. Next, Assign Role for whom should complete this step (role based, not user based). For Employee On-boarding, Complete Req. Form is the activity, and It is assigned to HR/ Manager.
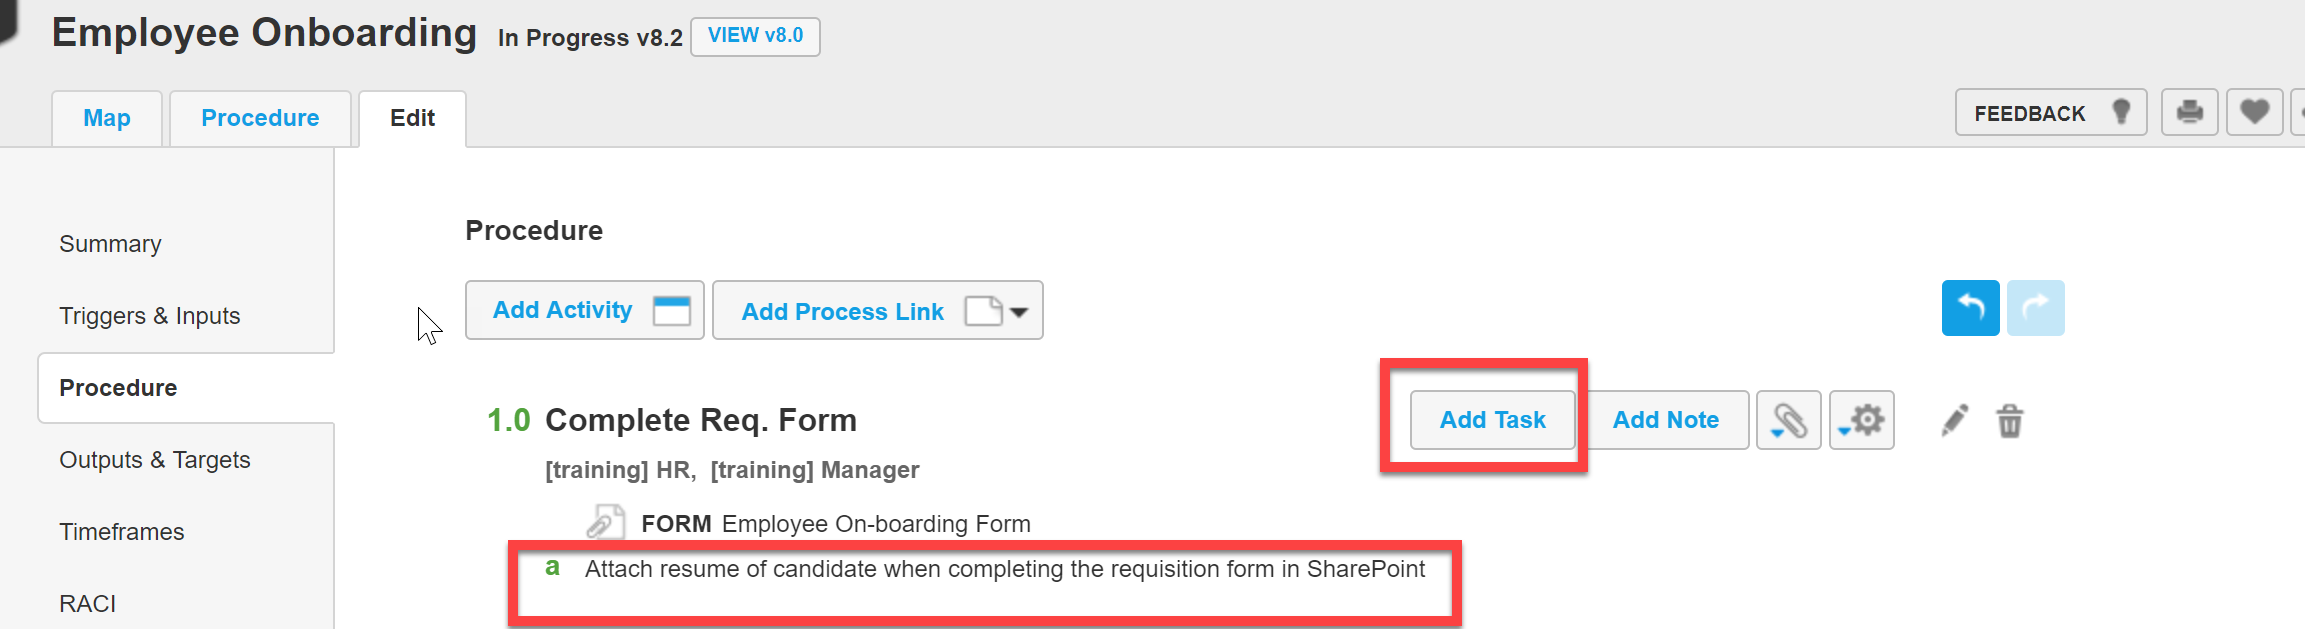
- Add Task: Task that is assigned or supports the Activity. There can be unlimited task to each Activity. Think of this as the “details steps to support a major step of the process”. For Employee On-boarding, it could be attach resume of candidate when completing the Req. Form:
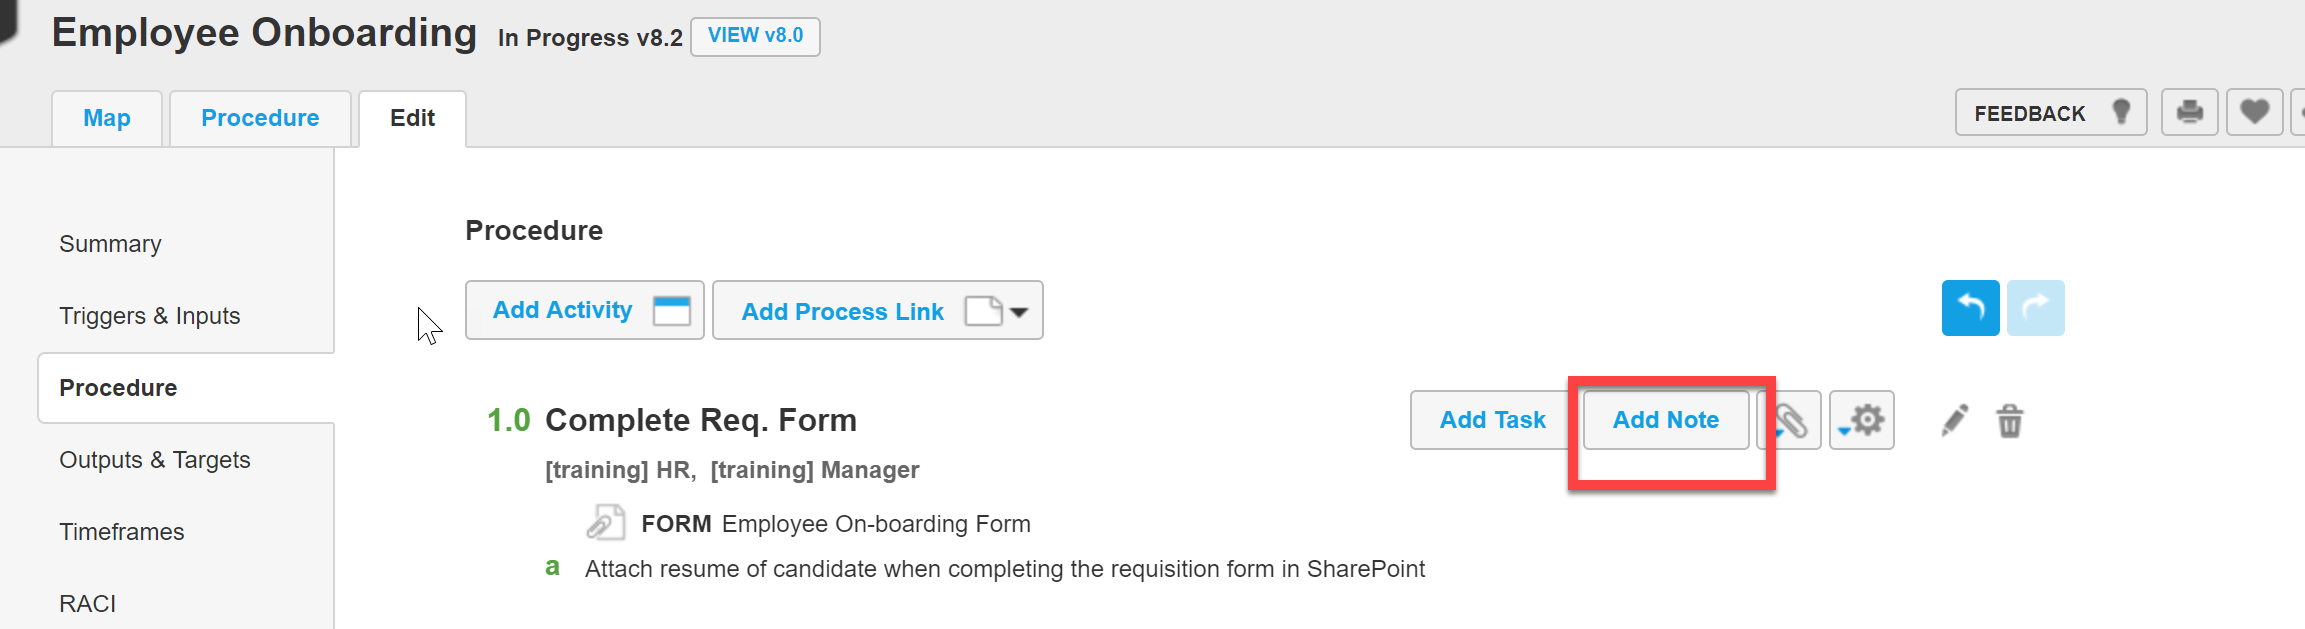
- Add Note: Additional things to note as it pertains to this step of the process:
- Attachments: You can link in any of the documents (Form, Guide, Image, Information, Policy, Training and Videos) to support your process. For Employee On-boarding, I have linked in the Req. Form that will be completed in SharePoint Office 365:
- Once you have finished mapping out your process, hit Save, Publish (Must add comments before publishing). Then you will be presented with a great map of the process that you just completed:

- Other features:
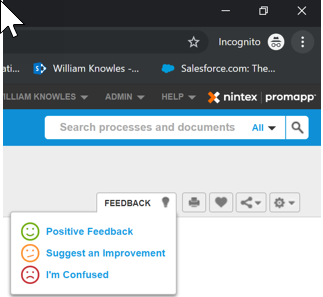
- Feedback: Allows you to provide Positive Feedback, Suggest an Improvement, or Be Confused:
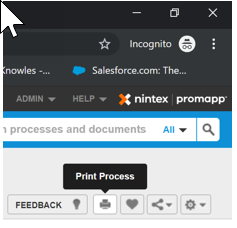
- Print: Print out the process:
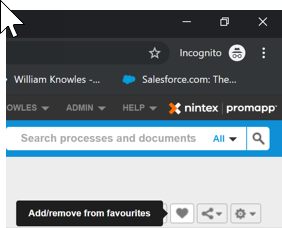
- Favorites: Add or remove your favorites:
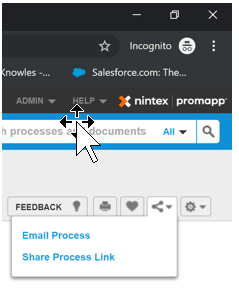
- Share: Email Process or Share process link:
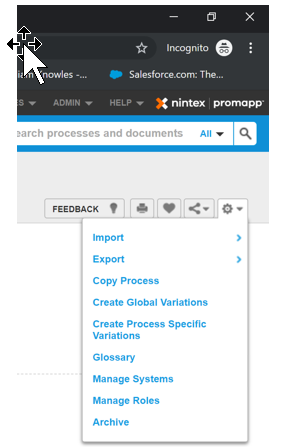
- Settings: Import, Export, Copy Process, Create Global Variations, Create Process Specific Variations, Glossary, Manage Systems, Manage Roles, Archive:
- Feedback: Allows you to provide Positive Feedback, Suggest an Improvement, or Be Confused:
I hope this blog is helpful, insightful and educational for all of you who are new to using Promapp. If you questions feel free to reach out to me in the Nintex Community, Twitter: wknowles22, or email me directly at William.knowles@nintex.com
Now have fun mapping those processes and enjoy :heart: