SharePoint web services can be used to manage content, as well as site settings and some configuration. You can read more about the SharePoint REST service here.
Nintex Workflow Cloud provides many out of the box actions for provisioning of objects in SharePoint Online; however sometimes we might want to apply further settings to newly provisioned sites and site collections than those actions allow.
Enter the new Call a SharePoint web service action!
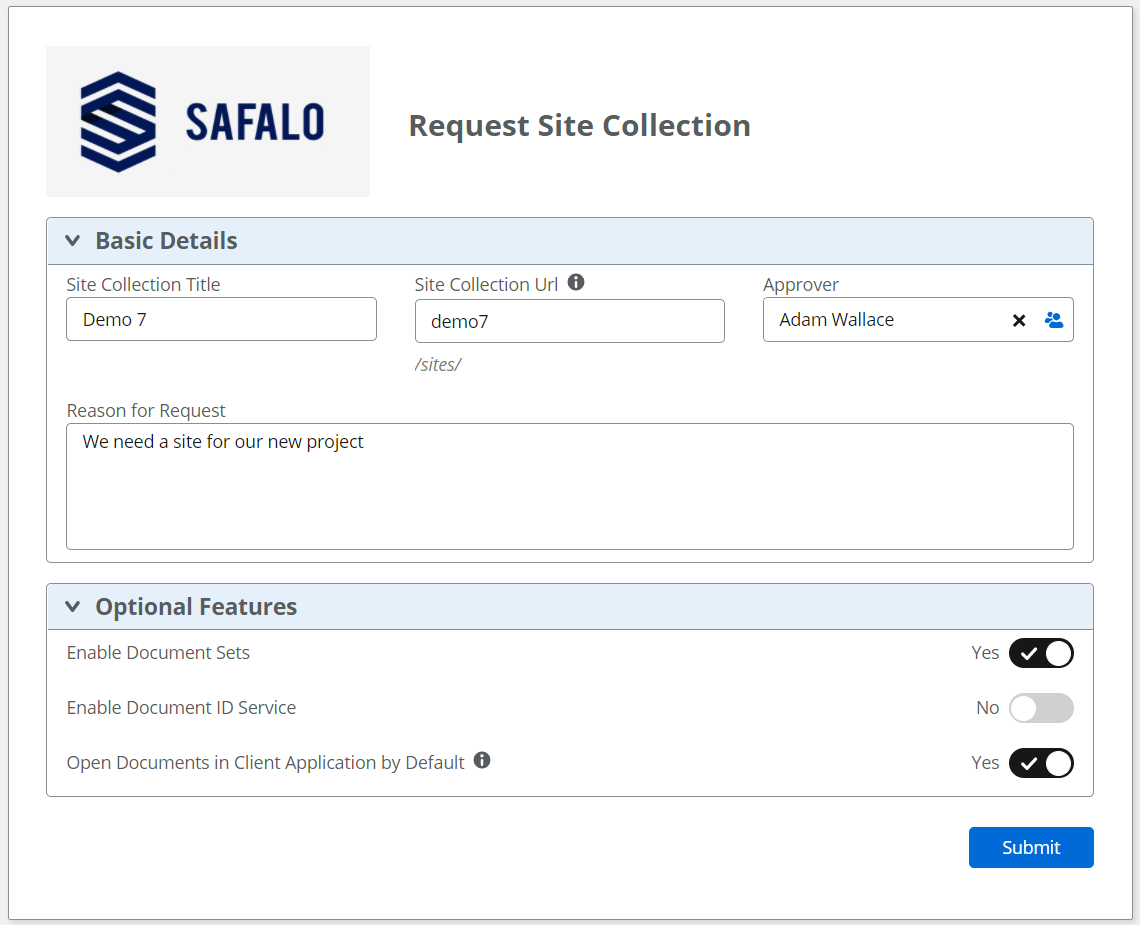
In this example we'll see how site provisioning form has been created in NWC, with options to allow the requester to specify particular commonly used features they would like to have activated on their new site.
Our simple form below offers the requester the ability to switch on the following features in the new site collection:
- Document Sets
- Document ID Service
- Open Documents in Client Application by Default (instead of the web app option)
Here's the form:
Our workflow has a simple approval step - if approved it will go on to create a new site collection using the standard action. After that, it will use the Call a SharePoint web service action for each feature that is to be activated.
The approved branch of the approval task looks like this:
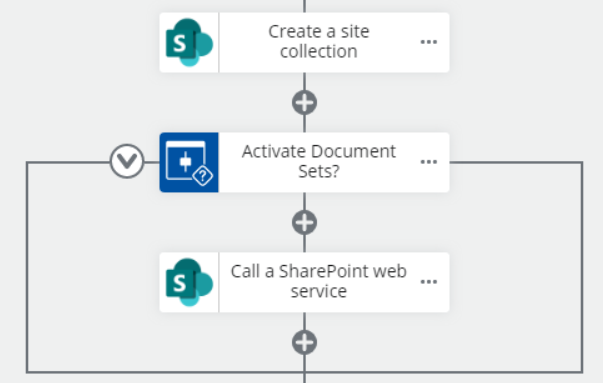
Let's check out the configuration of the Call a SharePoint web service action:
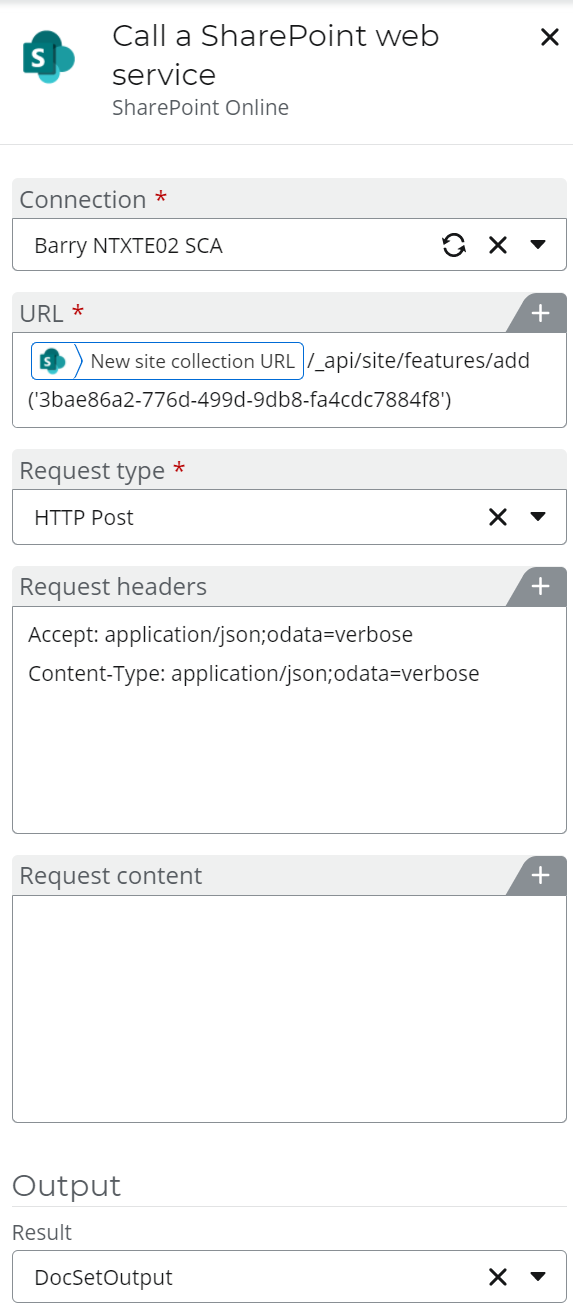
| First, we specify a connection to SharePoint Online. In this case, I've used a connection of the type Site Collection Administration.
Next we need to specify the URL of the SharePoint web service to be called. In this case, the URL for the site collection that was just created has been added as a variable. The format of the URL will vary depending on the web service being called. In this case /site/ refers to site collection. To activate a site feature, replace this with /web/. There are many resources available to find the GUID for SharePoint features, but you can also find this by inspecting the div for the Activate button the features page.
Specify a Request Type, in this case HTTP Post. You can learn about the different request types using the link at the beginning of this post.
Our action includes the Request headers by default, in most cases there is no need to change this.
My Request content here is empty, as the URL already includes the detail of the feature to be activated. However, if you were using this action to create or update multiple items, you would enter that detail in this field.
Finally, in the Output field, an Object variable has been created to store the result of the operation. This is useful because the web service call will return a status code and description and we can check this to ascertain if the operation was successful. |
Let's take a look at the outcome of running this workflow.
Checking out the Site collection features page we can see that the two requested features have been successfully activated!

As the requester, I receive an email confirming creation of my new site and activation of the requested features:
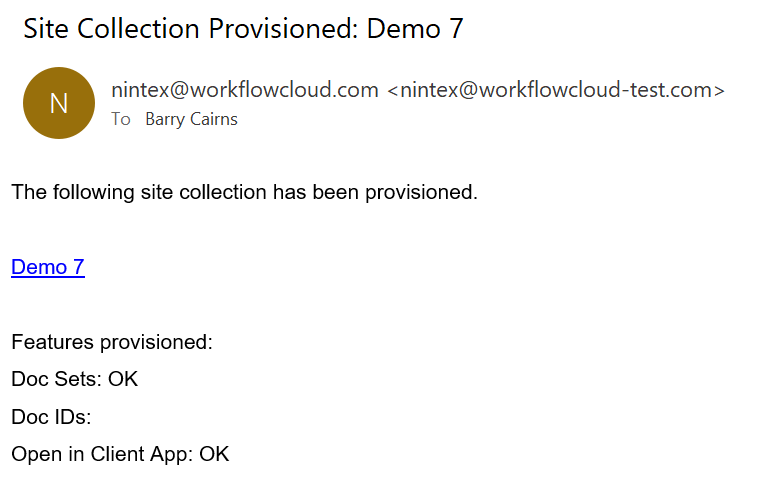
To understand how we checked the status of the web service calls, let's look at the DocSetOutput variable that was created earlier.
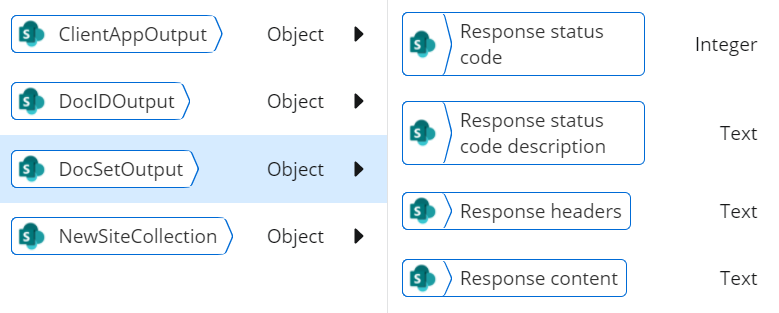
As we can see, the response status code and description are available. We are hoping to see 'OK' for the description, but if not, we can handle that in our workflow and alert an admin or the requester that the request has failed, with meaningful information about why.
Hopefully this has been a helpful example to introduce this new action and you find many uses for it in your NWC / SharePoint Online environment!
To view more details about this action, review the NWC help page here .


