


As InfoPath nears its end of life, we’re fielding more and more questions about how to migrate from InfoPath to Nintex. It’s not so simple with InfoPath as a solution built on InfoPath can be completely monolithic i.e. it combines data, business rules and presentation/forms into a single package.
When you are looking to replace InfoPath, you really need to understand what each of these three components is doing and then replicate on your platform of choice whether that is Automation Cloud (NAC) or K2. We have some really great on-demand webinars that you can watch at your leisure to help you through this journey:
This blog focuses on migrating your form to NAC and we have a very nice and easy way for you to do that.
InfoPath provides the following field types
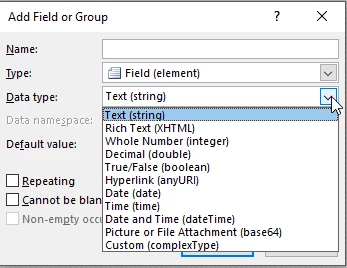
The nice thing is that Nintex Forms provides for all of these except for the Custom (complexType) so most forms can be replicated with a minimum of changes.
Where you will have to make some changes is in the layout. The Nintex Forms designer is responsive which means it will automatically resize the form and place fields depending on the type of device that is being used to access the form. The InfoPath designer uses tables and grids to layout all the elements. Your Nintex Form won’t replicate this layout so be prepared to make changes to the appearance.
If the InfoPath form has a handful of fields, the fastest way to replicate it is to start from scratch with the Nintex Forms designer as it is incredibly fast to create a form. If you have more than a handful of fields, a great shortcut is using the PDF import function.
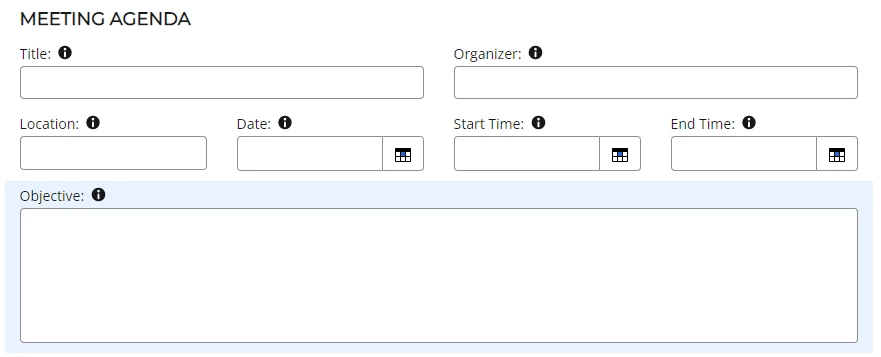
By way of example, check out this InfoPath form shown in design mode on the left and runtime mode on the right.
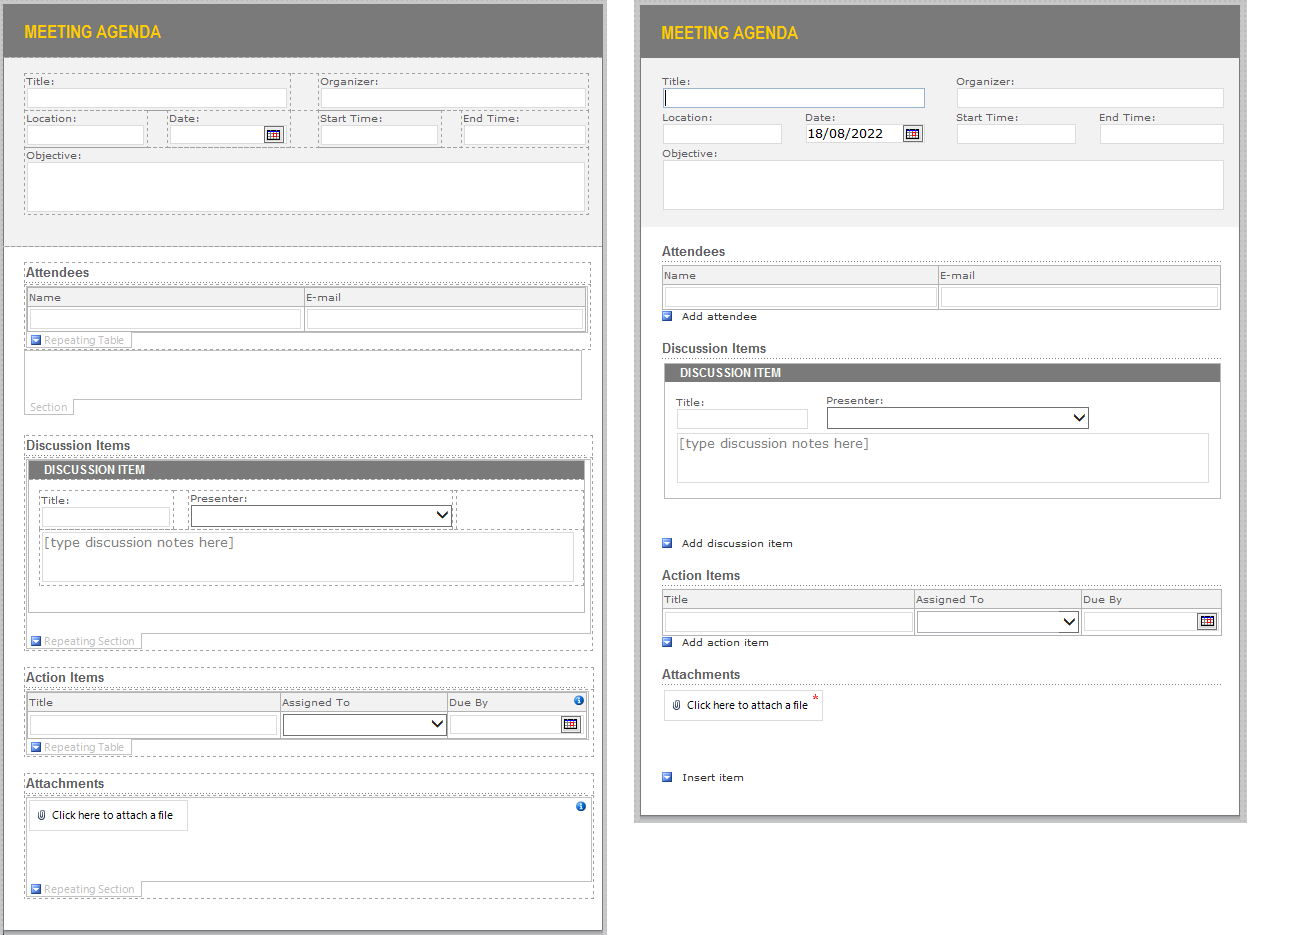
There are 15 fields and some headings so a good candidate to save on typing! Here’s what you need to do.
- Load the form in InfoPath Filler
- Click on the File tab and click on the Save as Snapshot button

- Choose PDF as the file type and save.
Now you can use the Start with PDF feature inside Nintex forms to import the form! This will save you a lot of time as it automatically recognises fields and field types. We’ll use the form above as an example.
- Go to Nintex Workflow Cloud, create a new workflow and bring up the forms designer as you usually would if you were creating a workflow (or editing a task form).
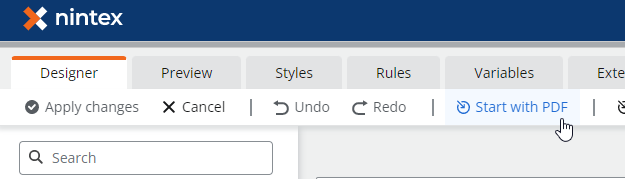
- Instead of building the form from scratch, click on the Start with PDF button
- The PDF importer will load, click on Import PDF and select the file you had just saved from InfoPath.
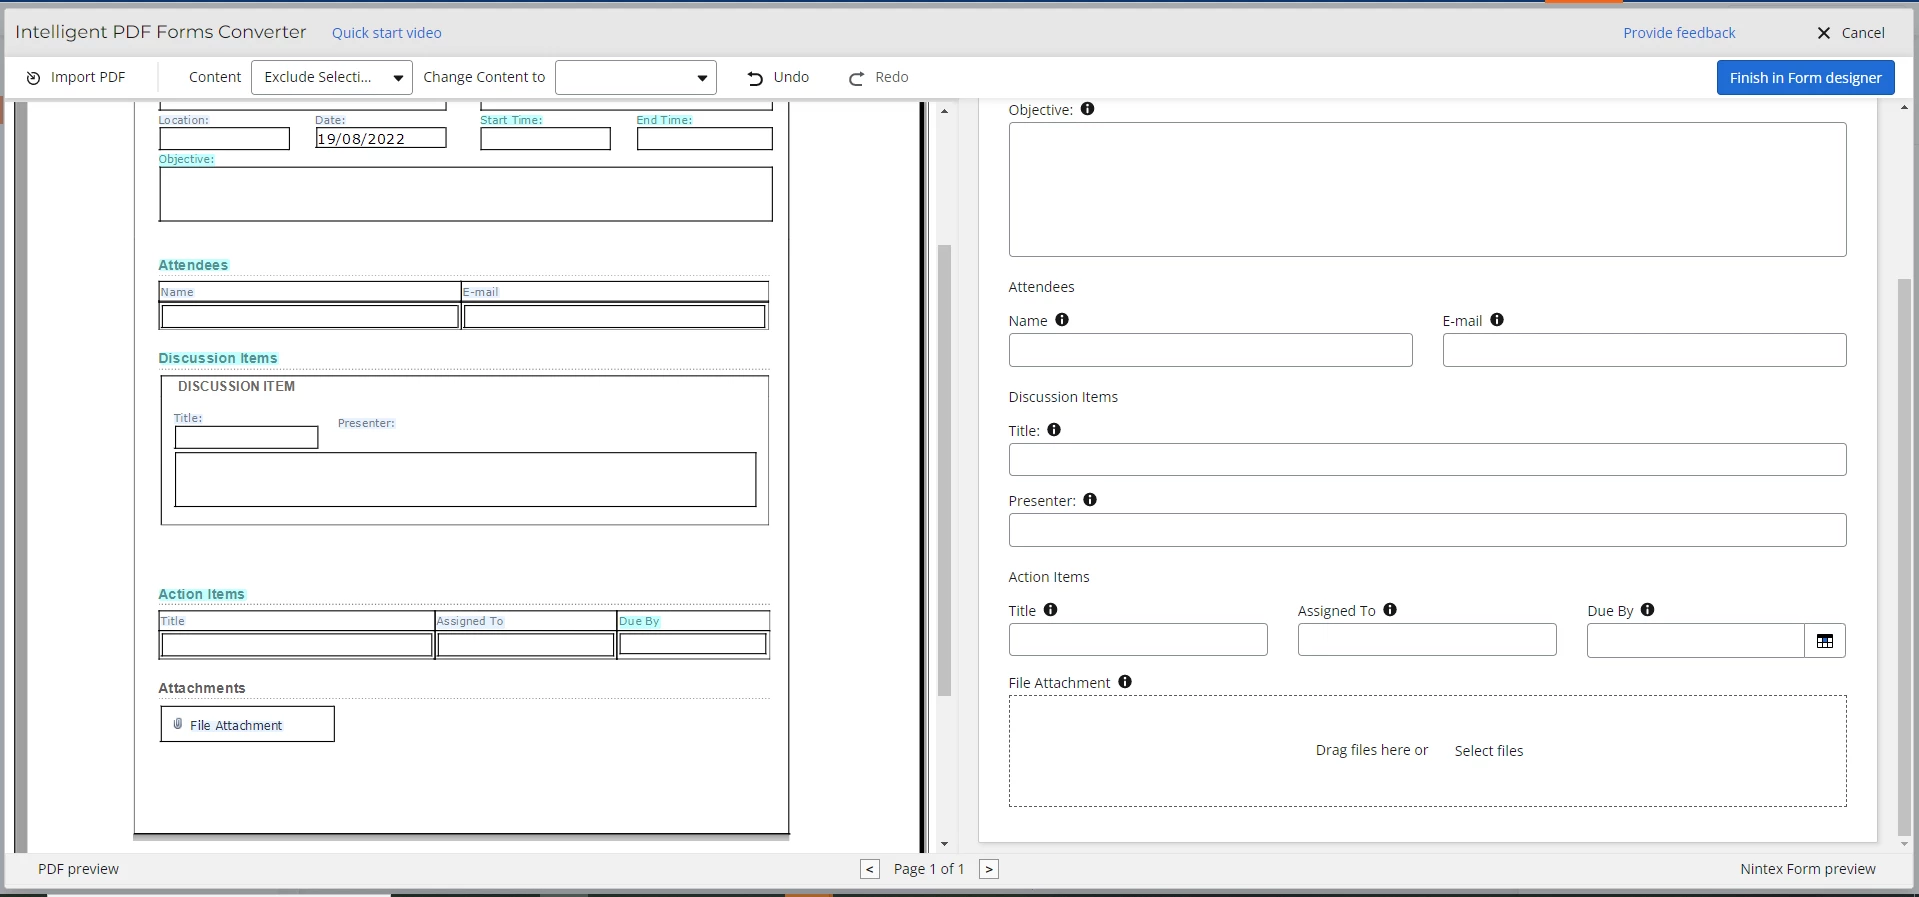
A rendition of the PDF will appear on the left of the screen and now it’s up to you to decide what you want to bring across into the NWC form. Most of the time I bring across everything and then remove the things I don’t want afterwards. To do this click on the Content | Convert page option
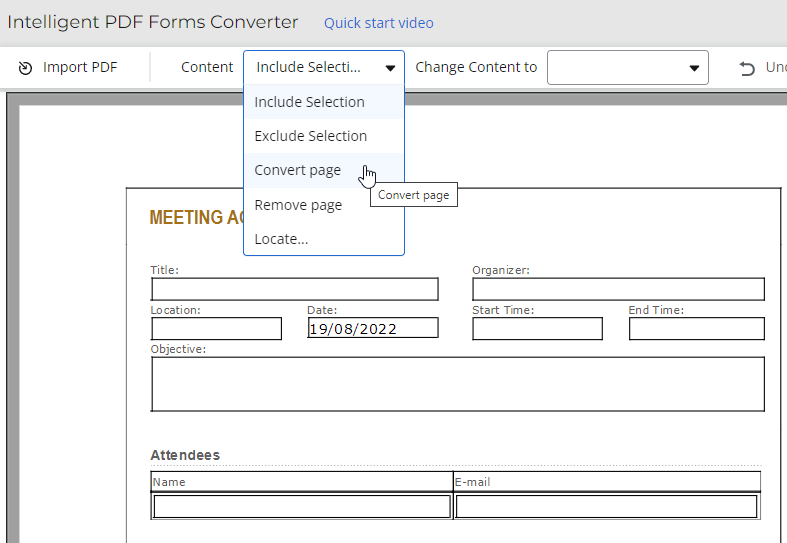
The PDF Forms converter will bring across everything that it detects on the PDF.
In my case, it also brings across some things that I don’t want or sometimes it mistakes texts/graphics for fields but these are very easy to remove or change. We’ll take these examples below.
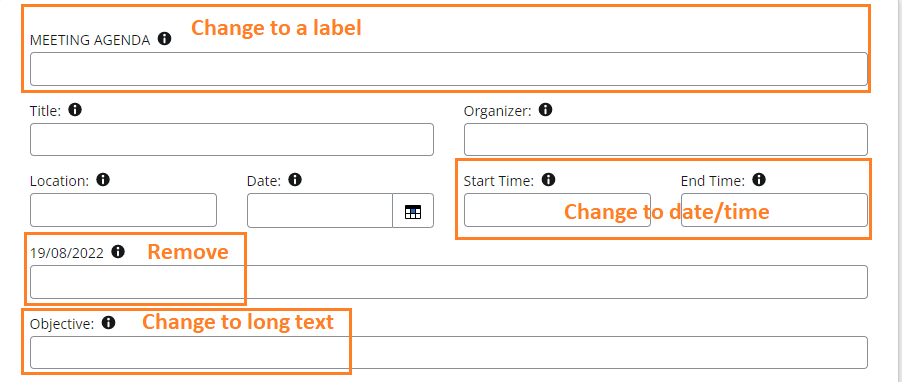
Changing item types
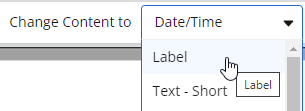
The converter has brought through the Meeting Agenda Title as a field instead of a label, the start and end time as text and objective as a single line of text. If you aren’t sure what data type the converter has used, just hover your mouse over the info tooltip and it will tell you. We’ll change each of these.
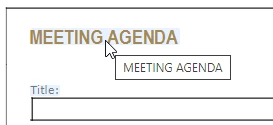
Click on the Change Content to and pick the correct data type. In the case of changing the Meeting Agenda field to a label, we’d pick label.
Then click anywhere on the Meeting Agenda text (or lasso multiple items) on the PDF rendition and voila! It has changed!
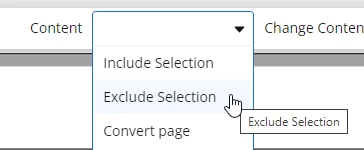
Removing unwanted items
The same concept applies to remove unwanted items such as the date that was brought over. Click on Content | Exclude Selection and then either click on or lasso the element(s) that you want removed.
After a couple of clicks, my preview form now looks like this:
Here’s the side by side view of the rest of the page.
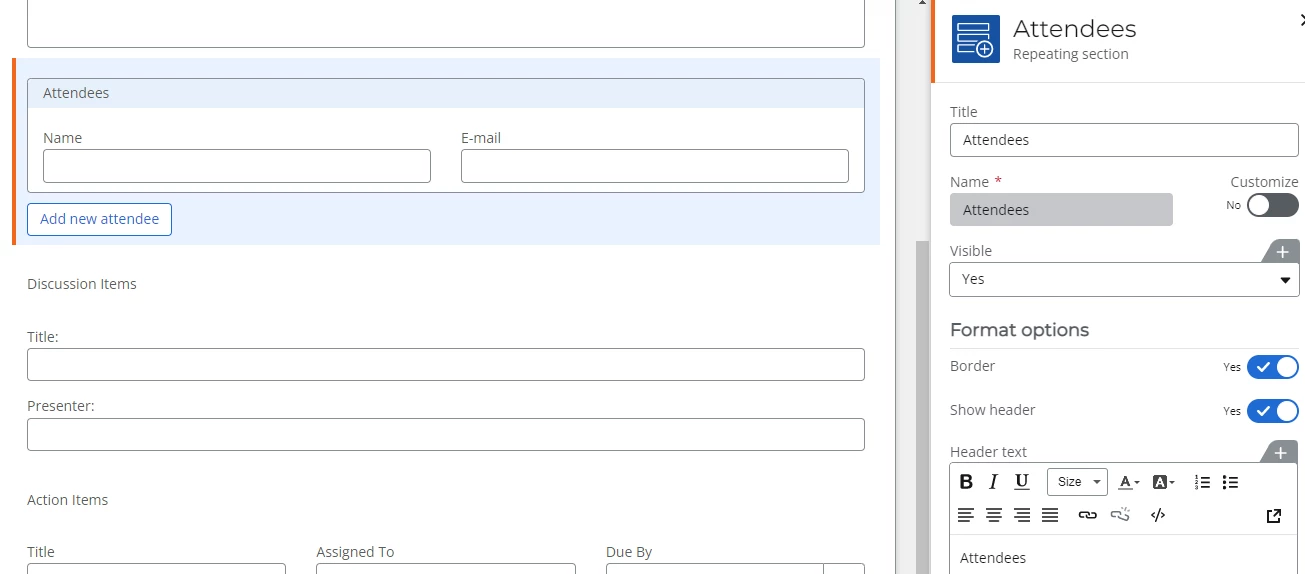
The eagle-eyed of you will spot that the attendees, discussion items and action items should be in repeating sections. That’s really easy to do after we have imported the fields so let’s go ahead and click on that Finish in Form designer button on the top right of the screen.
Now you’re back in the forms designer, this is where you can create the three repeating sections that you need and move the fields into them.
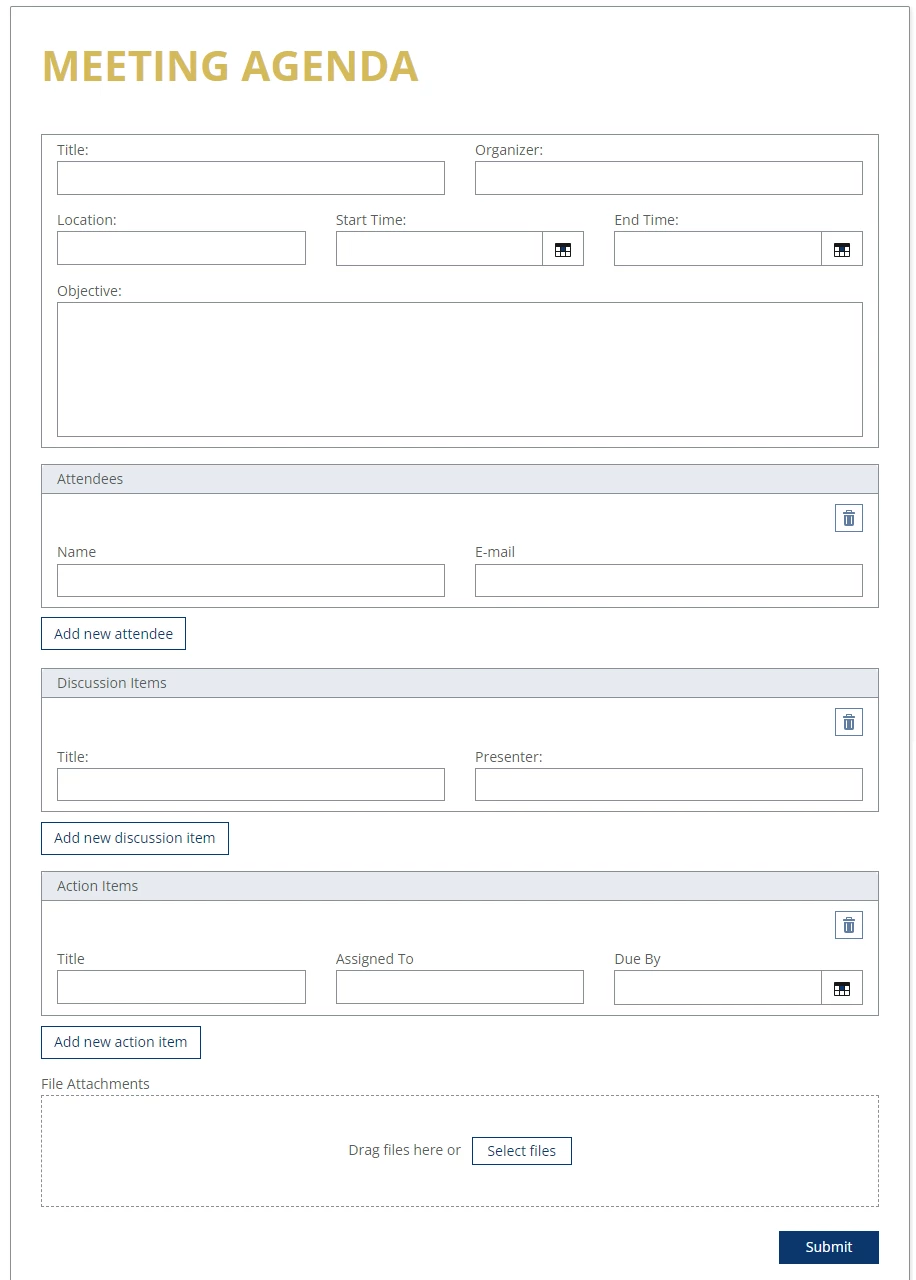
After that you can brand the form and you’re finished in a matter of minutes. Here’s a preview of the new form after I’ve done just that.
Also remember, this doesn’t just apply to InfoPath forms. If you have any form whatsoever - a paper form, anything– scan/save it as a PDF and take advantage of the PDF forms converter.