


Description: How to add Adobe Sign text tags in the Nintex Document Tagger for electronic documents requesting information and signature to use in a one step process.
Scenario: Customer X has an incorrect address on-file with Company Y and needs Customer X to update this information. Company Y sends Customer X an electronic document requesting for their most current address and signature.
Let's walkthrough the following scenario of how we would set this up within our workflow.
HOW TO SETUP TEXT TAGS
Document Template
- Open your template where you will want to add your Adobe Sign text tags.
- Once tags have been added, save file to your document library.
| TEMPLATE | TAGS |
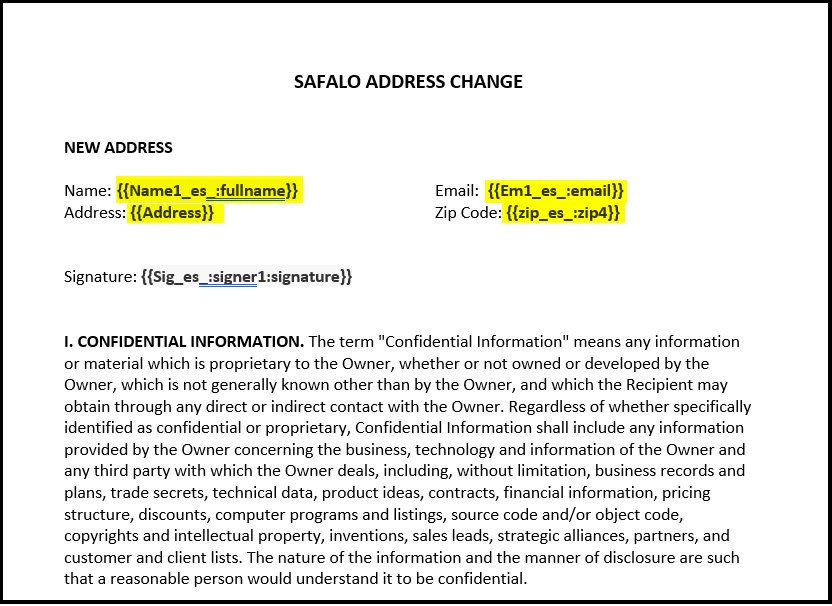 | 1. Name: {{Name1_es_:fullname}} 2. Email: {{Em1_es_:email}} 3. Address: {{Address}} 4. Zip Code: {{zip_es_:zip4} |
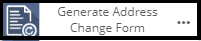
Configure Workflow - Generation Document Action
- Open your workflow.
- Add the Generation document action to your workflow by simply dragging and dropping the action on the workflow canvas.
- Next, configure the Generation document action to reference the template.
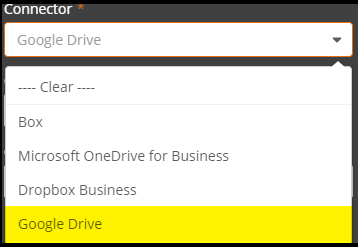
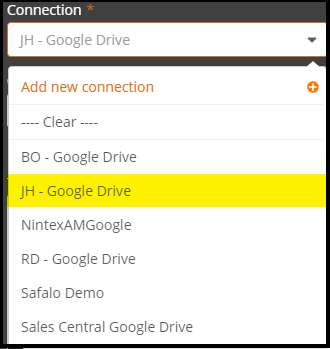
| ACTIONS | CONFIGURATION |
|
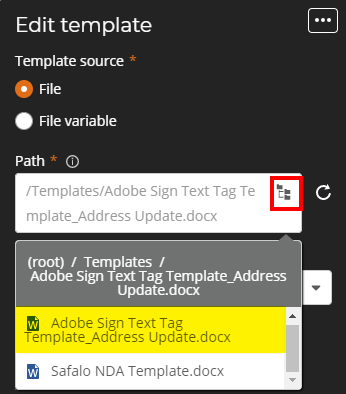
| 1. Connector Select existing connector (i.e. Google Drive) or add a new connector. 2. Connection Select existing connection (i.e. Google Drive) or add a new connection. 3. Generation type: Select the file type of your choice (i.e. Original file type (5 template limit)). 4. Document templates: 1. Select … 2. Under Path, select folder hierarchy icon. 3. Select document template from its location to use. |

Configure Workflow - Get Signature Action
- Next, add the Get Signature action to your workflow by simply dragging and dropping the action on the workflow canvas.
- Configure the Get Signature action.
| ACTIONS | CONFIGURATION |
|
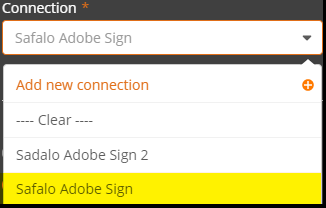
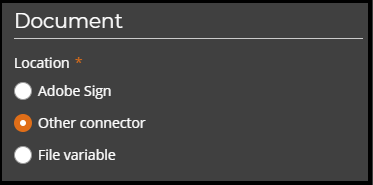
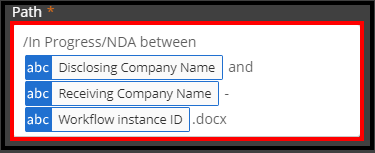
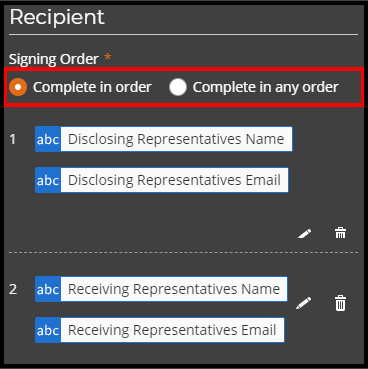
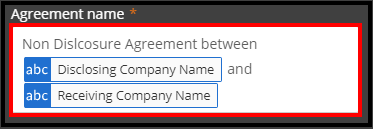
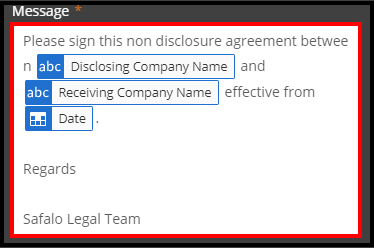
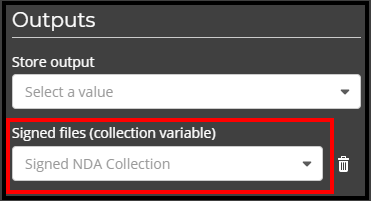
| 1. Connection: Select existing connection or add a new connection. 2. Under the Document section, select a location : 1. Adobe Sign 2. Other Connector 3. File Variable 3. Connector Select existing connector (i.e. Google Drive) or add a new connector. 4. Connection : Select existing connection or add a new connection. 5. Path: Select the relative path of the document library where the file is retrieved. 6. Recipient: Under Signing Order, select either: 1. Complete in order 2. Complete in any order (Depending on whether your recipients should sign in a given order or any order). 7. Message: Under Agreement name, populate the subject of email to recipients. Under Messages, populate the body of the email to recipients. 8. Outputs Under Signed files (collection variable), select the variable you would like your signed files to be stored as. |


Run the Workflow
- Once the workflow has been kicked-off, the recipient will receive a notification to provide detailed information and sign.
- Open notification and select link to "Click here to review and sign….".

Update Document and Sign for Return
Under Customer Information, you'll notice the following fields where you can populate information that may need updating. These are the fields that we setup in our Document Template (1st step).
- Once the fields are populated, then sign your document in the Signature field.
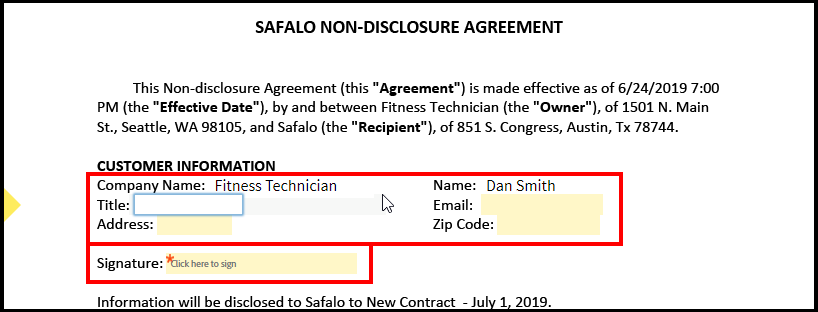
- At the bottom of your document select the Click to Sign and you're finished.

To recap, we've taken a two-step process of sending out a document to recipient to update and then at a later state requesting signature. In this process we've shown how we can combine those two steps (update and sign) into one single process.
I hope this blog is helpful and provides an alternative solution on how you might be able to accomplish your processes. If you have any questions, please feel free to reach out to me either by:
- The Nintex Community
- Twitter: @JHernandez512
- Email: John.Hernandez@nintex.com