Generating a Swagger Descriptor for REST-based Services using RESTUnited.com
KB001758
PRODUCTSEE ALSO Integrating a REST-based Service with K2
TAGS
REST services, unlike other web services, do not typically include metadata describing the data model and methods used in the endpoints of the service. To integrate a REST service with K2 using the REST broker, you must provide this metadata in Swagger format, which is a standard for describing REST services.
For more information about the REST service broker, see Resources for Working with the REST Service Broker (https://help.k2.com/kb001786).
The method for getting a Swagger file as described in this article is using a tool like RESTUnited.com to generate it. The tool used as an example in this article is the site RESTUnited.com. This is not the only site that allows you to describe and publish a service-based API, but for the purposes of this article, RESTUnited.com is used exclusively. To follow along and build your own Swagger descriptor file, you must register for an account to use this free service.
Before you Begin
Before you begin you need to gather some information, namely:
- The service URL of the REST service for which you want to generate a Swagger file. The example used in this article is from OpenWeatherMap.org which provides weather information via a REST API. Using this service requires free registration and an API key. The service URL is http://api.openweathermap.org/data/2.5/weather
- Whether or not the endpoint requires authentication, which OpenWeatherMap does not.
- A knowledge of how the service works, namely the parameters required to query and return data.
- An example response from the service in order for RESTUnited.com to infer the data model of the service.
Generating a Swagger Descriptor with RESTUnited.com
In RESTUnited.com, click the REST API menu and choose New REST API Wizard.

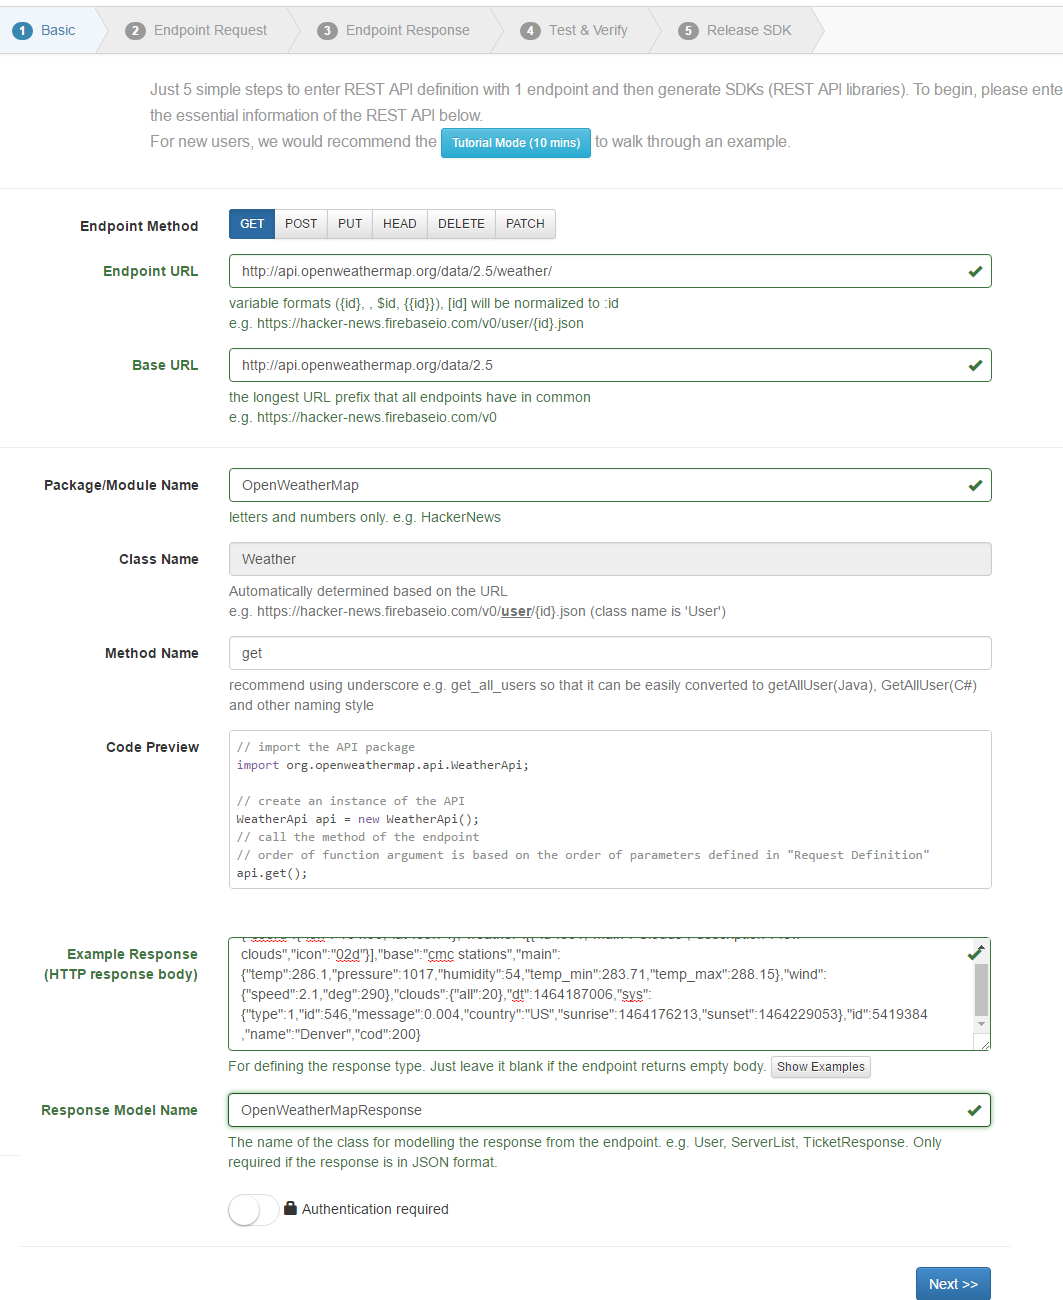
STEP 1: On the first page, the Basic step, enter the following values:
- Endpoint URL: http://api.openweathermap.org/data/2.5/weather/
- Base URL: http://api.openweathermap.org/data/2.5
- Package/Module Name: OpenWeatherMap
- Example Response:
| {"coord":{"lon":-104.98,"lat":39.74},"weather":[{"id":801,"main":"Clouds","description":"few clouds","icon":"02d"}],"base":"cmc stations","main":{"temp":286.1,"pressure":1017,"humidity":54,"temp_min":283.71,"temp_max":288.15},"wind":{"speed":2.1,"deg":290},"clouds":{"all":20},"dt":1464187006,"sys":{"type":1,"id":546,"message":0.004,"country":"US","sunrise":1464176213,"sunset":1464229053},"id":5419384,"name":"Denver","cod":200}
|
Response Model Name: OpenWeatherMapResponse
Your page should look similar to the following screen:
To get an example response from the OpenWeather service, you can enter a URL into a browser window, and OpenWeather returns the JSON payload directly to your browser window. For other services, you may have to use a tool like Fiddler to trace the response, but most services should return the JSON payload directly in the browser window. Use the following URL for the OpenWeatherMap service, substituting your location and API ID from OpenWeatherMap:
http://api.openweathermap.org/data/2.5/weather?q=Denver,CO&appid=Your-App-ID
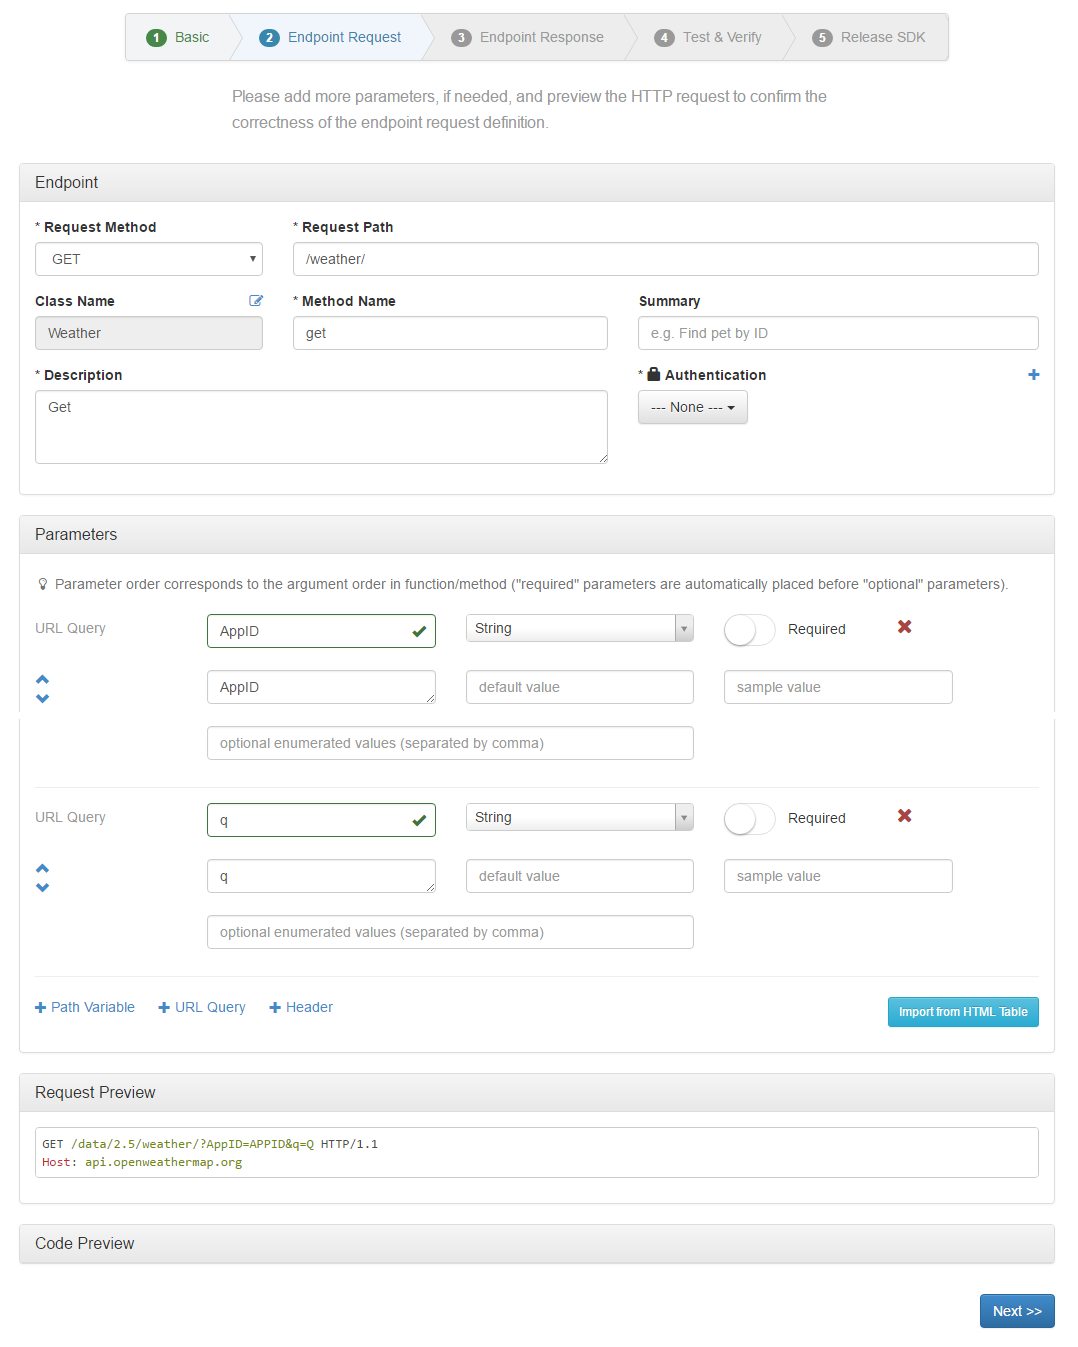
STEP 2: On the next page, the Endpoint Request step, you specify the parameters for the endpoint. For the OpenWeatherMap request, you need to pass two pieces of information:
- AppID: The key generated for you by OpenWeatherMap when you signed up for an account. You can generate multiple keys.
- q: The city & country that you want current weather information about. For more information about this see http://openweathermap.org/current
Note: Click URL Query twice to create these two parameters. You do not need to create Path Variables or Headers for this service but these may be useful for other services.
Your page should look similar to the following screen:
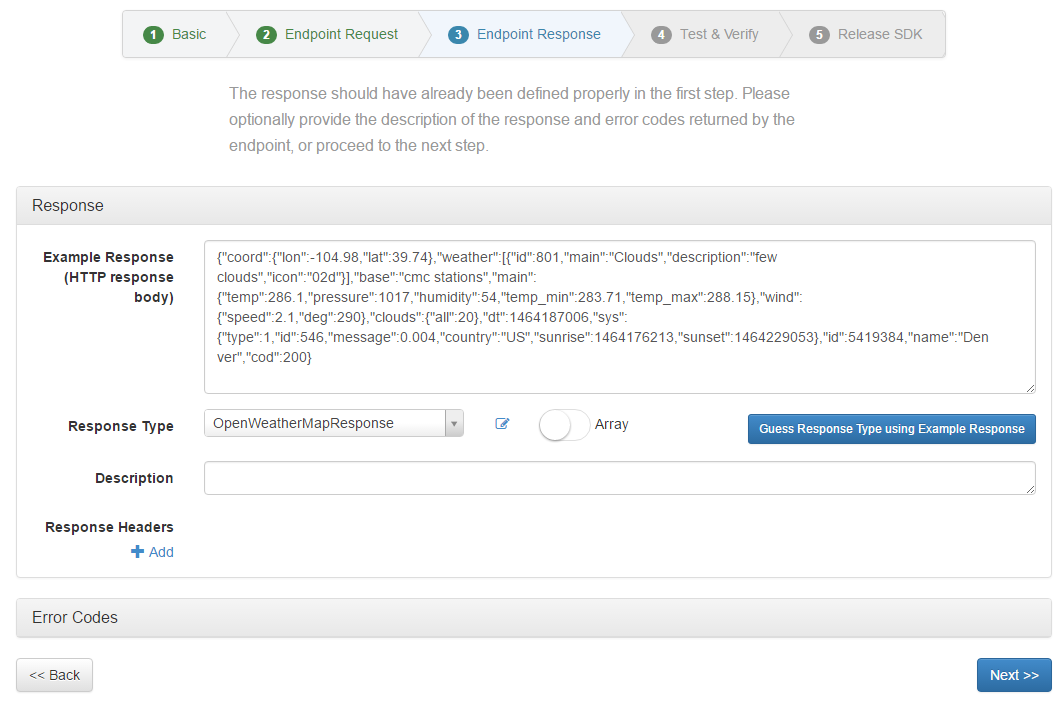
STEP 3: On the next page, the Endpoint Response step, you should not have to enter any values as you already provided the required values in the first step.
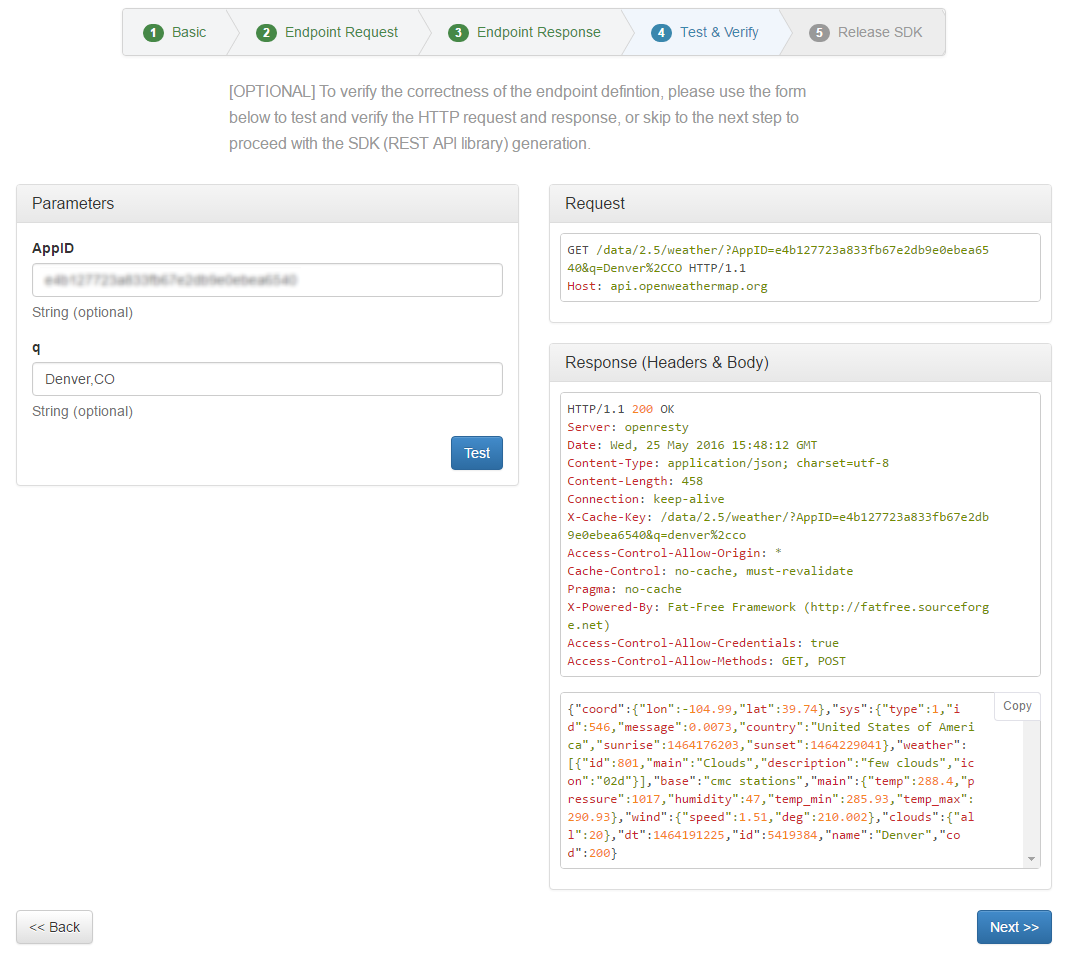
STEP 4: On the next page, the Test & Verify step, enter your AppID and a city and country, and then click the Test button. Your page should look similar to the following screen:
STEP 5: On the next page, the Release SDK step, you do not need to change anything unless you want to generate language-specific code stubs that would jump-start calling the service with code. But since you only need the Swagger file to create a REST broker service instance, click Test & Export.
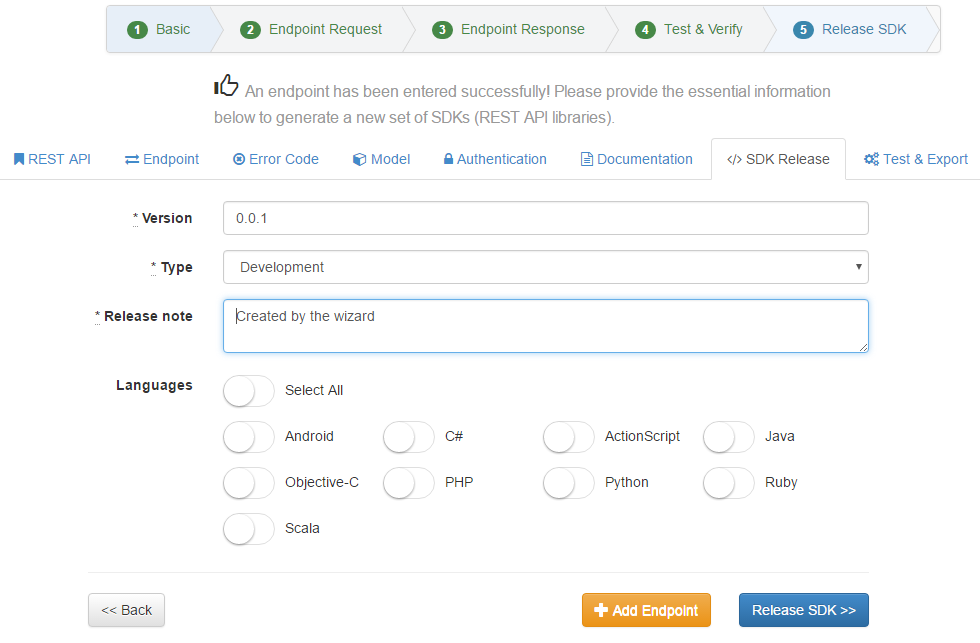
STEP 6: After clicking Test & Export, you see the following screen. Click Swagger (between Postman and Other Methods).
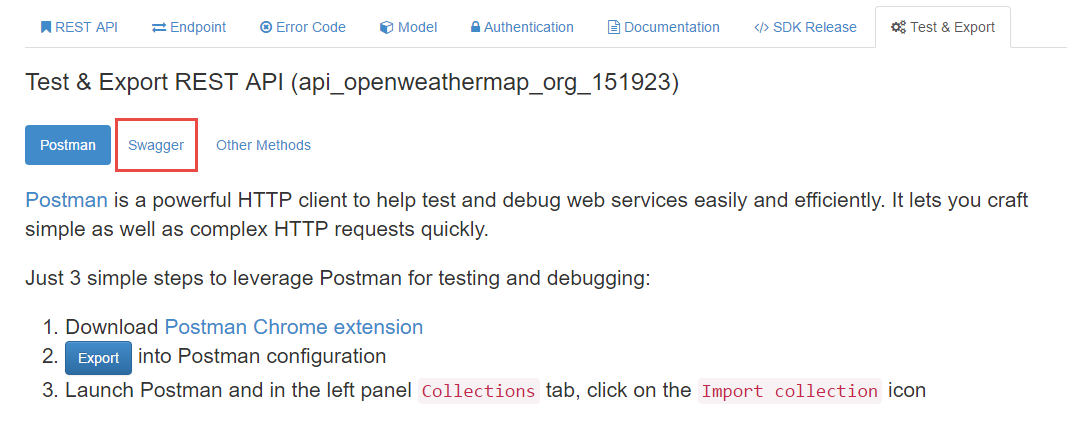
STEP 7: Click the Swagger tab and then click Export to download the Swagger definition as a .json text file. You will use this file when registering a service instance of the REST broker in K2.

Verify the Swagger file works in K2
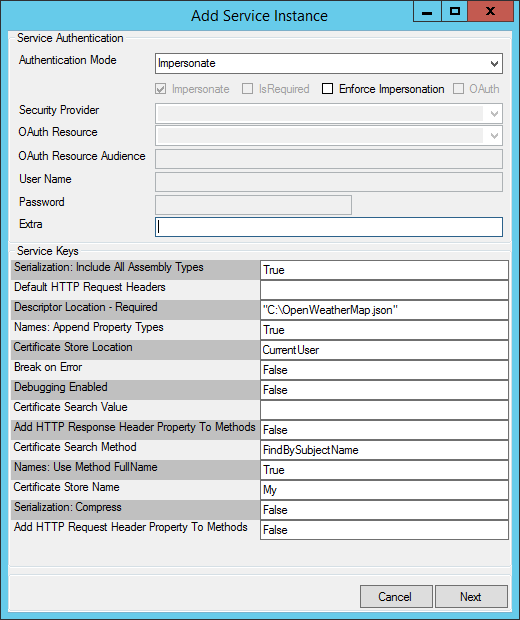
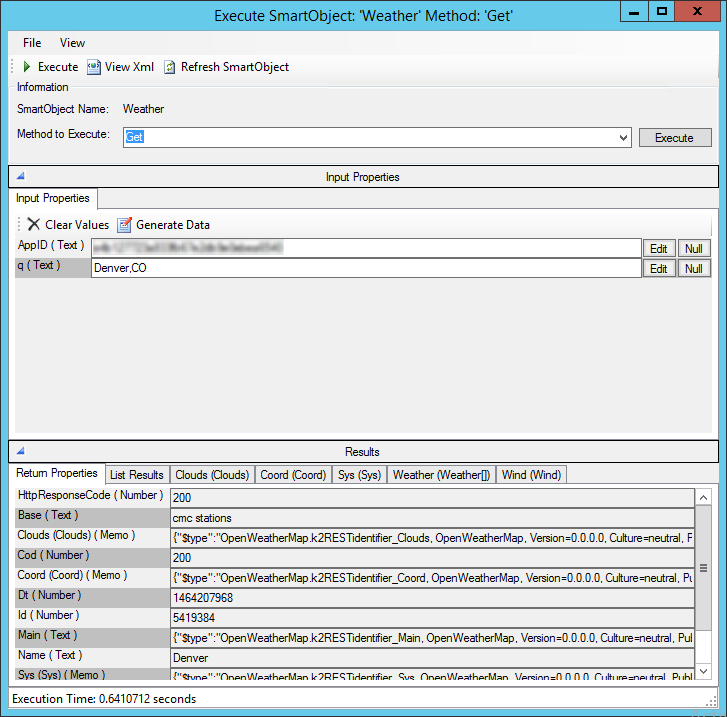
Use the Swagger file to register a REST broker service instance, and then generate SmartObjects to test and verify that the SmartObject methods can call the REST service and data is returned as expected. If you receive errors or no data is returned, go back to RESTUnited.com to determine what may be missing or incorrectly configured. If your entities are nested you must flatten them first and use $ref tags to link them together. See below for more information.
Resolving Validation or Namespace Errors
If you see validation or namespace errors when trying to register your instance, it may mean that the Swagger file definitions section contains nested objects. The REST broker does not support nested complex entities of the object type. For example, the category of the Pet object references the definition of a category:
"Pet" : {
"type" : "object",
"required" : ["name", "photoUrls"],
"properties" : {
"id" : {
"type" : "integer",
"format" : "int64"
},
"category" : {
"$ref" : "#/definitions/Category"
},
"name" : {
"type" : "string",
},
The category entity is defined separately (as a sibling of Pet) as its own object. Simple types are properties of an object, but object types must be defined separately and referenced.
"Category" : {
"type" : "object",
"properties" : {
"id" : {
"type" : "integer",
"format" : "int64"


