Hi Msharma
I have a few possible solutions based on your requirments. I have however added multiple solutions as you can have a look at them to determine which will be the best for your design. My solution are focussed on the RichText control and the Image attachment control as I think that they will work the best for identified scenario.
SOLUTION 1
Description:
Adding text data from the word document to the richtext control manually in order to identify the text data's html format, which can then be used to call the text data as is.
Steps:
- First you would need to createhave a item view containing a Rich Text Control (Important note: After adding the RichText Control do not modify its properties)
- Save and finish the view.
- Open the Word document containing your text data, keep it on one side.
- Run the item view which contains the RichText control.
- When the view is initialized you would then need to copy the text data from the Word Document and paste it into the RichText control.
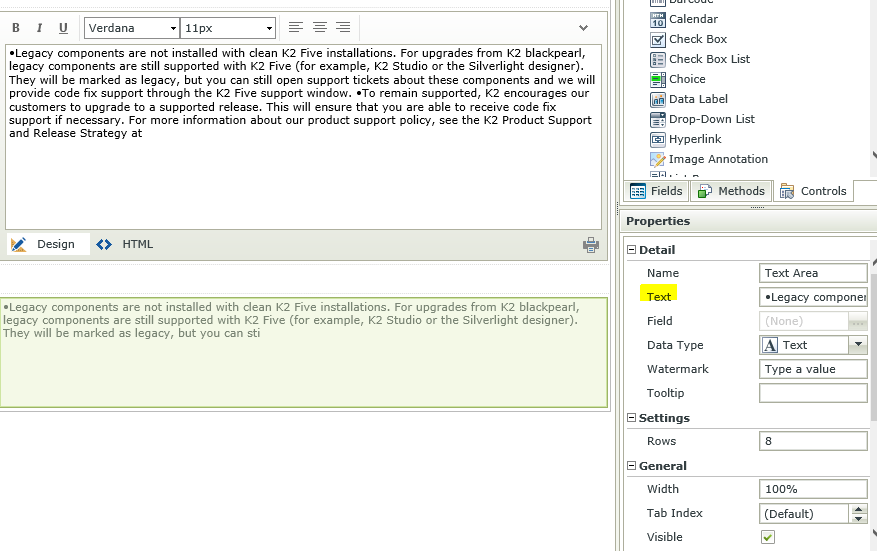
- Now that the Text data from the word document is on the RichText control you can select the "HTML" option in the RichText control which can be located at the bottom.
- This will provide you with the HTML for the Text data contained in the RichText Control.
- Now you will copy the HTML Text Data and then edit the Item view once more.
- While the item view is in edit mode, select the RichText control and locate its property called "HTML", in this property you would then paste the HTML Text Data. (Important: Sometimes when you paste the HTML Text Data in the HTML property the property still looks blank however that is not the case, as you will notice when you save and run the view).
- Save and Finish the item view.
- Run the view again and all your data that had been coppied from the word document to the item view should load as expected without any value limits.
Negative affects: The styling and image formatting will be lost. This can however be readded directly to the text in the RichText control prior to preforming step 6 of solution 1 manually.
Once Step 6 is preformed the HTML had been captured, therefore if there are any additional changes made to the text in the RichText control the HTML would first need to be recaptured and replaced with the HTML data from the RichText control properties. If this is not done then the changes will not stick and will dissapear when the view is reloaded.
How to add the Images:
Simply copy and paste the images from the word document to the RichText control.
How to add the Text formatting:
You can use the RichText controls tools to re-add the formatiing as required.
I tested this scenario with a word document containing 16 pages and the results was satifactory.
Something additional:
Should you want the controls in the RichText control to be invisible to the the usercustomer then you can apply the below setting to the RichText control post preforming the above steps for solution 1.
Ensure that the "Read Only" property for the RichText control is Checked.
Ensure that the "Design View" property for the RichText control is Unchecked.
SOLUTION 2
Description:
Add pdf file to the item view, allowing the usercustomer to view or save the pdf file.
Steps:
- First you would need to convert your word file into PDF format, to do this you can simply edit the word document then select file > save as
- From the Save As type you can the select PDF (* .pdf) and save the file to convert it to PDF.
- From K2 designer, you would then need to create a SmartObject with these properties (ID=Autonumber and PDF=File).
- Generate a Editable List view from the Created SmartObject and upload the PDF file to the SmartObject using the Editable list (Simply add a new record in the editable list by clicking on the "Add new row"option, then click on the file attachment control where it states "Click here to attach a file" and point it to the location of your pdf file. After that is done you would need to press the SAVE button).
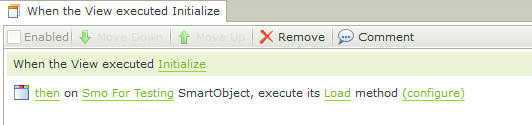
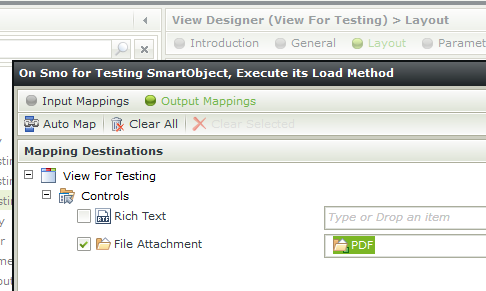
- From the Item view you can then add a File Attachment control and configure it to load the pdf from the SmartObject by using the below rule construction in the item view:
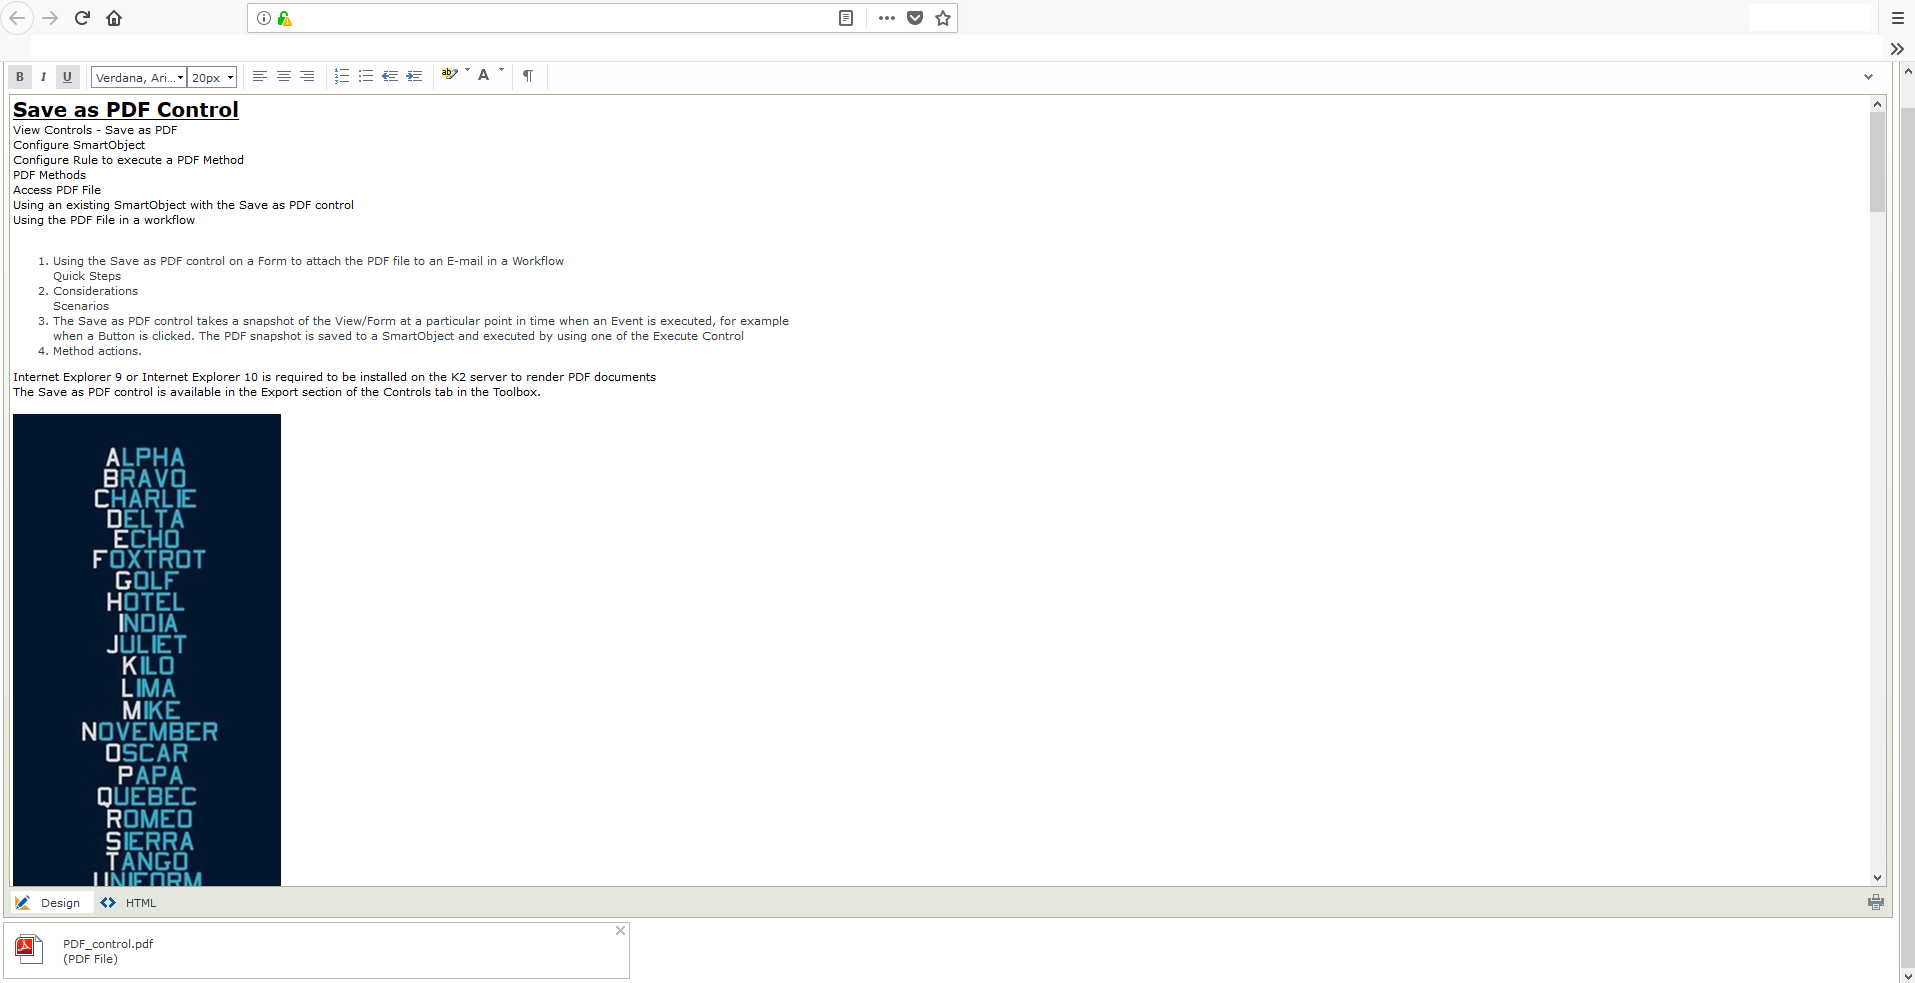
- Now your item viewform should look something like this when it is initialized

- When you click on the PDF, your browser should give you the option to save the file or view it.
I also tested this scenario and the results was satifactory however solution 1 seems to be the best option based on your requirements but solution 2 will also do the job.
Note: Should you feel that this post is of use and or an accurate solution to the raised question, I kindly encourage you to mark it as such using the 'Mark as Solution' and 'Kudo' options.
Kind Regards
Raymond