


In this blog I am going to go through how to set a character limit for a text jotblock in Nintex eSign. By limiting the amount if text you allow the user to input into the jotblock you can assure that when the document is generated after signing all the text that the signer input into that jotblock will be visible in the document.
Let take a look at how to configure this.
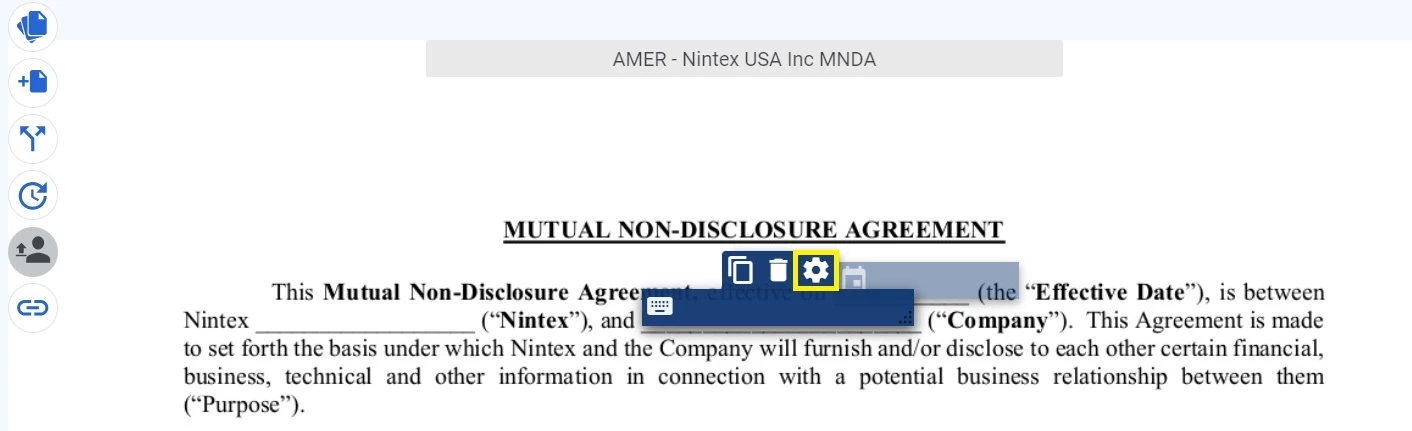
Open up the template in Nintex eSign you wish to configure this for, find the jotblock and open up the settings for that jotblock by clicking on the gear icon.
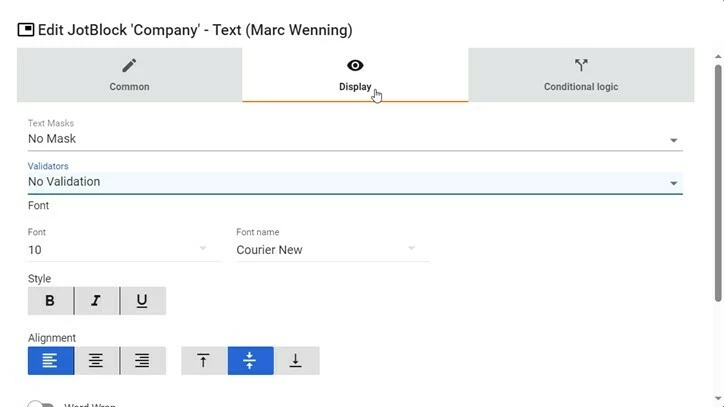
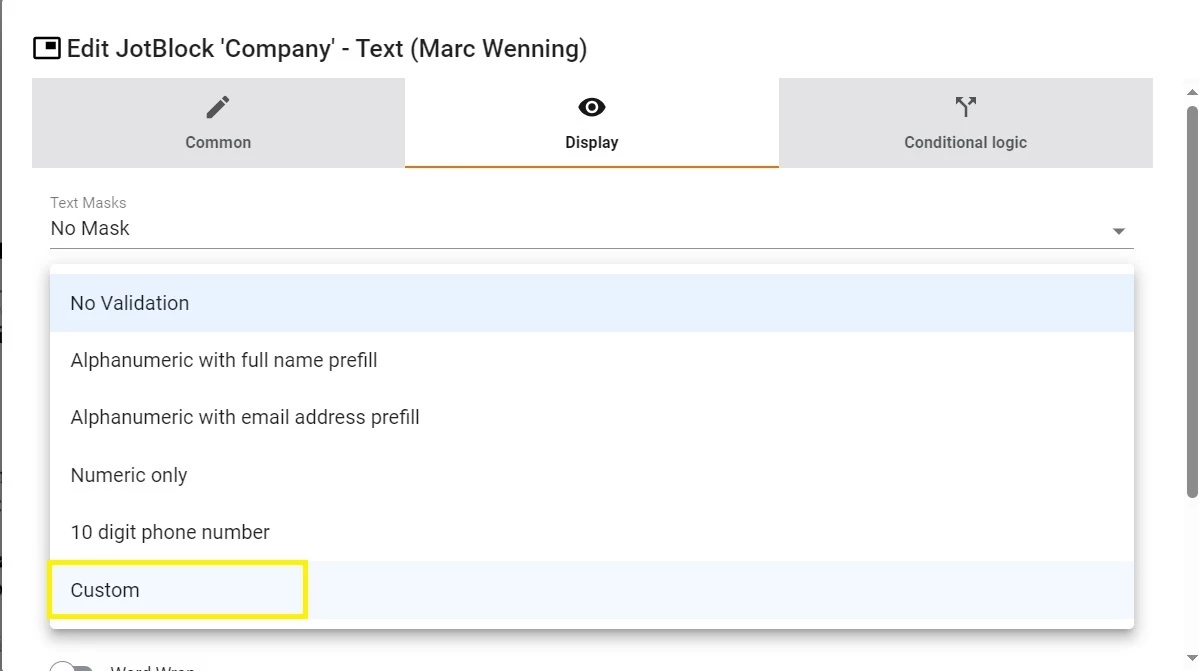
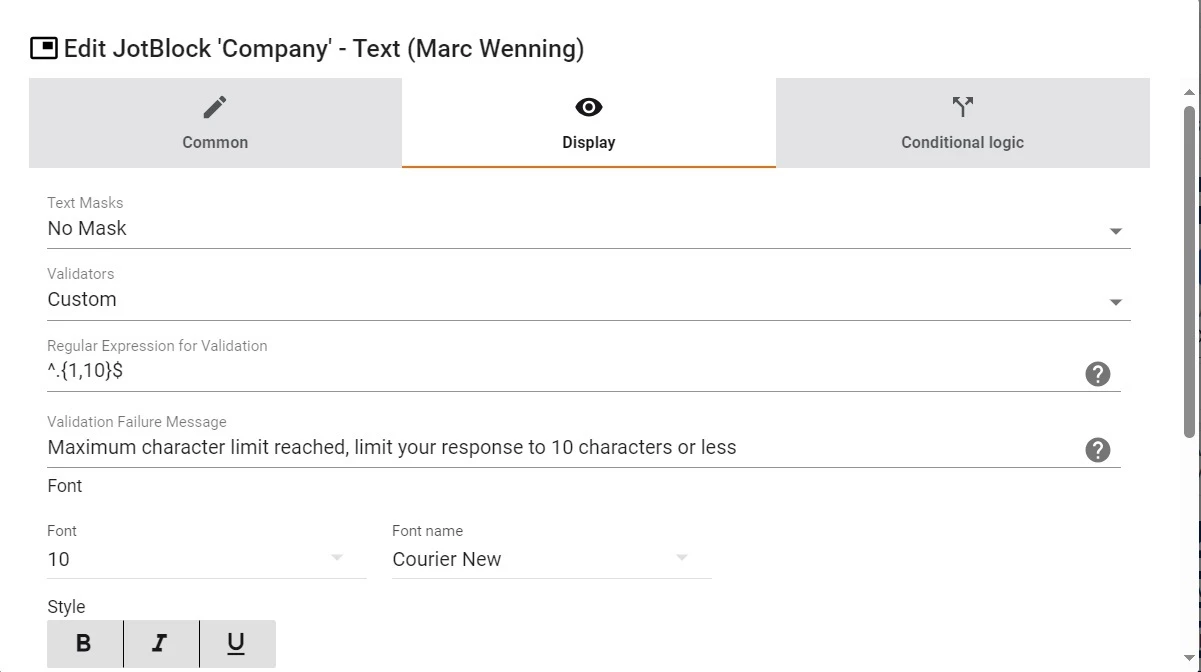
After opening the settings window, click on the display tab and then under the validators dropdown select custom.
Now we need to enter the regular expression that will be used to set the character limit in the jotblock and the validation message when that limit is reached.
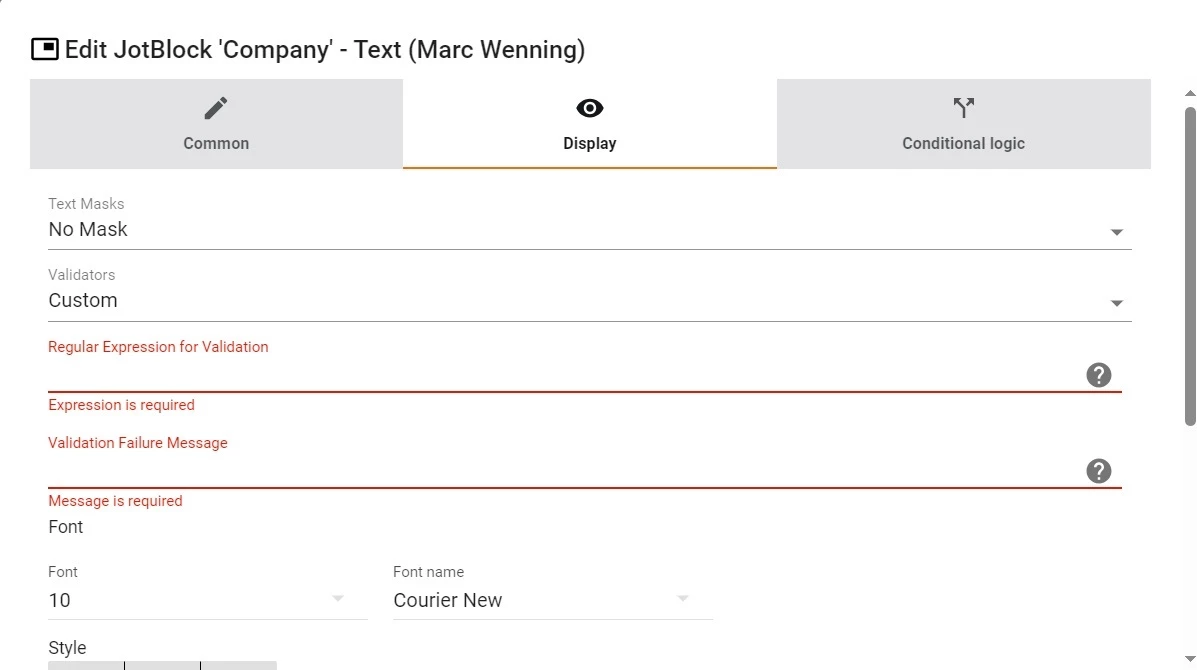
In this example the regular expression that is being applied will limit the characters in the jotblock to 10 or less. When that limit is reached the user will receive the validation message that they need to limit their response to 10 characters or less. Make sure to save the jotblock updates.
Now that we have it configured lets take a look at how it functions in the signing experience.
When the user that is signing the document inputs to many characters, they will receive the validation message and will not be able to continue until they limit their response to the number of characters that were set using the regular expression.

Repeat these steps for any other jotblocks that need to have a character limit applied to them.