Topic
Add DocuSign Status to a Custom Object
This procedure explains only how to establish a relationship between a custom object and DocuSign Status and then add a DocuSign Status section to a Salesforce object. If you have questions about customizing Salesforce, see the salesforce.com documentation for assistance.
Instructions
Create a Lookup Relationship from Custom Object to DocuSign Status Object
- From Salesforce.com, click Setup to go to the Force.com Home page.
-
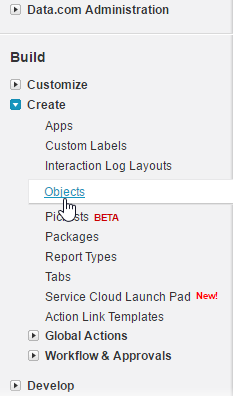
In the left sidebar, under Build, click Create > Objects.

- From the list of objects, click the custom object for which you want to add DocuSign Status. Do not click Edit.
-
Scroll down to the Custom Fields and Relationships section and click New.

-
Select the following in the New Relationship steps:
- Select Lookup Relationship, and then click Next.
-
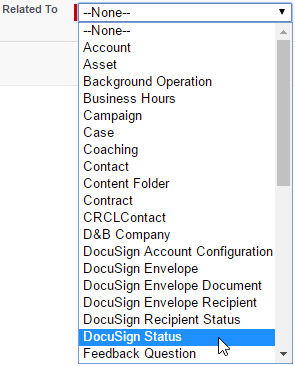
In Related To, select DocuSign Status, and then click Next.

-
Enter the Field Label and Field Name information, and then click Next.

- Select the field-level security profiles to which you want to grant edit access, and then click Next.
- Add the page layouts that should include this custom object, and then click Next.
- Click Save.
Create a Lookup Relationship from the DocuSign Status Object to the Custom Object
- From Salesforce.com, click Setup to go to the Force.com Home page.
-
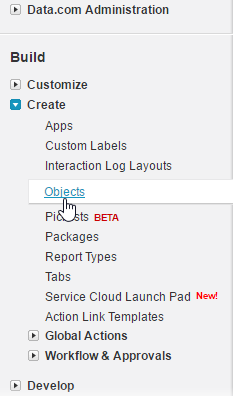
In the left sidebar, under Build, click Create > Objects.

-
From the list of objects, open the DocuSign Status object. Do not click Edit.

-
Scroll down to the Custom Fields and Relationships section and click New.

-
Select the following in the New Relationship steps:
- Select Lookup Relationship, and then click Next.
- In Related To, select your custom object, and then click Next.
-
Enter the Field Label and Field Name information, and then click Next.

- Select the field-level security profiles to which you want to grant edit access, and then click Next.
- Add the page layouts that should include this custom object, and then click Next.
- Click Save
Update DocuSign Connect
-
From within DocuSign for Salesforce, click the DocuSign Admin tab.

-
Click the DocuSign tab. The DocuSign web application opens in a new browser window.
Note: You might be asked to log in to DocuSign.
-
From the DocuSign application, click your profile image at the top of the application and select Preferences.
The DocuSign Account Preferences page appears.
- In the Navigation Pane on the left, under Account Administration, click Connect.
- Scroll down, find the dsfs_DocuSign_Status_c object and then click Edit.
This page shows the list of Salesforce fields that are updated. - At the bottom of the Update Fields section, click Add. A new line is added to the Update Fields section.
- In the Salesforce.com Field, select the lookup field for your custom object.
- In the DocuSign Field, select Envelope External Source ID.
- Click Save & Close.


