Form Plugin - 4 Column grid with Sorting Customized

  • 1 June 2023
  • 5 replies
  • 81 views

Userlevel 6
Badge +16

Hi Community Members


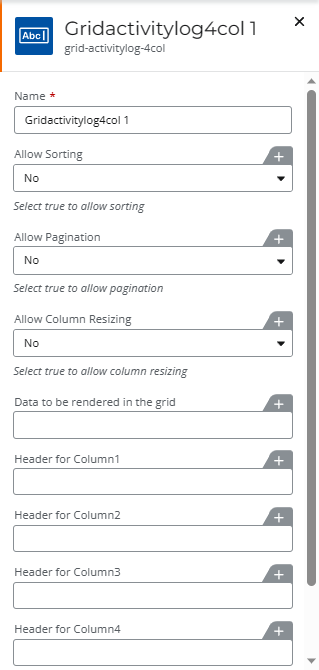
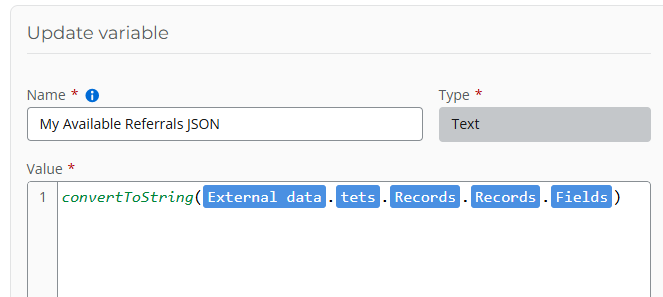
I managed to tweak the 4-column Grid with Sorting.
- Added paging.
- Shorten to just “Col1”, “Col2”
- Data size increase to 20k
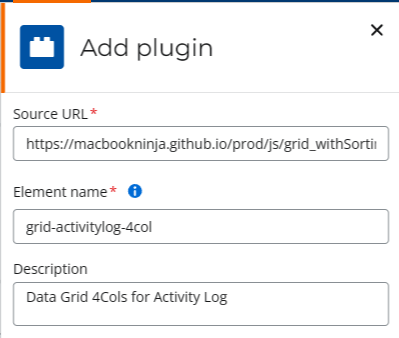
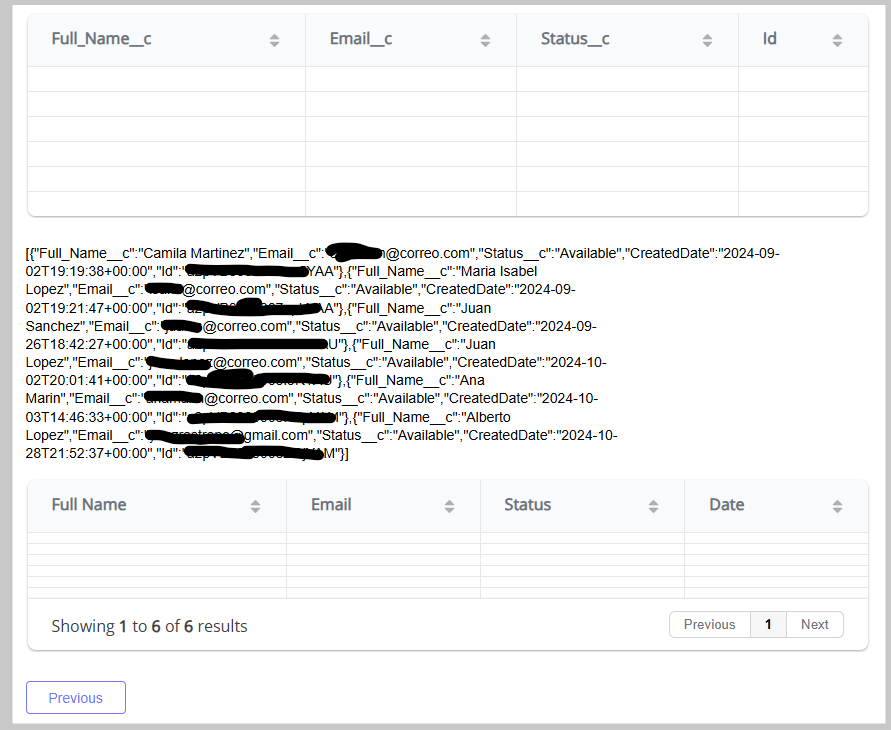
 

Here is the link

https://macbookninja.github.io/prod/js/
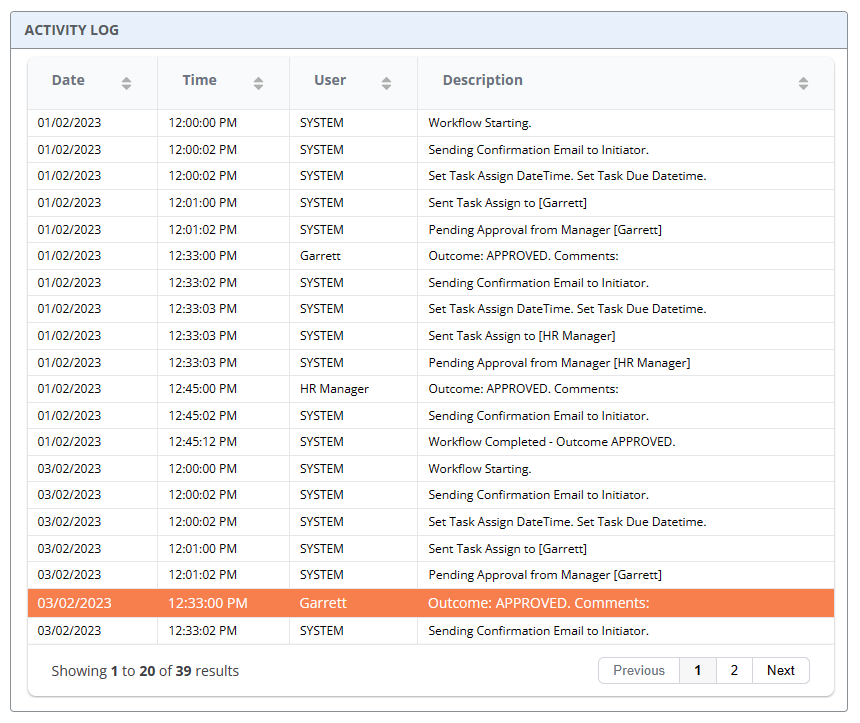
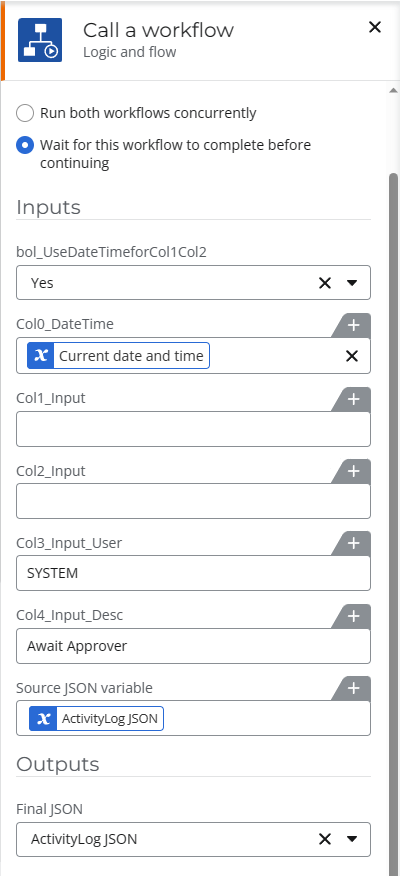
Sampled Date to use

[{"col1":"01/02/2023","col2":"12:00:00 PM","col3":"SYSTEM","col4":"Workflow Starting."},
{"col1":"01/02/2023","col2":"12:00:02 PM","col3":"SYSTEM","col4":"Sending Confirmation Email to Initiator."},
{"col1":"01/02/2023","col2":"12:00:02 PM","col3":"SYSTEM","col4":"Set Task Assign DateTime. Set Task Due Datetime."},
{"col1":"01/02/2023","col2":"12:01:00 PM","col3":"SYSTEM","col4":"Sent Task Assign to [Garrett]"},
{"col1":"01/02/2023","col2":"12:01:02 PM","col3":"SYSTEM","col4":"Pending Approval from Manager [Garrett]"}
]

Single row of data

[{"col1":"01/02/2023","col2":"12:00:00 PM","col3":"SYSTEM","col4":"Workflow Starting."}]


5 replies

Badge +4

Hi Garrett,

I saw your post about the 4 column grid plugin. I'm new to this kind of thing so can you explain how it consumes the data? I've tried setting up variables, etc and even copy/pasting the values to the field itself to no effect.
What do I do to utilise this plugin as I'm keen to use it.

thanks,
Paul

Userlevel 6
Badge +16

Hi @PScyner68 

Thanks for the great question.


Step 1 - Add the Plugin to your NAC environment

Automate → Form Plugins → Click Add Plugin


You will need the Source URL and the Element Name from the Github Page.

At the Add Plugin screen, enter the information. Click Add Plugin

The plugin should be added in the List of Form Plugins


Userlevel 6
Badge +16

Step 2 - Using the Grid Plugin

In NAC, create a new Workflow - Start Event Form. 

Edit the Form (design form)

You should see the Grid plugin in the Toolbox panel

Drag the Grid control to the form. Note that the Grid control is slim

Configure the Grid control

Data to be rendered: 

[{"col1":"01/02/2023","col2":"12:00:00 PM","col3":"SYSTEM","col4":"Workflow Starting."}]

Header for Column 1: Date
Header for Column 2: Time
Header for Column 3: User
Header for Column 4: Description


Preview the Form


Userlevel 6
Badge +16

I am using a Component Workflow to populate the value of the Data variable.

It just append new record to the existing variable 


Both the Grid plugin and the Component Workflow make it really easy to manage the Data for the Grid


Feel free to change the Column Header
- Item Name, Unit Price, Quantity, Total
- Full name, Email,  Department, Status (Active/Inactive)

Badge +4

Thanks for that Garrett. 

I was expecting to see something in the Designer view which led to the question.

All sorted now.


Thanks,

Paul

Reply