
Symptoms
Currently there is no built in SmartObject for SharePoint Taxonomy services in K2. However, there are some steps to create a custom SmartObject.
Diagnosis
N/A
Solution
Recorded Demo: http://screencast.com/t/nmoMvCxYX
1. Locate the SharePoint Taxonomy Web Services page located in your environment. Typically found at:
http(s)://[SharePoint URL]/_vti_bin/TaxonomyClientService.asmx
e.g. https://portal.denallix.com/_vti_bin/TaxonomyClientService.asmx
You should see a page like the one pictured below.
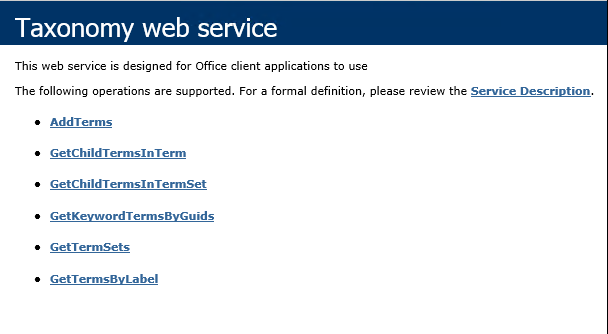
Copy the fully qualified URL. While there are other services here, we will only be adding the AddTerms operation.
2. Open the SmartObject Service Tester utility
3. Right Click on Endpoints Web Services Service Object and select Register Services Instance
4. Set Authentication Mode to: Impersonate
5. Under the Service Keys section, paste the Taxonomy Web services URL into the required WebServices URL. Then click Next. 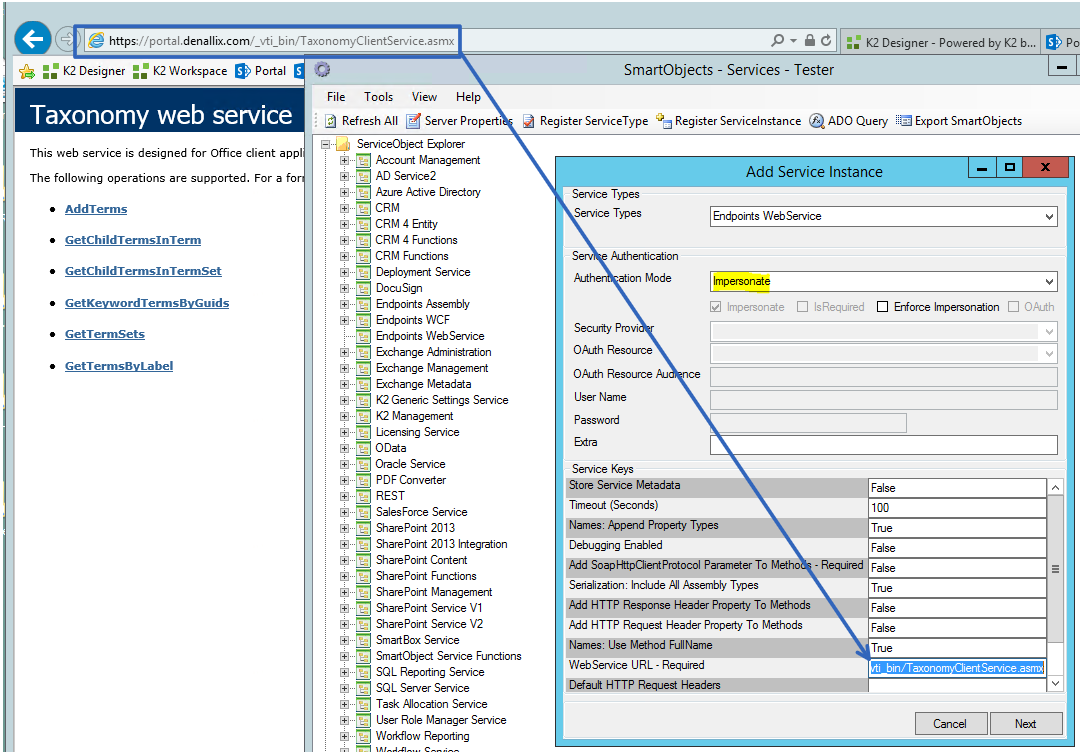
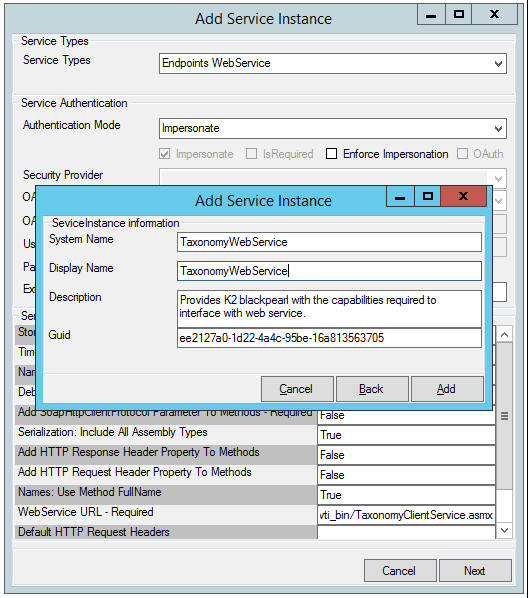
6. Rename the new Service instance from EndpointsWebService to TaxonomyWebservice. Then click Add.
7. You should see a message box pop up telling you your new Service Instances was successfully created.
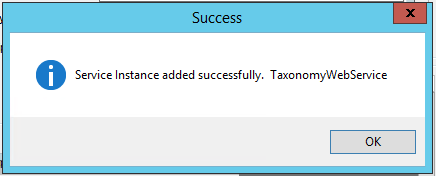
8. Now under Endpoints WebServices you’ll see the TaxonomyWebService Service Instance.
NOTE: This process created objects for all the Taxonomy web services. While in this article we are focusing on the AddTerms SmartObject, this will create SmartObjects for the other object too.
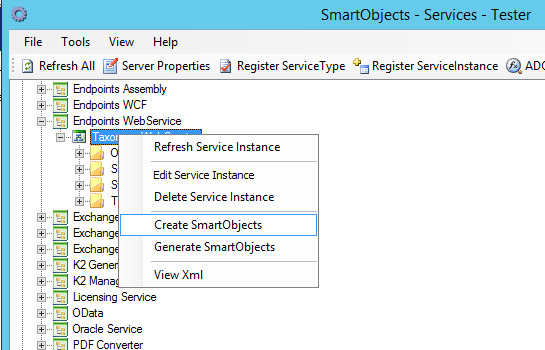
9. To generate the SmartObject right click on Taxonomy Web Services and select Create SmartObjects from the menu.
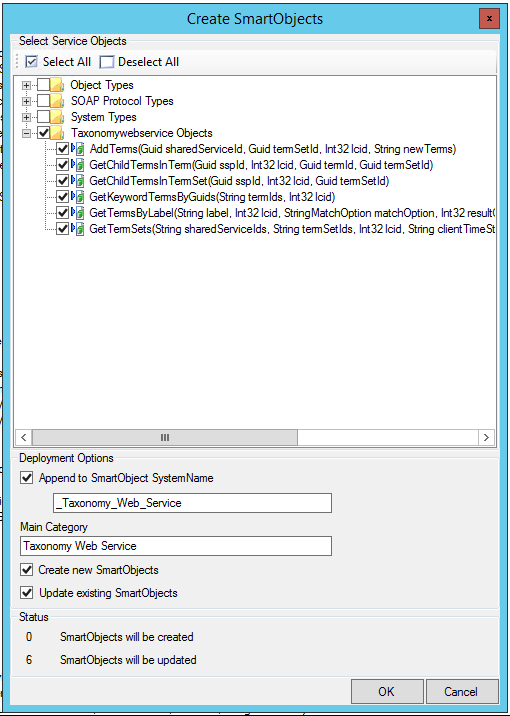
10. In the Create SmartObjects window that appears, deselect: Object Types, SOAP Protocol Types, and System Types. Leaving only the Taxonomywebservices Objects checked. Then Click OK
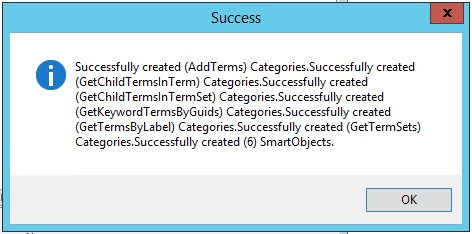
11. You should get a message box indicating the successful creation of the new SmartObjects. Click OK.
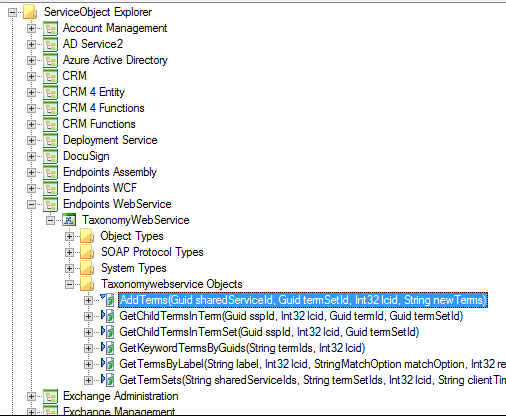
12. The SmartObject Service Tester should refresh and you should now see TaxonomyWebServices under the SmartObject Explorer Expanding the subtree should reveal the newly created SmartObjects, including the AddTerm SmartObject.
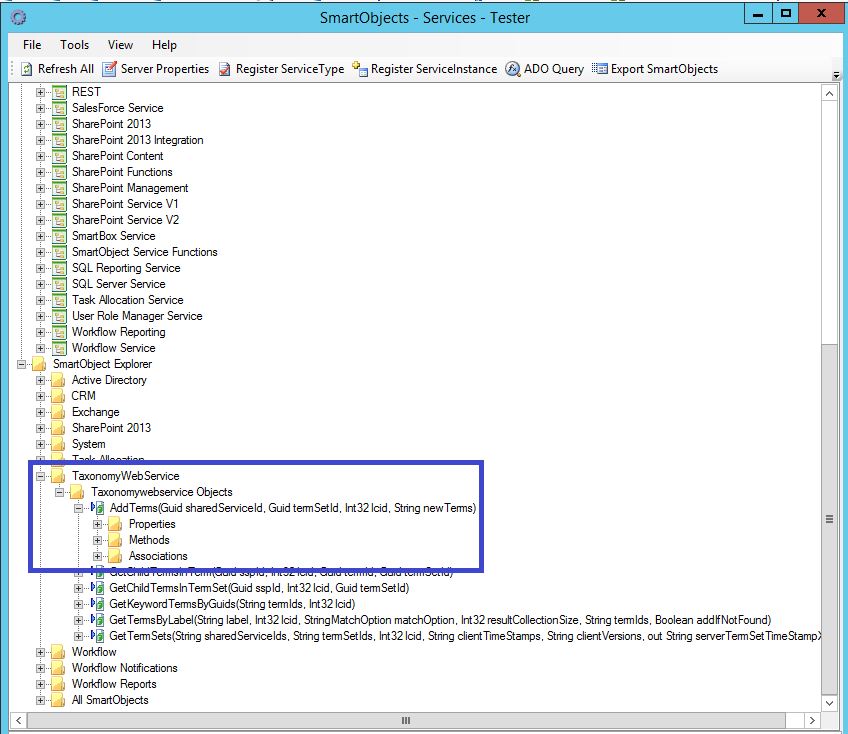
Executing the SmartObject.
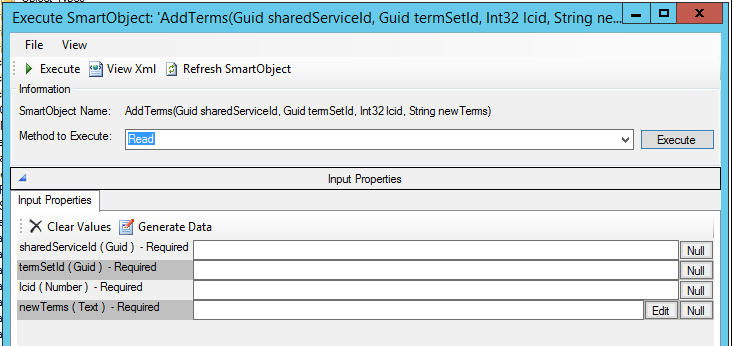
There are some additional steps to fully utilizing the AddTerms SmartObject. If we execute the SmartObject in the SmartObject Service Tester, we can see it requires 4 values.
shareServiceId (GUID)
termSetId (GUID)
lcid (Number) (1033 - for English)
newTerm (Text)
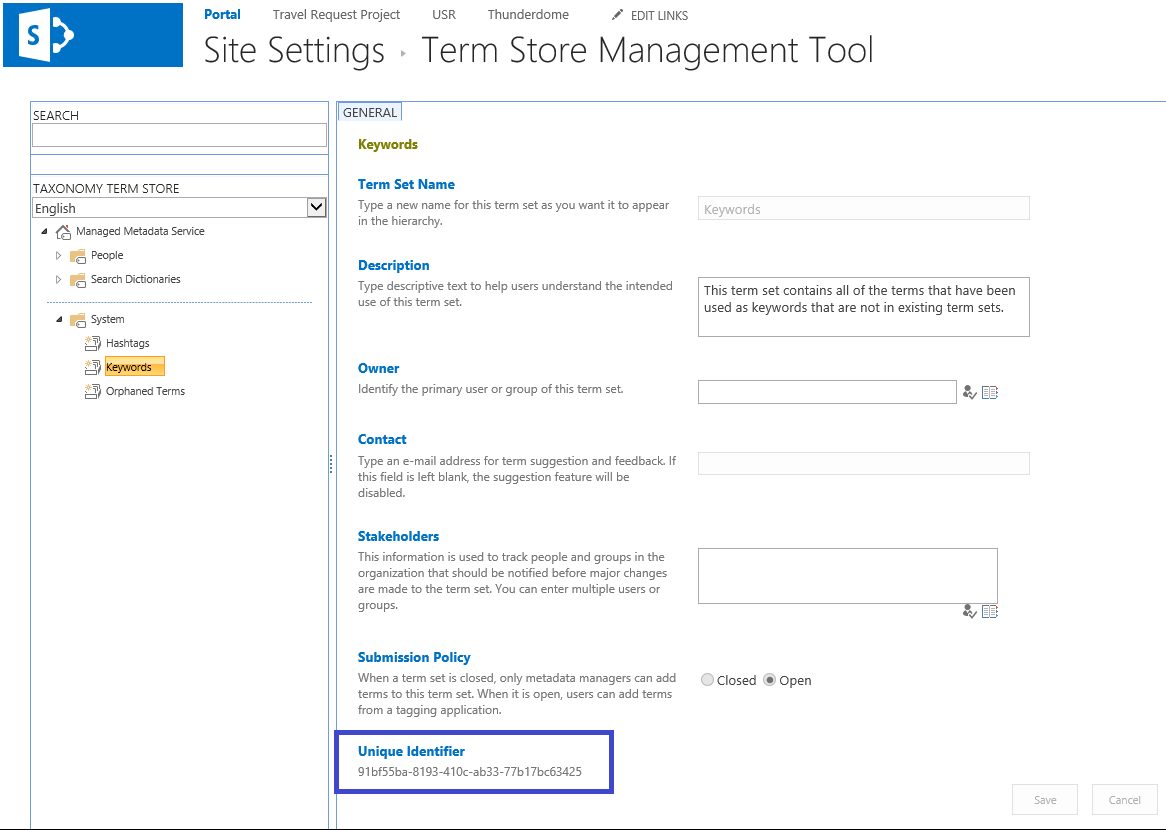
The shareServiceId and the termSetId can be found in Site Setting ->Term Store Management Tool in SharePoint. shareServiceId is the Unique Identifier under Managed Metadata Service section (e.g. 0dd4b72451474d17a41b303ff2505c5f), while the termSetId the Unique Identifier under the Keywords section (e.g. 91bf55ba-8193-410c-ab33-77b17bc63425).
shareServiceId: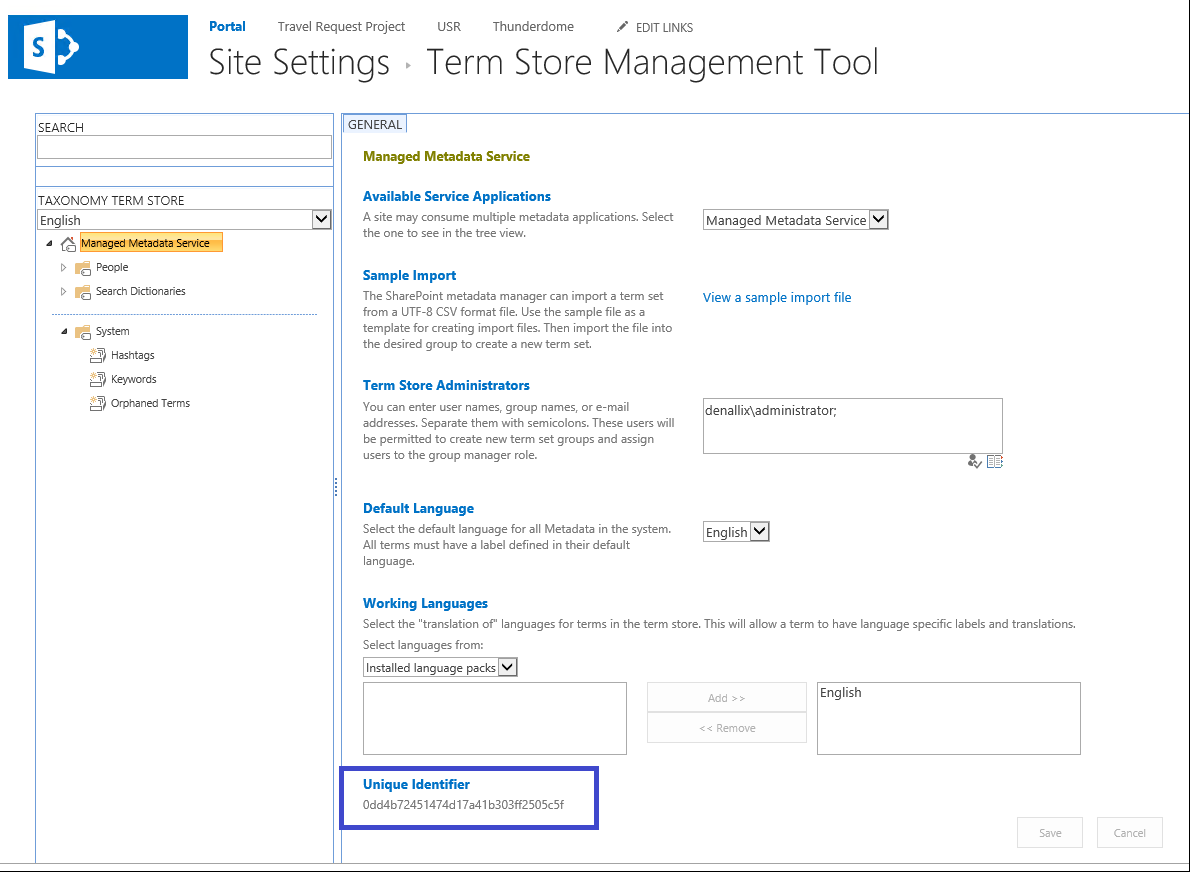
termSetId:
newTerms
This will be a little bit more complicated as it will require some xml formatting if we want to add terms dynamically. For the new term to be added the parentTermId needs to be zeroed out.
<newTerms><newTerm label="[Term to Add]" clientId="1" parentTermId="00000000-0000-0000-0000-000000000000"></newTerm></newTerms>
Example View Creation
1. Open K2 Designer and navigate to the All Items->Taxonomy Web Services->Taxonomywebservice Objects
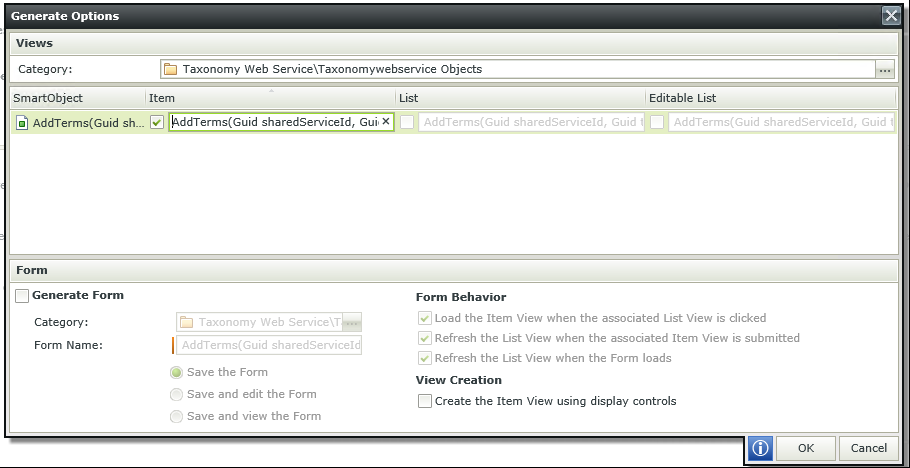
2. Right click on AddTerms and select Generate Views.
3. When the Generate Options window appears select the check box under the Item Column and click OK. This will create a generic view for us to work with.
4. Once the new view has finished being generated, select it and then Edit.
5. For this example, we will be adding a data label to the right hand column and naming it “newTerm”. Next we changing the name of the button from “Read” to “AddKeywordButton”
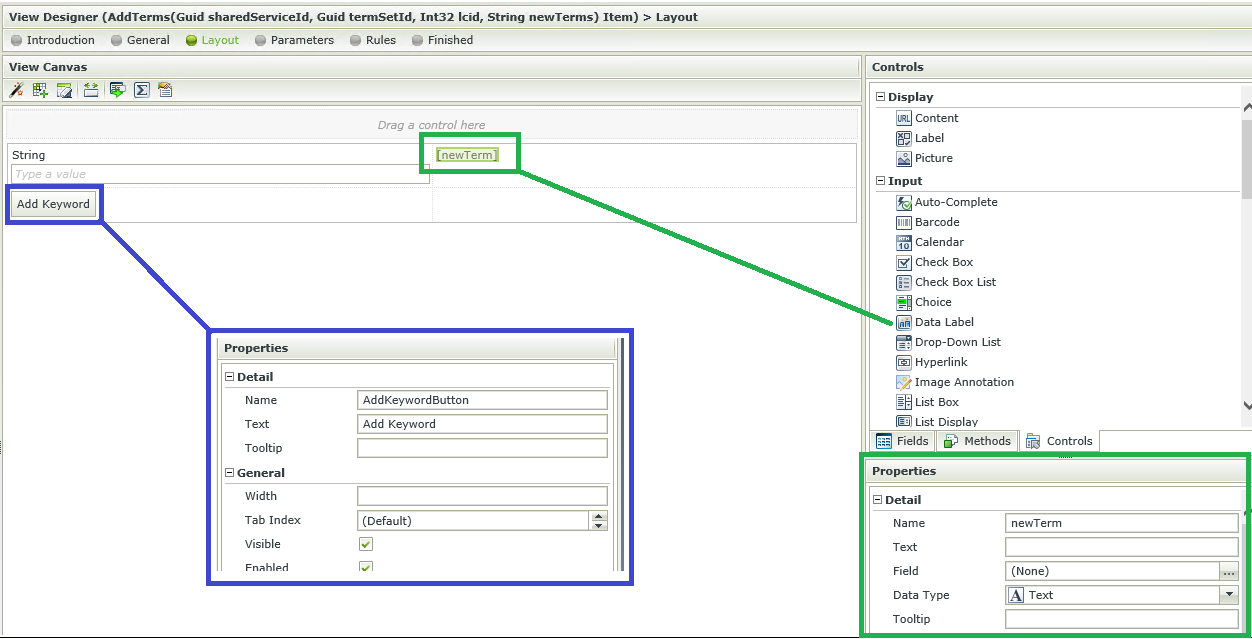
6. Next, on newTerm data label select expression in the Properties pane under General, and add a new expression.
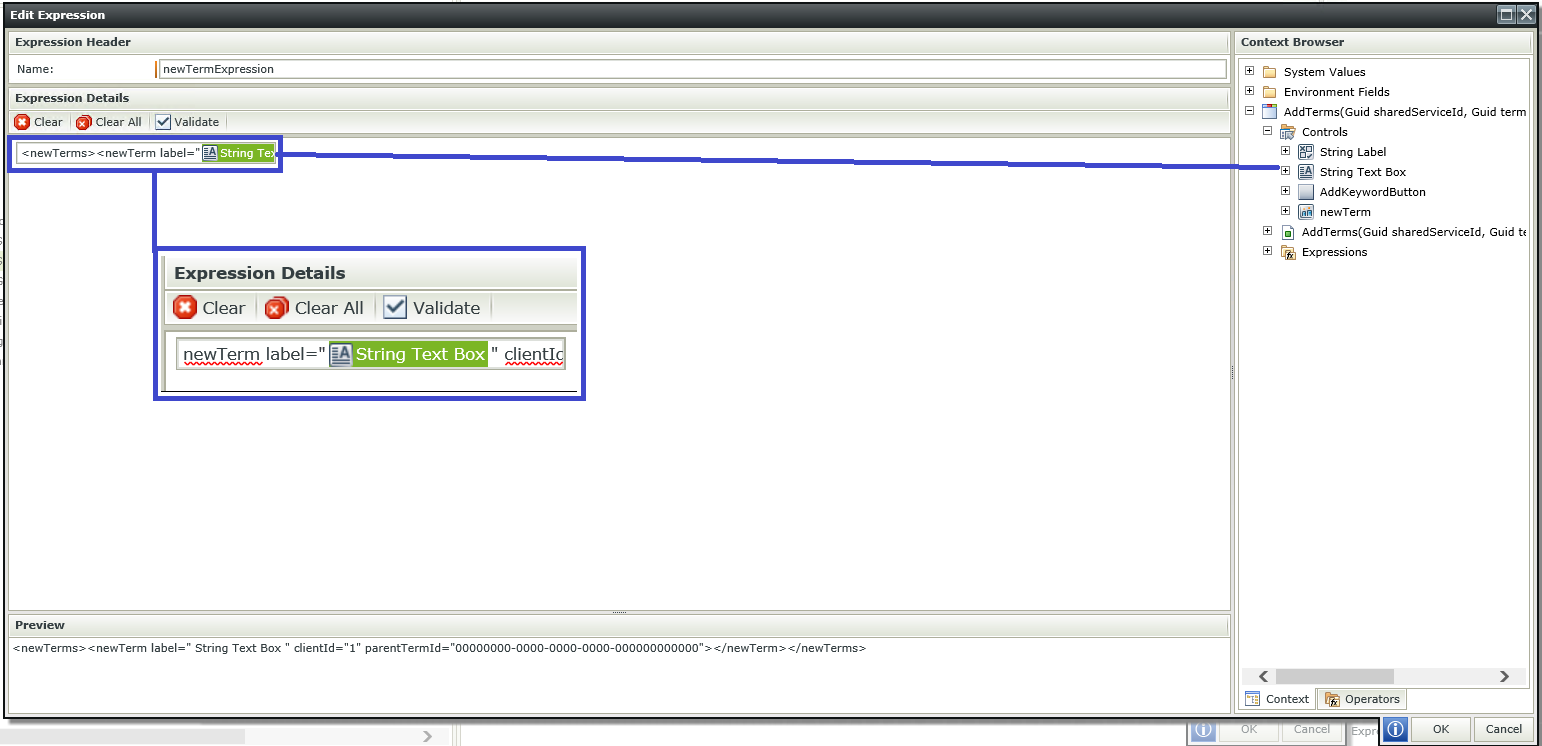
7. We are going to name this expression “newTermExpression”. Next we are going to copy the xml string into the Expression Details.
<newTerms><newTerm label="[Term to Add]" clientId="1" parentTermId="00000000-0000-0000-0000-000000000000"></newTerm></newTerms>
To make this dynamic you need to replace [Term to Add] with the contents of the String Text Box
8. Click OK to save the expression.
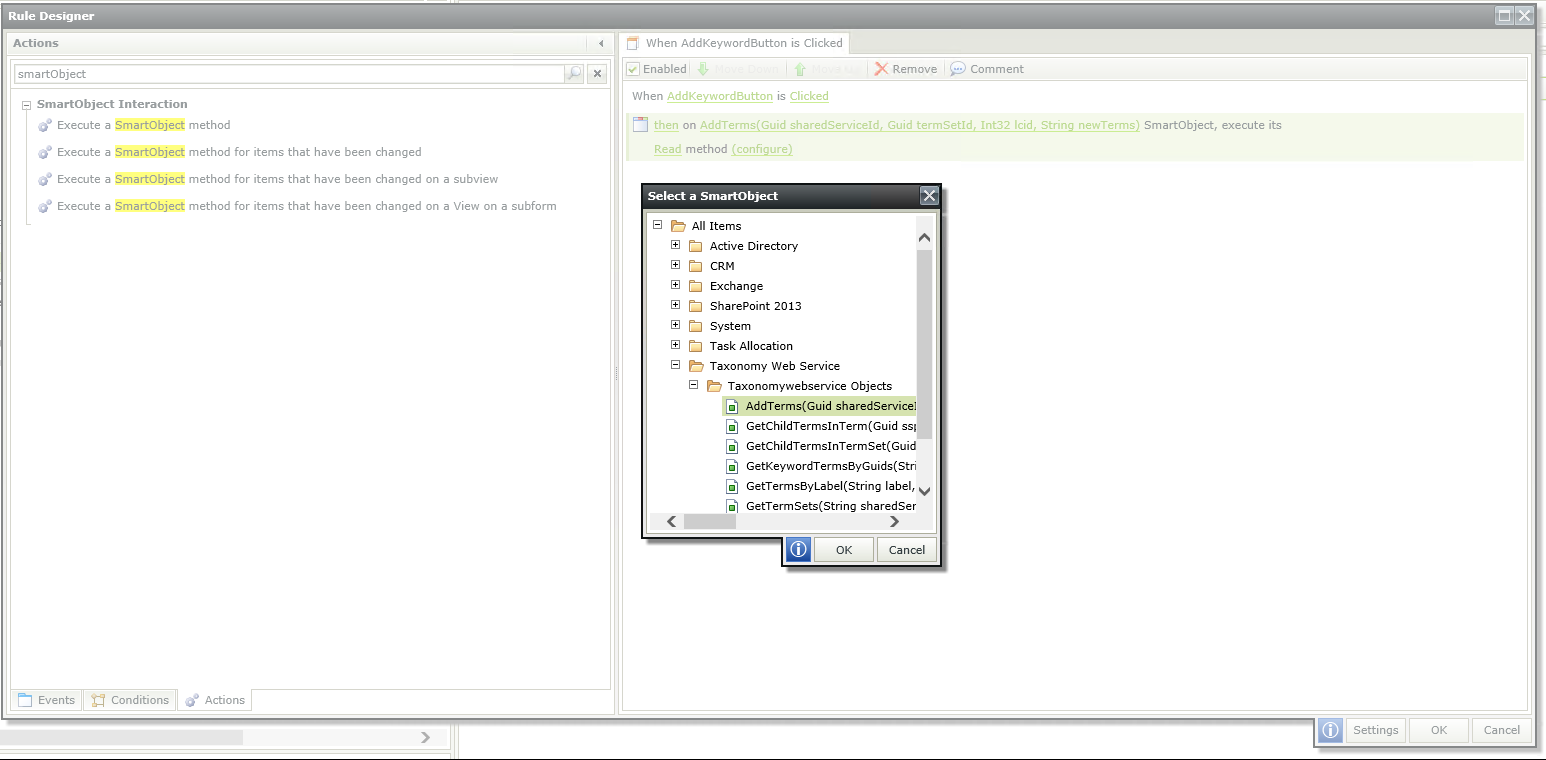
9. Under the Rules Tab, select the rule “When AddKeywordButton is Clicked” and Edit it.
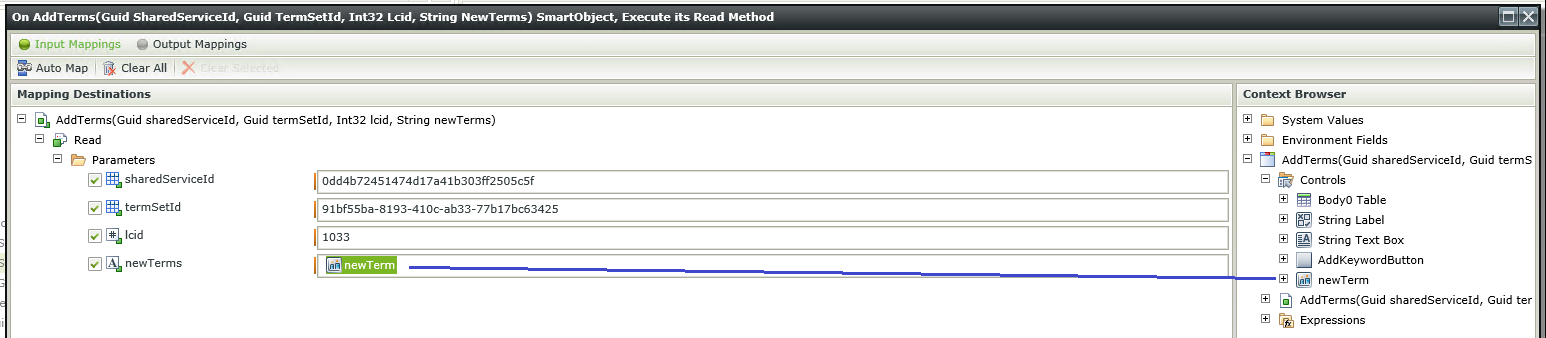
10. Add the rule “Execute a SmartObject method” and select the AddTerm SmartObject we created.
11. Execute it’s “Read” method and click “configure”. Next add the GUID’s from earlier as well as the LCID. Then add the newTerm data label to the newTerms text field. This will add the term along with the xml data that is required.
12. Click Finished and OK to save this rule. Then Finish again to save the view.
13. Now we can test this view.
14. We can run this form and enter a term into the text box. We should see the xml data in the data label to the right of the text box. Once our term is entered we can click off the text box and the data label should update with the term placed in the xml.

15. Click the Add Keyword button. Once the action completes, the term will have been added to our Keywords. We can check this by returning to our Term Store Management Tool. Since we used the Keywork GUID it will be under that Taxonomy.

