

Topic
Instructions
Review the following documentation:
Mass DocGen Packages
Reports and Mass DocGen Packages
Generates Documents from multiple records
Connected Apps and OAuth
The following Tab can be created using the Drawloop DocGen Button Wizard from the documentation above or the following steps below:
Items to be aware of:
- Note: Connected Apps and OAuth must be enabled in the DocGen Admin Tab to use Mass via Report functionality.
- Note: The user will require access to the Document Object in Salesforce to store the generated Document.
- The Salesforce Report selects the record id based on the first column of the Salesforce Report.
- If using an Email Delivery Option, review the Additional Information/Configuration section.
1. Salesforce: Create Web Tabs
a. In Salesforce setup > Quick Find search Tabs
b. Navigate to 'Web Tabs' > Click 'New'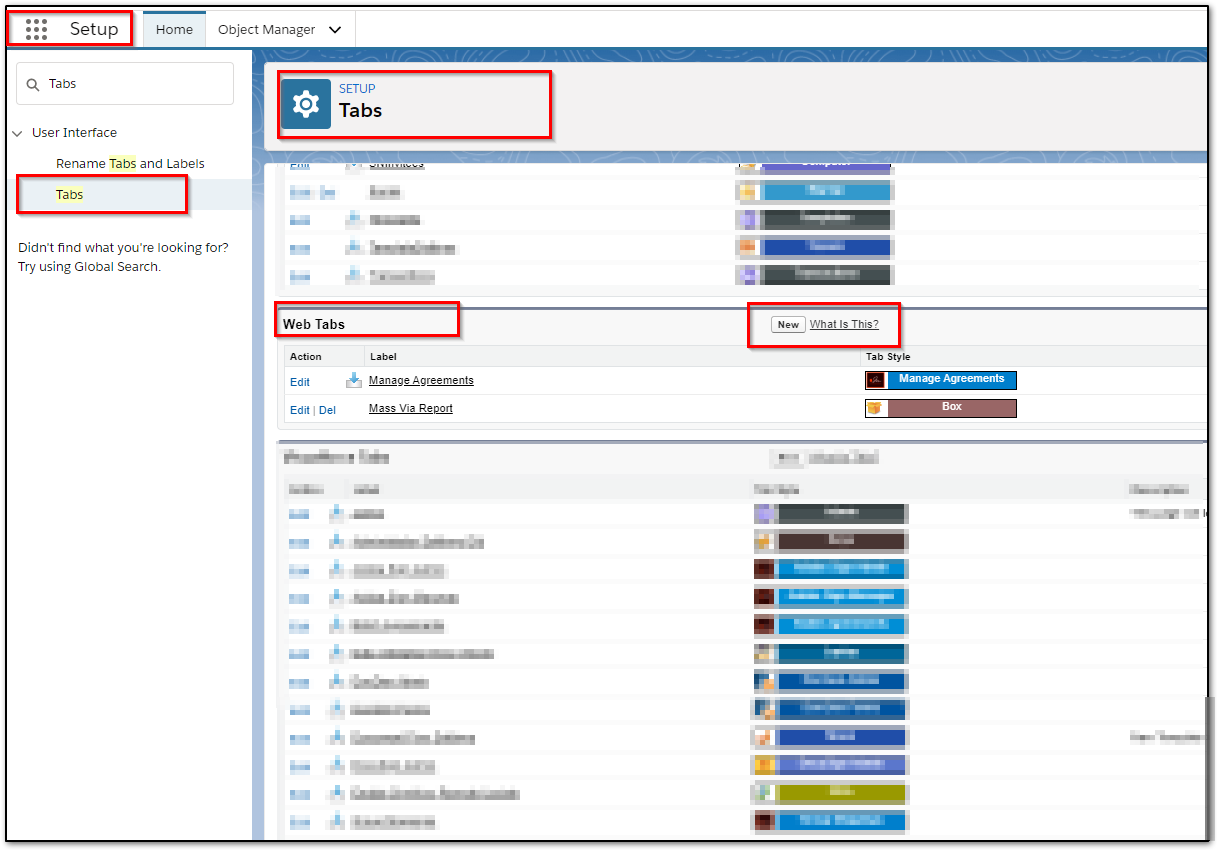
2. Choose the desired layout: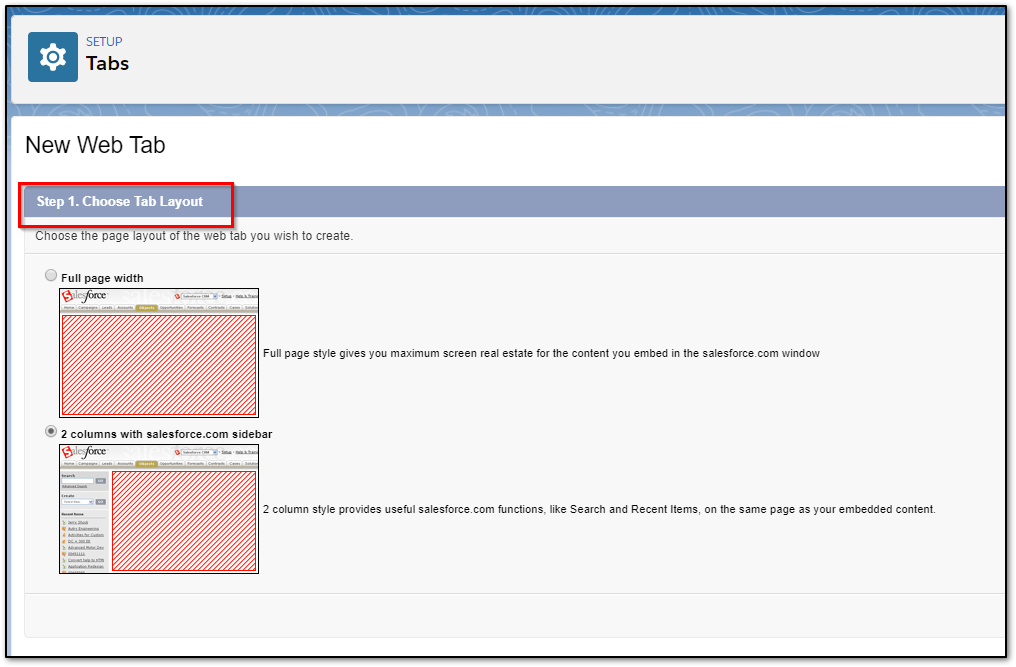
3. Define Content and Display Properties: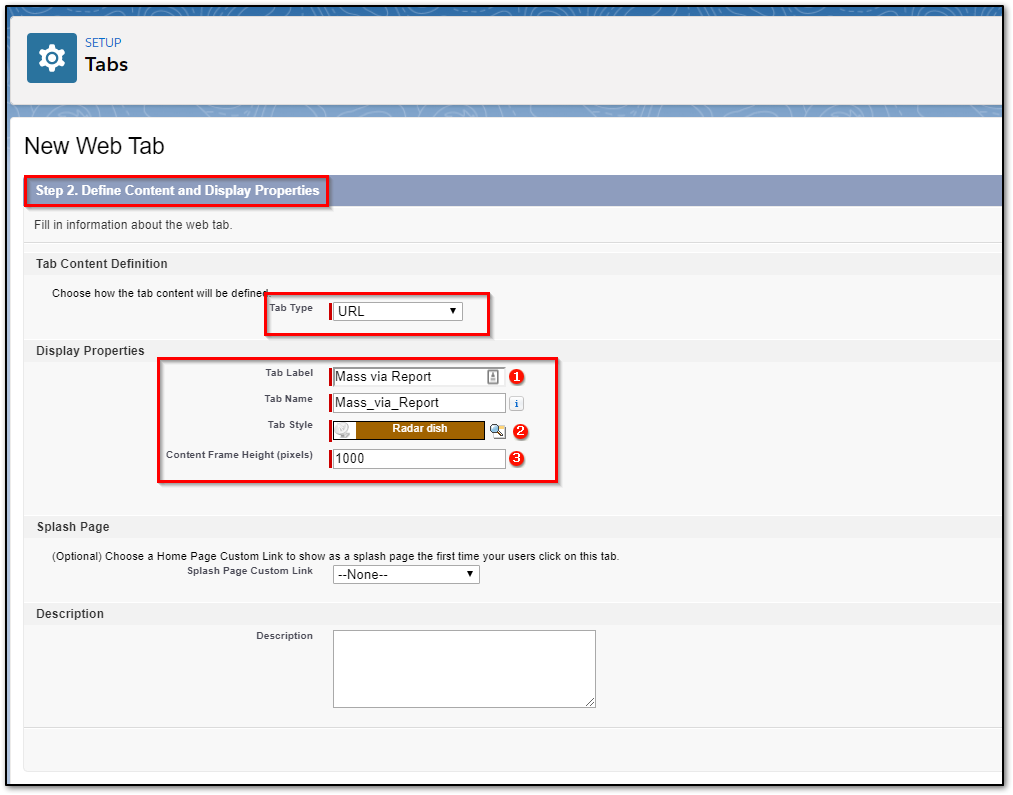
4. Configure the Mass via Report URL:
a. Examples: /apex/loop__masslooplus?&reportObject=OBJECT_API_NAME
- Standard: /apex/loop__masslooplus?&reportObject=Account
- Custom: /apex/loop__masslooplus?&reportObject=Custom_object__c
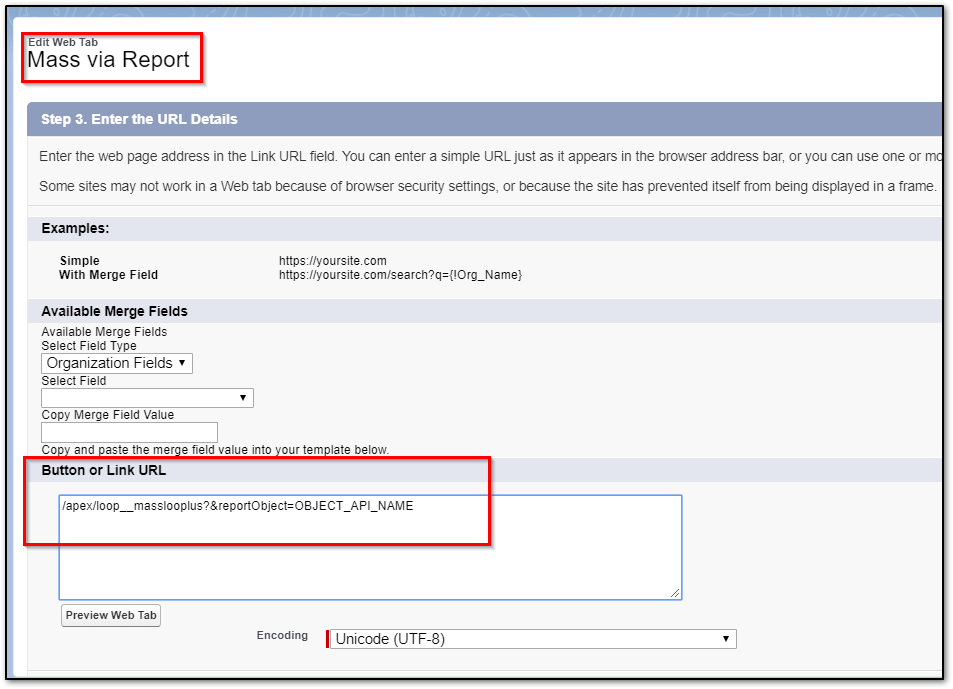
b. Click Save.
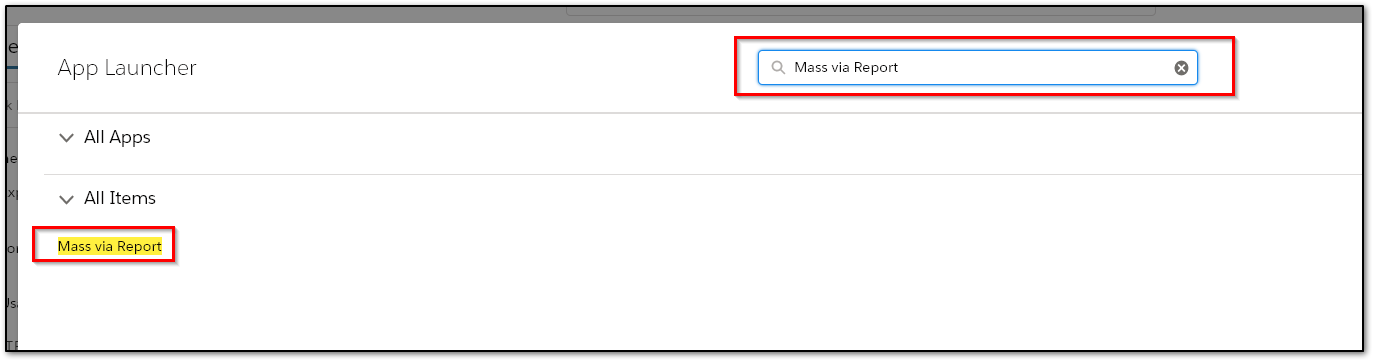
5. Navigate to the Tab from the Salesforce App Launcher
6. This Tab should direct to the Drawloop DocGen Run page. Here select the Folder, Report, DocGen Package, and Delivery Option. ( Download will not be available. Select DocGen Queue for Mass Downloads.)
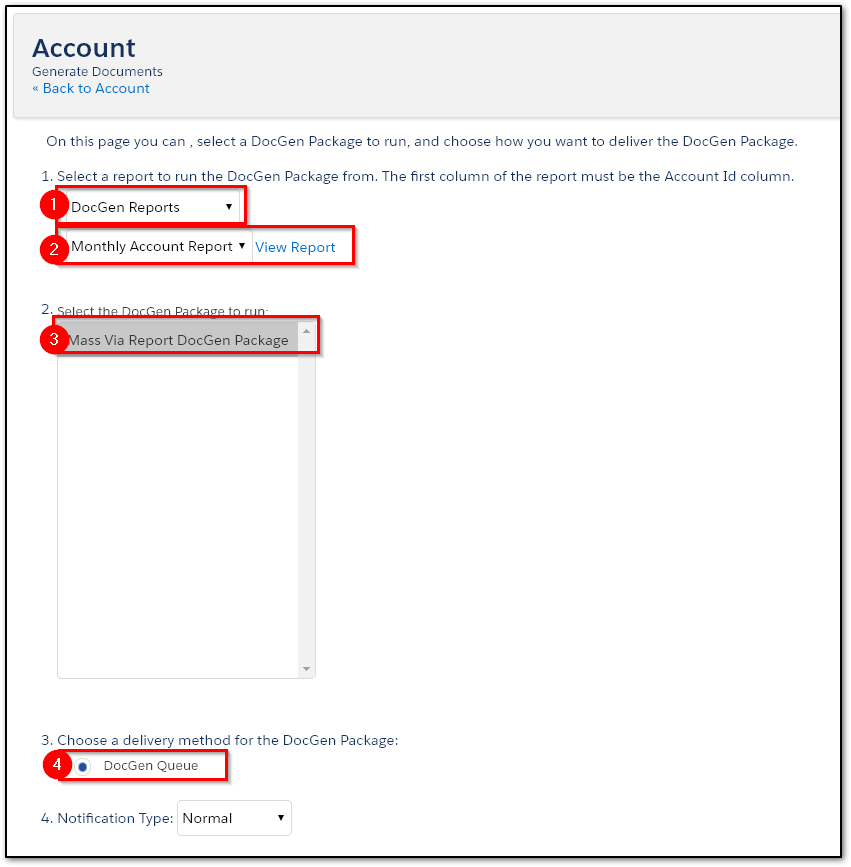
7. Expected Result:
a. The DocGen Package will run against all the Record Ids in the first column of the Salesforce Report and be delivered to the DocGen Queue.
Note: The user will require access to the Document Object in Salesforce to store the generated Document.
8. For Additional Configurations read the section below:
Additional Information
Email configuration Options:
Salesforce Email requires a Contact field to be specified. Below are two options for sending Salesforce Emails with a ContactId in the report and without.
Note: Add the following parameter to the Tab URL to validate this requirement.
1. Add the following Parameter to the Tab URL: &contactfield=Contact
Sample: /apex/loop__masslooplus?&reportObject=OBJECT_API&contactfield=Contact
Option 1:
Salesforce Email Template
Salesforce Email using a Salesforce Email Templates require a specified Contact to send successfully with Email Merge fields. If able to have a Contact Id specified, follow the information below:
The Contact ID must be listed in the report and will be used as the Contact to Send to.
Note: Depending on the report structure and available fields, it may require a Salesforce Formula field to pull the Contact Record Id into the report. This is due to the report being viewed as an Excel/CSV output to grab the contact Ids.
Report Sample: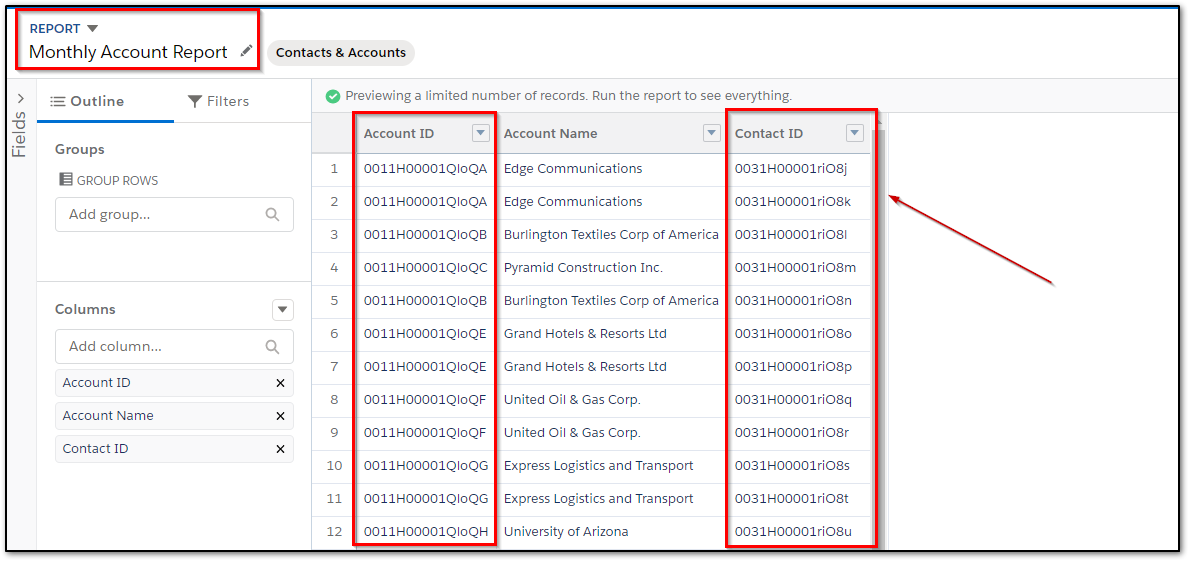
Option 2:
Salesforce Email using a DocGen Email Template
Configure the DocGen Delivery Option:
- Locate the desired email field from the Field Tagger and place it in the 'Additional To' section.
- Select the DocGen Email Template.
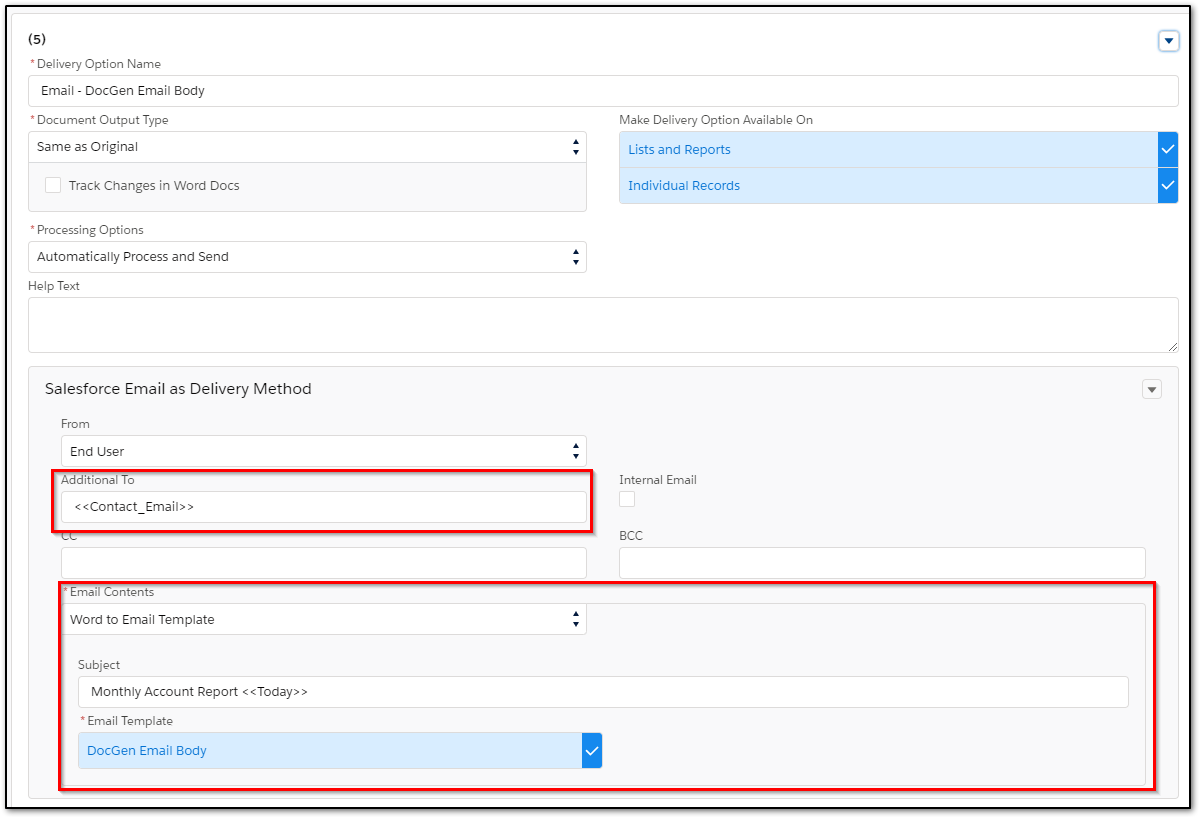
This type of delivery configuration does not require the Contact Id on the report. The Template tags will fill based on DocGen relationships.
Report Sample: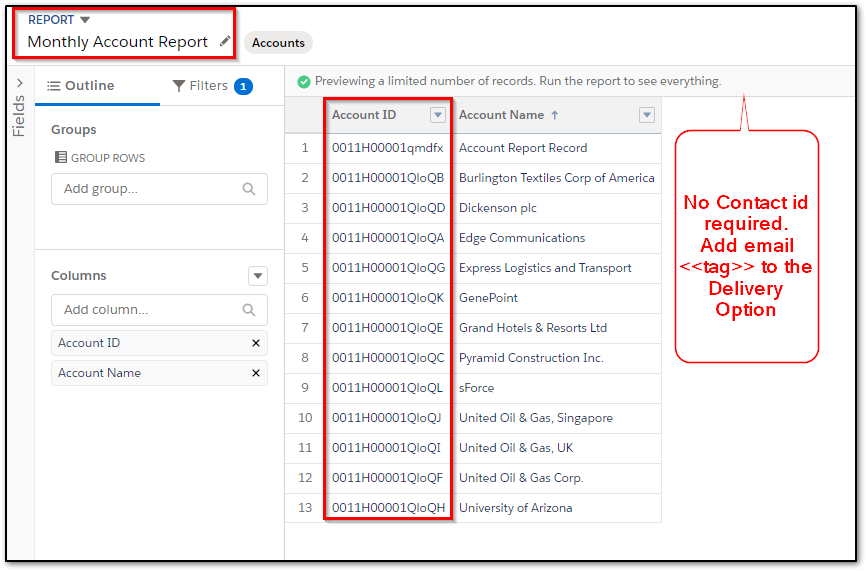
------------------------------------------------
Configure User Experience with Additional Parameters: (Report Folder, Report, DocGen Package, Delivery Option, and AutoRun.)
1. DocGen Parameter Documentation: Button/URL Parameters
2. Folder & Report Selection:
- &reportfolderid=
- Dynamically inserts the report folder in the interface.
- &reportid=
- Dynamically inserts the report in the interface.
Related Links
Mass via Report with DocuSign: https://community.nintex.com/t5/How-To-s/Mass-via-Report-with-DocuSign/ta-p/90185
Error: Mass via Reports has not been configured for this organization
