Workflow Export Key:
Q54w8FBLY7qpShZLdbiHok9thBhoq7VYMLyACf4mYJtLcAest
Hello,
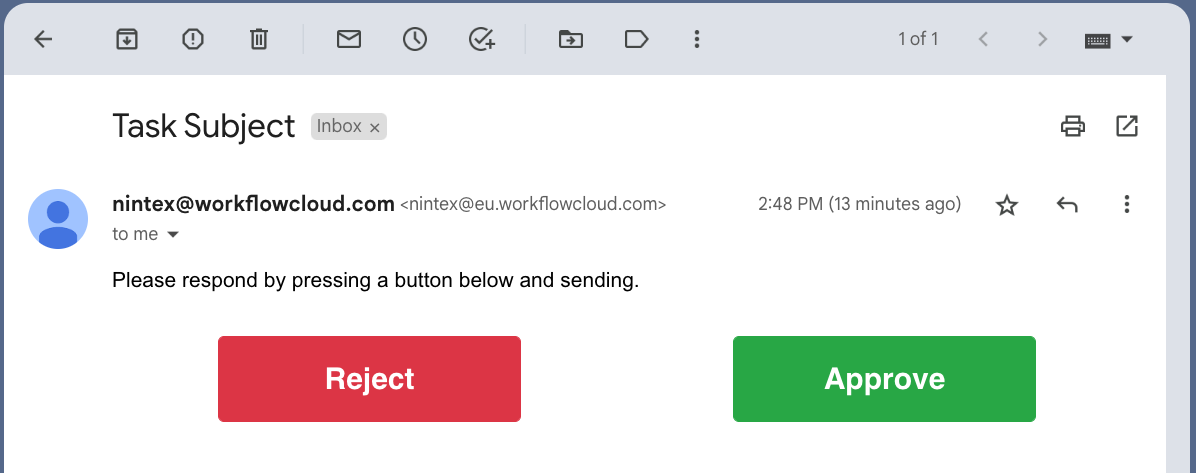
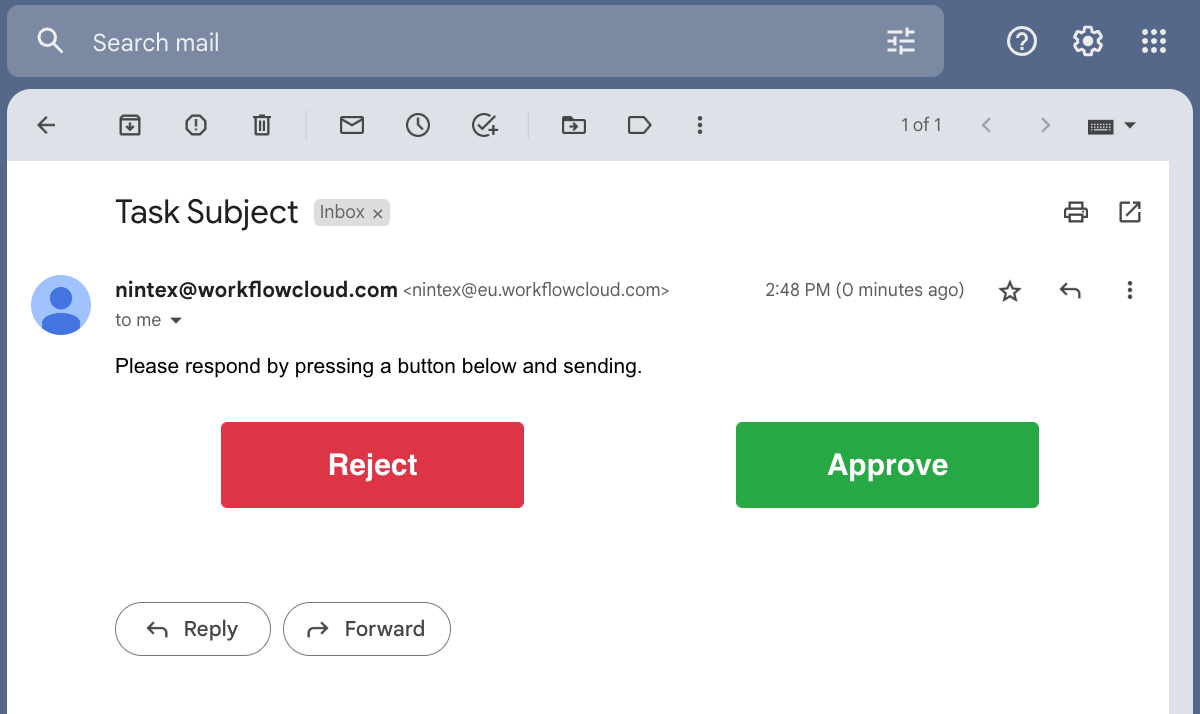
In this blog I am going to show you how you can add buttons to express approval emails to speed up the time it takes to respond, currently when you receive an express approval email you are asked to hit reply and type out your response, this can sometimes lead to mistakes in spelling, although already quite fast in relative terms, we can always improve and make them look like this:
I will be adding an export of this solution to the gallery if you prefer to skip some steps below but I recommend you keep reading to understand how it is configured.
Before we begin there is a couple things we need to do for this workflow.
First we need to generate an App token for Nintex Automation Cloud, If you haven't already got one.
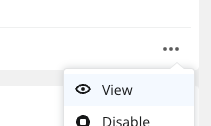
Once you have created your app token you'll need to copy and keep safe the client ID and Secret by clicking on the ellipsis and then View.

After that we need to create a new workflow cloud connection. you can either do this now or in the workflow later inside the action.
You will also need to copy your Nintex Automation Cloud Tenant ID, this is shown on your settings page labelled 'Tenancy ID'.
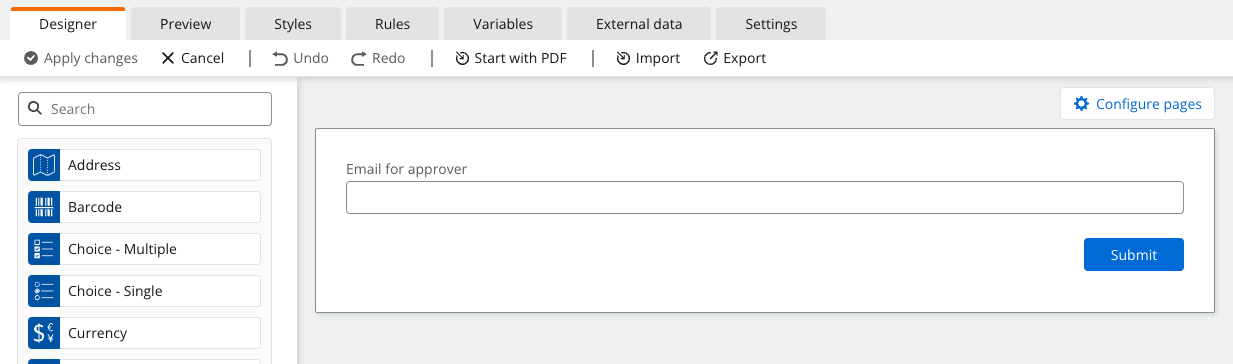
To start, create a new workflow with a Nintex start form, inside that start form you only need a single email field for this demonstration.
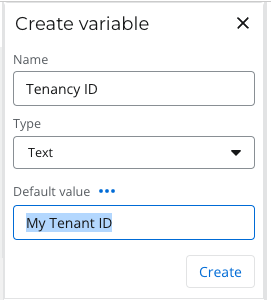
The next important step is to add a variable to store the Tenancy you obtained earlier, you can do this in 2 ways.
You can create a new variable and set the default value to the Tenancy ID, as this never changes it is perfectly suitable.
The other method is to create a Tenancy ID Variable but use a workflow action to set the variable.
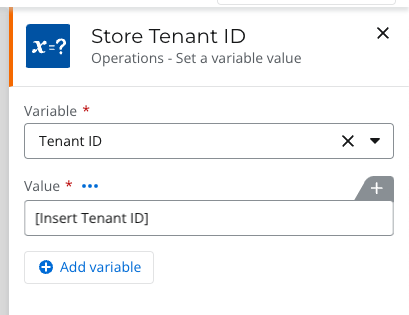
I prefer the former but the latter is perhaps more intuitive to any admins later on as it is clear the action is setting the variable, where as the default value setting is slightly more obfuscated.
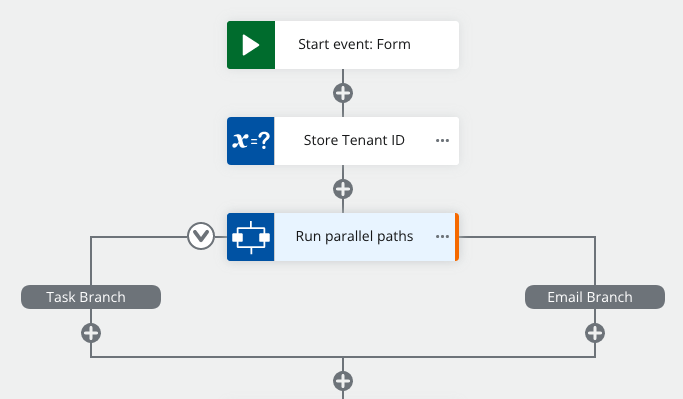
The next step is to add a parallel paths action to the workflow, to keep things simple, label the first branch 'Task Branch' and the second branch 'Email Branch'.
The reason we need a parallel path is the task ID is required in the process, this isn't generated in the workflow until after the task is created, as such it is not currently possible to reference that ID inside the task its self at this time.
First let's focus on the Task Branch by adding an approval task and select the task type 'Express Approval'
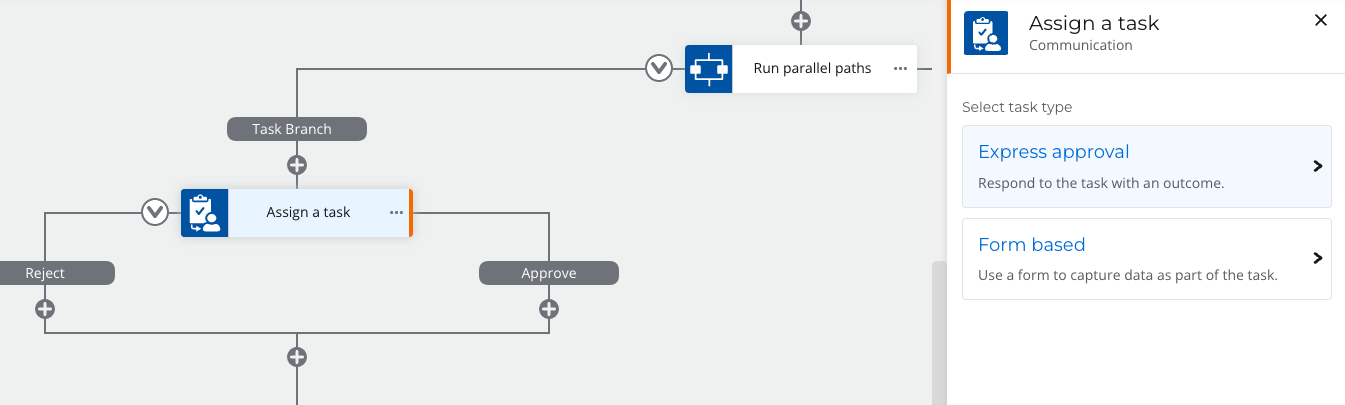
Configure the task as you normally would but for simplicity, leave the Outcomes as default for now and use the Email for the approver from the start form in the Assignee field.
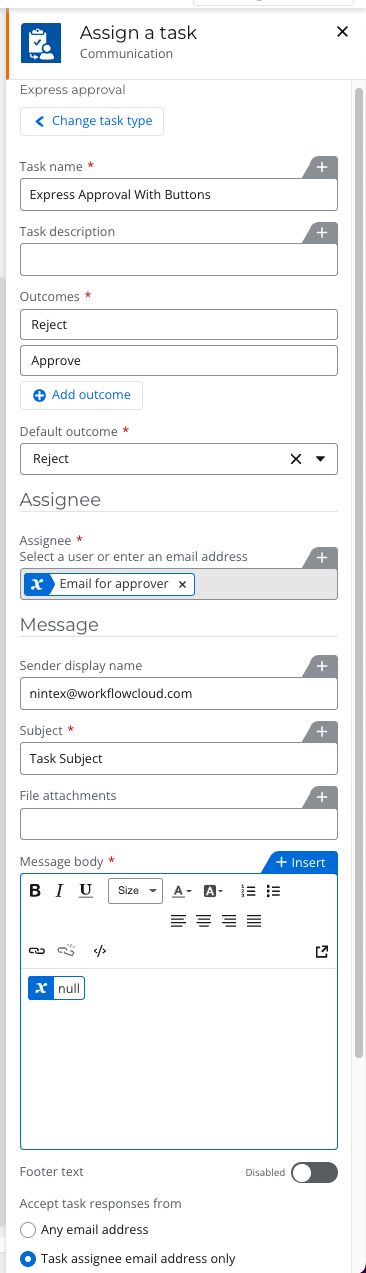
So an important component of making this process work we need to find a way to make sure that the email from this task never sends, to do this we are going to invalidate the email in the task, to do that follow these steps:
- You need to have a Subject defined or the workflow will error
- Create a new variable and call it null, place no default value so it is empty
- Use the null variable as the message body
- Turn off the footer text
If you follow these steps on a task, the task will generate and appear in Nintex but an email will not send, I believe this is because the message body is empty even though it is a required field.
Please note: that this isn't an officially supported capability for turning off emails from tasks, hopefully this is something we can add soon, a more consistent but less convenient way would be to allow 'Any email address' to respond to the task then assign the task to a shared mailbox, that way the email will still send but not to the intended person.
With that created, the Task Branch is complete, let's move onto the Email Branch.
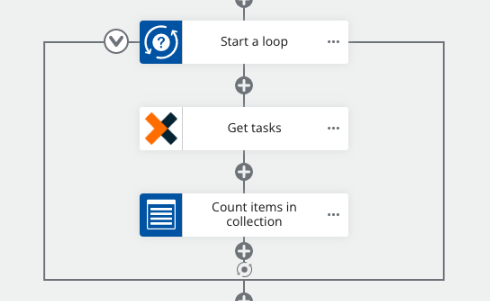
On the email branch we need to wait for the tasks to be generated before continuing, A nice way I have found to do that is to start a loop, Get the tasks from the Nintex Workflow Instance and count them, If there are no tasks then repeat the loop, that way you don't need to use a 'wait for duration' action permanently limiting your workflow speed.
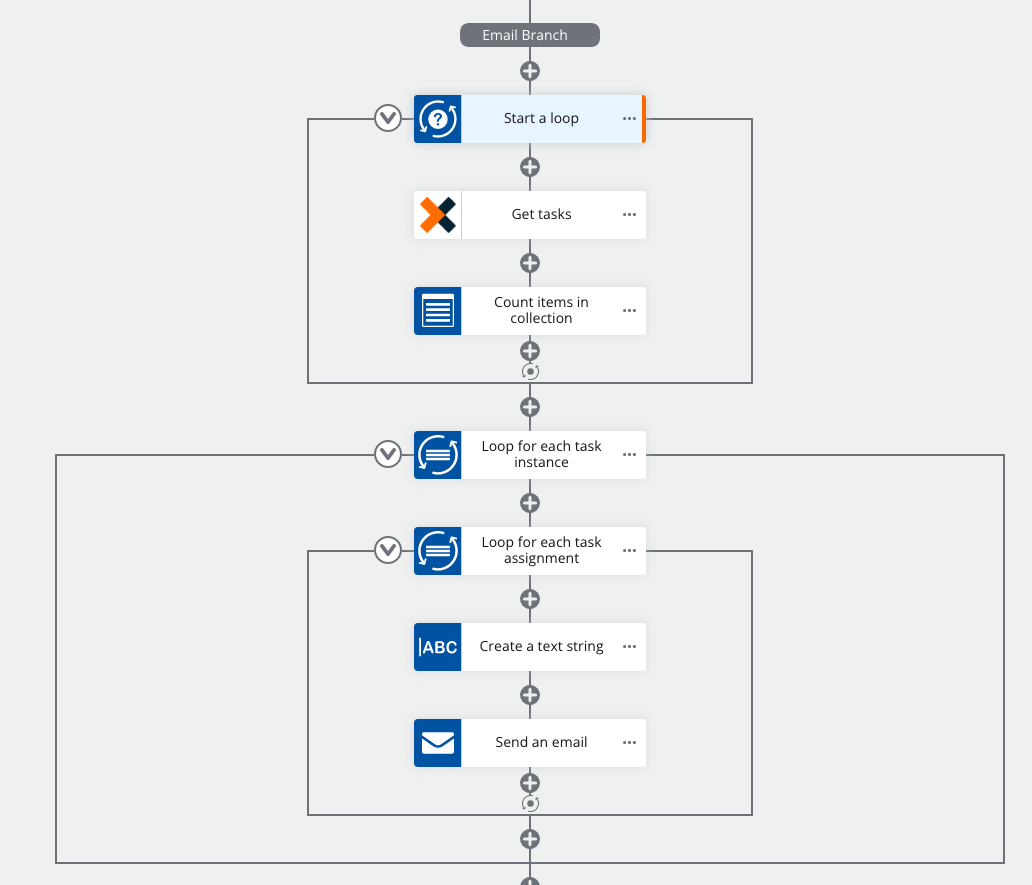
To do this add the following actions in this order.
To start we need to work backwards a little and configure the Get Tasks and Count items in collection actions first.
Start by configuring the get tasks action as follows:
Here you will be using the Nintex Automation Cloud connection we created earlier or if you haven't done that yet you can create one here with the Client ID and Secret obtained earlier.
- Insert the variable for the current workflow instance ID from Insert>Context>Workflow instance ID
- Set Status to Active
- Start and End date are not required
- Create a new output object, I named mine 'Tasks'

Now we have an object variable named Tasks that contains all of the tasks for this instance, we can use this object to determine the number of task active on the workflow and what their IDs are.
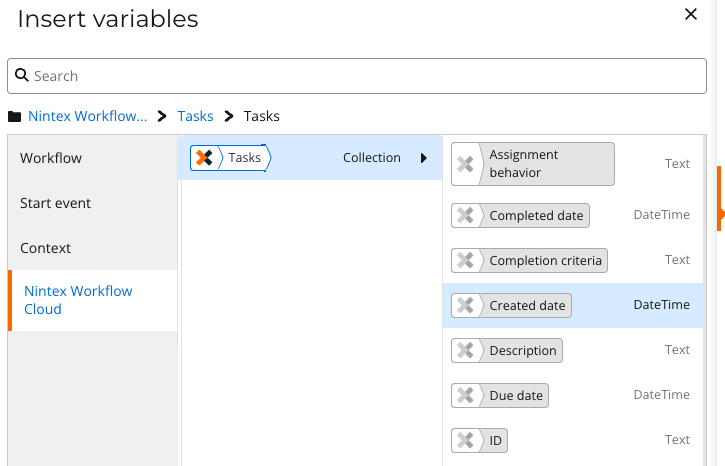
The next step is to count those tasks so to do that we use the 'Count items in collection' action.
To configure it, target the collection Tasks>Tasks collection.
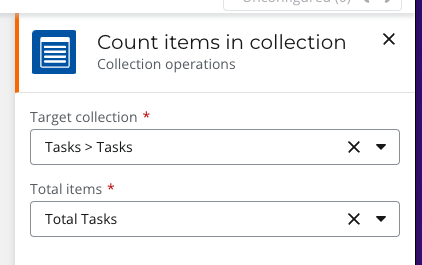
Create a new Integer variable named 'Total Tasks' and insert that.
Now we have gathered that information we can configure the loop as shown below.
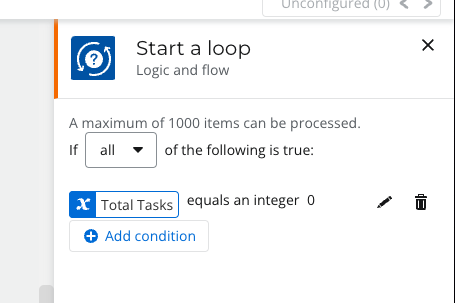
In this example using this logic where Total Tasks = 0 the loop will continue until this is no longer true, so in our scenario as soon as the first task is detected the loop will stop.
You can configure the loop to detect specific number of assignments if you use multi-assign tasks, you just need to ensure you know what that number is and set the 0 function to that number, then if you know you are waiting for 4 tasks, use the logic 'Total Tasks' does not equal 4
In the next step we need to extract some information from these tasks, mainly the Task ID but I also like to get the Assignee and also the Subject of the task email.
To do that we need to create a loop inside a loop containing a 'Create a text string' action followed by a 'Send an email' action as shown below.
In the first look for each action, target the Tasks collection by going Insert>Nintex Workflow Cloud>Tasks>Tasks as below.
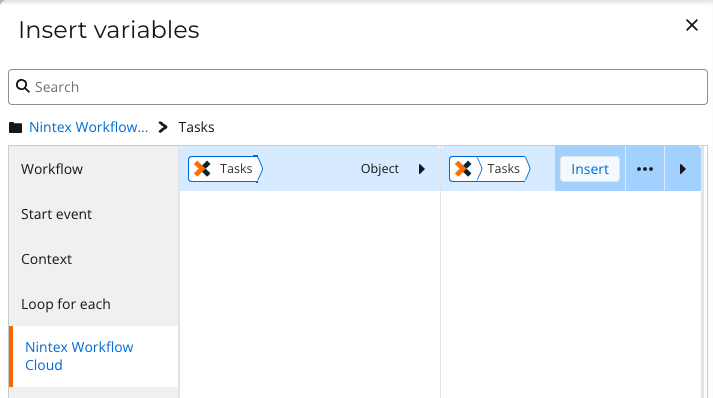
It should look like this:
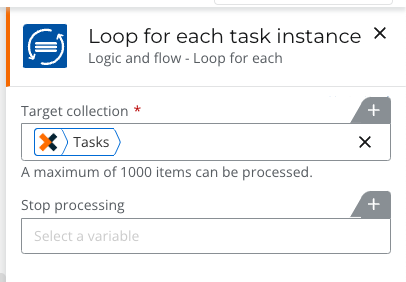
I like to name the loop now just so that I know which loop is which later on so I named the outer-most loop 'Loop for each task instance'
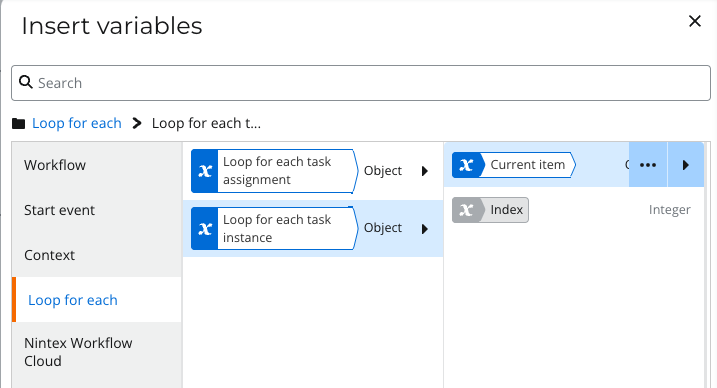
Now on the inside loop name that 'Loop for each task assignment' and point that to the first loops Task assignments by going Insert>Loop for each>Loop for each task instance>Current Item>Task assignments as shown below
Now for the fun part we need to build the buttons.
Emails support basic inline HTML so we can use that to create some buttons, I have made an example below you are welcome to copy or if you prefer to use your own code thats fine.
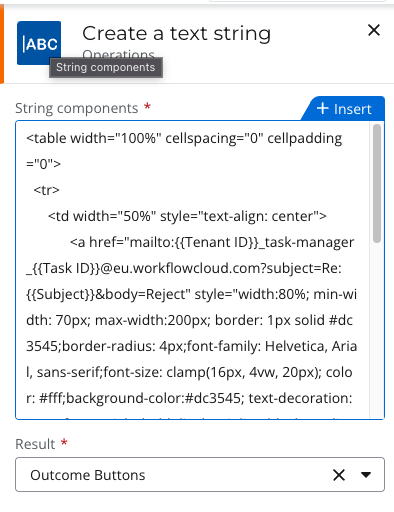
In the create a text string variable paste the following HTML code and store into a variable named 'Outcome Buttons'
The code looks a little bit messy but there is some changes we need to make to get it to work, inside the code you will find the following placeholders: {{Tenant ID}}, {{Task ID}} and {{Subject}} in 2 different lines starting with '<a href='
These placeholders need to be replaced with variables from the workflow for now just paste the code in as is.
<table width="100%" cellspacing="0" cellpadding="0"> <tr> <td width="50%" style="text-align: center"> <a href="mailto:{{Tenant ID}}_task-manager_{{Task ID}}@eu.workflowcloud.com?subject=Re:{{Subject}}&body=Reject" style="width:80%; min-width: 70px; max-width:200px; border: 1px solid #dc3545;border-radius: 4px;font-family: Helvetica, Arial, sans-serif;font-size: clamp(16px, 4vw, 20px); color: #fff;background-color:#dc3545; text-decoration: none;font-weight:bold;display: inline-block;"><div style="margin: 15px 30px;">Reject</div></a> </td> <td width="50%" style="text-align: center"> <a href="mailto:{{Tenant ID}}_task-manager_{{Task ID}}@eu.workflowcloud.com?subject=Re:{{Subject}}&body=Approve" style="width:80%; min-width: 70px; max-width:200px; border: 1px solid #28a745;border-radius: 4px;font-family: Helvetica, Arial, sans-serif;font-size: clamp(16px, 4vw, 20px); color: #fff;background-color:#28a745; text-decoration: none;font-weight:bold;display: inline-block;"><div style="margin: 15px 30px;">Approve</div></a> </td> </tr> </table>
At first the placeholders will be plain text like this:
To replace them just highlight them, remove and hit insert.
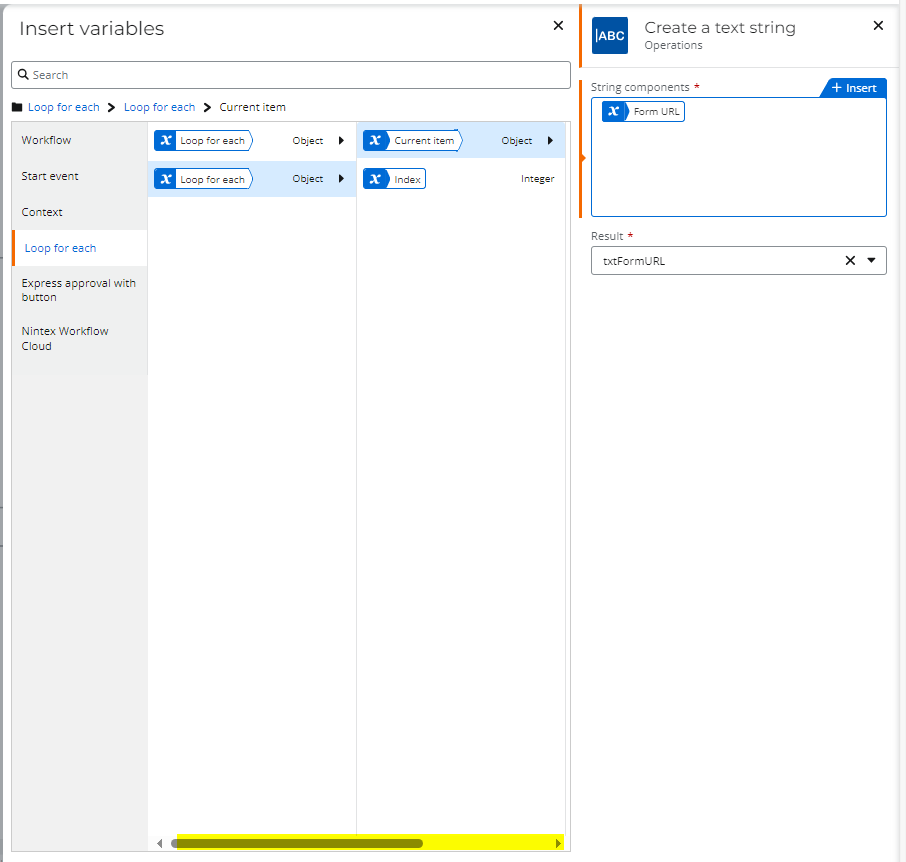
For the Tenant ID this is the variable we created near the start
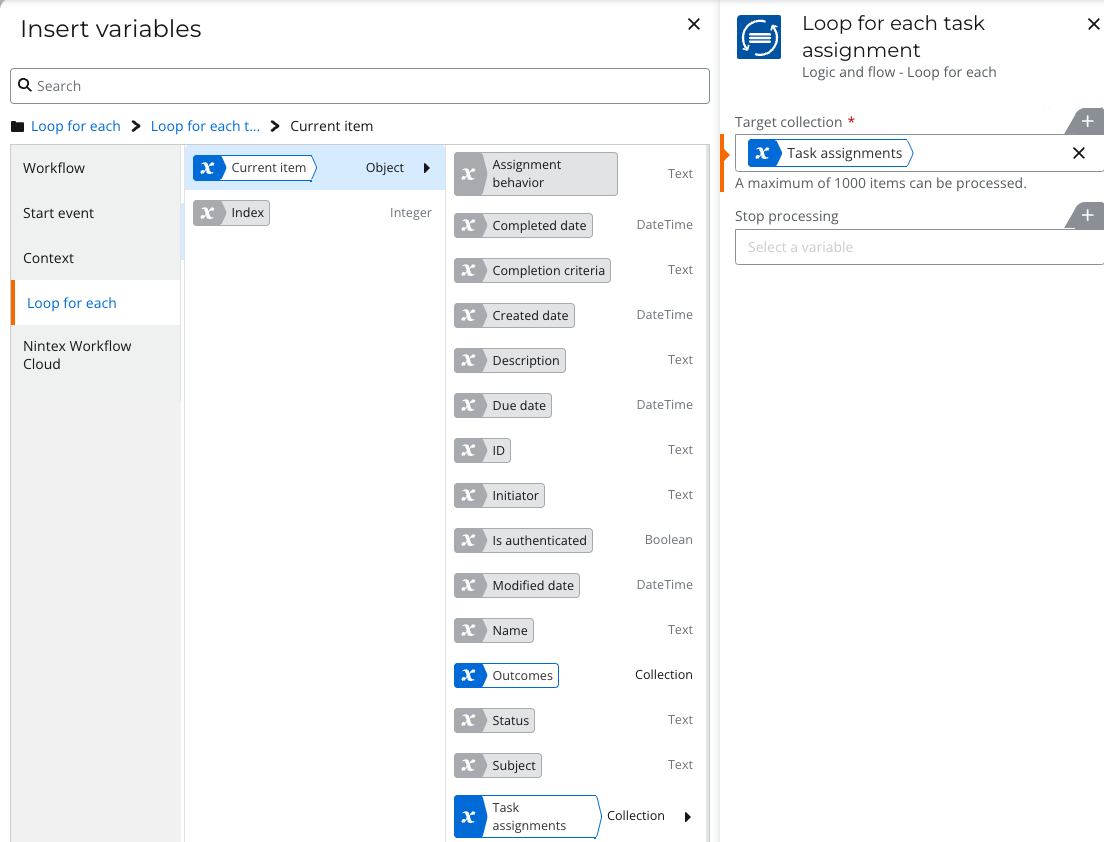
For the Task ID we can use Insert>Loop for each>Loop for each task instance>Current Item>ID
For the Subject select Insert>Loop for each> Loop for each task instance>Current Item>Subject
Be sure to replace all 6 placeholders, there are 3 for each button with 2 buttons in the code.
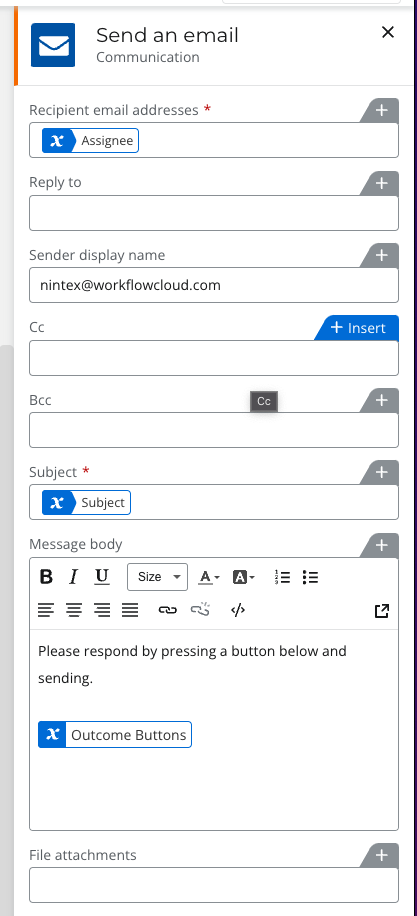
Next step is to configure the email as below.
The Assignee is selected by choosing Insert>Loop for each>Loop for each task assignment>Current item>Assignee
The Subject is the same as the subject placeholder above.
The outcome buttons are the variable stored using the build a text string action above.
Feel free to add any other messages before or after the buttons and configure anything else as you normally would in the task.
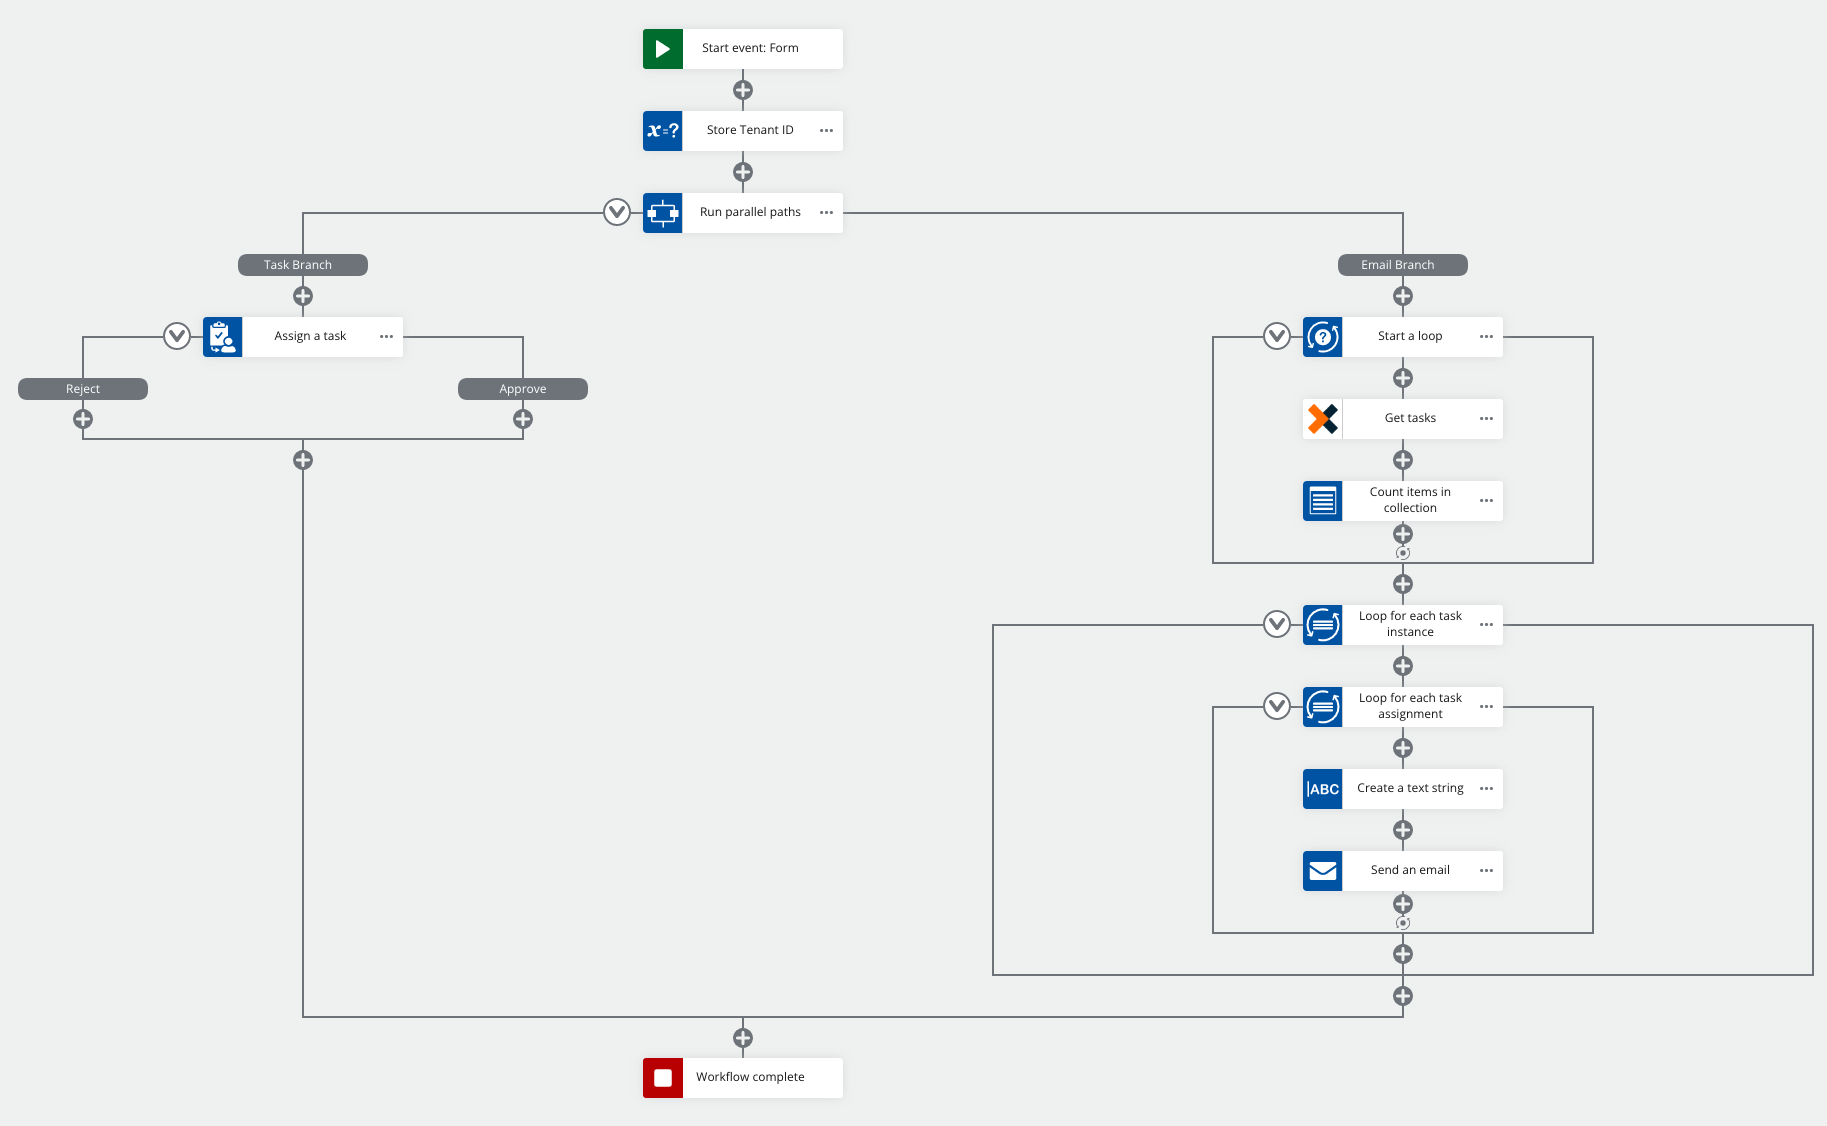
Now our workflow is ready to test it should look like this:
If you run your new workflow and put your email in the start form you will receive an email like this:
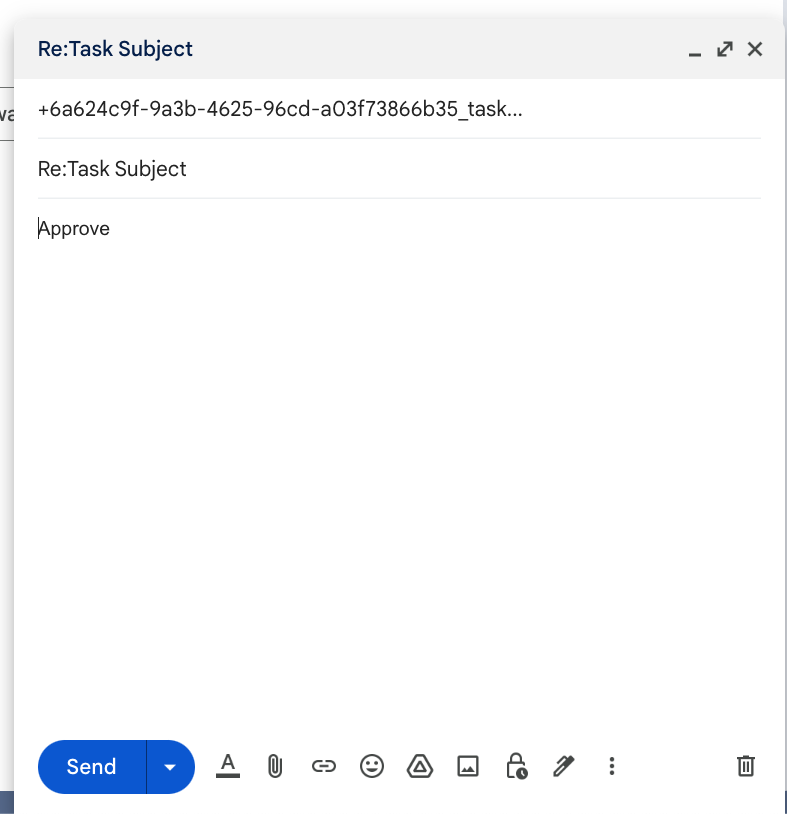
If you click on either Reject or Approve it will open a reply email for you with the message body pre-filled all you need to do is hit send.
As we are only using standard supported HTML links, this method should work on any modern device/email browser, I cannot however guarantee the same look and feel for all devices with the buttons, for example on a Mac you may find the text inside the buttons turns blue.
Thank you so much reading along, I hope this blog was insightful and helpful to you.
Jake