Hi all,
Document generation is such a simple yet valuable method of getting quick wins on your automation journey. You are saving your users a bunch of time putting repeatable documents together and you're also reducing errors.
This article takes you through the process from start to finish and we'll use a combination of information gathered from a form and data stored in Nintex Tables to populate the document.
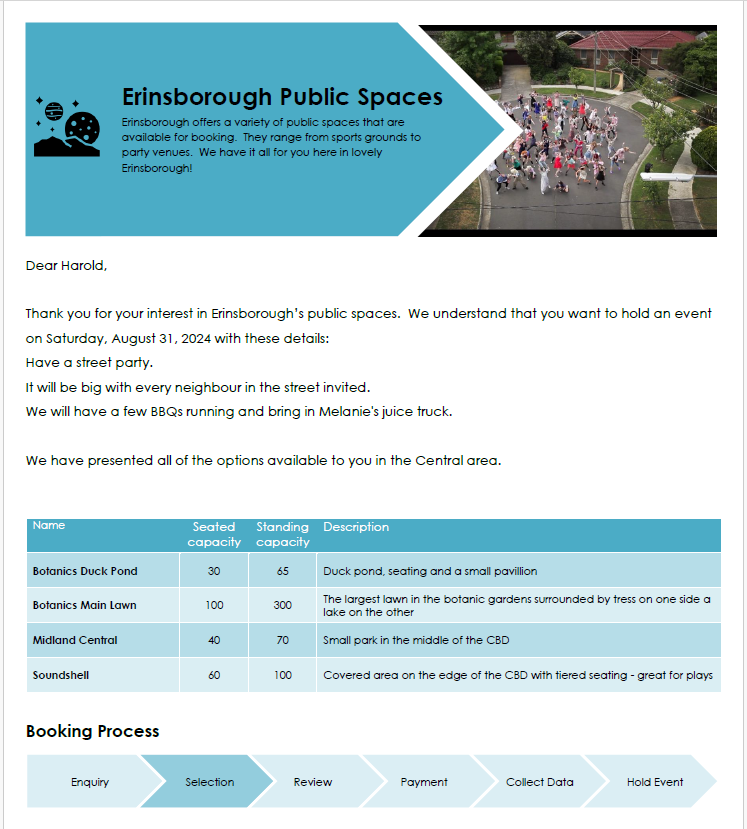
Imagine a scenario where you are a council and you want to provide a service where customers can run a search of public spaces available for hire for weddings etc. The output will be a nice one pager with a summary of their request and a list of the spaces in the area they have chosen.
The person making the enquiry fills out a form similar to this one:
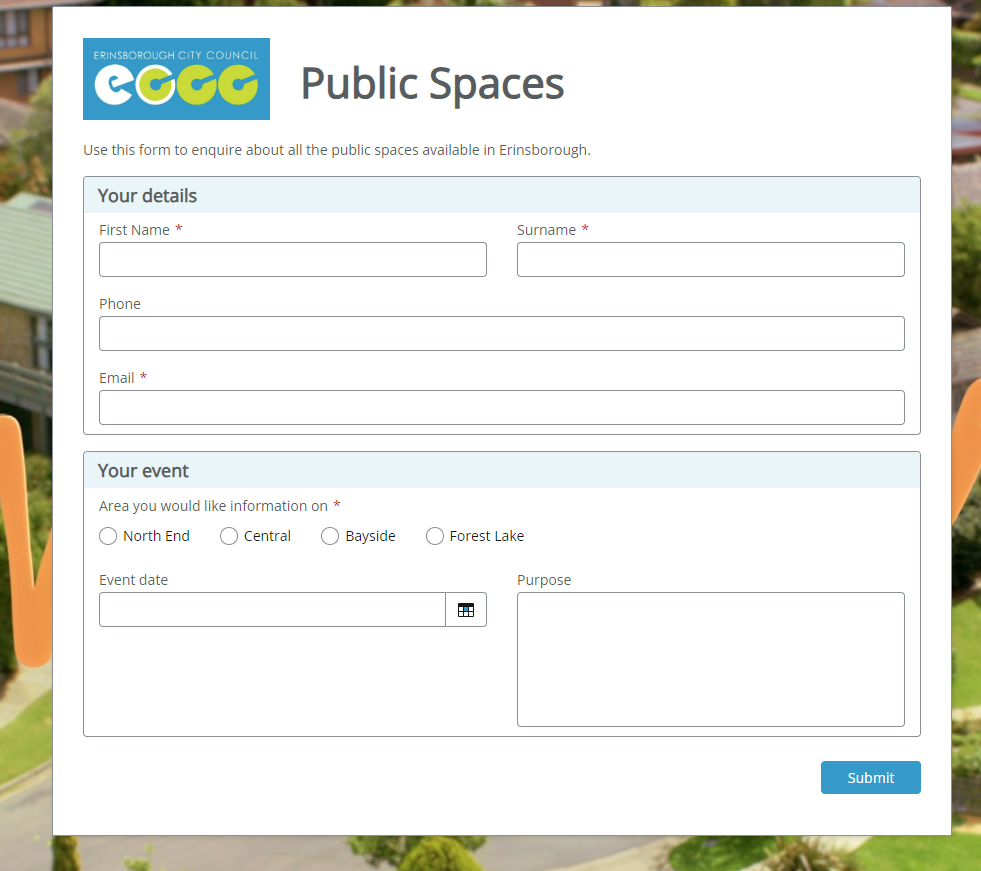
This blog won't cover how to make this form - have a search in this Community or the help documentation if you need help with that. The thing to keep in mind is that we'll be putting some of these values into the generated document.
The next thing the workflow needs to do is retrieve information about any public space that is in the area selected in the form. We'll put that information into a table in the document. Here's the master data that we've saved into Nintex tables.
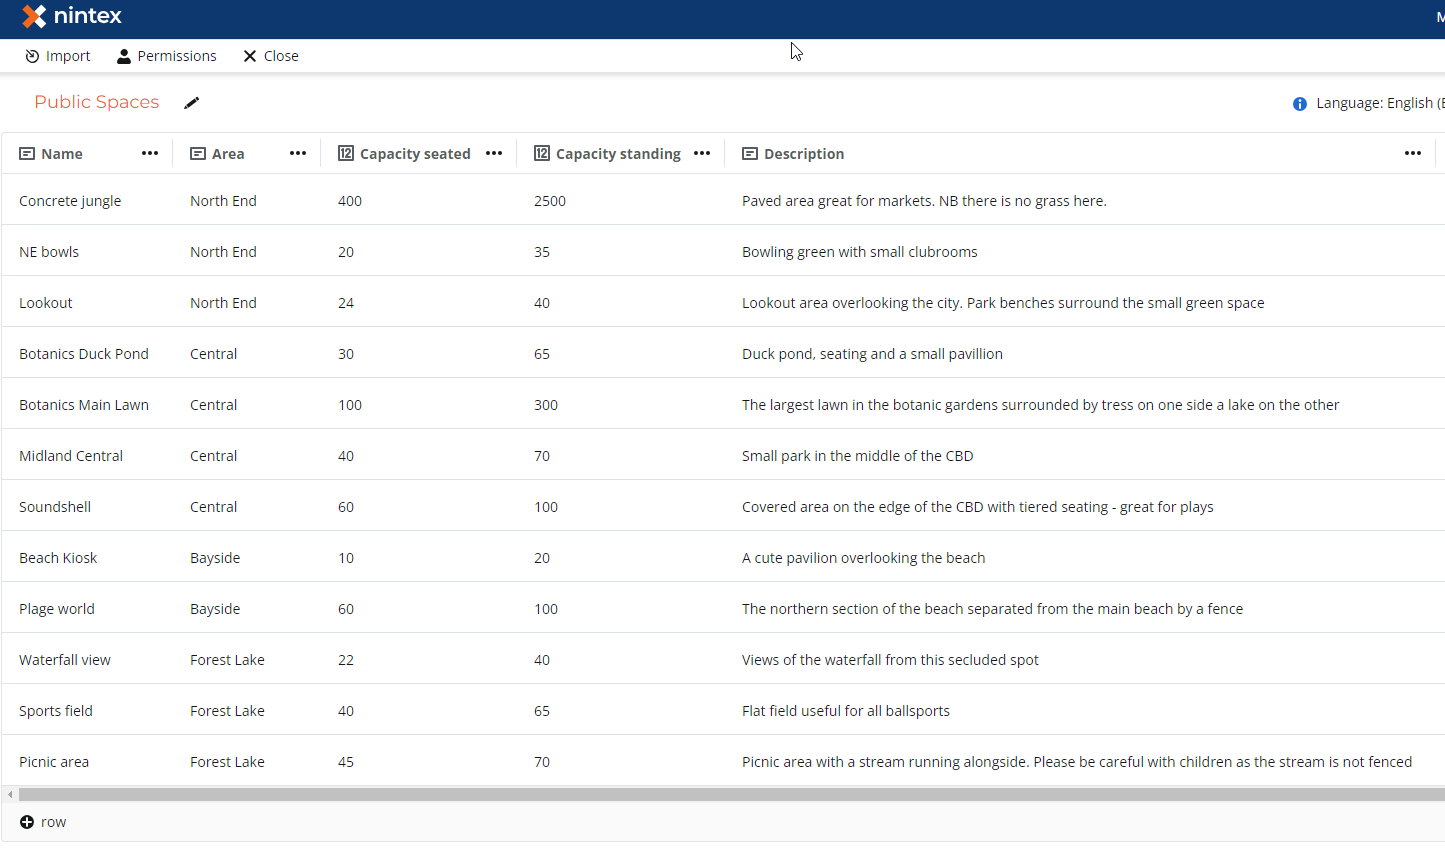
Once again, if you want to learn more about tables then check out this blog.
We'll use the Query a Table to retrieve information about all the public spaces in their selected area. First let's select the columns/data we want to retrieve:
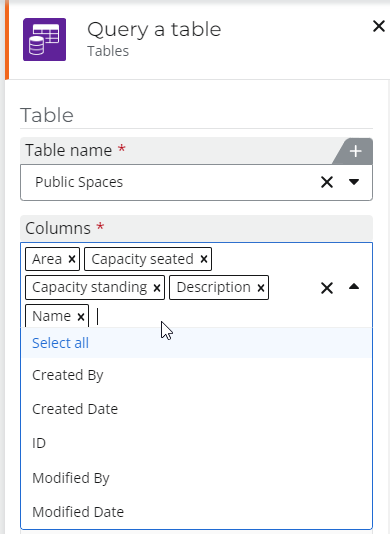
Then the conditions the only select the public spaces that are in the area the person selected in the form.
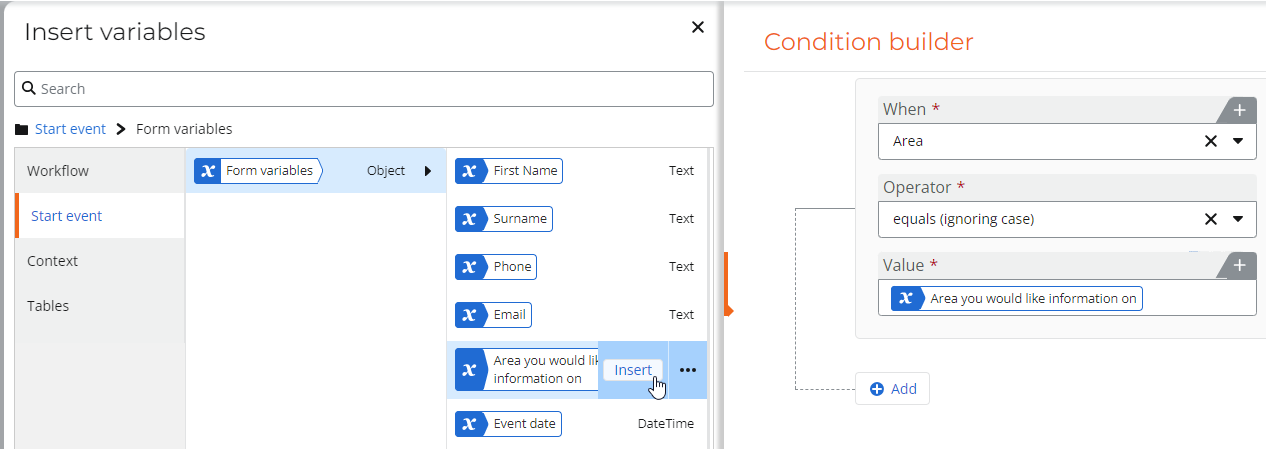
We can sort if you want. I won't bother in this case but as a side note, if you want to sort on a column, you must make that column sortable. You can do this by going to the table, clicking on the column name and selecting "Enable column sorting".
Finally, we need to save the results of the query to an object.
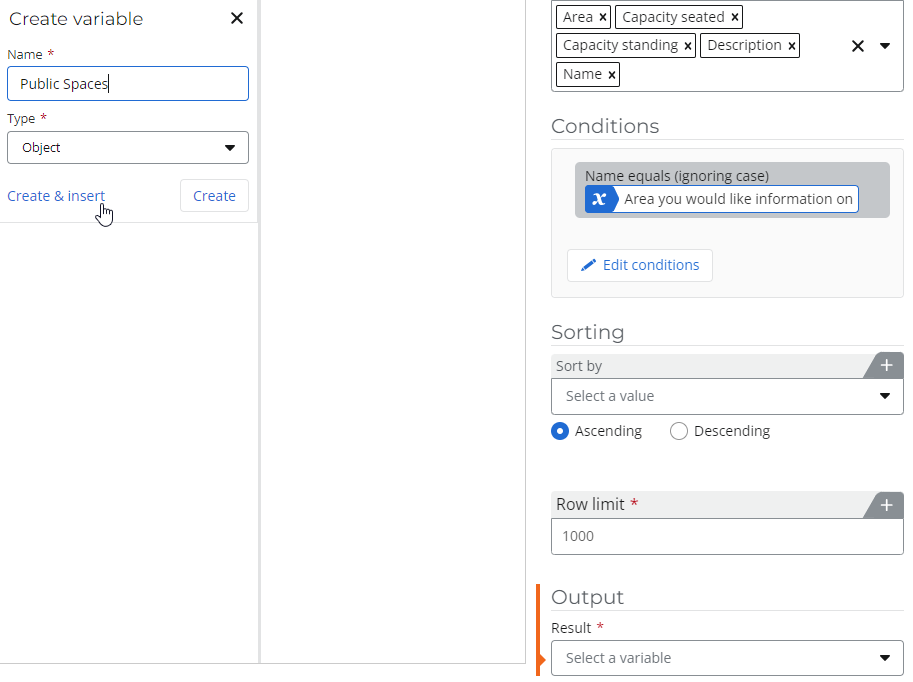
If you're familiar with the document generation action, you can stop reading this article now because I'll be teaching you nothing new. :) However, for the rest of you, read on…
Generating the document
Documents are based on templates. In this case we're going to use a Microsoft Word document as a template. Find somewhere to store your template such as SharePoint, Dropbox etc. In my example, I've stored it in OneDrive and referenced it using the variable name "Public Spaces Template".
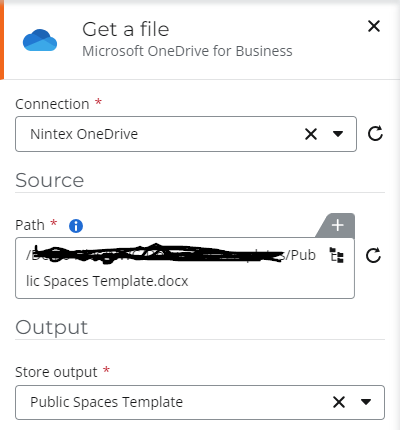
Now we can configure the Generate Document action
First I have to say what kind of document to generate. I'm going to pick a PDF but you can also create Word, Excel and PowerPoint files.
Then specify the template to use:
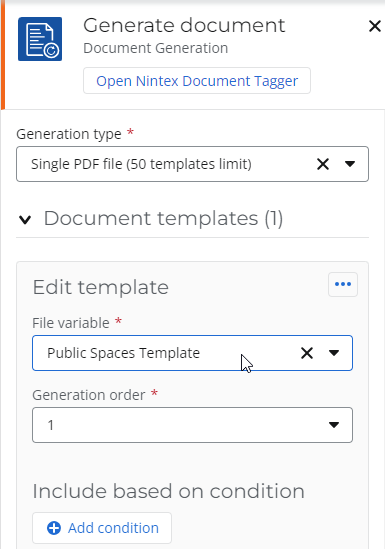
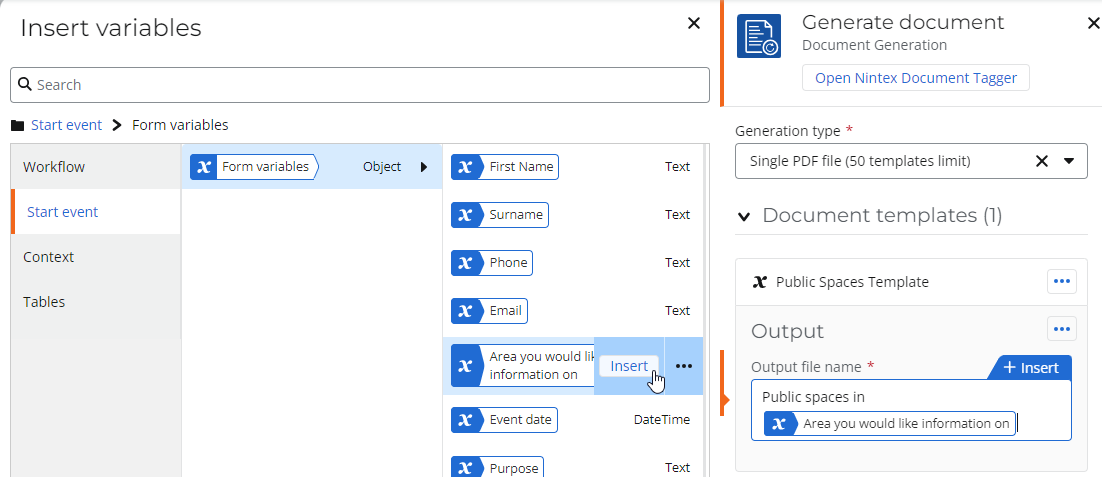
Next specify an output file name. I've made my dynamic as it uses the area of interest in the name.
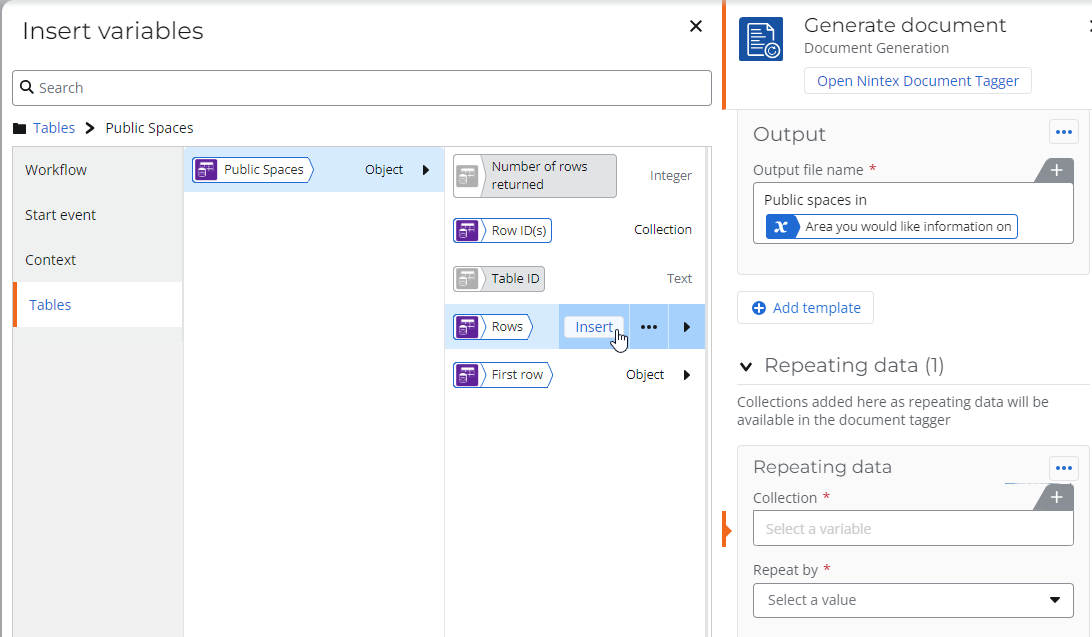
As there are many public spaces in each area, we're going to put them into a table so we have to tell the generate document action that there's repeating data. This is very easy - just click through into Tables | Public Spaces | Rows
Then tell the generate document action how to repeat the data. In my case, I want to repeat by adding a new row to a table so I select "row".
Finally, save the generated document to a collection variable.
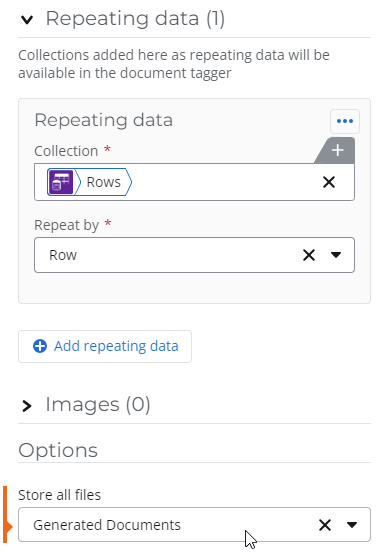
What is it a collection variable instead of a file variable? It's because sometimes you can generate multiple files in one go in the single action. However, most of the time you're only generating one file - just like this example.
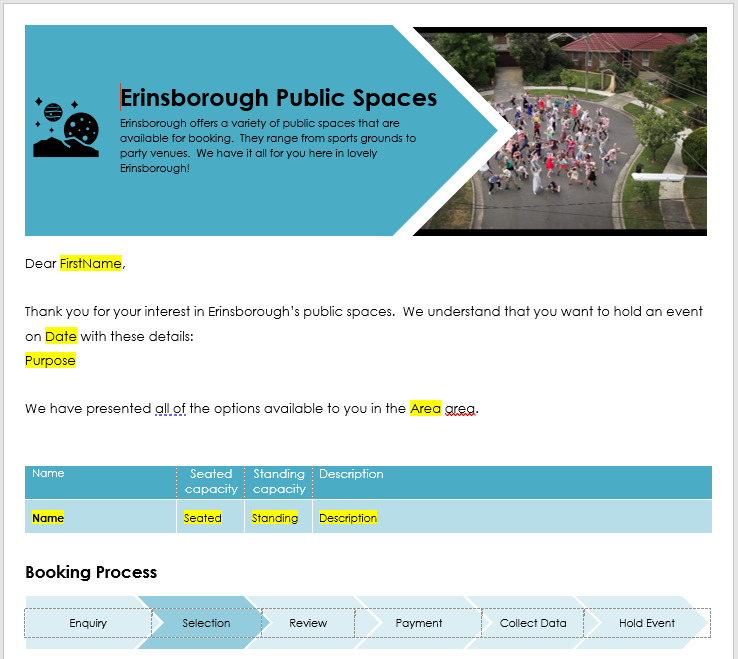
Next we open the document tagger and start tagging the template with the respective fields from the workflow. I am going to replace all the yellow bits with tags.
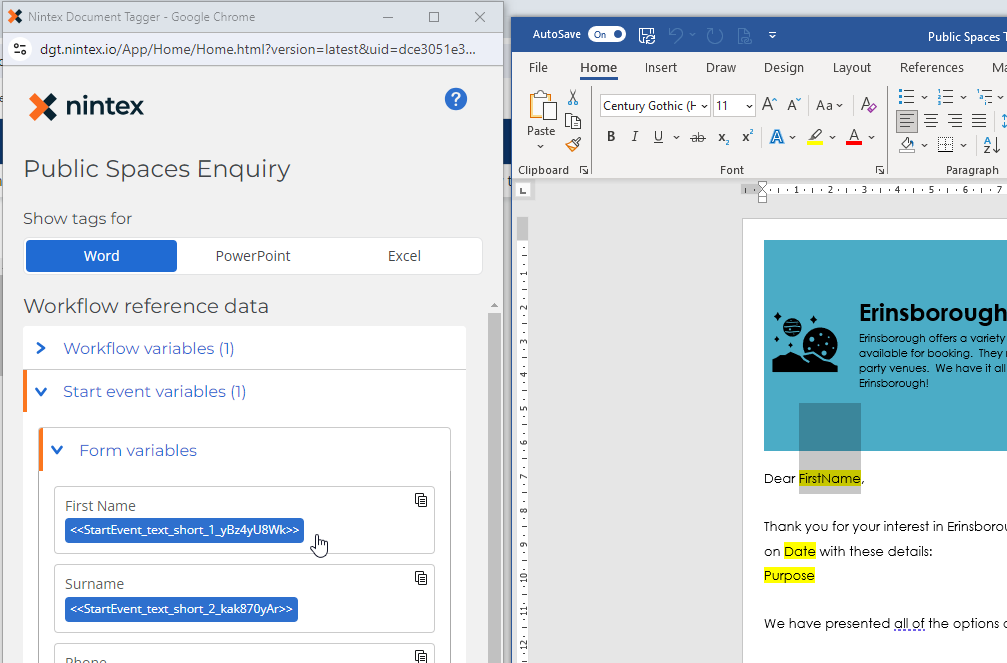
For example, to put the person's first name in, browser the document tagger to Start event variables | Form variables and then click on First Name (this field comes from the start form). After you have clicked on it, the tag is copied to the clipboard. Then you can go to the appropriate spot in the word document and paste the tag.
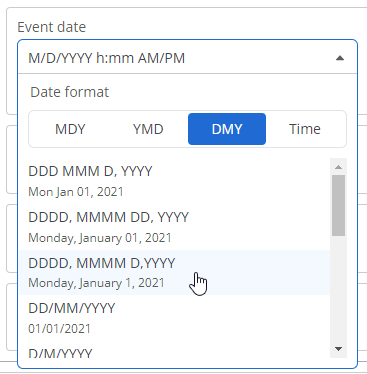
Do the same with the event date. You'll notice there are a few more options with this field because it's a date and dates can be formatted in many different ways. Just pick the format that you want, click on the tag and paste it into the Word document.
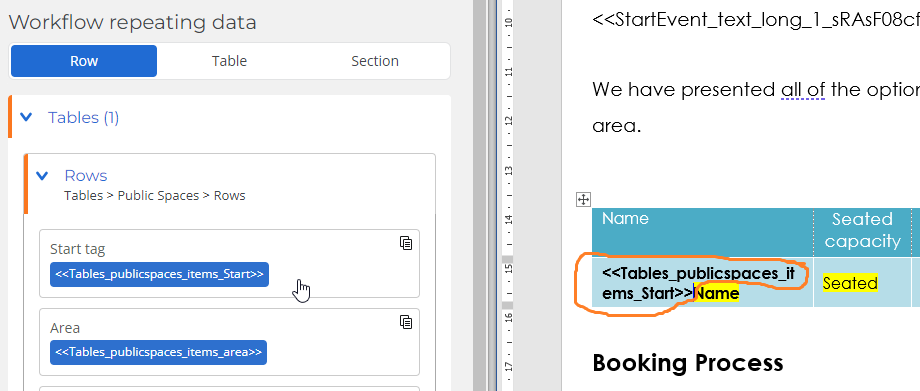
When you get to populating the table with information from Nintex data, that information is stored in a separate section of the document tagger - the Workflow repeating data section. Simply expand it by clicking on Tables | Rows and then you'll see the table column names as well as a special tag called Start tag. We use this Start tag to tell the document generation engine that the data potentially repeats. This tag should be pasted into the first row of your table. I always paste it in the first cell. You can see in my example, I've pasted it just before the name of the public space.
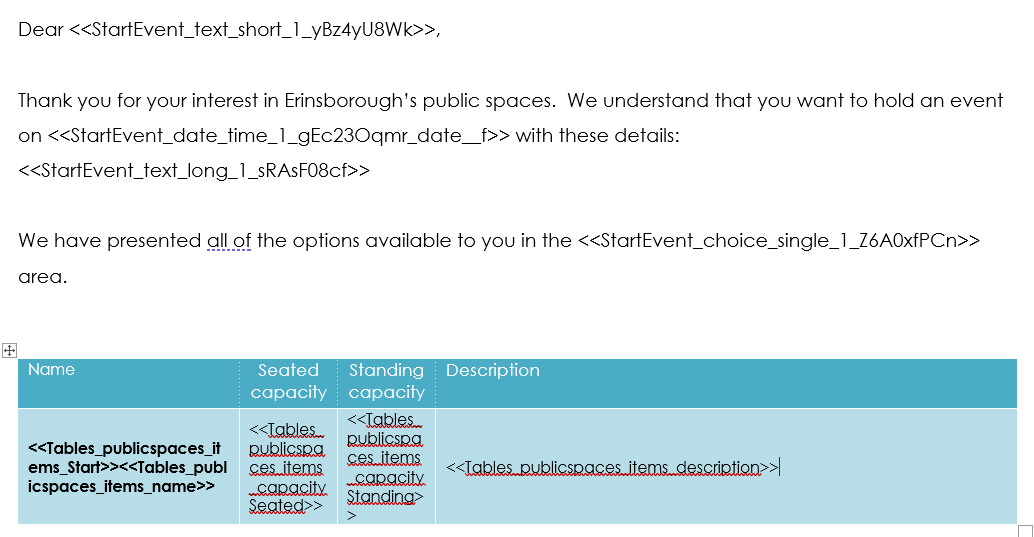
Now you can replace all of the other yellow highlights in the table with the tags from the Workflow repeating data section and your document template will look similar to the below. Nintex Document Generation will also respect exactly how you have set up your table e.g. if you make the columns fixed width, it will not change these. If you set up the table to show alternate colours per row, it will respect these.
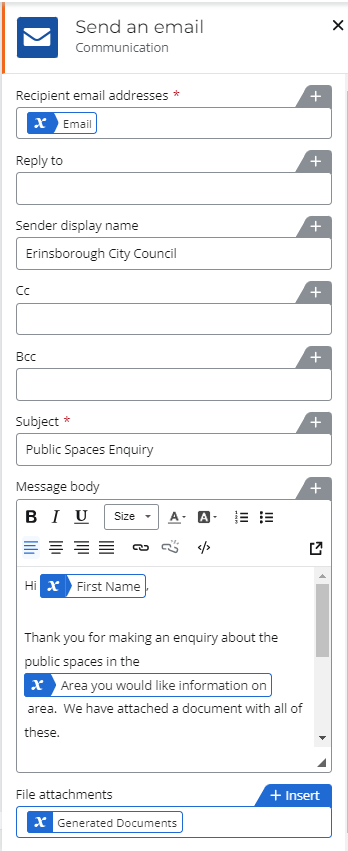
We're pretty much done. The final thing I'm going to do with my workflow is email this to the person who made the enquiry using the Send an email action.
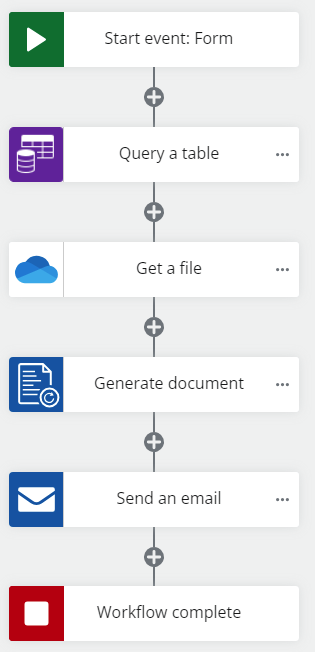
That's it, here's the complete workflow - pretty simple huh? In the space of a few minutes, you have built a form, looked up Nintex table data, generated a document with that data and sent it off to the person making the enquiry.
Of course you can easily expand on this workflow and send that document to the person for electronic signature and then automatically book the public space for them in the events calendar. I'd love to hear what others come up with using this type of workflow as a base.
Document generated:
