First off the biggest hint, may be summed up by this tip from Ockert found on another forum:


"Just a note on this...
[UserName] will resolve to:    DefaultSecurityLabel]:]DefaultDomain]nUserName}
/Domain]nUserName] will resolve to:    DefaultSecurityLabel]:eDomain]aUserName]
rSecurityLabel]:eDomain]aUserName] will resolve to:  oSecurityLabel]:bDomain]mUserName]"  -Ockert

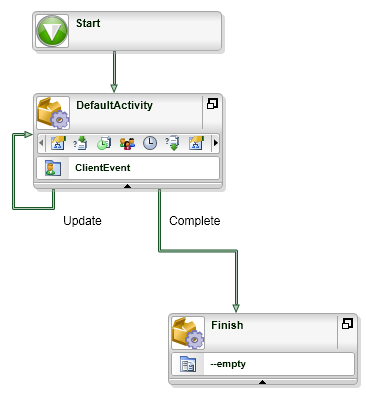
Second, I'm able to resolve a list of destination users and assign them successfully even if one of the users is currently "disabled".  -- This is important because the current AD Service Objects do not pay attention to the user's "disabled/enabled" flag.

Here's how I did it:
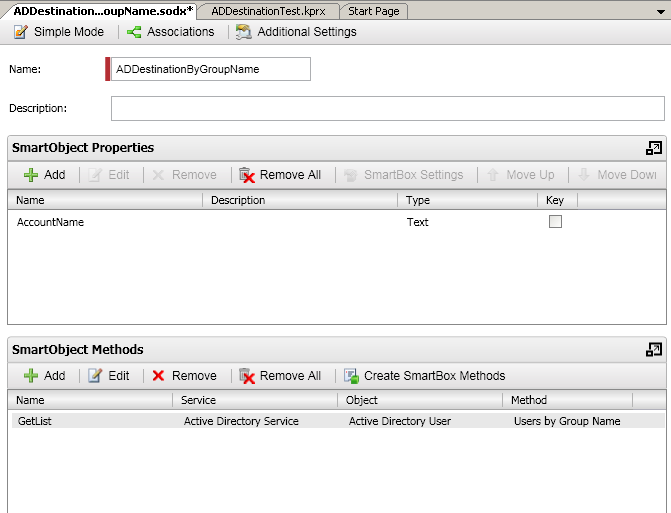
1) New SmartObject
2) Named it "ADDestinationByGroupName.sodx", ADD
3) SmartObjectProperties>ADD>  "AccountName"; text
4) click ADVANCED MODE (at top)
5) Highlight and Remove all methods except "Get List"
6) highlight "Get List" and click EDIT
7) check ADVANCED > NEXT
8) rename to "GetList"  (no space) > NEXT
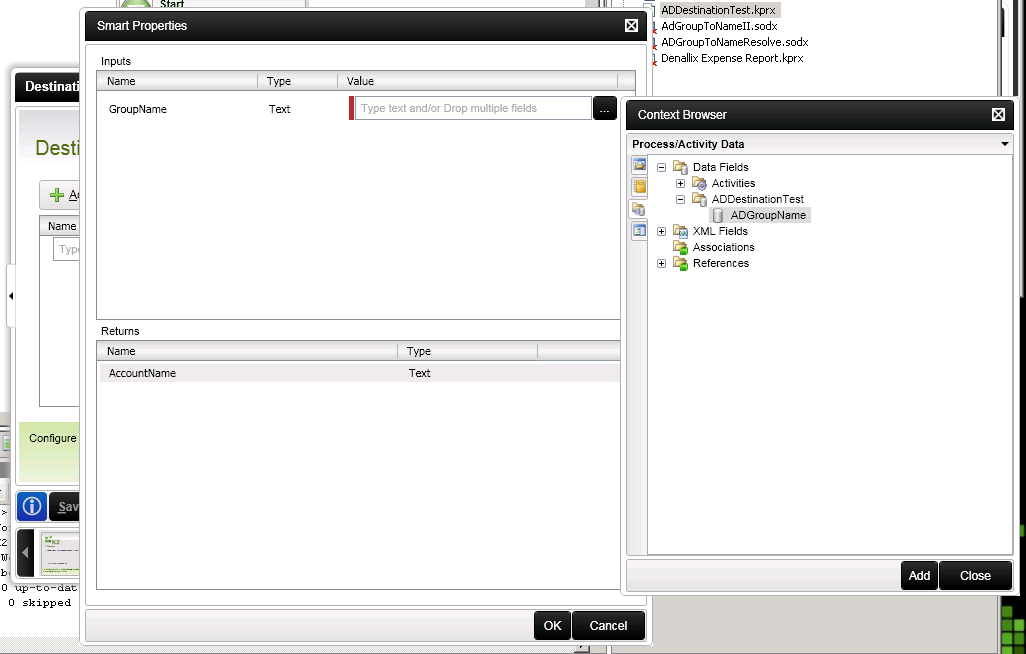
9) Click ADD to add parameter > "GroupName"; Text > OK > NEXT
10)  Highlight "SmartBox Service" listing > REMOVE
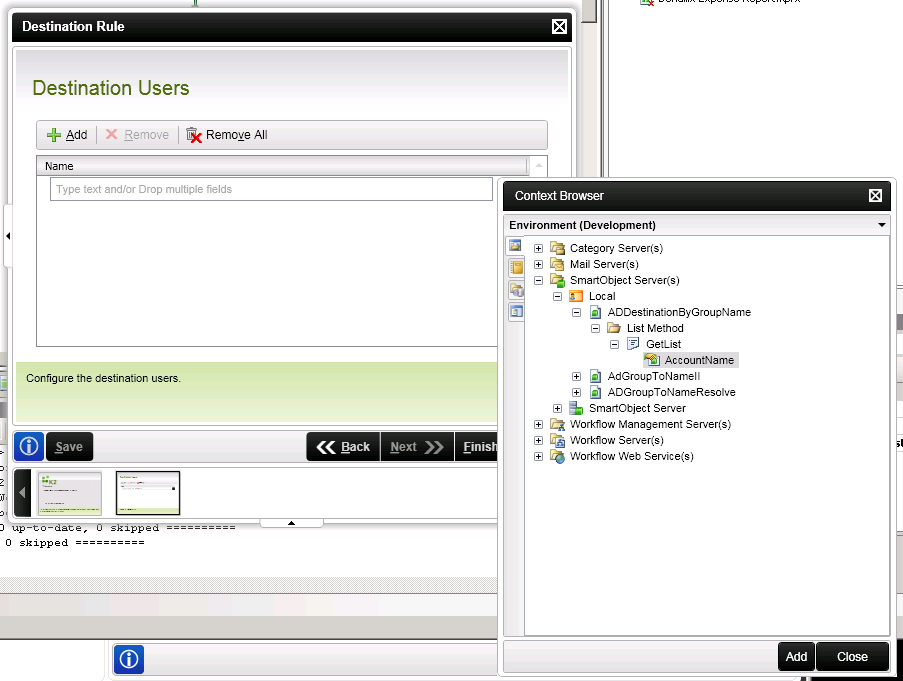
11) click ADD > click elipse button (...) > Service Object Server(s) > Service Object Server > Active Directory Service> Active Directory User > Users by Group Name  > ADD
12) Highlight *GroupName > click ASSIGN > Select "Smart Object Method Parameter" and then "GroupName" > OK
13) highlight "AccountName > click ASSIGN > In SmartObject Property Name select "Account Name" > OK > OK > NEXT > Finish


15737i1EA1E43974F3F1F2.png

Next, to test, I created a quick workflow with two possible actions on the Client Event... 

Within this workflow I setup 1 process data field called "GroupName" and gave it a default value of "ITPeople".  I also set Codi to be member of this AD group on my training VPC so I could test the success of a destination by Codi's ability to see the worklist item.

Typically this GroupName process datafield might be set by an assignment selection in a prior activity or as the process is originated/instantiated.


Remember that you have access to your actions and outcomes directly from the worklist, so no need to actually create a client web page to test destinations like this.

**Shift-click and drag a line's endpoint to let it "loop-back" like the update activity here (thanks Tom E Miller)


13472i2DFA1573FCED2726.png

Two screenshots for adding destination user::


1)  Either during your client event wizard, or by clicking the "little people" icon, you can display the destination rule dialogue as show here.   -- Drill down to and pick the "AccountName" return property you added to your SmartObject earlier > ADD


16018iE1C3DA3BE547525A.png
2)  After you click ADD, (unless you previously setup a real SmartObject reference) you will be greeted with the screen below.   Click the elipse button (...) and navigate to the process datafield you created for the "GROUPNAME"> ADD > OK > FINISH


14158iECE4169A0E38ADD6.png
One key point to not miss when trying implement destinations via a SmartObject lookup like this is that: in the current build of BlackPearl (RTM+HF2 in my case) within the destination set although it looks as though you can add input values for properties, you are only allowed to add inputs for parameters and only one at a time. 

Thus if you must filter on two fields, these will have to be concatenated during population or in a servicing layer in order for your lookup to work.  Note that I am feeding the ActivityName and the ProcessInstanceID into one Parameter field in this destination set (the black line is my cursor blinking in between the two fields that I dragged/dropped on):


11978i0A4ADC0ACA85C3E1.png

Reply