Here we demonstrate how to create a cascading dropdown using Nintex Forms.
The video is shown on Nintex Forms 2010, but the same applies to Nintex Forms 2013.
In this written example, I demonstrate with a common State to Store relationship. You'll need to create three SharePoint lists, two of which contain the lookup information for the cascading drop down.
Create the SharePoint Lists
Create two custom lists. These custom lists form the basis for the lookups, which the main list will look the cascading information up from.
- Navigate to a SharePoint Team Site.
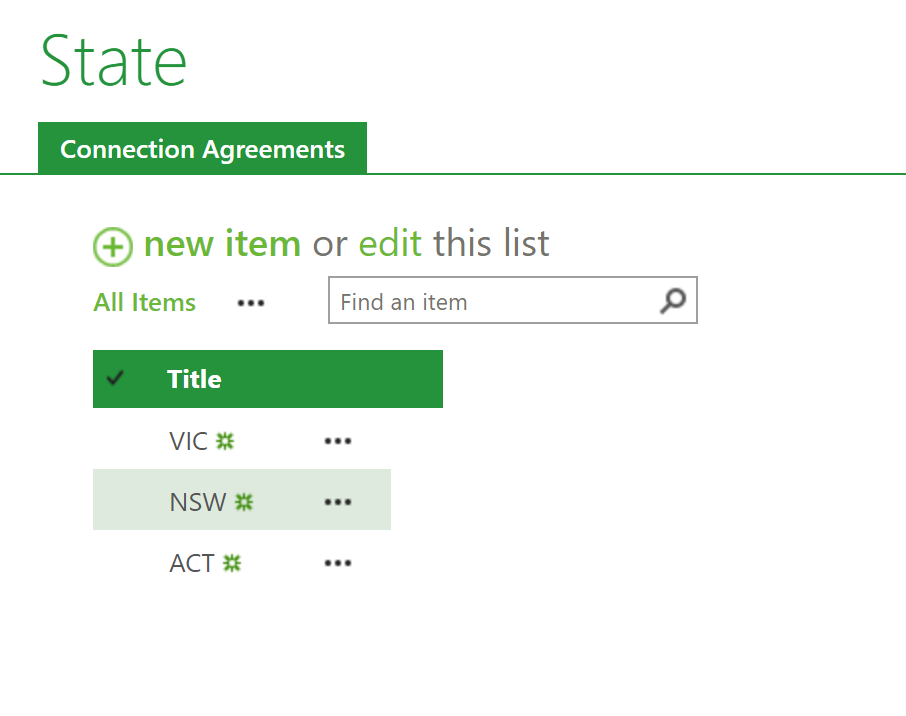
- Click the Site Settings icon, and select Add an App. Select Custom List, and call it "State". Click Create.
- Open the newly created SharePoint list, and click new item. In the Title field, enter "VIC", and click Save.
- Repeat step 3 and enter “NSW”, “ACT”, “NT”, “QLD”, “WA”, “TAS”, and “SA”.
Create the Second SharePoint List - Stores
- Click the Site Settings icon, and select Add an App. Select Custom List, and call it "Stores". Click Create.
- Open the new list, click on the List tab and select List Settings.
- Click Create column from the available options.
- Fill in the following options:
- Type “State” as the Column name.
- Select Lookup (information already on this site) in Thetype of information in this column is section.
- Select Yes for Require that this column contains information.
- Select States from the Get information from drop-down.
- Navigate to the Stores list and click on new item.
- Type “Melbourne” in Title.
- Select VIC from the State drop-down and click Save.
- Repeat steps 5-7 for the below stores:
- “Geelong” and VIC
- “Ballarat” and VIC
- “Sydney” and NSW
- “Newcastle” and NSW
- “Canberra” and ACT
- “Perth” and WA
- “Adelaide” and SA
- “Hobart” and TAS
- “Darwin” and NT
- “Brisbane” and QLD
The information that will be used for the cascading dropdown items has been created.
Customizing the SharePoint List Form using Nintex Forms
Now that we have created the two lists required for the cascading drop down, we need to create the Nintex Form to display this information on a SharePoint list.
- Create a new list or open an existing one where the data will be collected using Nintex Forms, for example “Car Dealerships”.
- Click Nintex Forms in the Ribbon.
- Select all of the controls on the form except the Nintex Forms label, the Save, and the Cancel buttons.
- Right-click and select Delete so that the form looks similar to the one below.
- Add two Label controls to the form and change their title to “State” and “Store”.
- Add a List Lookup control from the SharePoint category of the Form Controls. Place the List Lookup control next to the State label. Resize the control to reduce its default height. Double-click on the action to open the settings.
- Type “MyFormState” as the Name of the control.
- Select States from the Source List drop-down, and click Save.
- Add another List Lookup control from the SharePoint category of the Form Controls. Place the List Lookup control next to the Store label. Resize the control to reduce its default height. Double-click on the action to open the settings.
- Type “MyFormStore” as the Name of the control.
- Select Stores from the Source List drop-down.
- Expand the Filtering section:
- Select By a controls value from the Filter available selections drop-down.
- Type “State” in the Where field box.
- Select MyFormState from the Filtered by control drop-down. Click Save.
Preview the Form
- In the Ribbon, click on Preview. Select Generate Preview, and test out the cascading dropdown.
- When the configuration of the form is complete, Save and Publish.
Please see subsequent replies to the original post in the attachment.


